Coconut Bourbon Banana Bread by Amy Cantu

Print Friendly and PDF

I'm of the belief that you can't cram enough goodness into banana bread; it can totally handle it! This banana bread is made with browned butter, big chunks of walnuts, toasted coconut, and a splash of bourbon–browned butter for it's rich nutty flavor, walnuts because my two-year-old is obsessed with nuts, toasted coconut since we were out of chocolate chips, and I cannot stop myself from putting some form of coconut in everything, (here's a short list: Coconut Bars, Buddha Bowls, Coconut Tres Leches Cake, Mango with Coconut Sticky Rice, Olive Oil Granola . . . ) and bourbon makes everything seem a little bit more sinful and therefore delicious. (That was a crazy run-on sentence, and I can't fix it, so just bear with me. It's that kind of day.) The reasoning behind this banana bread is perfectly sound, and I can promise not a crumb will be left behind. No seriously.

Notes: Like any good banana bread recipe, this one is highly adaptable to whatever you have in the pantry. I let the kids pick their favorite "mix-ins", so that each loaf is uniquely their creation. On this day, my two-year-old was adamant about "more and more and more nuts", so I obliged with a whole cup of toasted chopped walnuts. We all enjoyed it immensely, but if nuts aren't your thing, feel free to leave them out. For that matter, add whatever mix-ins make your day happy, (chocolate or peanut butter chips, nuts, coconut flakes, raisins, cranberries, etc.) or none at all!


Time: 1 hour 30 minutes
Yield: One 9"x13" loaf

1/2 cup butter, diced
1 cup all purpose flour
1 cup whole wheat flour
1/4 cup dark brown sugar
1/2 cup granulated sugar
1 teaspoon baking powder
1/2 teaspoon baking soda
3/4 teaspoon kosher salt
1/2 teaspoon cinnamon
4 small (or 3 medium) ripe bananas, mashed
2 large eggs
1/2 cup greek yogurt (any kind)
1/2 cup unsweetened shredded coconut, toasted + extra un-toasted for sprinkling on top
Optional: 1 cup walnuts, toasted and coarsely chopped + extra un-toasted for sprinkling on top

Preheat oven to 350 degrees F. Line a 9"x5" loaf pan with oil and parchment paper (or oil and flour). 

Line a rimmed baking sheet with two pieces of parchment paper (one piece of paper covering each half of the sheet). Place walnuts on one half and coconut on the other. Toast in the oven, removing when they are golden. (5-10 minutes for walnuts and 3-5 minutes for coconut).

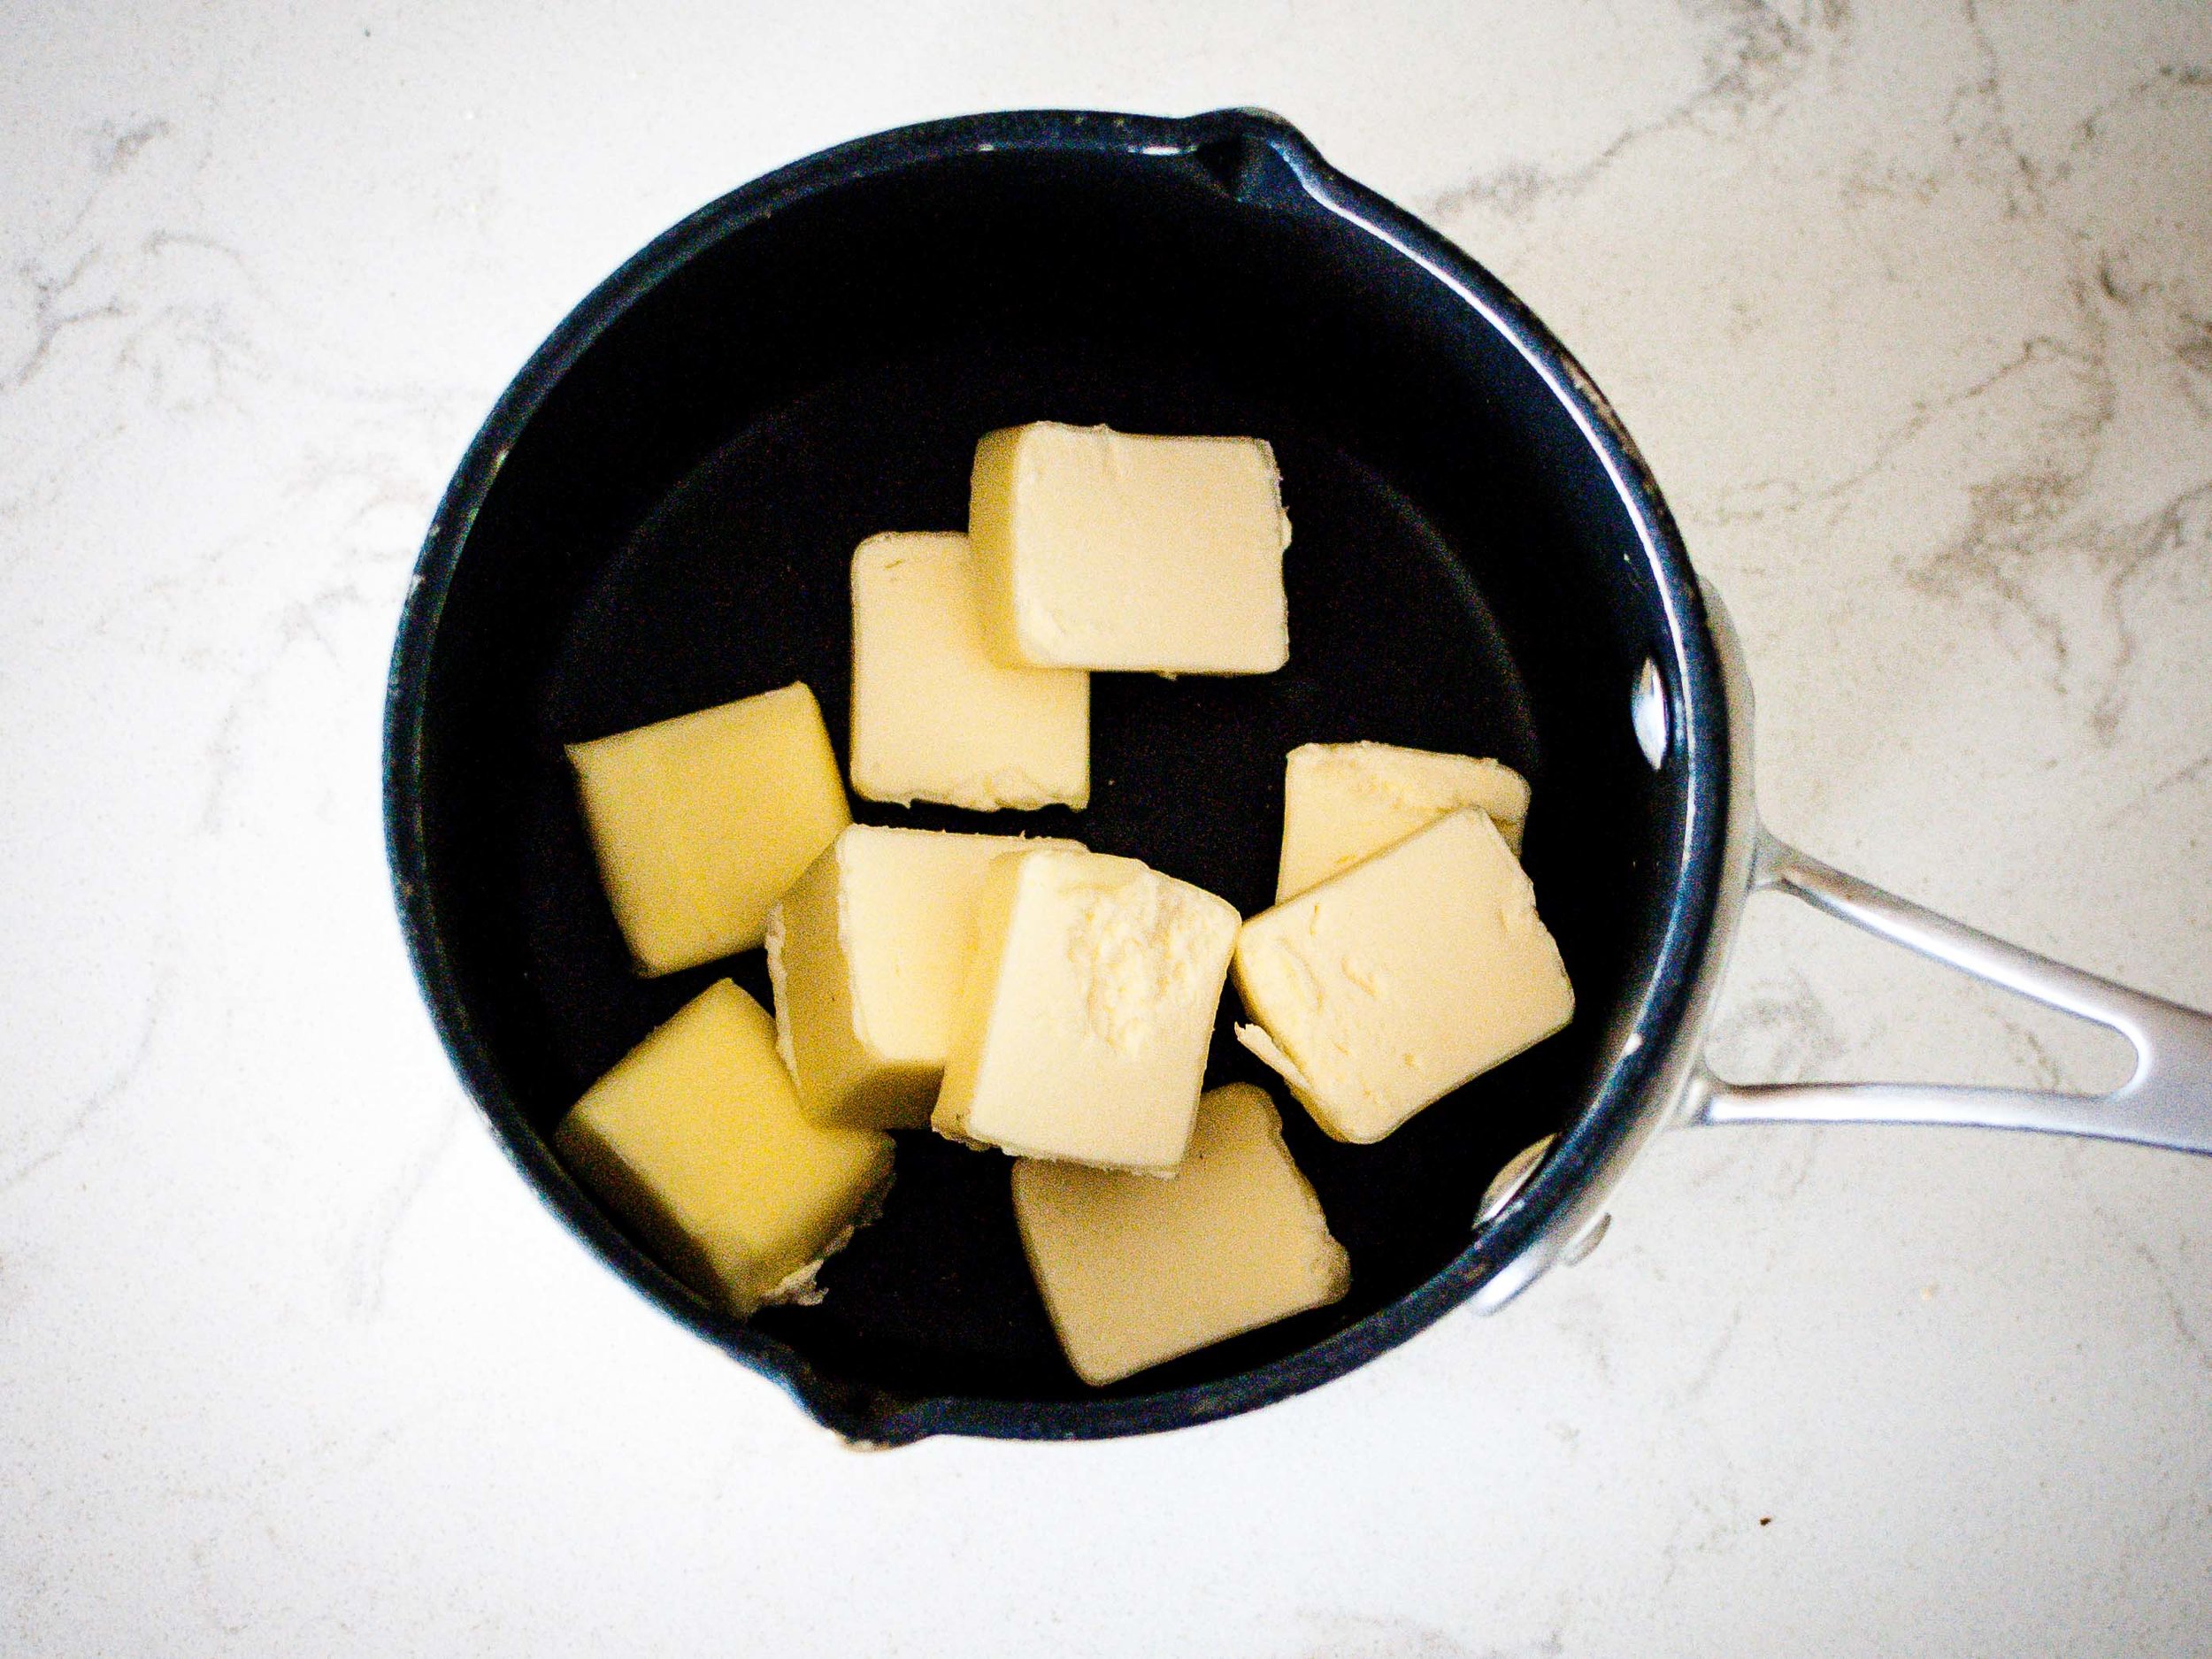
Melt the butter over medium heat in a small saucepan, swirling butter occasionally until butter smells toasty and is golden brown. (Watch closely, because it will go from browned to burnt quickly!) Transfer to a medium bowl to cool.

In a large bowl, whisk together all-purpose flour, whole wheat flour, brown sugar, granulated sugar, baking powder, baking soda, salt, and cinnamon.

Add mashed bananas, eggs, yogurt, vanilla, and bourbon to the browned butter and whisk together, until well combined.

Pour the banana mixture into the flour mixture all at once and stir together until just combined and no patches of flour remain. Batter will be thick and not pourable. Lightly fold in the toasted coconut and walnuts, then scrape the batter into prepared loaf pan. Give the pan a little jiggle and spread the batter as evenly as you can. Sprinkle the top with a un-toasted walnut pieces and coconut.

Bake for 55-65 minutes, or until a toothpick inserted into the center comes out clean. Remove from oven and let cool for 10 minutes in the pan, then remove and place on a wire rack until completely cool. (Who are we kidding? Slice into that baby and try not burn your fingers and your mouth as you devour it!)

Autumn Harvest Buddha Bowls by Amy Cantu

Print Friendly and PDF


September is the month of birthdays in my family–there are at least four. As evidenced here, here, here, and here, I have a very soft and tender spot for cake. And so, more than anything this month, I've been craving foods that I could feel good about eating. I'm talking nutritionally dense foods that are also filling and easy to source, as the bountiful summer produce disappears from the market. A beautiful, colorful Autumn Harvest Buddha Bowl filled with hearty quinoa, bright orange butternut squash, earthy roasted mushrooms, deep green wilted spinach, and protein-rich tofu make me feel good about the meal, while the richly satisfying peanut sauce keeps me eating to the very last bite. I told my 5-year-old that it was "peanut butter sauce", which made him grin from ear to ear and eagerly eat the entire buddha bowl. (Because who doesn't love peanut butter?)

Notes: Buddha Bowls are highly customizable. The quinoa can be replaced with quick-cooking farro, barley, or brown rice. The roasted vegetables could be pumpkin, carrots, sweet potatoes, and/or kale. The tofu could be chickpeas, beans, or lentils. If you're feeling more like having a Dalai Lama bowl, shredded or chopped rotisserie chicken would be a great substitute for the tofu. The optional fish sauce will also deepen the flavor or the peanut sauce.

The chiles in the peanut sauce are there for flavor and can easily be modified for your heat preferences. Smaller red or green Thai chiles provide the most heat, especially if you leave the ribs and seeds intact. Jalapeños with the seeds and ribs removed will be super mild–I used one and no one noticed any spiciness at all.

Peanut sauce adapted from Bon Appetit.


Time: 40 minutes
Servings: 4

For the vegetables and tofu:
1 14-ounce block Firm or Extra-Firm Tofu
2 pounds butternut squash, peeled, seeded, and cut into 1" pieces (about 1 large butternut squash)
8 ounces crimini (brown) mushrooms, quartered
5 ounces baby spinach
3 tablespoons grape seed or olive oil, divided use
Kosher salt
Freshly ground pepper

For the quinoa:
2 cups quinoa
4 cups water
Kosher salt
1 lime, juiced

For the peanut sauce:
1 or 2 Jalapeño or Thai chiles, chopped (see notes above)
2 garlic cloves, grated or minced
1 cup creamy peanut butter
3/4 cup unsweetened coconut milk
2 tablespoons maple syrup
2 tablespoons soy sauce
2 teaspoons fish sauce (optional)
1/2 cup water
Kosher salt

For the garnishes:
Finely sliced green onions
Chopped cilantro
Chopped peanuts

For the vegetables and tofu: Preheat oven to 450 degrees F., with one rack in the top third of the oven and the second rack in the bottom third.

Cut tofu block in half horizontally (width-wise), and cube into roughly 1" pieces. Lay tofu in a single layer on top of a double-layer of paper towels to drain while preparing the vegetables.

Arrange butternut squash in a single layer on a rimmed baking sheet. Drizzle with 1 tablespoon oil and season with kosher salt and pepper; toss to coat squash evenly. Push the butternut squash to one side of the pan, keeping them in a single layer. 

Blot the tofu cubes dry with another paper towel, pressing down on them gently to release any excess liquid. Arrange tofu next to the butternut squash. Drizzle with 2 teaspoons oil and season with kosher salt and pepper; toss gently to coat evenly. Space tofu so that they are in a single layer.

On a second rimmed baking sheet, toss quartered mushrooms with 2 teaspoons of oil, kosher salt and pepper; arrange in a single layer.

Place the butternut squash and tofu on the top oven rack and the mushrooms on the bottom rack. Roast for 25 minutes. 

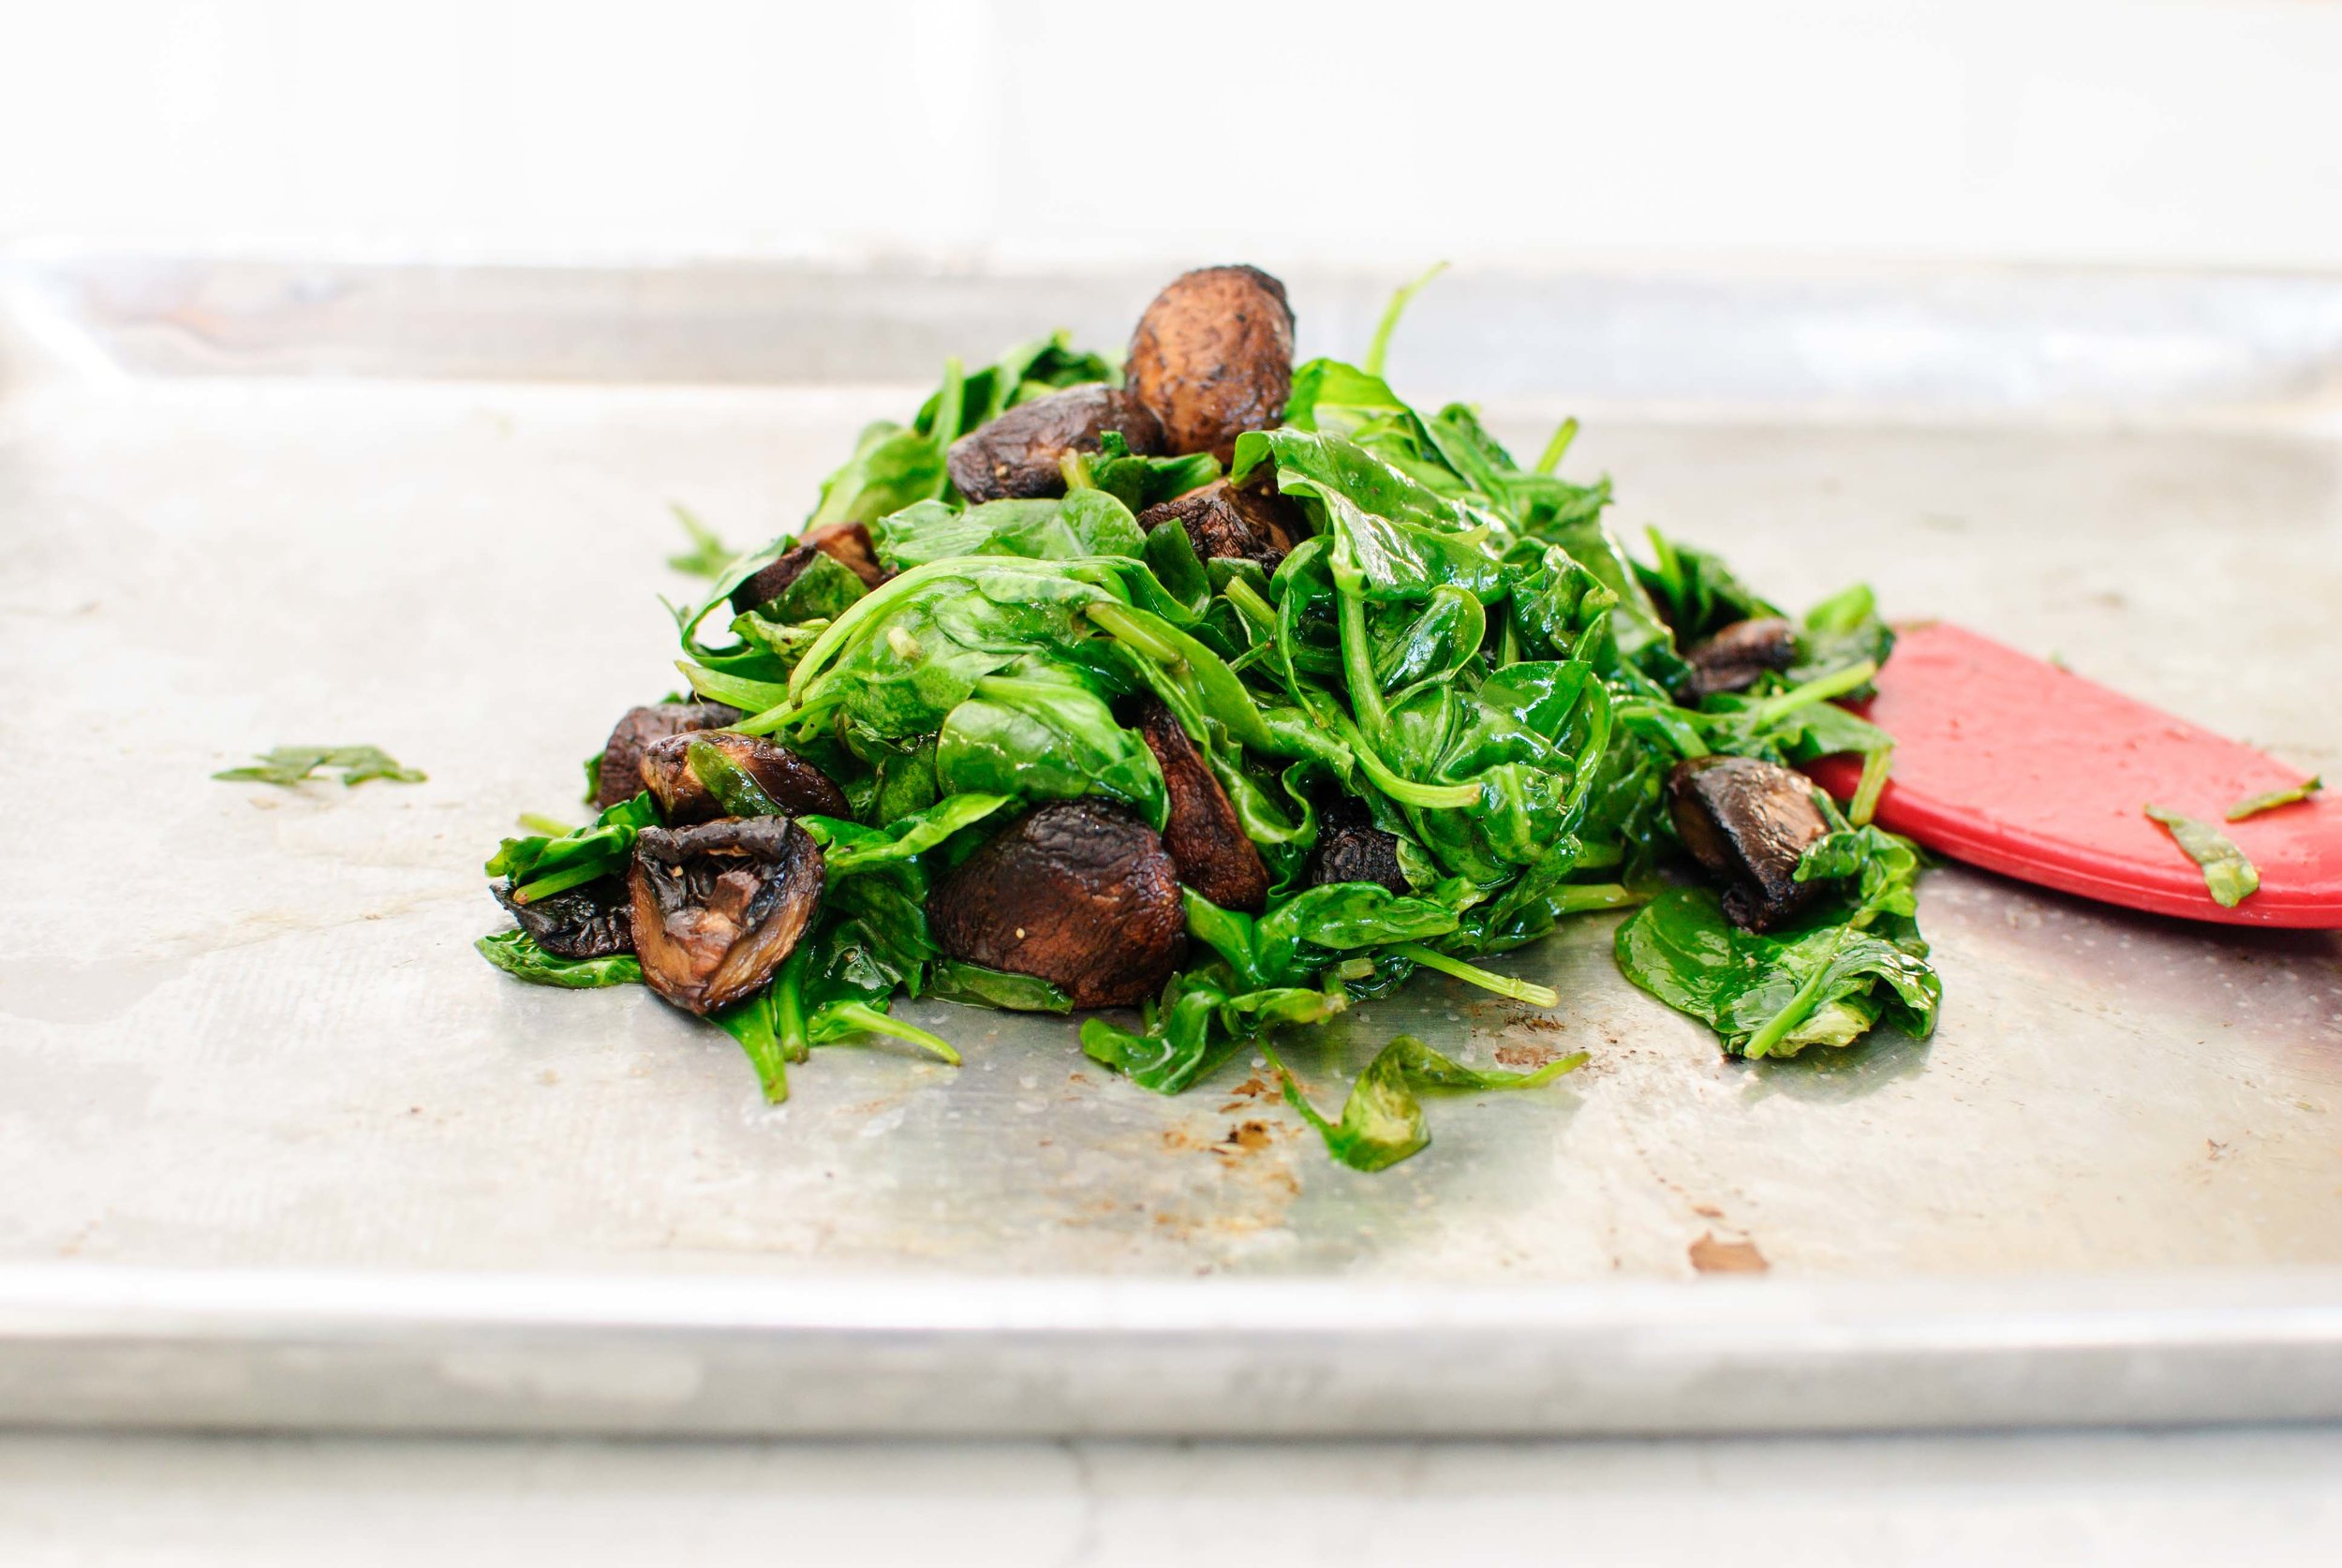
Add spinach to baking sheet with mushrooms, drizzle with 1 tablespoon of oil, kosher salt, and pepper; toss to combine. Continue to roast for 2 more minutes or until spinach is wilted. Remove both baking sheets from oven. Check the butternut squash with a fork–there should be little resistance. If squash is not done, return baking sheet to the oven for another 5 minutes.

For the quinoa: Bring 2 cups of quinoa, 4 cups of water, and a generous pinch of salt to a boil, then reduce to low, cover, and simmer for 15 minutes. Remove from heat and let sit for 5 minutes, before fluffing with a fork. Drizzle with lime juice and stir with a fork to combine.

For the sauce: Pulse all the ingredients, except water and salt, together in a blender until smooth. Pour into saucepan with water and whisk together over medium-low heat until hot. Remove from heat.

To assemble: Place quinoa at the bottom of a bowl. Heap roasted vegetables over the quinoa and drizzle generously with peanut sauce. Garnish with green onions, cilantro, and chopped peanuts.

Pane Bianco by Cynthia Raub

Print Friendly and PDF

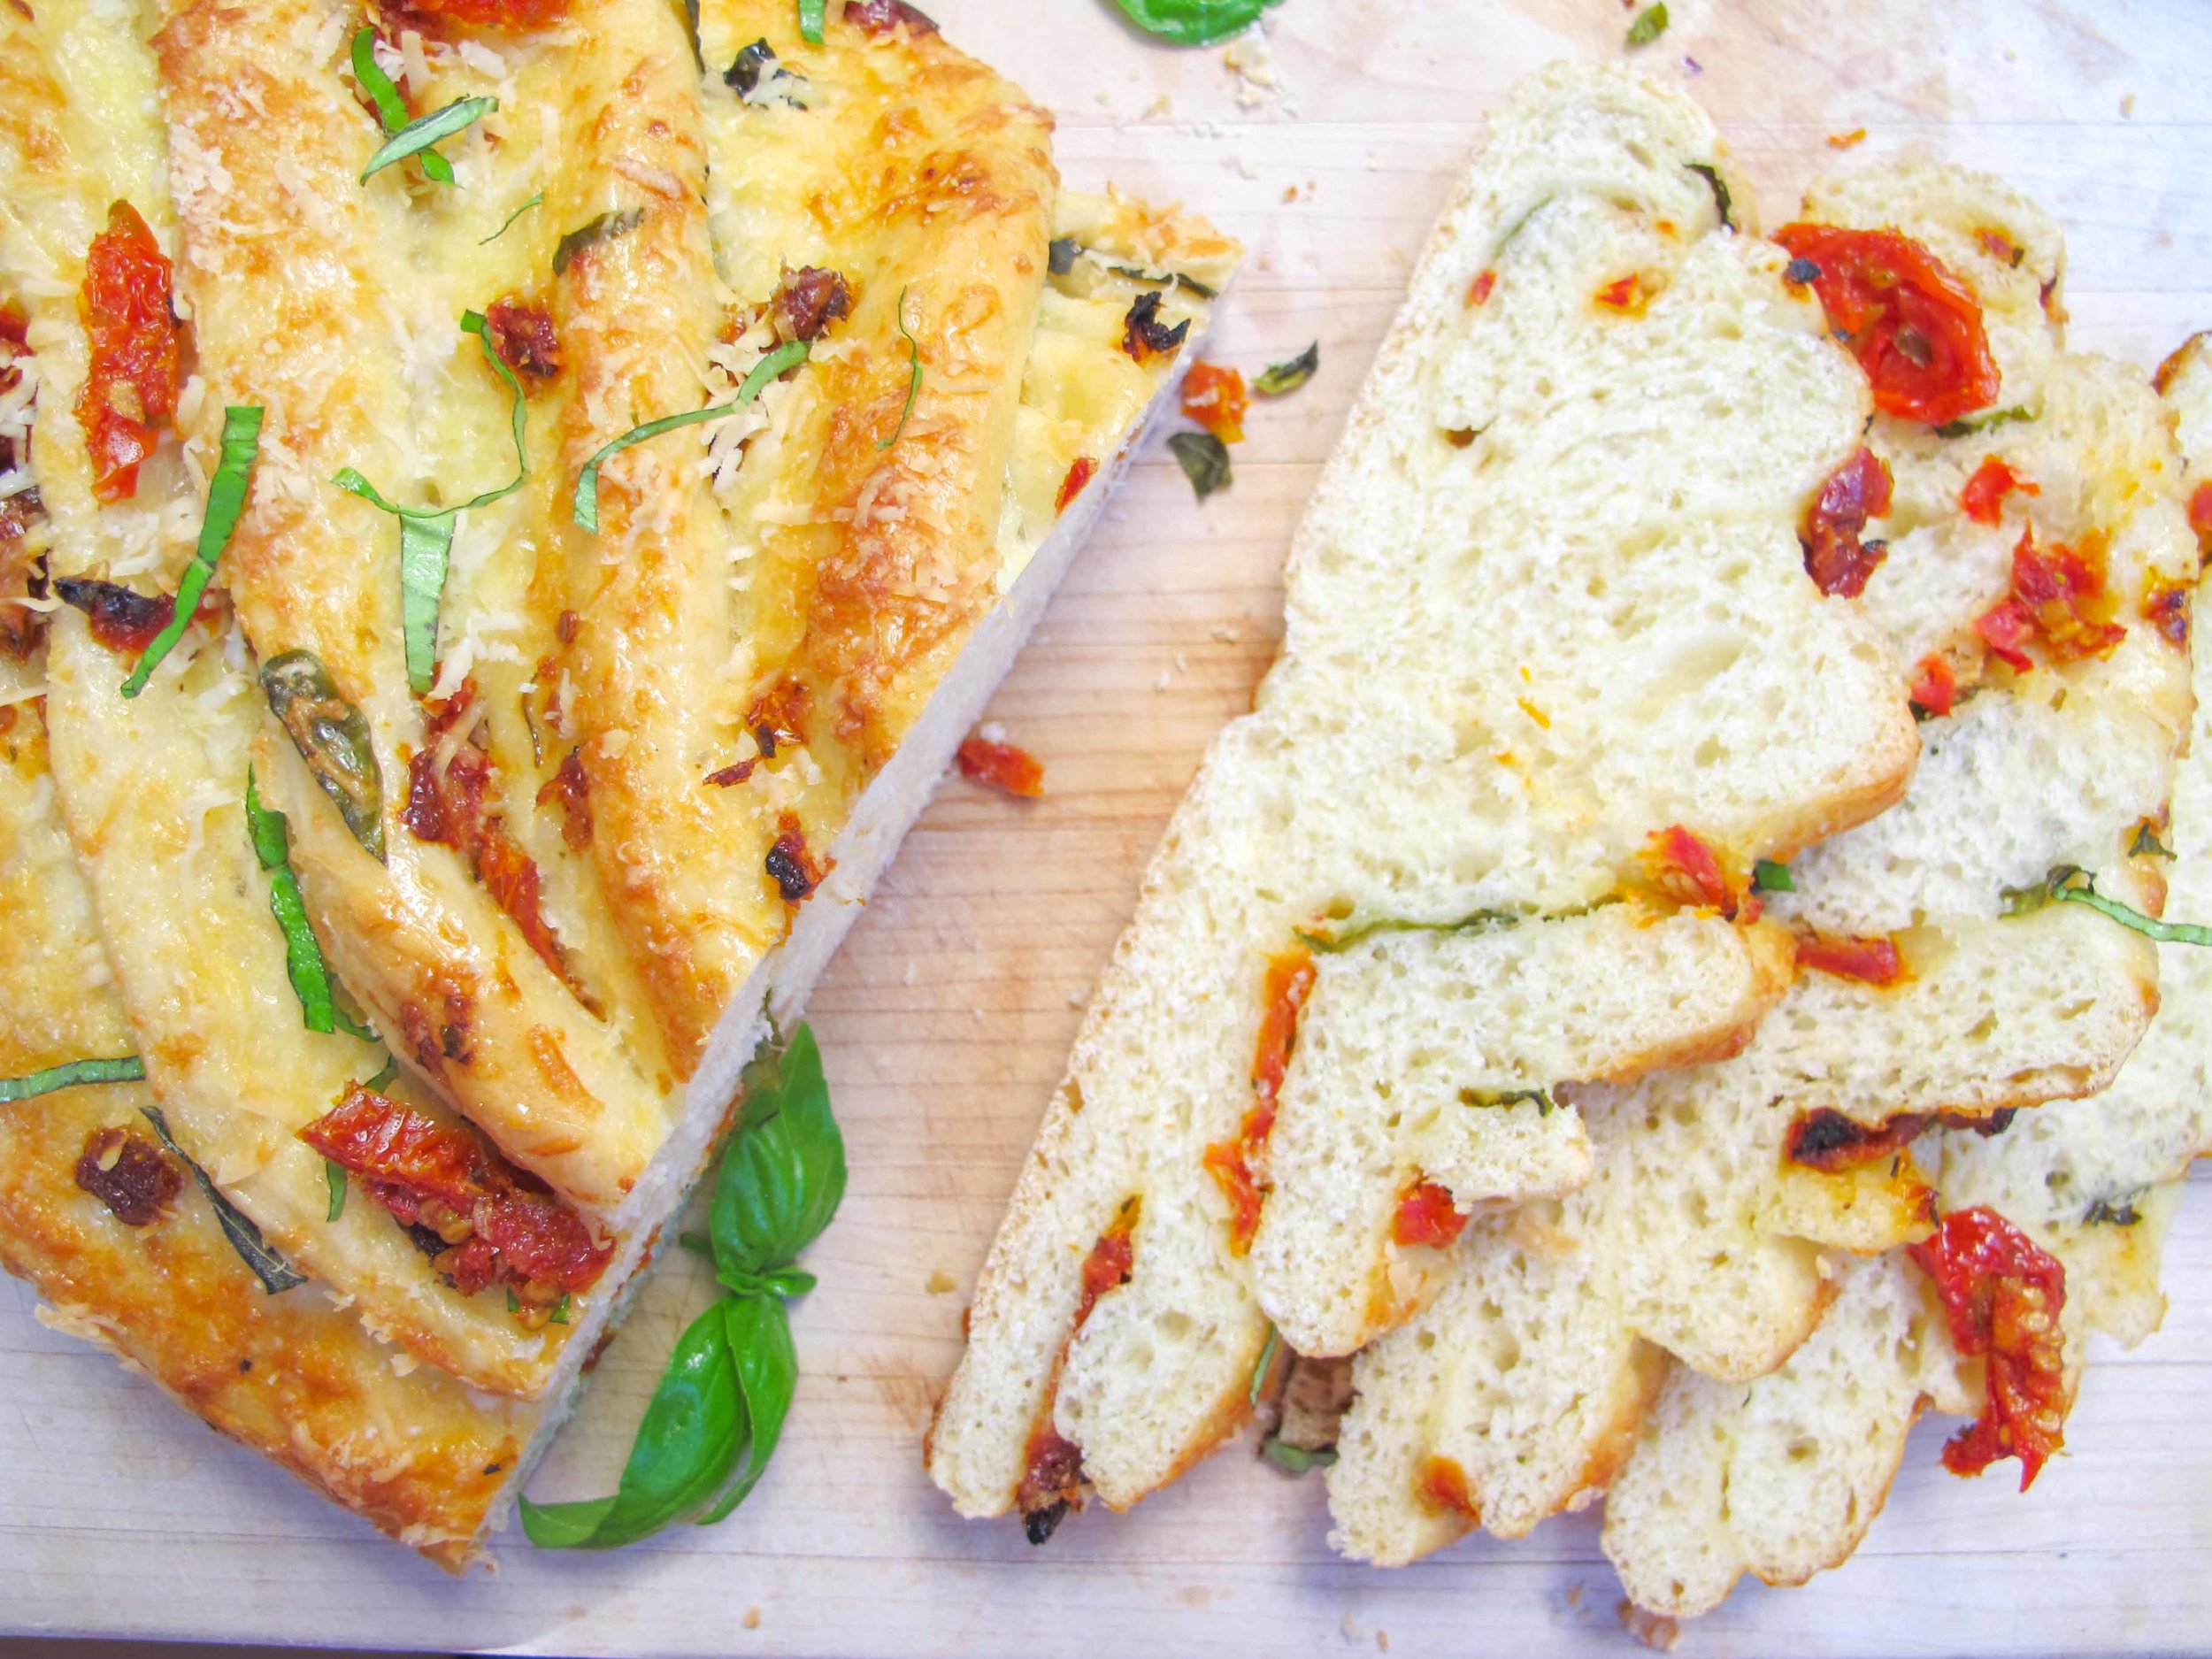
When I first laid eyes on a photo of this golden and curvy loaf of Pane Bianco, I was in awe and intrigued. As a baking newbie, I was intimidated by the gorgeous loaf until I read the recipe. Very little special equipment is required, (a stand mixer or rolling mat aren't necessarily required, they just make the work easier,) and the recipe uses straightforward ingredients I always have on hand. Since I am actively working on developing my baking skills, this was a great confidence boosting recipe to try. The attractive valleys created by slicing through a rolled log are filled with aromatic and colorful specs of tomato and basil. The scent of freshly baked bread and garlic was intoxicating. So much so, that my children followed their noses down the stairs to the kitchen to ask what I was cooking. I turned the oven light on and they sat in my lap in front of the oven and we watched it bake away together. "I can't wait to eat that!" Emily exclaimed. "Mommy, can I have that for lunch tomorrow?" Asked Olivia. I responded with, "Yes, you can have that in your lunch tomorrow . . . if we don't end up eating the whole thing tonight!" 

Notes: King Arthur Flour notes that you may substitute all-purpose flour for the bread flour in the recipe but to reduce the water in the recipe to 1/4 cup. They also warn that the bread may not hold its form as well. This recipe is endlessly adaptable and can be filled with a myriad of combinations! If you're a novice baker like me, sometimes bread recipes can be intimidating or confusing because you might not trust your judgement on what exactly the visual descriptions are supposed to look like. Because of that and because I am a visual learner, I have watched many a YouTube video on bread and scrolled through thousands of pictures on Instagram to expose myself to the process of baking. This may or may not help you, but I have found it helped my judgement in what to look for, immensely. 


Time: 3 hours (2 hours inactive, 35 minutes baking, 25 minutes preparing)
Yields: 1 loaf

Bread
3 cups bread flour
2 teaspoons instant yeast
2 teaspoons sugar
2 teaspoons salt
1 large egg
1/2 cup lukewarm milk
1/3 cup lukewarm water
3 tablespoons olive oil

Filling
2 tablespoons olive oil
4 cloves garlic, finely minced
1 cup shredded Parmesean (or cheese of your choice) divided
1/2 cup oil-packed sun-dried tomatoes, drained and cut into 1/2″ pieces
1/3 cup torn fresh basil

1 egg, beaten with a splash of water

Combine the eight bread ingredients (flour through olive oil) in your stand mixer (with a dough hook), in your bread machine, or in a large mixing bowl. On the lowest setting (or with a wooden spoon), begin to mix the dough until smooth and elastic (about 6 minutes). The dough should pull away from the sides and "clean" the sides of the bowl.

Grease a large bowl with olive oil, place the dough ball into the bowl and cover. Place the bowl in a warm area in your kitchen and allow to rise until about double in size, 45-60 minutes. Meanwhile, gather your remaining filling ingredients and set aside. 

Once the dough has risen, gently deflate it on your clean and flat work surface. Reshape into a ball and allow to rest for 10 more minutes. Then roll the dough into a rectangle, about 22" x 10". Combine 2 tablespoons of olive oil and finely minced garlic in a small bowl and brush or massage this mixture onto the rolled out dough. Sprinkle 3/4 cup of cheese, sun dried tomato and basil over the garlic mixture evenly. 

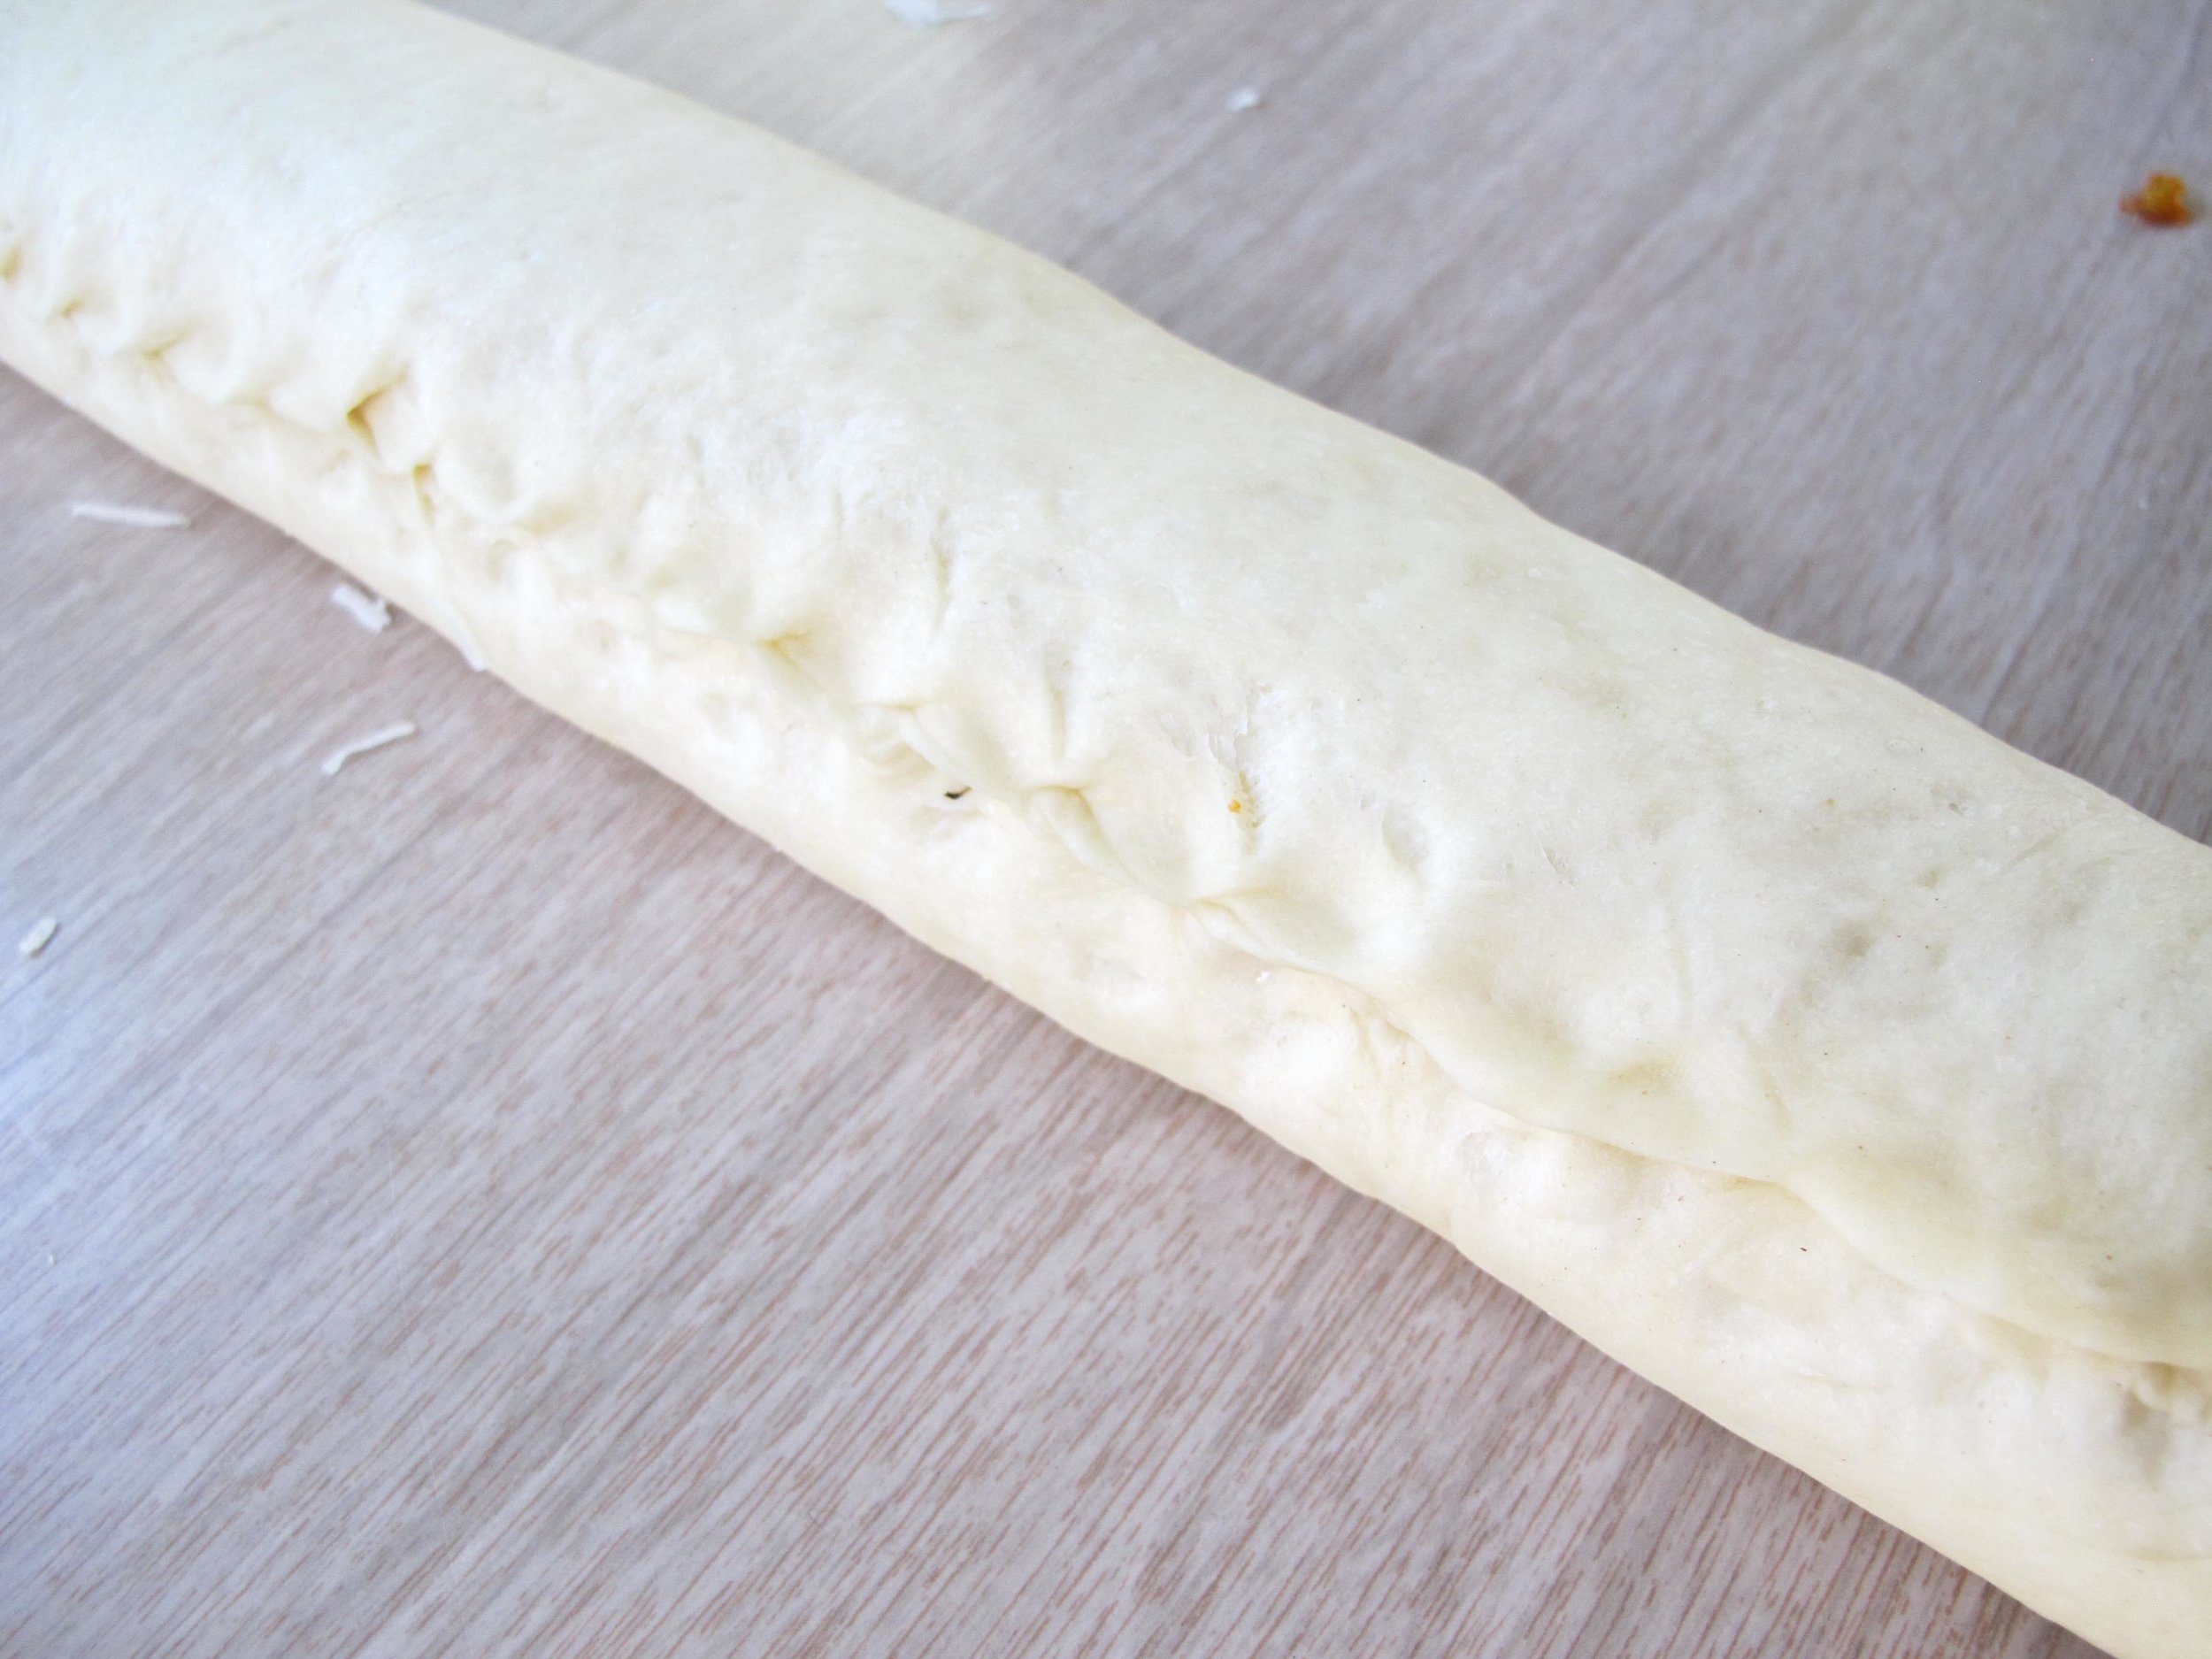
Carefully roll the dough lengthwise from one end to another. Once rolled, pinch the flap closed against the log and place the dough seam-side down on a piece of parchment paper that fits your baking pan. 

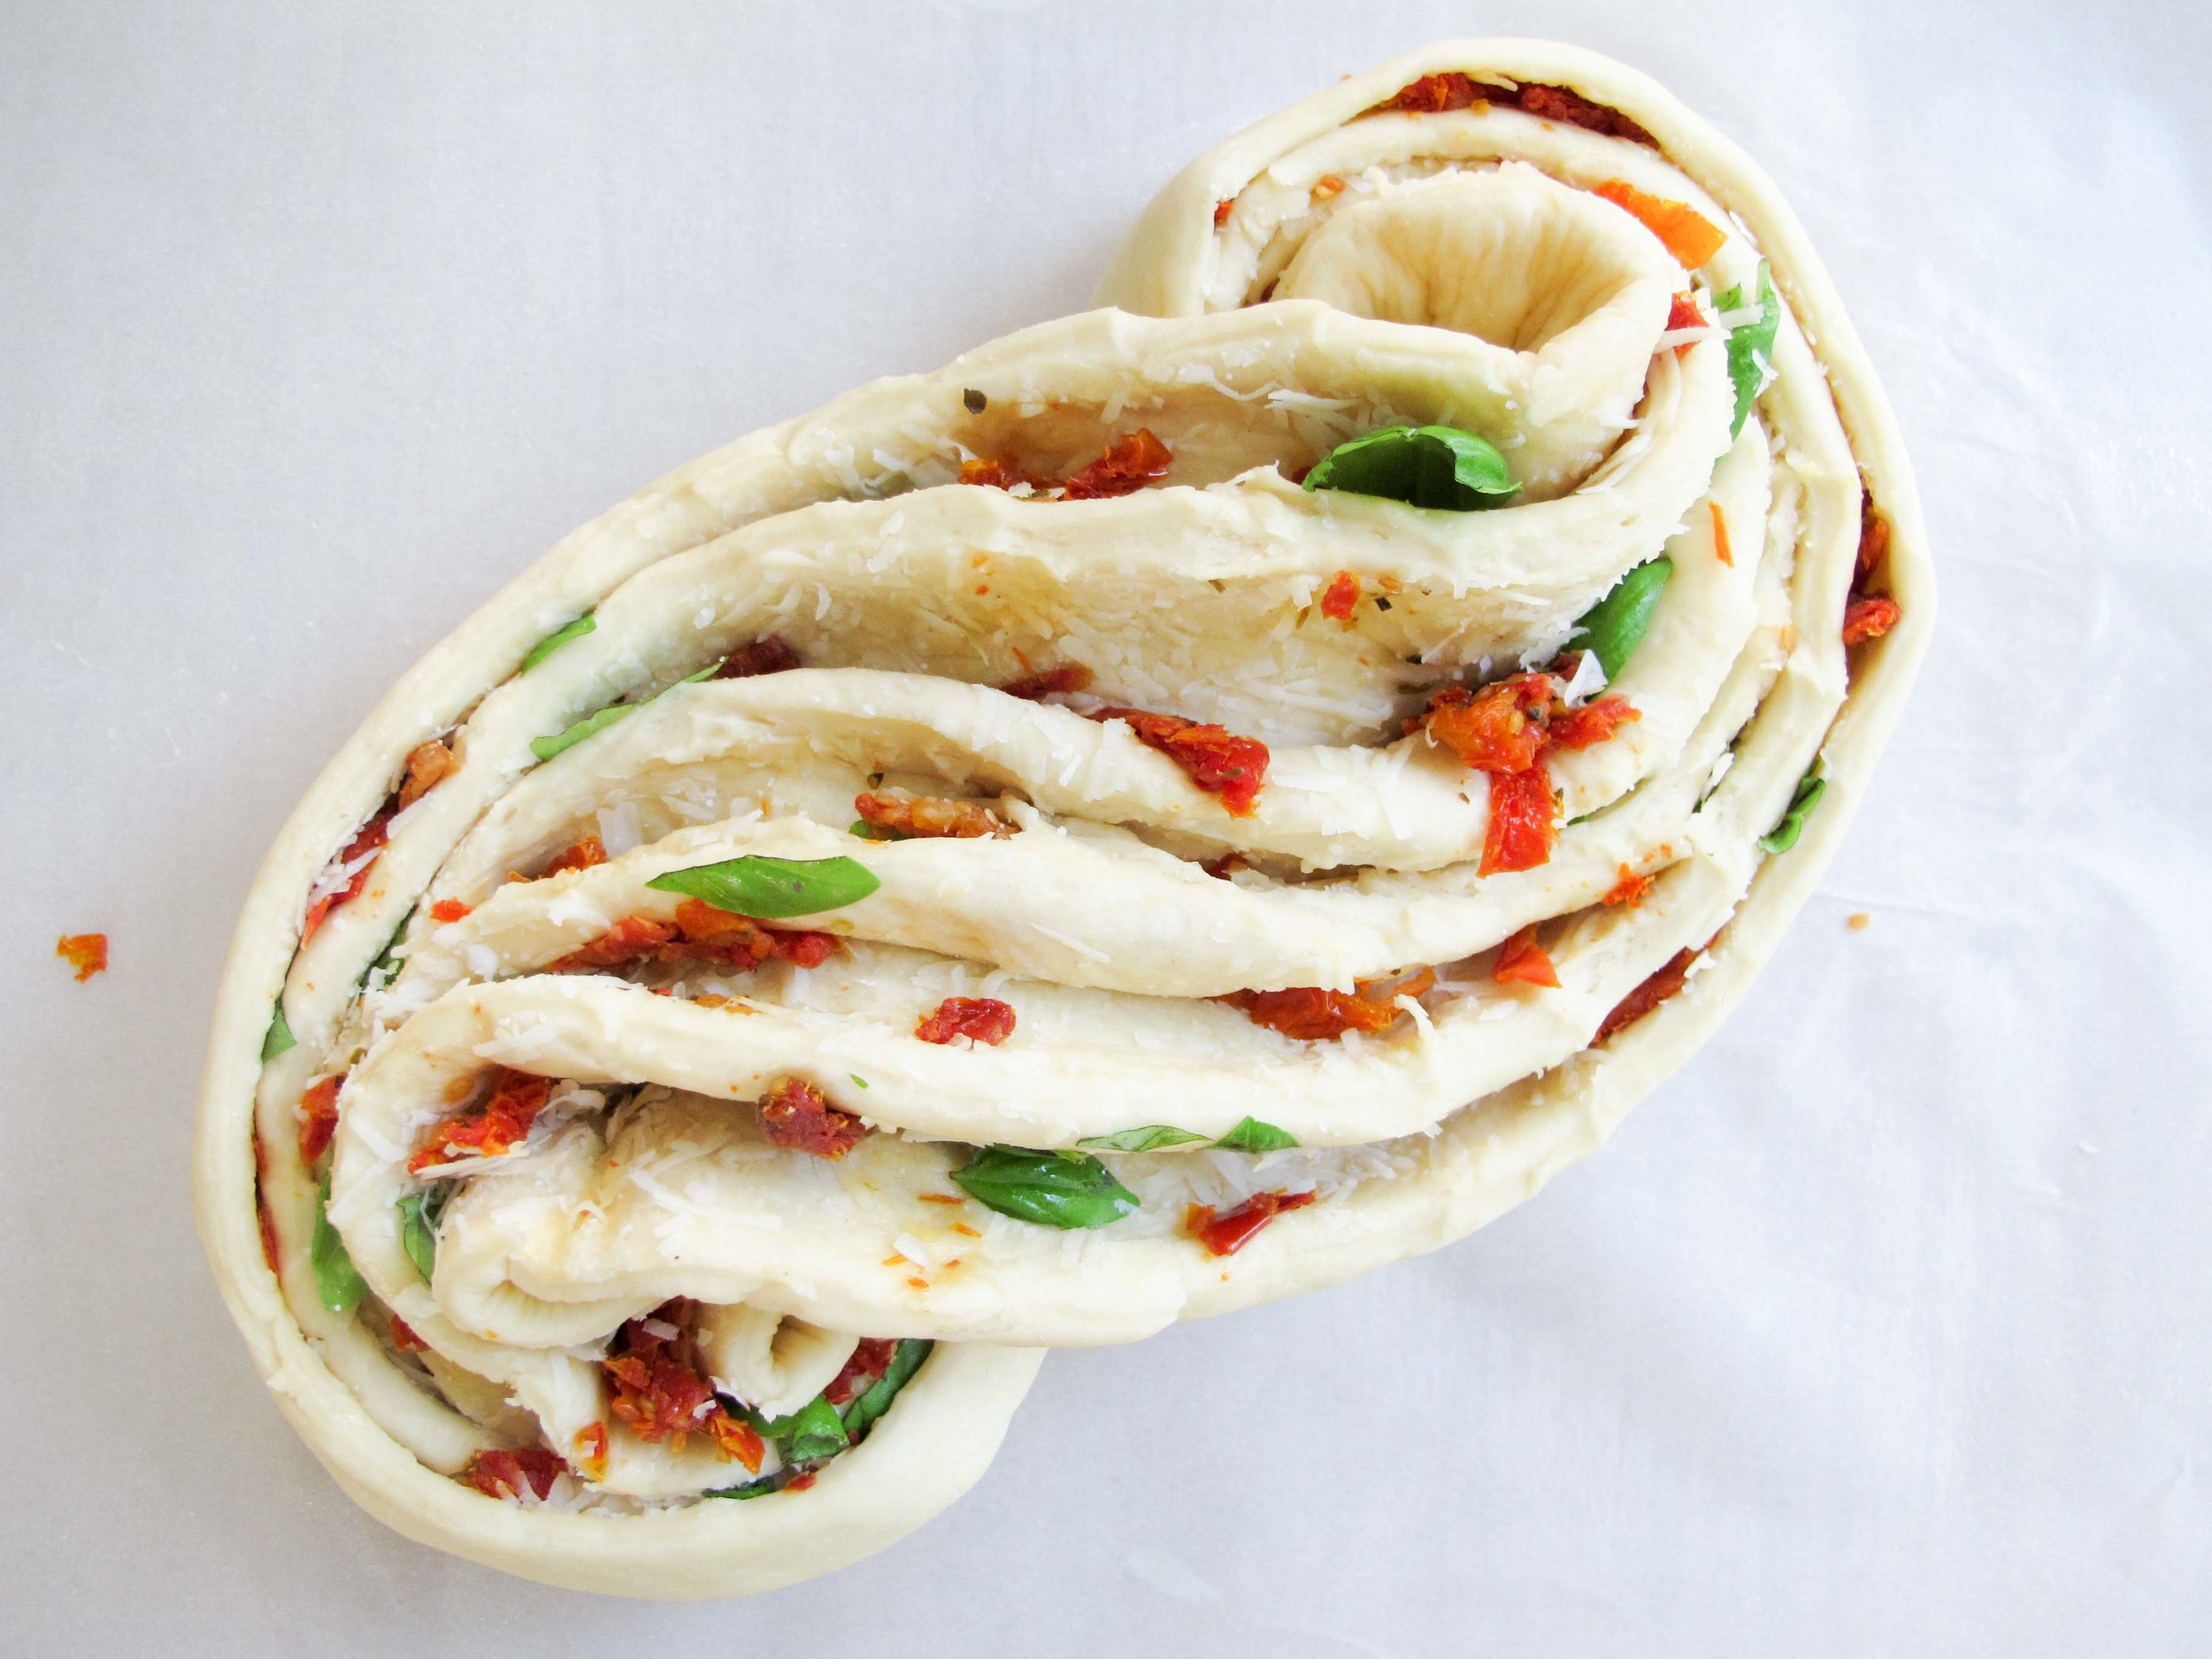
Starting from 1/2" from one end, snip through 1" depth of the roll with kitchen scissors, exposing the layers and filling. Continue to cut through the length of the roll.

Shape the log into a figure-8 shape by tucking one end of the roll underneath the center of the roll. Tuck the remaining side underneath the roll on the opposite side. Transfer the parchment paper with your loaf onto your sheet tray.

Cover the shaped dough and allow to rise until doubled in size, another 45 minutes to 1 hour. Preheat oven to 350 degrees at this time.

Once the loaf has risen, brush with egg wash and sprinkle with remaining 1/4 cup of cheese if desired. Bake the loaf for 20 minutes and check for browning. It should begin to develop a golden color, so tent the loaf to prevent too much browning and scorching of the delicate and exposed filling ingredients. Bake another 10 minutes to finish cooking. Remove from oven and place on wire rack to cool completely. 

Chocolate Birthday Cake with Chocolate Frosting by Amy Cantu

Print Friendly and PDF

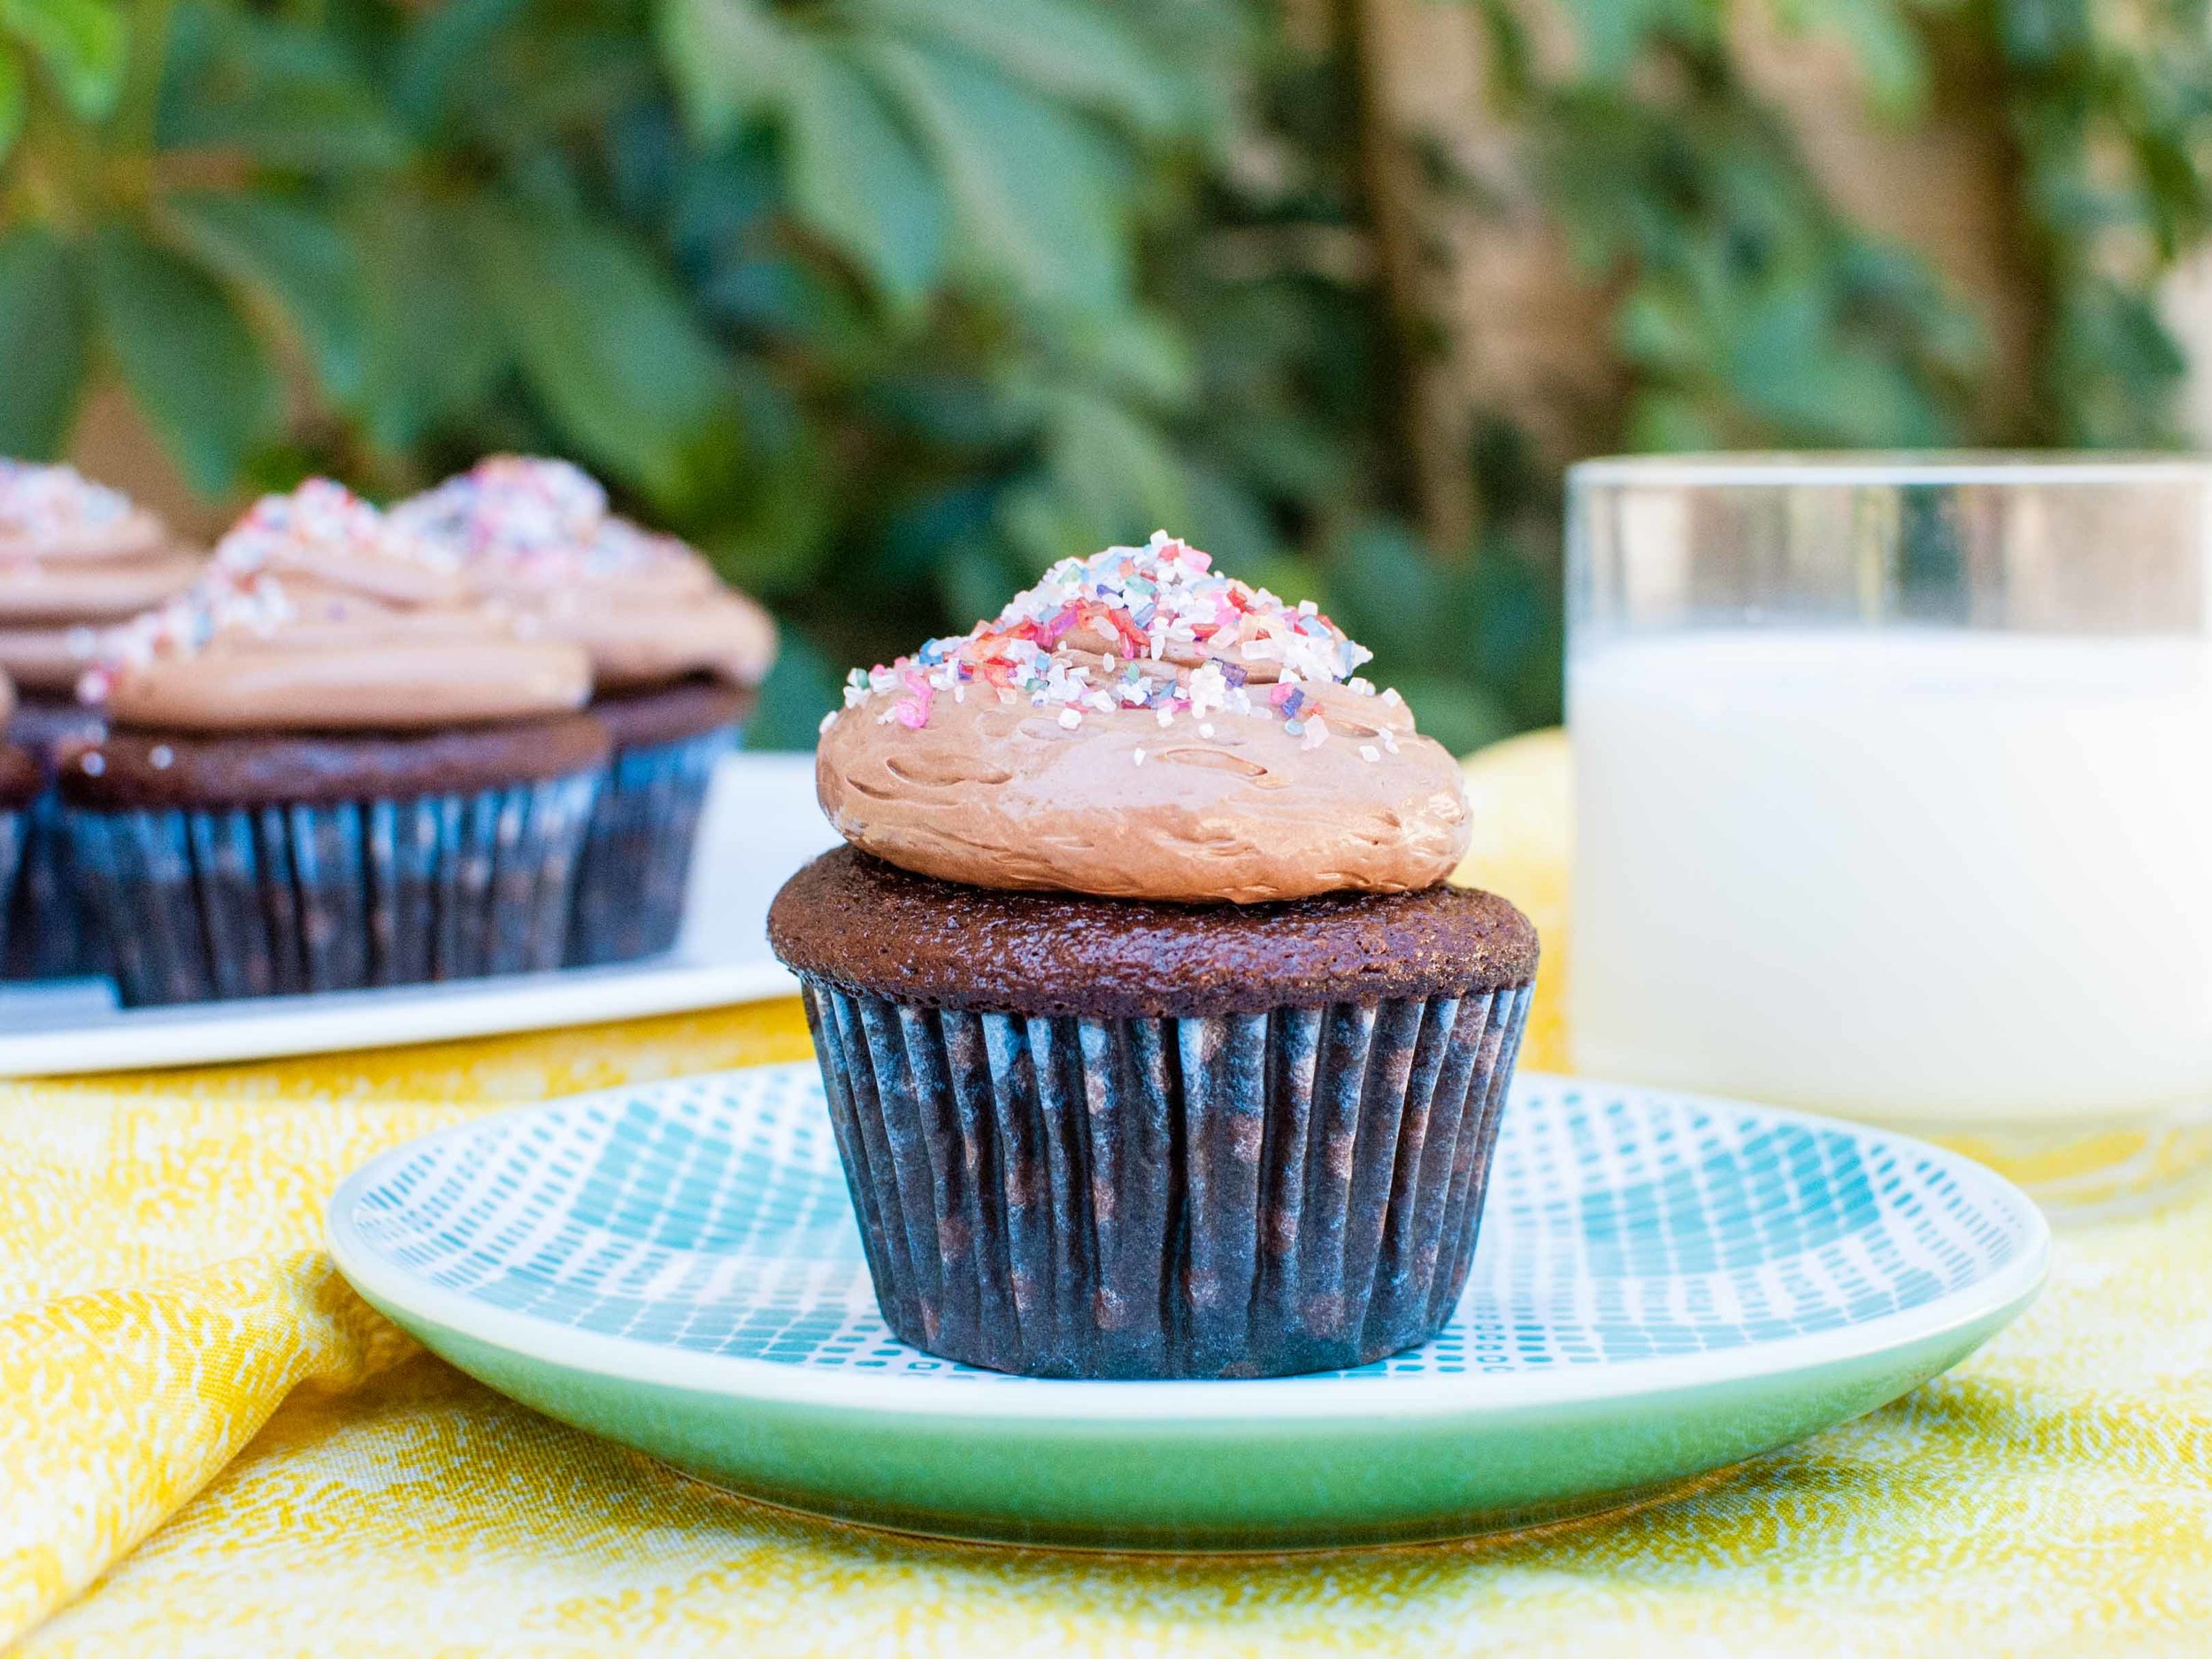
If you didn't know already, I have an absolute obsession with cake. Coconut Cake, Ice Cream Cake, Polenta Cake . . . it doesn't matter—I love it all! But sometimes nothing will do except rich, moist chocolate cake slathered with creamy, chocolate buttercream frosting, and this cake is exactly that. It's at once homey, impressive, and deeply satisfying to eat. Adults and kids both love it because . . . chocolate. It's the cake that strikes that nostalgic pang in my heart when I think of childhood birthday celebrations with balloons and streamers in primary colors. So go ahead: Make the time investment, bake this Chocolate Birthday Cake with Chocolate Frosting and eat your heart out, even if it's only your un-birthday.

Notes: I used the cake batter to make 12 cupcakes, (for a birthday play-date with a few besties,) and a small 6-inch double layer cake to enjoy with the family. I've also included instructions for using the batter to make all cupcakes, a 9x13 cake, or an 8-inch 3-Layer cake: Don't be scared off by all the text! I love the included recipe for Chocolate Buttercream Frosting because it stays beautifully shiny and creamy even as it sits out, and it's not cloyingly sweet. If the frosting begins to curdle as you are beating it, switch to high speed and keep whipping it until it looks smooth again. Don't worry, just keep whipping, and I promise it will come together. The cake is best at room temperature and will keep for 3 days without refrigeration . . . if it lasts that long!


Time: 2 hours
Yield: 12 cupcakes + 6-inch double-layer cake (I used a 6x3" round pan), 30 cupcakes, 13x9x2-inch baking pan, or 3-layer cake (8" rounds)

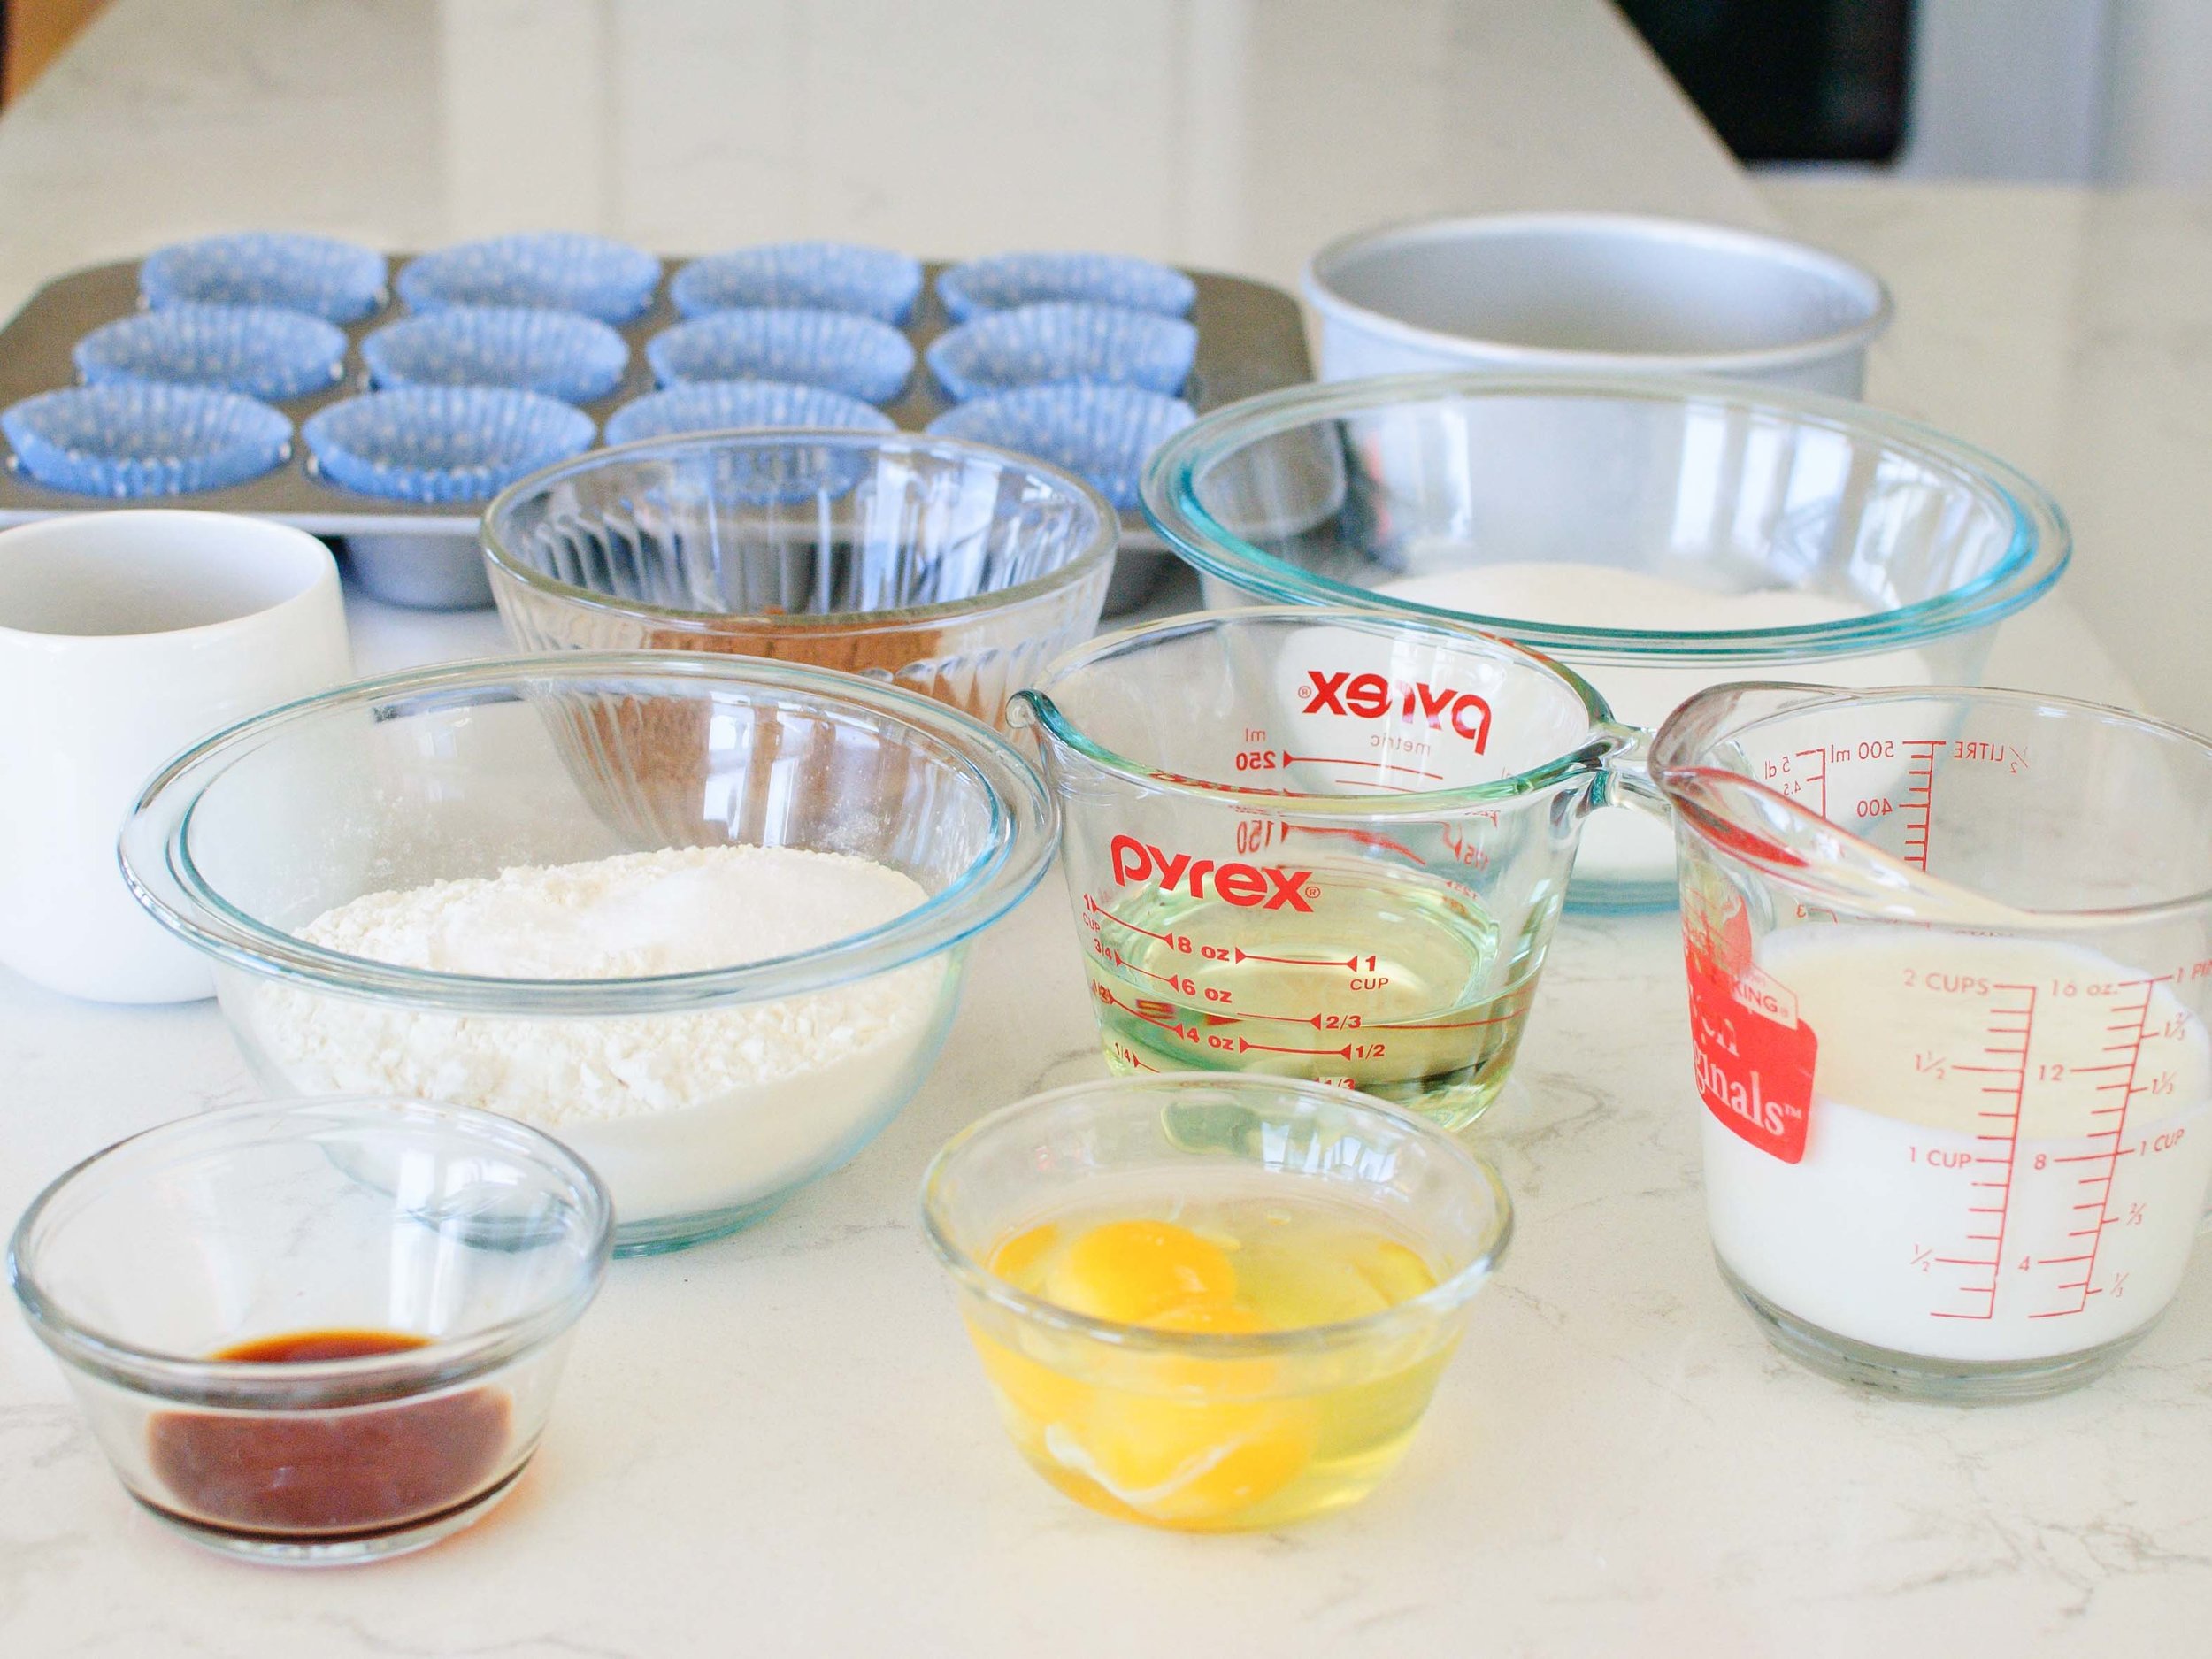
2 cups sugar
1 3/4 cups all-purpose flour
3/4 cup cocoa (natural, not dutch process)
1 teaspoon baking powder
1 1/2 teaspoons baking soda
1 1/2 teaspoons kosher salt (3/4 teaspoon table salt)
2 eggs
1 cup shaken buttermilk
1/2 cup vegetable oil
2 teaspoons vanilla extract
1 cup very hot brewed coffee
1 recipe Chocolate Buttercream Frosting (See recipe below.)
Loads of sprinkles

Preheat oven to 350 degrees F. Cupcakes: Line with cupcake liners. Cake pans: Cut parchment paper to fit the bottom of the pans. (I trace the bottom of the pan onto the parchment paper, then cut it out for a perfect fit.) Grease the bottoms and sides of the pan(s), line with the parchment paper, then grease the top of the parchment paper. (The extra parchment paper step ensures no wasted effort from the cake sticking to the pan!)

In a large bowl (or stand-mixer bowl fitted with a flat beater), stir together sugar, flour, cocoa, baking soda, baking powder, and salt. Beat in eggs, buttermilk, oil, and vanilla at medium speed for 2 minutes, until well-combined. Stir in very hot coffee - batter will be runny. Pour batter into prepared pans, filling them 2/3 full.

Bake until a wooden toothpick poked into the middle of the cake comes out clean. (Cupcakes: 22 to 25 minutes, 6x3-inch round: 30-35 minutes, 9x13-inch cake: 35-40 minutes, three 8-inch round cake pans: 30-35 minutes.) Cool 10 minutes, then remove from pans to wire racks. Cool completely. 

Cupcakes: Frost with Chocolate Buttercream Frosting and decorate judiciously with sprinkles!

6-inch Double Layer Cake: If necessary, lightly trim the top of the cake to create a flat top. Using a serrated bread knife, slice the cake horizontally to create two round layers of equal thickness. Place one layer on a flat plate or cake stand. Using a knife or offset spatula, spread the top with frosting. Top with the second layer, and spread frosting all over the top and sides, creating pretty swirls as you go, if you like. Decorate with plenty of sprinkles!

13x9 Single-Layer Cake: Spread Chocolate Buttercream Frosting over the top and sides. (There will be extra frosting.) Then sprinkle, sprinkle, sprinkle with sprinkles!

3-Layer Cake: Lightly trim the top of each 8" round cake to create a flat top. Place one layer on a plate or cake stand. Using a knife or offset spatula, spread the top with frosting leaving a 1/4" border. Top with the second layer, and spread the top with frosting leaving a 1/4" border. Place the final layer on top, and spread frosting evenly over the top and sides, creating pretty swirls as you go, if you like. Then, go crazy with those sprinkles!

Chocolate Buttercream Frosting

Recipe adapted from The Cake Bible by Rose Levy Bernanbaum

10 ounces bittersweet or semisweet chocolate, roughly chopped or chips
2 cups unsalted butter, room temperature (softened)
4 large egg whites, room temperature*
1 cup granulated sugar

Using a double-boiler to melt chocolate: Improvise a double-boiler, (if you don't have one,) by filling a saucepan 1/4 full with water and placing a heat-safe bowl over the pot. (The bowl should not touch the water.) Bring the water to a boil, then reduce the heat to low to keep a steady simmer. Place the chocolate into the bowl and stir frequently, until the chocolate begins to melt. Remove from heat when half the chocolate is melted, and continue to stir, using residual heat to complete the melting. The chocolate should be completely smooth. (If the chocolate is not completely melted, return the chocolate to the double-boiler for 30 seconds and continue stirring.)

Using a microwave to melt chocolate: Microwave chocolate in a microwave-safe bowl on high for 15 seconds. Stir well. Repeat until chocolate is half-melted and stir, using residual heat to complete the melting. If chocolate cools before chocolate is completely smooth, return to the microwave for another 15 seconds and continue to stir until chocolate is fully melted.

In a mixing bowl beat the butter on medium speed until smooth and creamy.

In the bowl of an electric mixer, beat the egg whites using the whisk attachment, (if you have one,) using a high speed setting, until soft peaks form when the beater is raised. Gradually beat in the sugar until stiff peaks form when the beater is raised slowly. Beat in the butter by the tablespoon. If the mixture looks slightly curdled, increase the speed a little and beat until smooth before continuing to add more butter. Add the melted and cooled chocolate all at once and beat until smooth and uniform in color. Use immediately or place in an airtight bowl. Re-beat frosting at room temperature to restore texture.

*Contains raw egg: Please be aware that consuming raw and lightly cooked eggs exposes a slight risk of salmonella or other food-borne illness. To reduce this risk, use fresh, properly refrigerated, clean grade A or AA eggs with intact shells, and avoid contact between the yolks or whites and the shell.

Orecchiette with Roasted Broccoli by Cynthia Raub

Print Friendly and PDF

Olivia has a spectacular appetite, and she really enjoys eating, much like her mommy and daddy. This year, in Junior Kindergarten, she is required to bring her own lunch every day. This excited both of us, and we made quick work to brainstorm ideas of things she loves. She started a journal and began drawing pictures of meals that she enjoyed, so we could remember what to include for lunch. Her very first idea was pasta and broccoli, and this recipe is a version with seasoned breadcrumbs that she really loves. This pasta dish is light and tasty and simple to make. The reserved pasta water and a pungent cheese make a light sauce and the tender-crisp broccoli is the perfect texture for kids. I find that kids cannot be fooled and really just want to eat delicious food like cheesy pasta! This is a healthier alternative to macaroni and cheese, so it's imperative to season these simple and few ingredients very well. 

I find that involving my kids in any part of the planning or cooking of meals makes them more enthusiastic to eat. The foods I send with Olivia to school are an extension of our food priorities at home: I focus on homemade and simple. Because Olivia has such an impressive appetite, satisfying meals are another priority since a variety of snacks will most likely not fill her up when she's hungry. This makes a filling lunch or an easy weeknight dinner!

Notes: This recipe can be simplified even further by skipping the blanching step for the broccoli before roasting it; you can even oven roast the broccoli for a nuttier flavor and a less hands on step. Substitute the cheese for any other finely grated hard cheese like Parmesan, but personally, I like the more pungent flavor of Pecorino-Romano with broccoli. These breadcrumbs are delicious on EVERYTHING and you can also enhance them in so many ways. A while back, I cooked them in rendered pancetta fat and herbs, which would be spectacular in this dish too.


Time: 35 minutes
Servings: 6

1 lb pasta
5 cups broccoli florets
6 tablespoons olive oil (divided)
2/3 cup bread crumbs
Kosher salt
Freshly cracked black pepper
1/2 teaspoon garlic powder
2 cloves of garlic, smashed
1 cup finely grated Pecorino-Romano
1 teaspoon lemon zest (about 1 small lemon)

Cook pasta according to package directions and your preference. Don't forget to season the boiling water liberally with salt! Strain pasta, reserving 2/3 cup of pasta water. Fill your pot back up with water and bring to a boil (for the broccoli).

While your pasta is cooking, make the breadcrumbs. In a large skillet, heat 3 tablespoons of olive oil on medium heat. Add breadcrumbs to the hot oil and stir to combine. Season breadcrumbs with 1/2 teaspoon of salt, garlic powder, and a pinch of black pepper. Cook breadcrumbs until golden and crunchy. Set aside.

Cut broccoli into large bite sized pieces. Blanch broccoli florets: bring water to a boil in a large pot and season with salt. Drop in broccoli and cook for 60-90 seconds or until desired doneness has been reached. Plunge broccoli into an ice bath, (large bowl filled with ice and water,) to stop broccoli from overcooking. Once cooled, drain, dry on a clean kitchen towel and set aside.

In a large skillet, add 3 tablespoons of olive oil and garlic and cook garlic until fragrant and barely browned. Remove garlic from oil and dispose. Add strained broccoli to the oil and season with salt and pepper. Over high heat, roast broccoli on the first side until crisp and browned. Toss the broccoli to roast on another side. Once browned, remove broccoli from the pan and set aside.

In the same large skillet, heat reserved pasta water and pasta together. Add finely grated cheese and stir to combine until pasta becomes creamy. Add roasted broccoli and lemon zest and heat through together. Transfer to a serving plate and garnish with breadcrumbs.

Gougères (Cheese Puffs) by Cynthia Raub

Print Friendly and PDF

Pâte à choux, (also referred to as choux pastry,) is a basic French pastry paste made from flour, water/milk, butter and eggs. From the basic ingredients, other ingredients are added to transform the choux pastry into gougères (flavored with cheese), eclairs (sweet, rod-shaped, and filled with pastry cream), profiteroles (similar appearance to gougères but filled with pastry cream or ice cream), and even Parisian gnocchi. Choux pastry does not include a leavening (or rising) agent, such as baking powder or yeast. The piped pastry mounds puff during cooking due to the high moisture content of the soft dough, which evaporates and results in a golden pastry shell. This is a classic, easy to master, and versatile dough that can be used in a multitude of ways. I encourage you to try it and never look back! Not to be dramatic or anything . . . but your life will never be the same once you can make homemade gougères.

Notes: This recipe might seem daunting, but once you make it successfully once, (hopefully the first time,) you will feel like a rockstar. The most important thing to remember when it comes to this recipe, is to have everything prepared and measure before you begin. The steps move quickly, and there should be very little lag time between steps. You can substitute the milk for water and any kind of semi-hard and hard cheese will work, depending on your preference. I have made them with Parmesan, Gruyere, Comte, Emmental and Cheddar. In this instance, I used Dubliner, which I find multi-dimensional: nutty, sweet, sharp and salty. You can also jazz it up with herbs and other seasonings. Thyme is one of my favorite herbs for these cheesy, airy puffs.


Time: 50 minutes
Yield: ~30 puffs

1 cup milk
1 stick unsalted butter, cut into large pieces
1/2 teaspoon kosher salt
1/4 teaspoon freshly ground black pepper
1 cup all-purpose flour
4 large eggs
1 cup grated cheese
Egg wash (1 well beaten egg, splash of milk or water)
1/4 cup finely grated cheese (for sprinkling)

1. Begin by preheating oven to 425 degrees and lining two sheet trays with parchment paper.

2. Meanwhile, bring milk, butter, salt and pepper to a boil of medium-high heat.

3. Once at a boil, turn heat down to medium and add flour to the pot. Stir vigorously, incorporating the flour into the milk mixture.

4. Continue to cook and stir until a cohesive, soft dough is formed (the dough will pull away from the sides of the pot). Once the dough has taken shape, continue to cook for 1 minute more, stirring constantly.

5. Add the mixture to a stand mixer bowl fitted with a paddle attachment (or a mixing bowl, or a food processor) and mix on low for 1 minute to release steam and cool down the dough. Add an egg, one at a time and mix on medium-low until it the egg has been fully incorporated (about 30 seconds to 1 minute). This photo has one egg and has been mixed for 10 seconds. The appearance of the dough is curdled and not cohesive. Continue to mix until it looks like the following photo.

6. Continue adding the remaining eggs until the dough resembles this constancy. 

7. Add shredded cheese and fold in.

8. Scrape dough into a gallon-sized freezer bag or piping bag. (I used a large beer stein to keep my bag open.)

9. Squeeze dough to a bottom corner of the bag and twist and pinch the bag at the top of the dough to create pressure. Snip the corner to approximately the diameter of a dime.

10. Standing directly above your prepared baking sheet, position the tip of the bag to kiss the parchment. Gently squeeze bag from the top, releasing the dough, while simultaneously and slowly drawing the bag upwards.
 

11. Continue piping mounds on the baking sheet with 2" of space between each one.

12. Dip your finger into the egg wash and gently push down each of the unruly tails that formed on your mounds. With a pastry brush, brush the top of each mound with egg wash.

13. Sprinkle finely shredded cheese on top.
 

14. Place baking sheets into the preheated oven, with the racks positioned at 1/3 and 2/3 distance. Bake for 15 minutes at 425 degrees. Carefully turn the pans in the oven to ensure even cooking. Be gentle! You don't want to bang them around and have any collapse - they are still fragile at this point. Turn oven down to 375 degrees and continue to cook for 10 minutes more, until beautifully golden brown and hollow on the inside.

Enjoy immediately or store in an airtight container, and rewarm in a 350 degree oven for 8 minutes.

Mango-Shrimp Tacos with Honey-Lime Slaw by Amy Cantu

Print Friendly and PDF

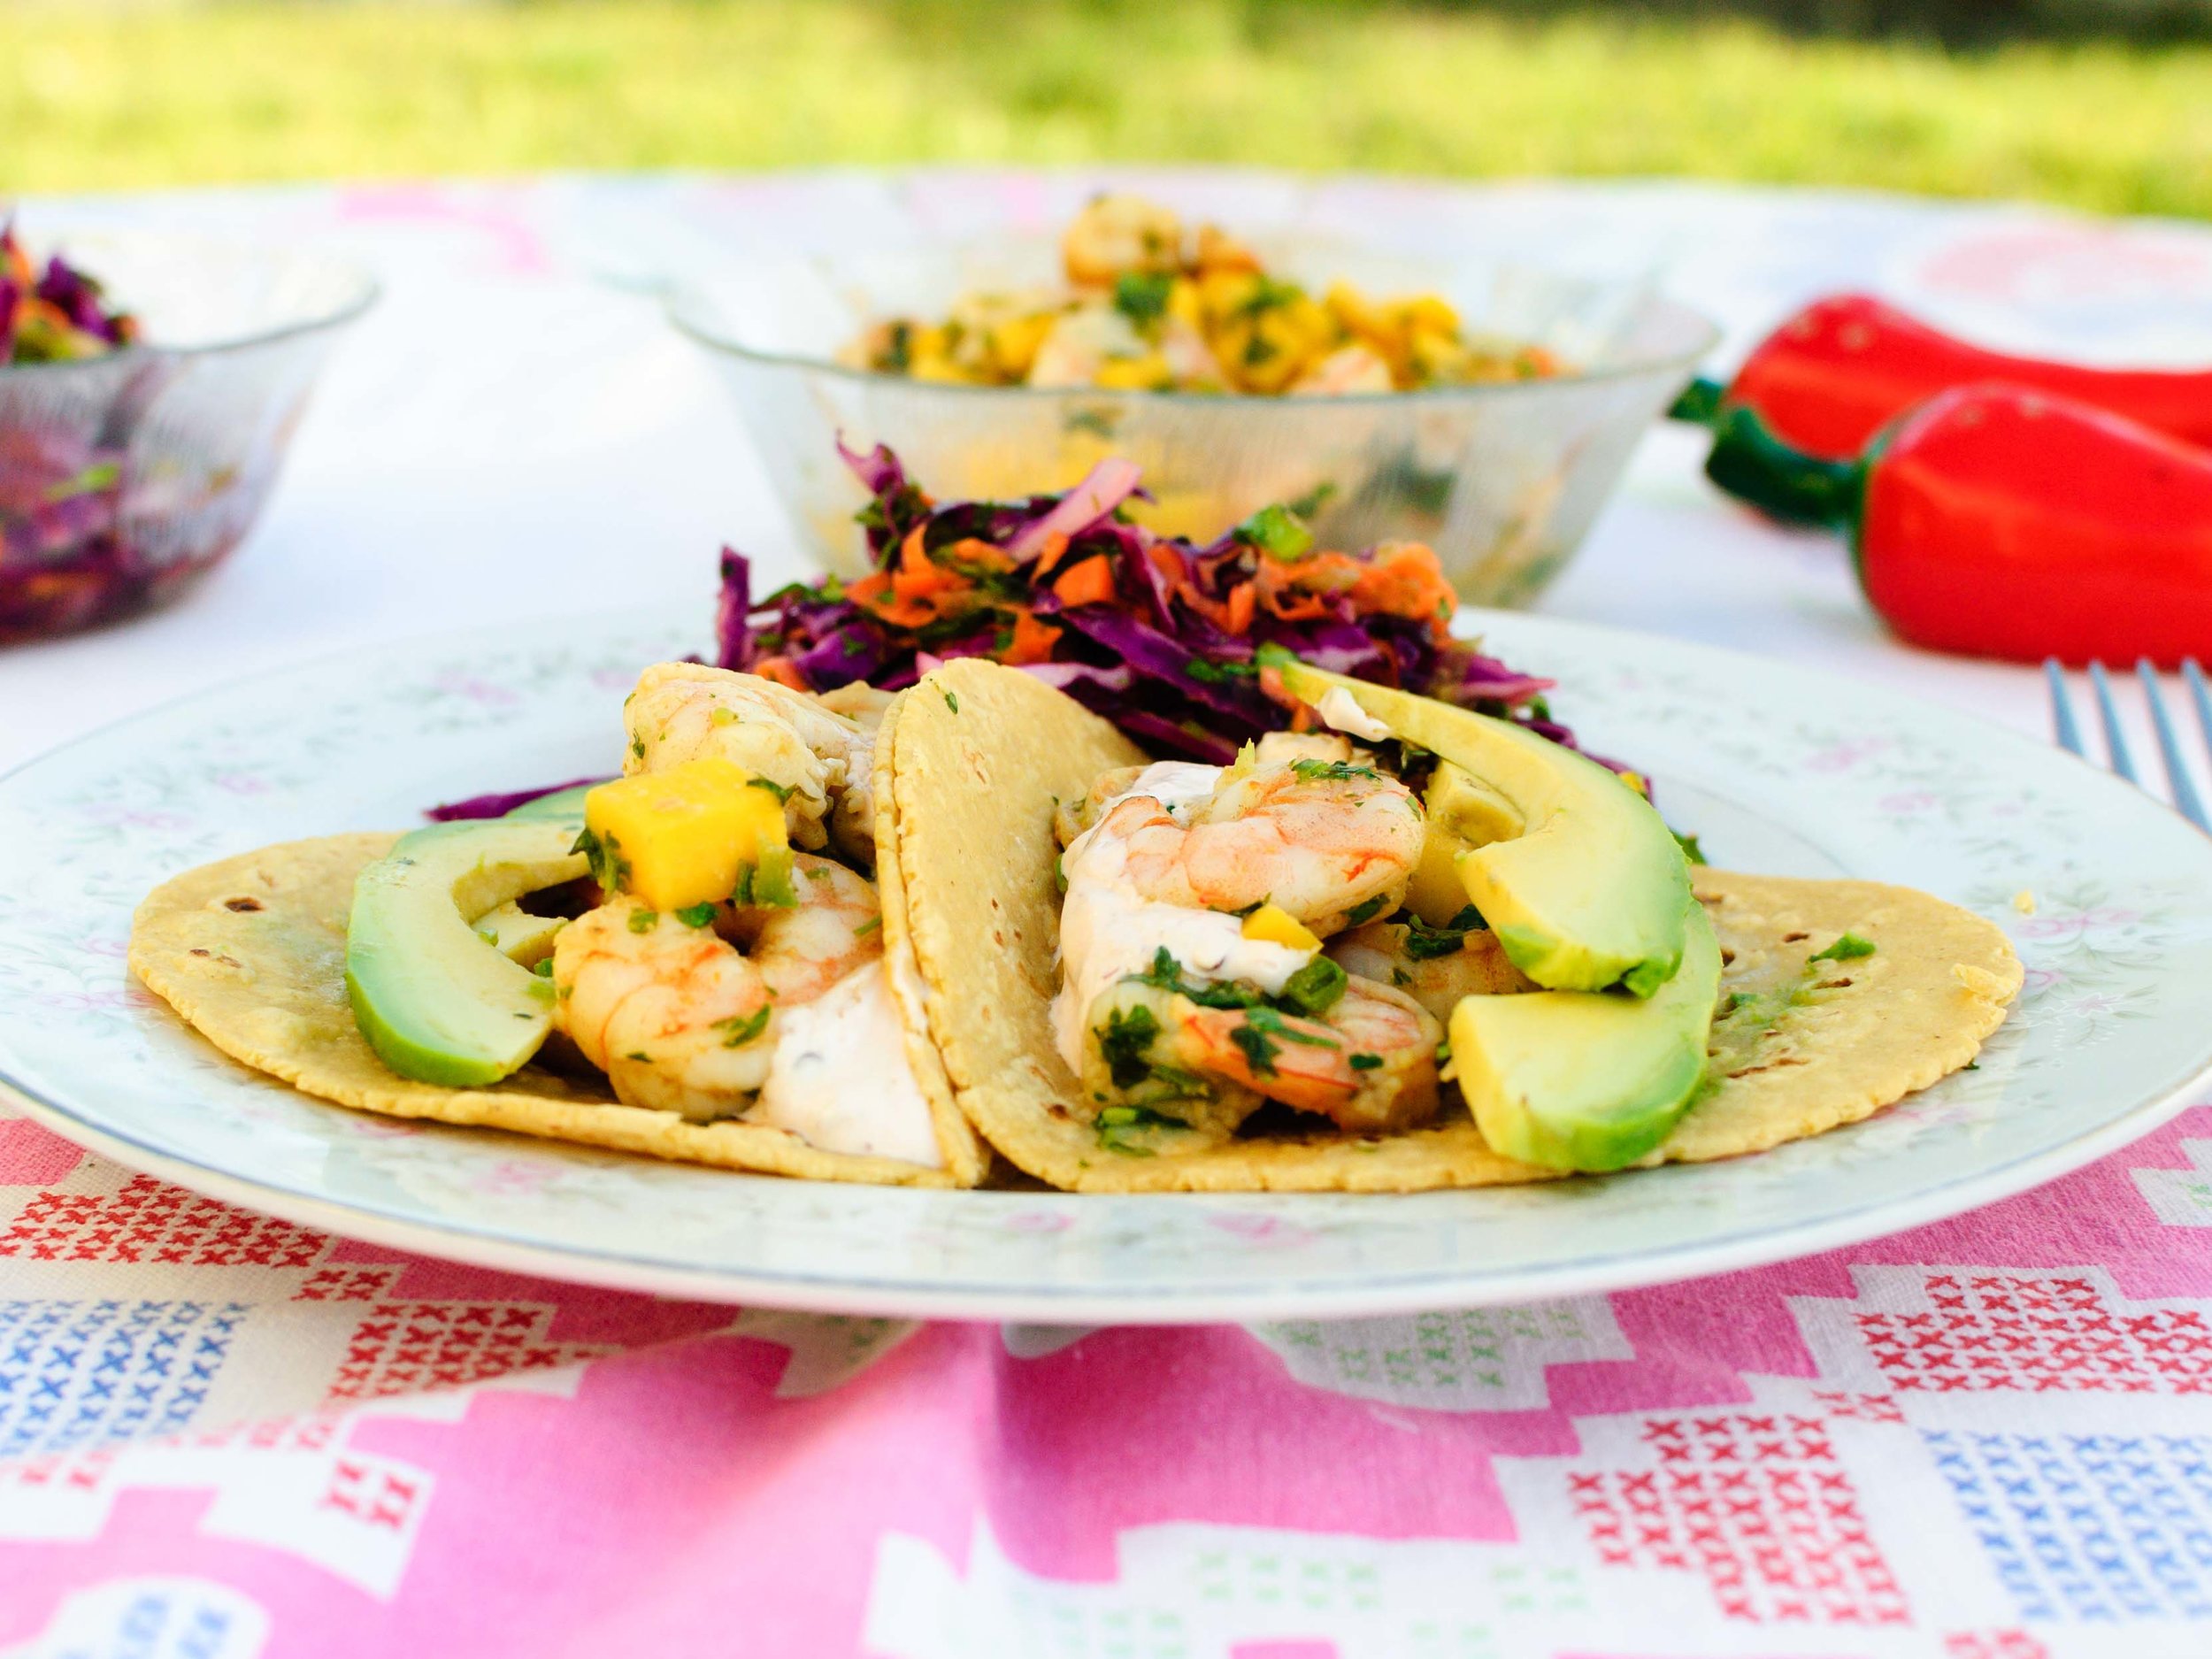
Sometimes, I close my eyes and try to imagine that I'm stretched out in the sand somewhere warm and tropical with waves lapping at my feet. This is when I'm usually painfully interrupted by, "MOM! Mommmmmm!" and my reverie comes to an abrupt halt. So, I shove a giant bite of Mango-Shrimp Tacos in my mouth, squeeze my eyes closed tight, and suddenly for a few more seconds that vacay is a reality. (I suspect that this island dream might also be why I love coconut so much too.) Oh yeah, and those kiddos yelling for my attention? They just want a bite too. Plump, juicy shrimp tangled together with bits of sweet mango, all heaped over a warm tortilla and topped with mildly spicy and smoky chipotle sour cream and crunchy honey-lime slaw. Excuse me, I need to close my eyes again and take another bite. See you in paradise!

Notes: I heart mangos so much! I usually try to get the smaller manila or Ataulfo mangos if possible, since they are so much sweeter, but I found that even the larger (and more common) Kent mangos work well in this recipe. I removed the seeds from all the peppers to keep this dish mild enough for my kids. (I could barely detect any heat.) Feel free to leave the seeds in or swap the jalapenos for spicier serrano peppers, if you like things spicy! The honey-lime slaw is delicious heaped over the tacos or on the side as a salad. It has enough going on to be it's own side dish without the tacos too!


Time: 40 minutes
Servings: 4-6

1 cup sour cream
1-2 chipotle peppers in adobe sauce

2 teaspoons ground cumin
1 1/2 pounds medium shrimp, peeled and de-veined
3 garlic cloves, sliced thin
Kosher salt
2 mangos, small-diced
1 large jalapeno, seeded and minced
1/4 cup cilantro, minced
2 limes, juiced

Sliced avocados
Corn tortillas
Honey-Lime Slaw (recipe below)

Mince 1 or 2 chipotle peppers, removing the seeds if you don't want it spicy. Stir peppers into the sour cream and set aside.

Heat a large pan over medium-high heat. Add ground cumin and stir frequently for one minute or until it smells fragrant and toasty. Add shrimp, sliced garlic, and about 1 teaspoon of kosher salt, stirring and flipping the shrimp frequently, until shrimp are mostly pink and opaque (about 4-5 minutes). Add mango, jalapeno, and cilantro to the pan and continue to cook for 1 minute or until the shrimp are just cooked through. Turn off the heat and stir in lime juice. Taste and adjust seasoning as needed. 

To serve, spoon mango and shrimp over warm tortillas with a couple slices of avocado and a big dollop of chipotle sour cream. Top with Honey-Lime Slaw or serve the slaw on the side. Open up wide and devour!

Recipe adapted from Martha Rose Shulman at NYT Cooking.

Honey-Lime Slaw

2 limes, juiced (about 1/4 cup)
1-2 tablespoons honey (to taste)
1/2 cup grape seed oil (or vegetable oil)
Kosher salt
Freshly ground pepper
1/2 head red cabbage, cored and sliced thin
2 carrots, peeled and coarsely grated
1 jalapeno, seeded, and sliced thin
2 stalks green onion, thinly sliced
1/2 bunch cilantro leaves, roughly chopped (about 1/2 cup)

In a small bowl, whisk together lime juice, honey, oil, about 1 teaspoon kosher salt, and 1/4 teaspoon ground pepper. Set aside.

In a large bowl, combine cabbage, carrots, jalapeno, green onions, and cilantro. Drizzle dressing over the vegetables and toss well. Taste and adjust salt and pepper to taste. Serve heaped over Mango Shrimp Tacos or on the side.

Chicken Salad by Cynthia Raub

Print Friendly and PDF
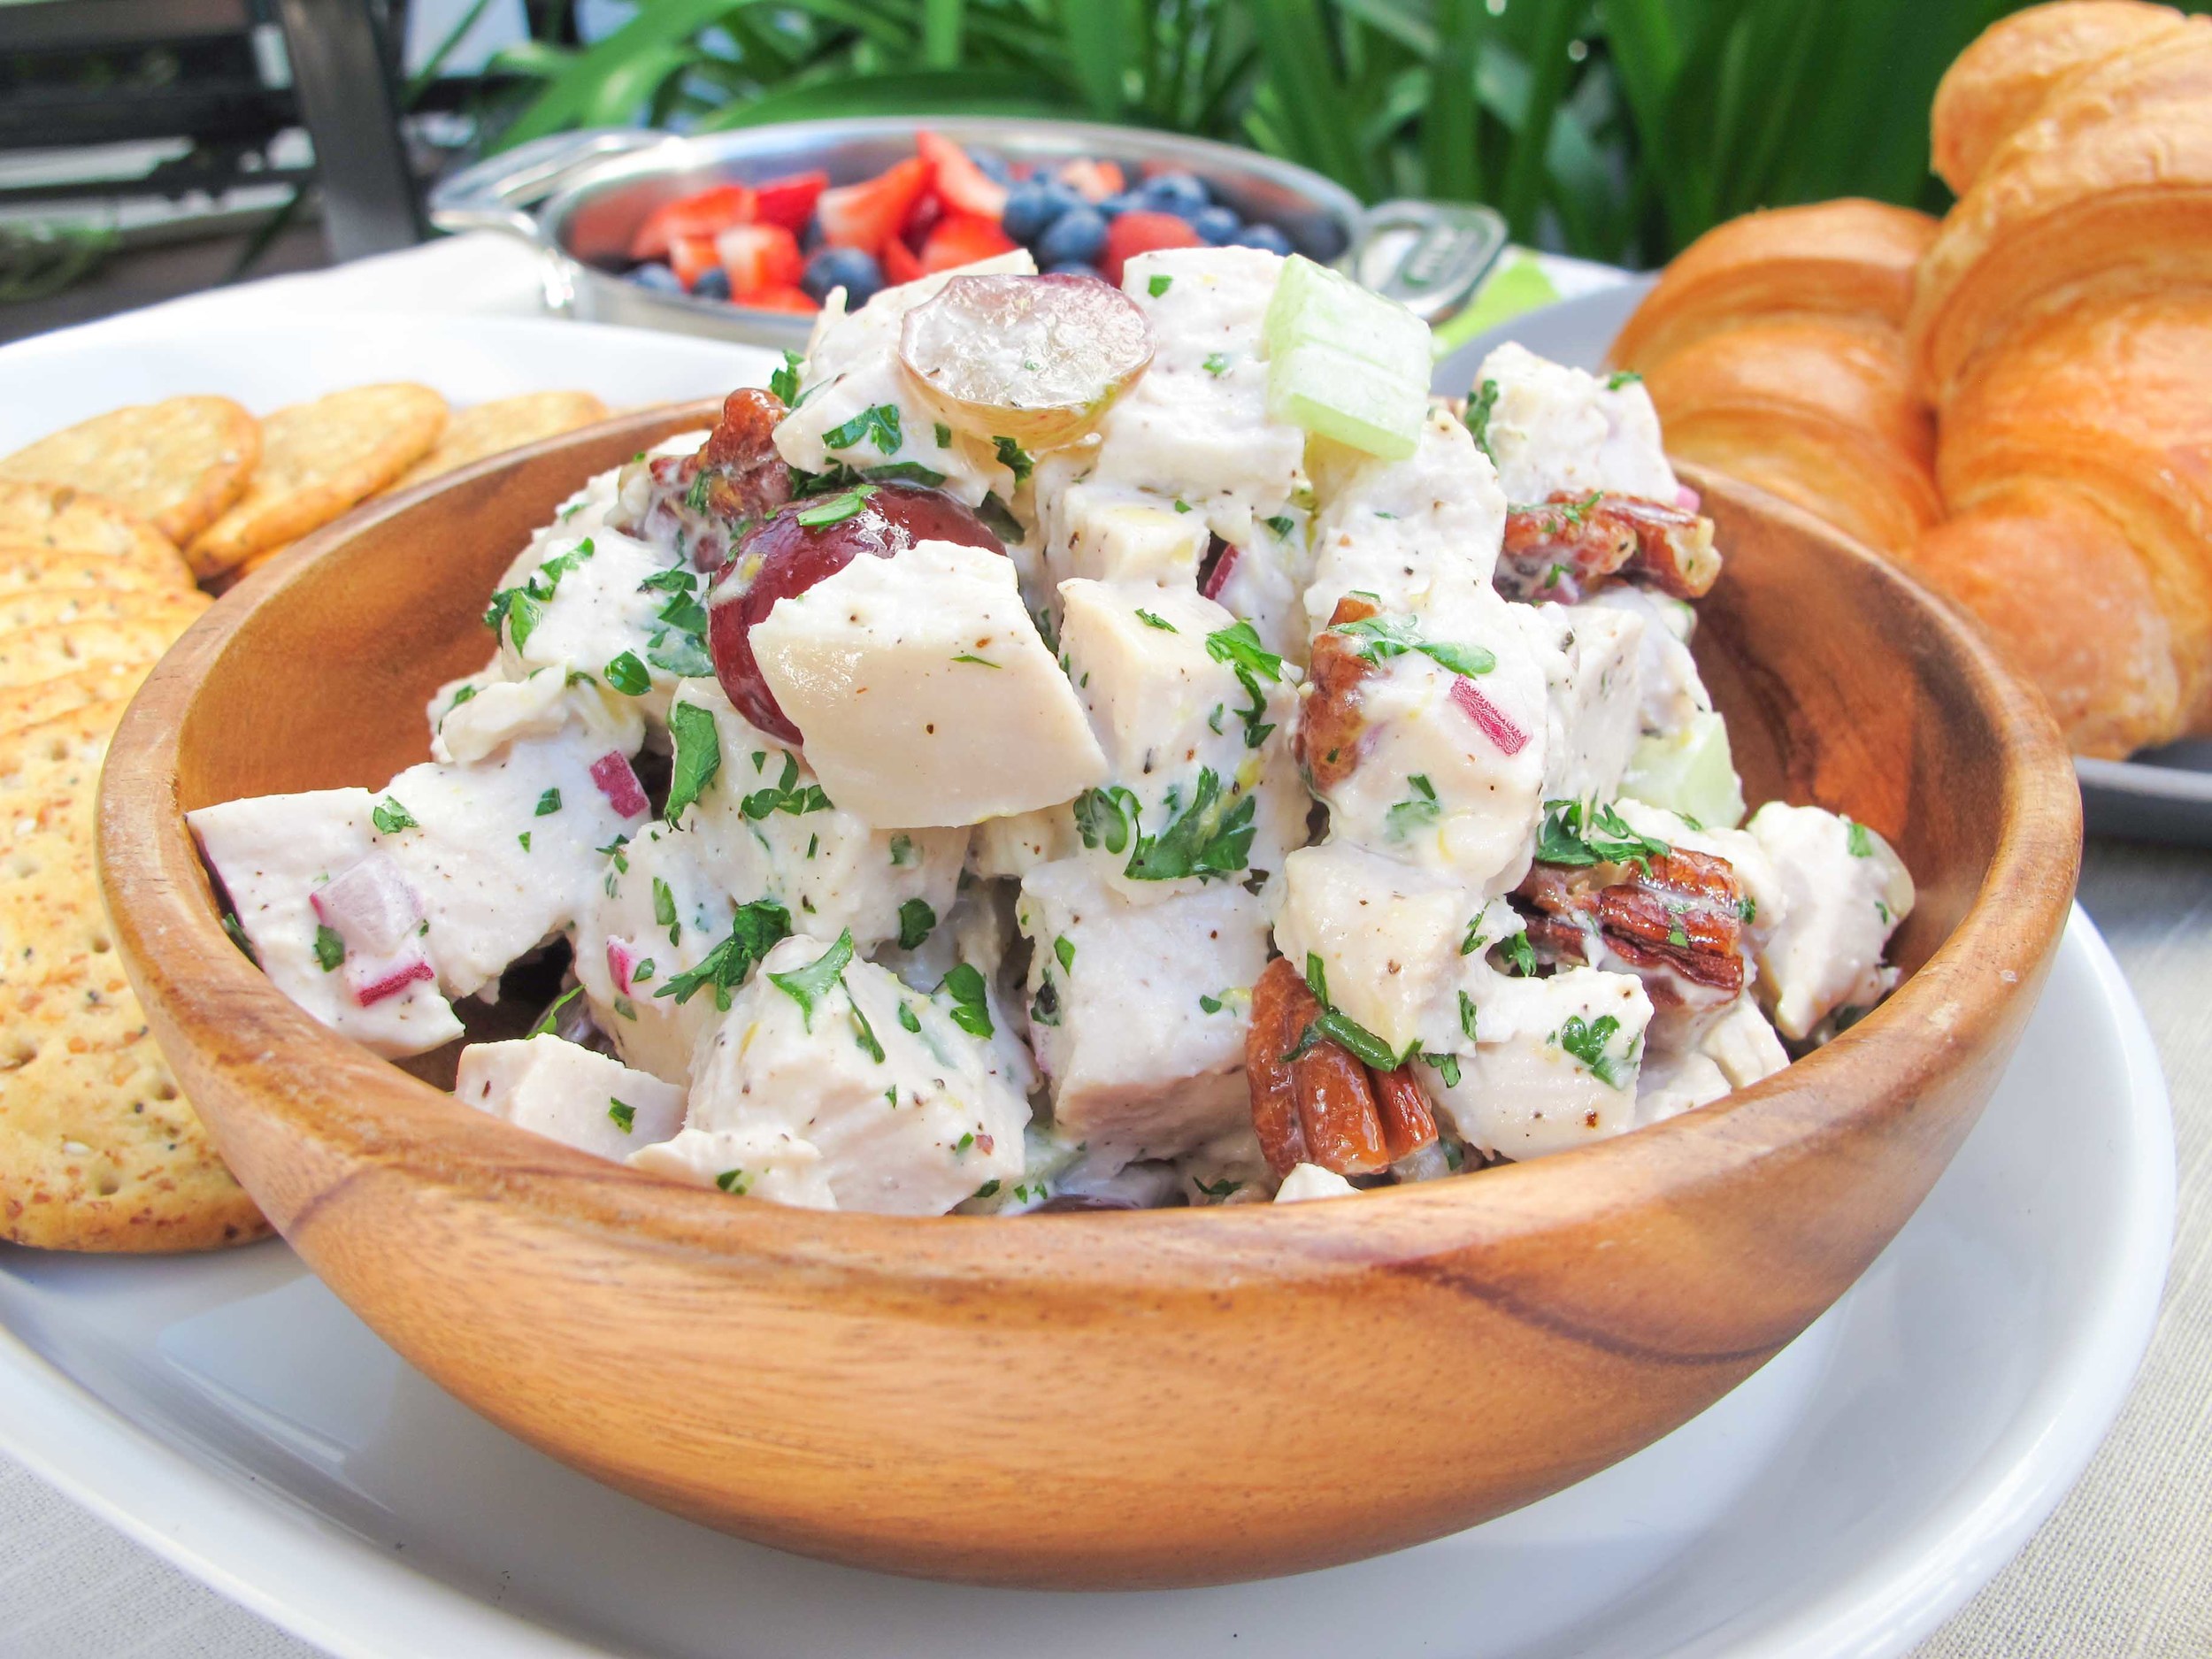
chicken salad recipe with croissants and crackers

Is there anything to dislike about chicken salad? Unless you are a vegetarian or vegan, or you don't care for mayonnaise (Amy . . . ), what is there not to love? Tender supple chicken accompanied by a crisp crunch of celery, a little sweetness from the fruit of choice, all brought together by a delicate mayonnaise dressing. Ahhh! Sounds like the perfect lunch or snack to me. I love sandwiches because they deliver the perfect bite and I especially have a thing for loosely filled sandwiches. I'm always looking for more recipes to make that keep well, and are easy to make larger quantities without much more work. This is one of those recipes and I promise it will be a crowd favorite, unless the crowd is vegetarian or hates mayonnaise (Amy . . . ).

Notes: This recipe requires a fair amount of chopping, but it comes together in a cinch. It involves very little to no cooking, depending on what chicken you choose to use. In a pinch, you can always shred chicken from a store-bought rotisserie bird or you can buy prepared chicken meat; however, I would strongly suggest you try the simple poaching method, (recipe below,) to get tender chicken and a delicious broth simultaneously with hardly any extra work. The grapes in this recipe can also be substituted with other fruit such as diced green apple or dried cranberries. I love chicken salad on a croissant because, why not? But, it's also a dream on sliced white bread, a simple roll, or on crackers.


Time: 20 minutes
Yield: 4 cups

1 tablespoon lemon zest
2 tablespoons lemon juice
1/2 cup mayo
1 1/2 teaspoon salt
1 teaspoon black pepper
1 teaspoon sugar
2 tablespoons chopped parsley
1/3 cup red onion, finely diced
1/2 cup toasted pecans, roughly chopped
3 cups (about 2 pounds) poached chicken, diced (Recipe Below)
1/2 cup celery, small dice
3/4 cups grapes, halved

In a small bowl, make the dressing by combining lemon zest, lemon juice, mayonnaise, salt, black pepper, sugar and parsley. Set aside.

In a large bowl, combine red onion, pecans, chicken, celery, and grapes. Pour dressing over chicken and stir to combine. Taste and adjust for seasoning. 

Serve as a sandwich on a roll, croissant or sliced bread; or with crackers as a light side or appetizer.

Poached Chicken

2 pounds chicken breast (about 3 moderately sized breasts)
1/2 carrot
1 celery rib
1/2 onion
10 parsley stems
1 teaspoon black peppercorns
1 tablespoon salt
Water

Place chicken in a large pot and cover with water by 1 inch. Scatter carrot, celery, onion, parsley stems and peppercorns on top. Season with salt. 

Turn heat to medium high and bring the pot to a simmer. Allow to simmer for 3 minutes, then turn off the heat and cover the pot with a tight fitting lid. Set aside and allow chicken to finish cooking in the hot liquid. Leave the chicken to cool in the pot, about 1 hour. 

Remove chicken and dice into 1/2 pieces. Strain liquid from vegetables for a beautiful and easy broth.
 

Easy Chocolate Pudding by Cynthia Raub

Print Friendly and PDF

I vacillate between having absolutely no self control to annoyingly smug and proud for my saint-like restraint. It's black or white and there is no grey. I either have self control or I don't. This is why you normally won't find cookies, ice cream or any other sweet treat in my home. My smug self feels superior for not caving in at the store and buying yummy and delectable treats at the store. The reason I don't keep treats in the house is because if I have them, I will eat all of them. Not one, not a few - ALL. This is where my self control fails me. But after my kids go to bed, I open my sad pantry doors, and I am disappointed that there are no yummy sweets for me to indulge in. This has lead to some desperate alternatives. A handful of chocolate chips? I've done it. A spoonful of Nutella? On the reg. Cinnamon sugar toast? I'm a child, I know.

But ever since I made this easy and fast chocolate pudding from pantry staples, my late nights have been a little less sad and disappointing. This pudding comes together in 15 minutes because of the cornstarch. Cornstarch doesn't have the best reputation, but it's just as "natural" as refined flour or sugar. I love to use cornstarch in my Korean Green Onion and Seafood Pancakes (Pa Jun) to lighten the pancake batter. For this recipe, the cornstarch thickens your pudding beautifully and easily. This recipe is also very versatile, as you can switch the milk from whole to skim, or an alternative milk. You can omit the cocoa to make a vanilla pudding or omit the generous portion of butter to health-ify things a little. Chocolate pudding can be made ahead and kept for several days, or it can be made on the fly to satisfy an immediate craving. I love that it's easy to transport (especially to a picnic with a summery bean salad) and doesn't require any extraneous kitchen equipment.


Notes: Although this recipe is very straightforward, it does implement one important cooking technique: tempering. Tempering is the process in which you heat an egg mixture slowly with a hot milk mixture. Adding hot milk to eggs will heat the eggs without cooking them, in order to develop the custard. The egg in this recipe helps to thicken the pudding and brings an overall richness to each bite but must be cooked and introduced to the recipe properly. If too much heat is introduced to the eggs too quickly, the eggs will scramble and curdle, leaving the mixture inedible and unusable.

If you are looking to cool your chocolate pudding quickly, (maybe you're pressed for time or maybe you have no self control . . . ) cover a rimmed baking sheet with a piece of parchment paper or plastic wrap. Spread the chocolate pudding evenly to increase the surface area of the pudding, and cover the top of the pudding with another sheet of parchment paper or plastic wrap. Placing the parchment paper or plastic wrap directly on top of the pudding prevents the rubbery pudding skin from forming. If you find that your pudding it too firm or gelatinous for your liking once it's been cooled, you can put it in a mixer with the whisk attachment to lighten it up.


Time: 15 minutes active + cooling time
Yield: 3 cups

3 egg yolks
1/3 cup cornstarch
3 cups whole milk (divided)
3/4 sugar
1/2 cup cocoa
2 tablespoon vanilla
2 tablespoons butter
Optional: cookie crumbs and/or whipped cream for garnish

In a large bowl, combine egg yolks, cornstarch and 1/2 cup of milk. Whisk until frothy and until the cornstarch has been fully incorporated.

In a non-reactive medium pot on medium heat, combine remaining milk, sugar and cocoa. Whisk until combined and bring to a simmer, allowing to simmer for 3 minutes.

Remove pot from heat and with a ladle, slowly stream 1/4 cup of hot cocoa liquid into the large bowl containing the egg and cornstarch mixture, whisking to disperse the hot liquid. (In my photo I did not use a ladle- I poured the hot cocoa liquid directly from the pot, which I would not advise). Continue to add hot liquid in a thin stream to the egg mixture slowly, while whisking constantly, until the egg mixture has been tempered (see Notes above).

Once combined, pour back into the pot and bring to a boil over medium heat, whisking occasionally. Once thickened and glossy after coming to a boil, turn off heat and transfer to a clean, heat proof bowl and place plastic wrap or parchment paper directly onto the top of the pudding. Chill in the refrigerator and serve, garnishing with cookie crumbs and/or whipped cream. (See Notes above for a rapid cooling tip!)

Two Bean Summer Salad by Amy Cantu

Print Friendly and PDF

Once a quarter, I eagerly await my next shipment of beans from the Rancho Gordo Bean Club. When I hear the loud thud of the box hitting my doorstep, I run out and rip the box open to take stock of what beautiful bean goodies have arrived - I'm never disappointed. Rancho Gordo grows heirloom bean varietals that might otherwise go extinct, since grocery store beans have become so limited and homogenous. I never knew how glorious beans could be before I cooked up my first batch of Rancho Gordo beans. There are so many different kinds with varying colors, textures, sizes, and flavor. Some varieties cook up big, sturdy and meaty, while others are petite, melty, and creamy. Also, these beans don't take forever to cook because they haven't been sitting on warehouse shelves for years and years. I held a bag of scarlet runner beans in my hands and admired their deep eggplant purple sheen with violet speckles and streaks - so beautiful. I knew these scarlet runner beans were destined for a bean salad that would celebrate summer. An overnight soak and hour-long cook rendered the beans plump and substantial with creamy centers, ready to soak up a bright, vibrant dressing. Tossed with summery green beans, ripe tomatoes, and sweet corn, this Two Bean Summer Salad has lots of fun textures and is hearty enough to be a main course. Tote this bean salad along for a picnic alongside a few cups of easy chocolate pudding, and you'll remember why sometimes the ordinary can really be spectacular. Happy summer!

Notes: I can't encourage you enough to seek out quality dried beans and cook them up yourself, but I know that sometimes we're in a pinch, and we just need to pull a meal together. Feel free to substitute two cans of beans, drained, and rinsed for the beans in this recipe, if you are short on time (red kidney beans or cannelini beans will work).

Just like with Broccoli Cooked Forever or in a good Caesar Salad dressing, even if you're not an anchovy fan, I promise that you won't taste them or anything fishy in the final salad. The anchovies lend a deep, savory flavor that is really delicious in the dressing.


Time: 1 hour, 20 minutes (or 30 minutes, if using canned beans)
Serves: 6-8

1 1/2 cups dried scarlet runner beans (or other dried runner bean), soaked overnight and drained (about 4 - 4 1/2 cups cooked)
1/2 pound green beans, ends trimmed, and cut into thirds
3 ears corn, shucked
2 large tomatoes, watery seeds removed, 1/3" dice
1/4 cup red wine vinegar
1 teaspoon kosher salt
Freshly round pepper
1 teaspoon dijon mustard
2 garlic cloves, minced
2 anchovies, minced
1/2 cup olive oil
1/4 cup basil, slivered or torn into small pieces
 4 stalks green onion, thinly sliced

In a stockpot or french oven, combine beans with enough water to cover beans by 2 inches (about 6 cups). Bring to boil for 5 minutes, then reduce heat to low, and simmer partially covered, until tender - about 1 hour. Drain and rinse under cold water until beans are cool. Transfer to a large bowl.

Meanwhile bring a large pot of water to boil. Prepare an ice water bath by combining water and a few handfuls of ice in a large bowl. Blanch green beans in the boiling water for 2 minutes or until crisp tender, then scoop out the beans with a slotted spoon or strainer and plunge into the ice water. Add cooled green beans to the scarlet runner beans.

Next put the corn into the boiling water, reduce heat to medium low, and cook for 5 minutes. Add another handful of ice to the water bath, and plunge the cooked corn into the icy water to cool. Stand an ear of corn flat side down on a large cutting board. Using a sharp knife, cut the kernels from the corn cob. Transfer corn kernels into the bowl with the beans and repeat with remaining corn.

Add diced tomatoes, red wine vinegar, salt, pepper, mustard, garlic, anchovies, and olive oil to the salad and mix well. Taste and add additional salt and pepper to adjust seasoning. Sprinkle slivered basil and green onions over the salad and lightly toss to combine. Serve immediately.

Flatbread with Chicken Shawarma, Eggplant, and Caramelized Onions by Cynthia Raub

Print Friendly and PDF

Recently, I got an email from NYT Cooking that was sharing Sam Sifton's Oven-Roasted Chicken Shawarma. It is one of those invaluable and easy pantry dishes that come together with very little prep and even less hands-on cooking. Throw marinade and chicken into a bag, let sit, dump on a sheet tray and toss it in the oven. And then what emerges is fragrant, multi-dimensional, and tasty chicken. The chicken is highly versatile as it can be served alongside typical Mediterranean sides and dishes like pita, cucumber and tomato, hummus, and rice. Or, I thought, you could throw it on a flatbread (a.k.a. pizza dough) and feel like a real, true and actual genius. Do you know what else is genius? Outsourcing the luscious spread to marry the flatbread and chicken together. You see, I am all too familiar with Amy's love for eggplant and I decided to exploit it. I told her I was planning on making the chicken shawarma, and I thought about putting it on a flatbread but that's where my ideas ended. Dang, shoot, crud - I'm plum out of ideas! Oh what could possibly be irresistibly delicious to spread on the flatbread? Then like a horse out of the gate, Amy threw out a dozen ideas, and it ended with roasted eggplant with caramelized onions. That was it. We are going to make this together, eat it, and be happy.


Notes: I used this recipe for the flatbread and pre-cooked the bread before adding any of the toppings. Like pizza, flatbread can be topped with nearly anything, so in the words of Melania Trump (just kidding, FLOTUS Michelle Obama) about flatbread toppings, "the only limit to your achievement is the strength of your dreams and your willingness to work for them." #foodwisdom


Read More: The Shared Craving


Time: 15 minutes to assemble
Makes 2 flatbreads

2 flatbreads, pre-baked
1 cup Eggplant Dip with Caramelized Onions and Tahini
1 1/2 cups shredded Chicken Shawarma
1 cup crumbled feta cheese
1/4 cup mint, chopped or chiffonade
Olive oil for finishing
Lemon wedges for serving

Preheat oven to 400 degrees. Place pre-baked flatbread dough on a full sheet tray. Spread eggplant dip generously over each flatbread and top with shredded chicken shawarma. Split feta between the two flatbreads and sprinkle evenly. Drizzle or brush edges of crust with olive oil.

Put the flatbread in the oven and cook until edges of the bread are golden and crisp and the spread, chicken and cheese are warmed through, about 6-8 minutes. Slice the flatbread and garnish with mint chiffonade and lemon wedges. 

Eggplant Dip with Caramelized Onions and Tahini by Amy Cantu

Print Friendly and PDF

It was another one of those harried days - I felt vaguely grumpy from getting too little sleep because I've become so used to waking up at every little sound my kids make that I'm now an insomniac. Also, I'm a worrier. I can't help it. I lay awake at night thinking about nothing and everything - that weird bump I found on the back of one kid's knee, the persistent grumble in my stomach, why American politics is so polarized, and exactly what time do I need to roll out of bed so that I still have enough time to throw together a lunchbox and get to the preschool on time (or maybe just 5 minutes late)? It's possible, I also drink too much caffeine too late in the day. I digress. The previous night, I laid awake distraught over eggplant dip, and now I stood in the kitchen with Cynthia and Christine passing around pieces of flatbread with various versions of eggplant dip, "OK, which do you like better? Bite A or B? Really? Are you sure you like B? What?! And you like A better? Well you're both no help!" In that moment, it felt like world peace depended upon which eggplant dip tasted better, and I was at an impasse. (I know this sounds ridiculous, and that's because it was. This is also a PSA on the importance of sleep. Don't be like me!) My dad would be the tie-breaker. "OK dad, it's down to you. Which one tastes better??? No pressure. Actually, yes, pressure. You're deciding!" My dad looked at me dubiously, as I shoved a bite into his mouth. "Mmmm, yeah this one tastes good. Kind of creamy." And then I pushed the second bite his way. "Mmmm, yeah this one tastes good too." Exasperated, I cried, "Oh, come on! You said almost the same thing twice!" My dad looked at me like he did when I was a teenager, and I was being particularly hormonal and witchy. He grunted, "Mmm. The second one. I can taste that it has eggplant." The tie breaker - because an eggplant dip should also taste like it contains eggplant. Brilliant! So, here is my recipe for Eggplant Dip with Caramelized Onions and Tahini: The roasted eggplant is silky, the caramelized onions adds deep savory sweetness, the tahini coats the tongue in nutty richness, and most importantly, you can still taste the eggplant! Sometimes it takes a village to raise children, and sometimes it takes a village just to make a bowl of eggplant dip. It's darn good eggplant dip.

Notes: This eggplant dip is a delicious and different accompaniment to a crudité platter, especially if you throw in some wedges of pita bread. The texture is already a bit creamy from the roasted eggplant and tahini, but you could extend the dip and make it even creamier by stirring in some plain yogurt. It will be a different kind of delicious. My dilemma as to whether to include the yogurt in the recipe was great (see babble above), because both versions of this dip are delicious with or without the yogurt. However, aside from using this dish as a dip, it also makes an amazing spread for Chicken Shawarma Flatbread or a fancy pizza, if you will. I repeat, AMAZING. And for this use, I say, no yogurt.

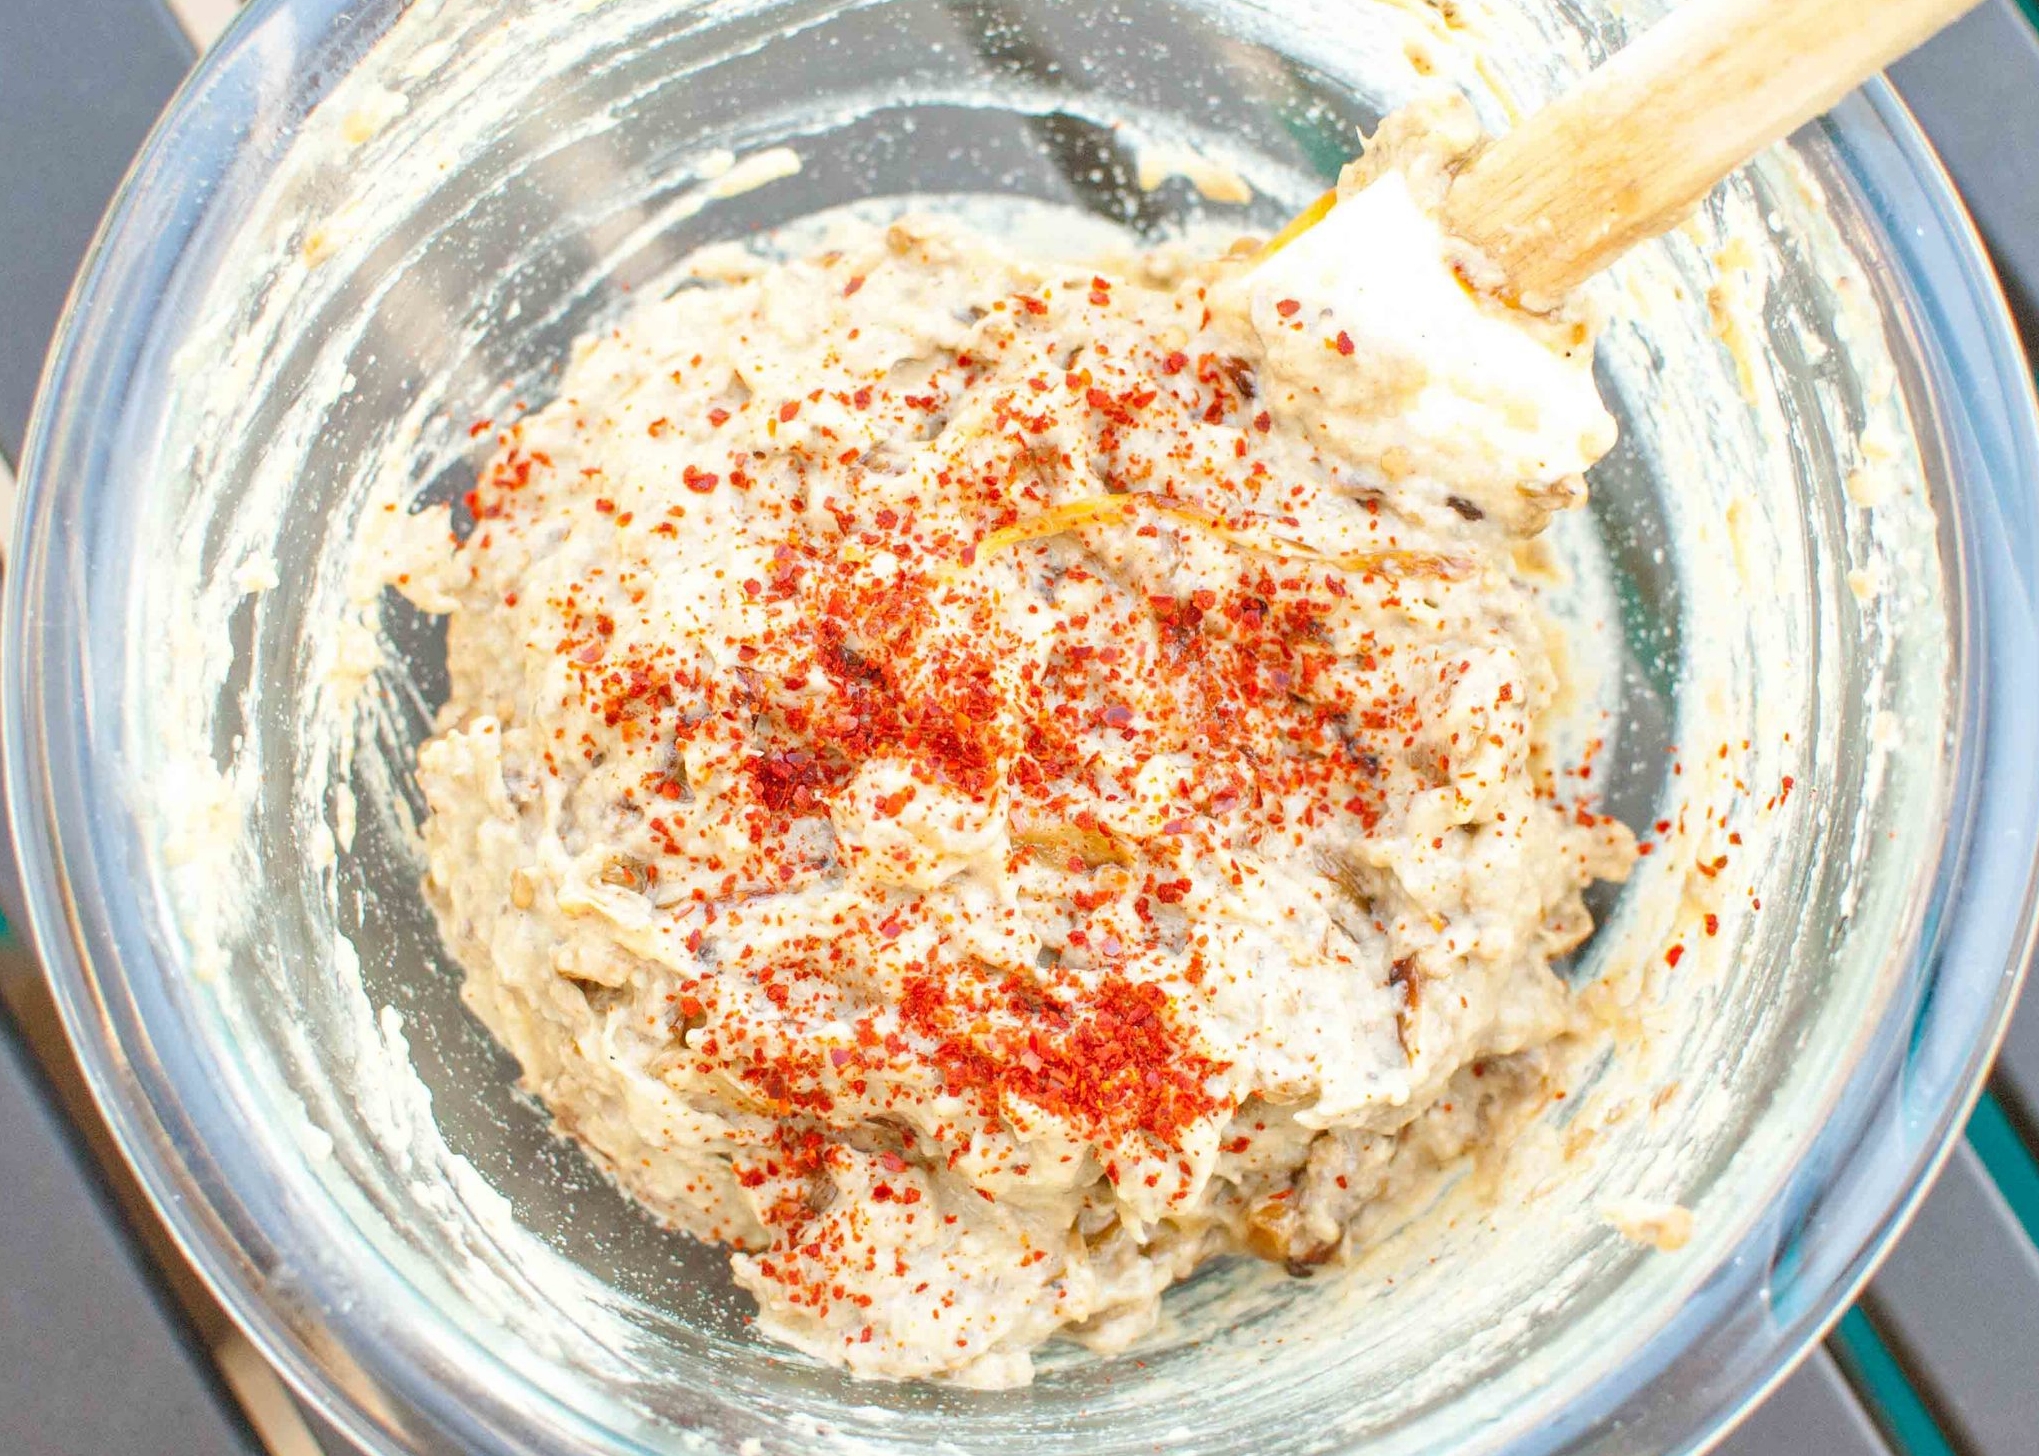
I call for aleppo chile flakes in the recipe, which is worth seeking out. I got a bag on Amazon, and it's now my go-to for chile flakes. Aleppo chile is commonly used in Middle Eastern cuisines, and adds a little heat (without being over-powering), bright acidity, and an interesting je ne sais quoi to whatever you sprinkle it on!


Time: 1 hour, 30 minutes
Serves: 6-8

2 large eggplants
2 medium onions
1 tablespoon, plus 2 tablespoons extra virgin olive oil (divided use)
1/3 cup tahini, well-stirred
Juice of 1 lemon
1 teaspoon cumin
Kosher salt
1/4 - 1/2 teaspoon aleppo pepper flakes or freshly ground black pepper, to taste

Preheat oven to 400 degrees F. Line a rimmed baking sheet with aluminum foil and grease lightly with oil or cooking spray. Prick eggplants all over with a small sharp knife, to allow steam to escape while the eggplants roast. (Don't skip this step or beware of exploding eggplants!) Place pricked eggplants on baking sheet and roast in oven for an hour or more, until eggplants are wrinkled, deflated, and scorched in spots. Remove from oven and let rest until cool enough to handle. Using a spoon, split the roasted eggplants open, and scoop up the soft inner-flesh from the charred skin and into a colander. Stir in a sprinkle of salt, and let drain for 5-10 minutes. Press the eggplant with the back of a spoon to squeeze out any excess liquid, then scrape into a large bowl.

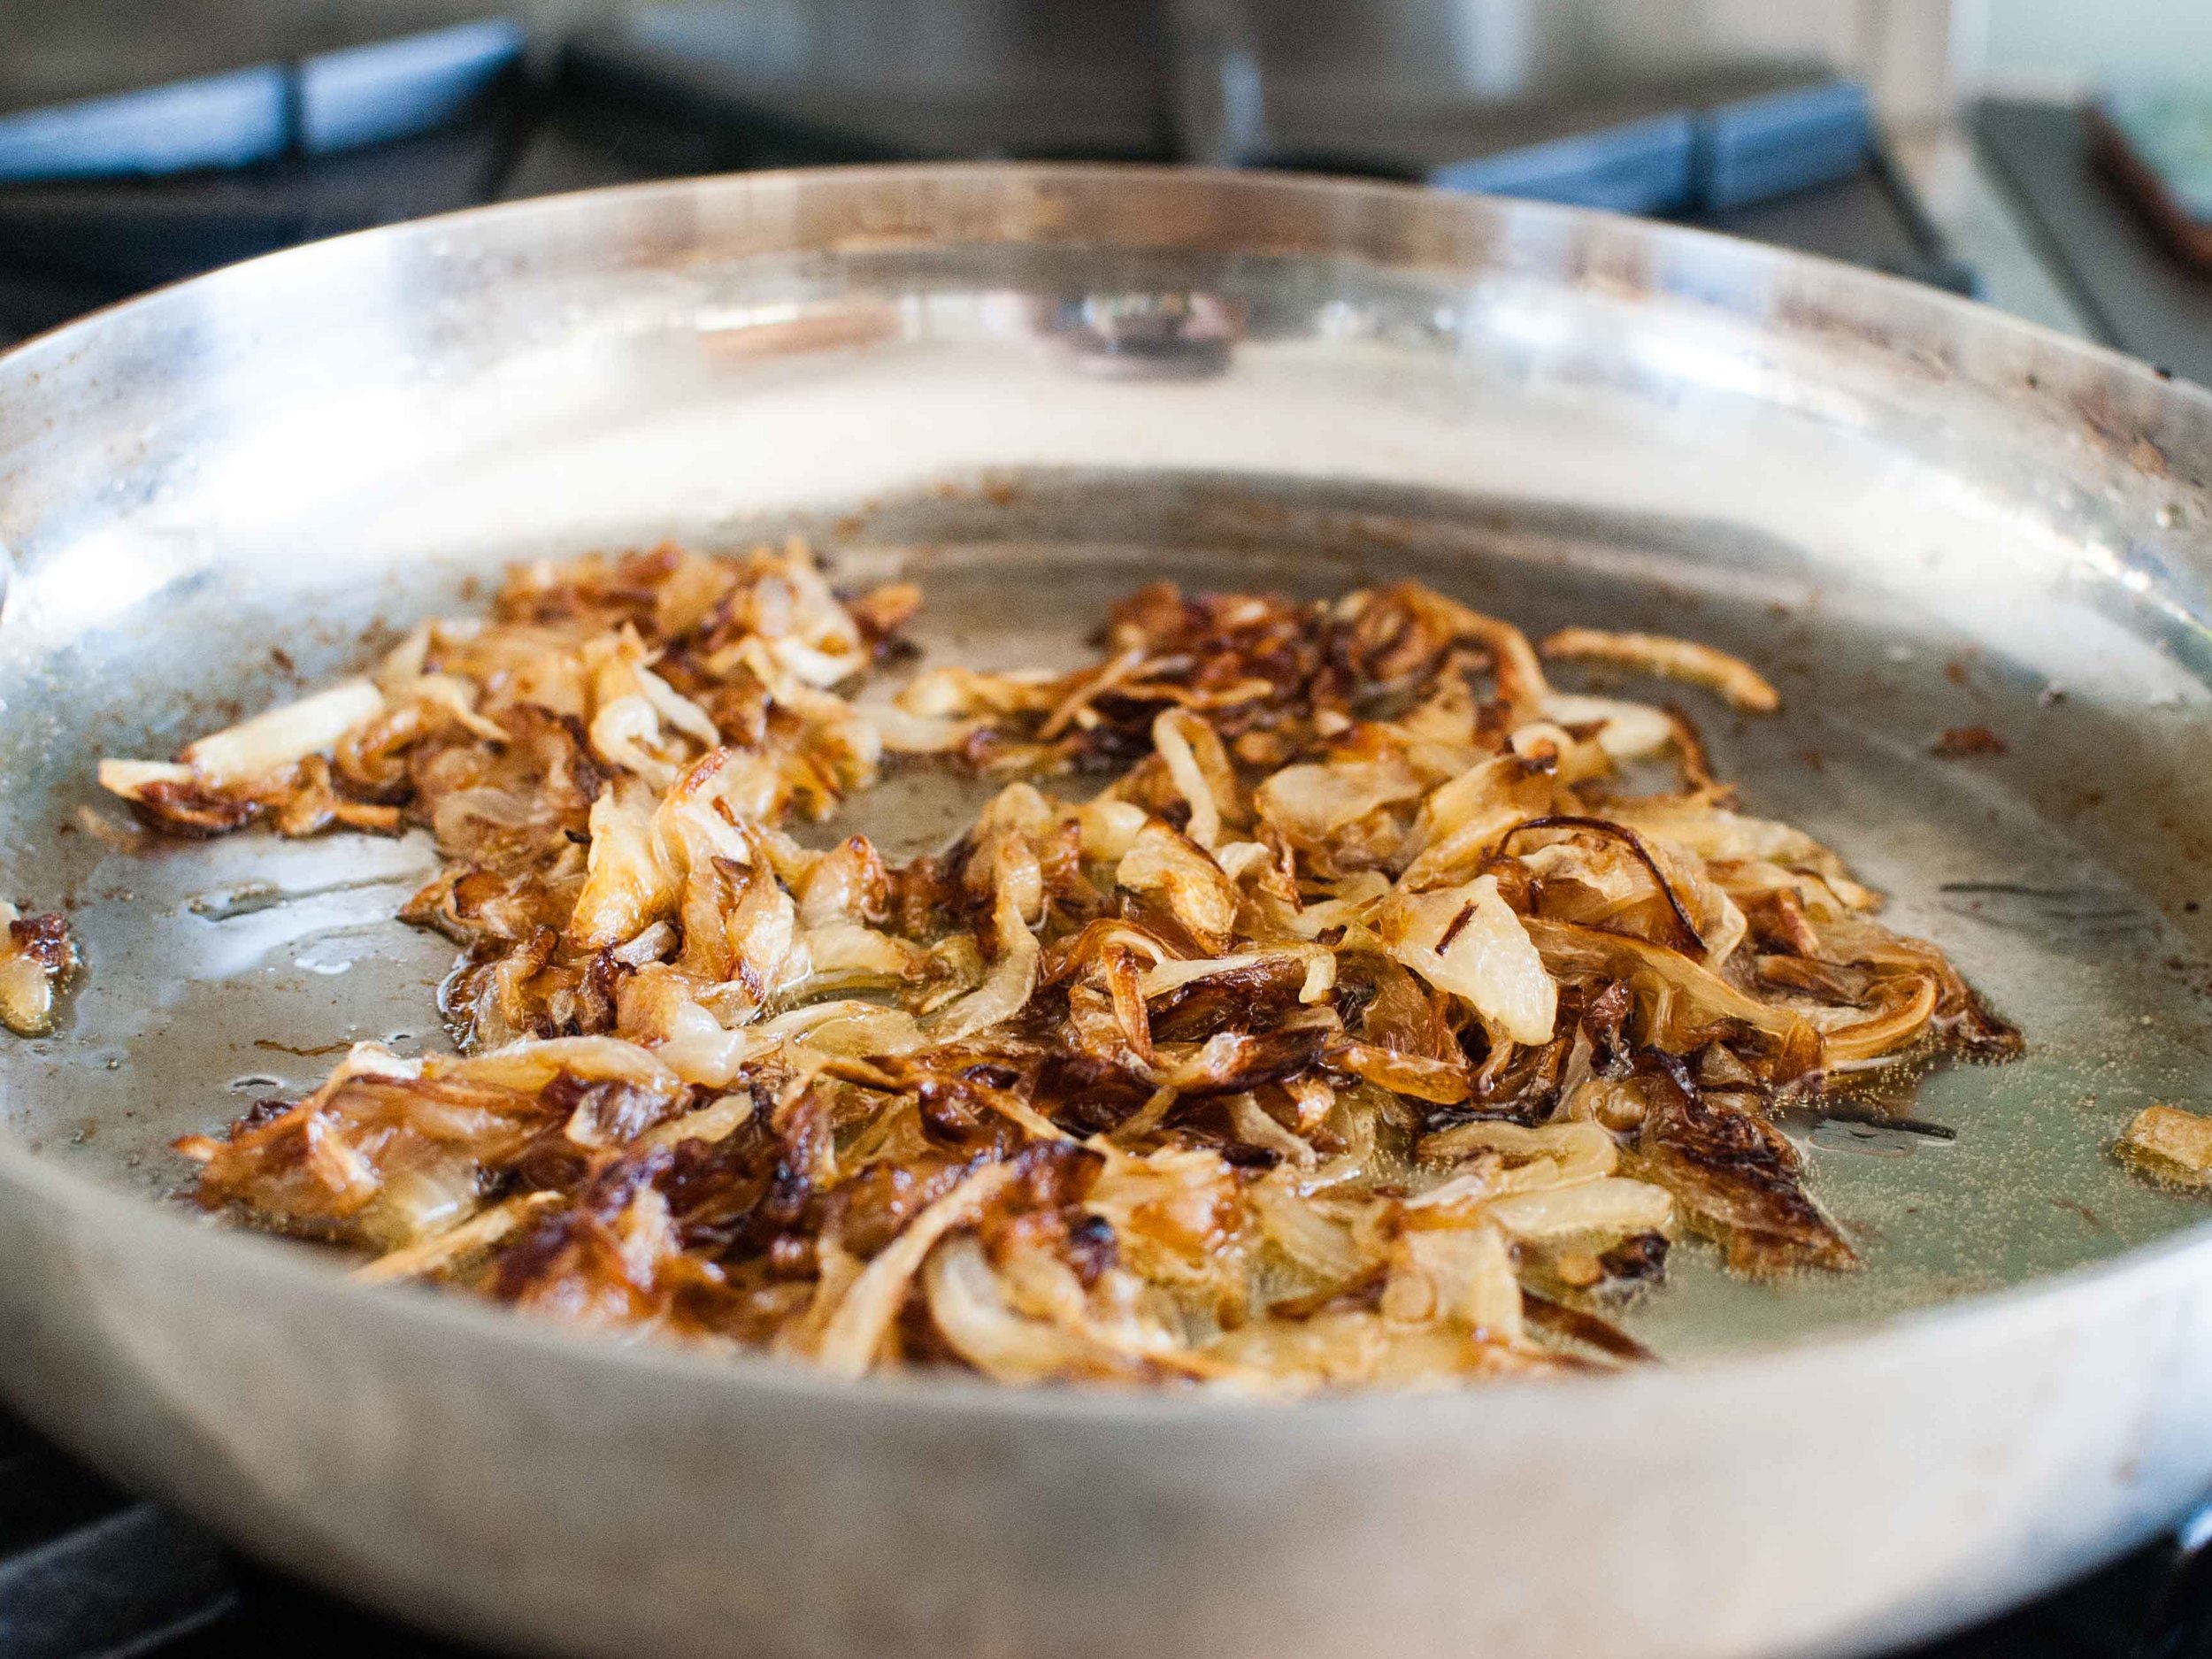
Meanwhile, trim the ends of the onions. Cut the onions in half from root to tip and remove the papery skins. Place the onions flat-side down, and slice them thinly (1/8" thick) from root to tip. Heat 1 tablespoon of olive oil in a large wide pan (12") over medium-low heat. Add the sliced onions and stir to coat the onions in oil and distribute the onions evenly across the pan. Let the onions cook, stirring occasionally (every 5-10 minutes), keeping the heat at medium-low. Continue to cook until the onions are a deep golden brown, about 45 minutes. If onions look like they are beginning to burn, lower the heat a bit. Once the onions are caramelized, drizzle 2 tablespoons of water into the pan, scrape up the brown bits (fond) from the bottom of the pan, and stir it into the onions. Remove onions from heat, and let cool.

Stir the eggplant around a bit to loosen it up and make a chunky paste. Add caramelized onions, 1 tablespoon olive oil, tahini, lemon juice, cumin, kosher salt, and aleppo pepper flakes or black pepper, to taste. Stir well and taste again to adjust seasoning.

Transfer dip into a serving bowl. Drizzle the final tablespoon of olive oil over the dip, and sprinkle with another pinch of aleppo pepper just before serving with pita bread wedges and sliced vegetables.

Chicken Shawarma by Cynthia Raub

Print Friendly and PDF

In college, my priorities were: being hopelessly aimless, Depeche Mode, and Ali Baba. I'd walk around campus with my first generation iPod and listen to Enjoy the Silence on repeat daydreaming that it was written for me. After class I would scurry down to Ali Baba, a small Mediterranean place on the edge of campus and order a chicken shawarma gyro. Chicken shawarma is often crisped and browned on its warmly spiced edges, all while juxtaposing and pairing perfectly with the sides it is served with. When a recipe for chicken shawarma was delivered to my inbox, I immediately needed to eat it. I turned on some Depeche Mode and threw some ingredients in a bag to marinate. Once it was done roasting, I shredded off a steaming piece and was briefly transported to the dearly departed memory of my 22 year old, ear-phoned, and aimless self. 

Notes: Shawarma is generally served with tomatoes, cucumbers, pita, tahini sauce, and rice or in a delicious gyro. We decided to make a fussy but worthwhile flatbread that mimicked pita. But this chicken is so versatile and easy that you could eat it on a shoe and be satisfied. 


Read More: The Shared Craving


Time: 10 minutes prep, 1-6 hours inactive, 30 minutes cooking
Yields: about 3 cups shredded chicken

2 lemons, juiced
½ cup plus 1 tablespoon olive oil
6 cloves garlic, peeled, smashed and minced
1 tablespoon kosher salt
2 teaspoons freshly ground black pepper
2 teaspoons ground cumin
2 teaspoons paprika
½ teaspoon turmeric
 A pinch ground cinnamon
 Red pepper flakes, to taste
2 pounds boneless, skinless chicken thighs
1 large red onion, peeled and quartered
2 tablespoons chopped fresh parsley

Combine lemon juice, olive oil, garlic, salt, pepper, cumin, paprika, turmeric, cinnamon and red pepper flakes in a sturdy gallon freezer bag. Add the chicken and onion, seal the bag, and massage chicken with the marinade. Refrigerate for at least and hour, or up to 12. 

Preheat oven to 425 degrees. Arrange chicken and onion evenly on rimmed baking pan. Roast chicken for 25-35 minutes until cooked through and browned on the edges. Allow chicken to rest for a couple of minutes before slicing thin in 1/4" strips. 

Optional: To further crisp the chicken, toss the thinly sliced chicken back onto the used sheet pan, drizzle with oil, and roast for 2-3 more minutes until crisp. 

Adapted from: NYT Cooking

Raspberry Peach Jam by Amy Cantu

Print Friendly and PDF

Making jam is a labor of love, but it also extends the flavors of summer into the winter. I have a soft spot in my heart for fruit jams, and love the soft, spoonable texture of this pectin-free Raspberry Peach Jam. Since there is no added commercial pectin to this jam, the texture is looser than most jams you would find in a grocery store, and the raspberry and peach flavors are bold and vivid. I think it also makes this Raspberry Peach Jam more versatile, since you could also use at as a topping for ice cream or yogurt. My favorite way to eat it is spooned generously onto a buttermilk biscuit - mornings don't get much better than that!

Notes: If you are going to bottle the jam to make it shelf stable (and more giftable), make sure to read and follow the recipe well. (Nothing worse than a spoiled jar of jam.)

I added vanilla beans to this jam to give it a more sophisticated, floral flavor, but feel free to leave it out if you don't have any.


Time: 1 1/2 hours
Yield: 6 half-pint jar

5 pounds (80 oz) Fresh peaches
24 ounces Fresh aspberries
7 cups (50 oz) granulated sugar
1/4 cup lemon juice (1-2 lemons)
1/2 teaspoon kosher salt (1/4 teaspoon table salt)
2 large vanilla beans

Bring a large pot of water to boil. Put a few metal spoons into the freezer to use for checking the set of the jam later. 

If bottling your jam, preheat oven to 250 degrees F. Wash 6 half pint mason jars with rims and new lids in hot, soapy water. Let rims and lids dry on a clean towel. Place clean jars (without lids/rims) on a rimmed cookie sheet and carefully place in oven. Heat for 30 minutes or until ready to fill with jam. 

Meanwhile, use a sharp paring knife to score the bottom of each peach with an "X". Blanch the peaches in the boiling water for 30 seconds, then remove to a bowl of cold water to cool. Skins should now easily peel off the peaches using your fingers. Remove pits and dice the peaches into 1/2-inch pieces. 

In a very large bowl, stir together diced peaches, raspberries, sugar, lemon juice, and salt until well combined. Slice vanilla beans in half length-wise, and use the tip of a small knife to scrape the black seeds into the bowl. Add the vanilla bean pods into the bowl as well, and stir until combined.

Divide fruit mixture into two large, wide saute pans (or complete this step in two batches). Bring fruit to a boil over medium heat, stirring frequently so the fruit doesn't scorch. Continue to cook jam until the large bubbles subside to smaller, finer bubbles and the jam thickens a bit. Begin checking the jam by drizzling a bit of jam onto a frozen spoon. Let the jam cool for a few seconds on the spoon, then draw a line through the jam with your fingertip. If the jam stays mostly separated, the jam is ready. If the jam quickly fills in the line, continue cooking the jam for a few more minutes and then check again.

Freezer jam: Pour jam into freezer safe containers, leaving 1/2-inch headspace. Place lids on containers and let stand at room temperature for 24 hours. Then place jam in the freezer (for up to 6 months) or refrigerator (up to 3 weeks).

Bottled jam: Place canning rack in a large canning pot, and fill halfway with water. Bring to a boil. Fill hot mason jars with jam leaving 1/4" headspace between the jam and the rim of the jar. Wipe the rims of the jar clean. Seal jars and carefully load into the canning pot, using jar lifters. Check that the water covers the jars by 1 or 2 inches, adding additional boiling water if needed. Boil the jars for 10 minutes to process. Use jar lifters to remove from the canning pot and let cool on a towel or cake rack at room temperature for 12-24 hours. Any jars that do not seal, should be stored in the refrigerator and eaten first. Sealed jars should be stored in a cool, dry place away from direct sunlight.

Easy Buttermilk Biscuits by Amy Cantu

Print Friendly and PDF

These Buttermilk Biscuits are big, fluffy, and ethereally buttery. (In fact, I baked them multiple times just to ensure that this description is accurate.) Even better, these biscuits are EASY and quick to make (under 30 minutes). There's no special equipment required - just two clean hands! The Buttermilk Biscuits are perfect split open while still hot with a little pat of butter, or amazing with this Raspberry Peach Jam. I was so excited about them, that I just slapped a thick slice of ham into a split biscuit and devoured it without a second thought.

Notes: I used a round cutter to make these buttermilk biscuits, but you could also use a clean, empty soup can or just shape the dough into a rectangle and cut into large squares. Two-inch wide biscuits are great for breakfast or tea with a bit of jam, while 3-inch wide biscuits are the ideal mate for ham and egg sandwiches.

Variations - Make them extra decadent by brushing the baked biscuits with melted butter. Add 1/2 cup shredded sharp cheddar or other hard cheese. Add chopped chives or green onions.  

The dough can also be shaped and frozen to enjoy at a later date. Bake them from frozen and add a few extra minutes to the bake time.


Time: 30 minutes
Yield: 6 large 3" biscuits or 9 medium 2" biscuits

2 1/4 cups all-purpose flour
1 tablespoon sugar
1 tablespoon baking powder
1/2 teaspoon baking soda
1 teaspoon kosher salt (or 1/2 teaspoon table salt)
1/2 cup (1 stick) very cold, unsalted butter, diced into 1/2" pieces
1 cup buttermilk

Preheat the oven to 450 degrees.

Whisk together flour, sugar, baking powder, baking soda, and salt in a large bowl. Toss very cold butter pieces into the flour. Using your fingers, squish the butter into the flour, until the flour looks like wet sand with visible flattened pieces of butter.

Pour the buttermilk into the flour mixture and stir using a fork or your fingers until a soft, sticky dough is just formed.

For round or square biscuits: Turn the dough onto a lightly floured surface. Using a rolling pin or just your hands, flatten and shape the dough into a rectangle with an even 3/4 to 1-inch thickness. Use a round cutter or cut the dough into squares, pushing the cutter straight down, without twisting. Transfer biscuits to a cookie sheet lined with parchment paper, spacing them 2 inches apart.

For drop biscuits: Use a large spoon to drop large spoonfuls of dough onto a cookie sheet lined with parchment paper, spacing them 2 inches apart.

Bake for 12-15 minutes, or until buttermilk biscuits are fluffy and tops are lightly golden brown. Serve while still warm.

Katsudon by Cynthia Raub

Print Friendly and PDF

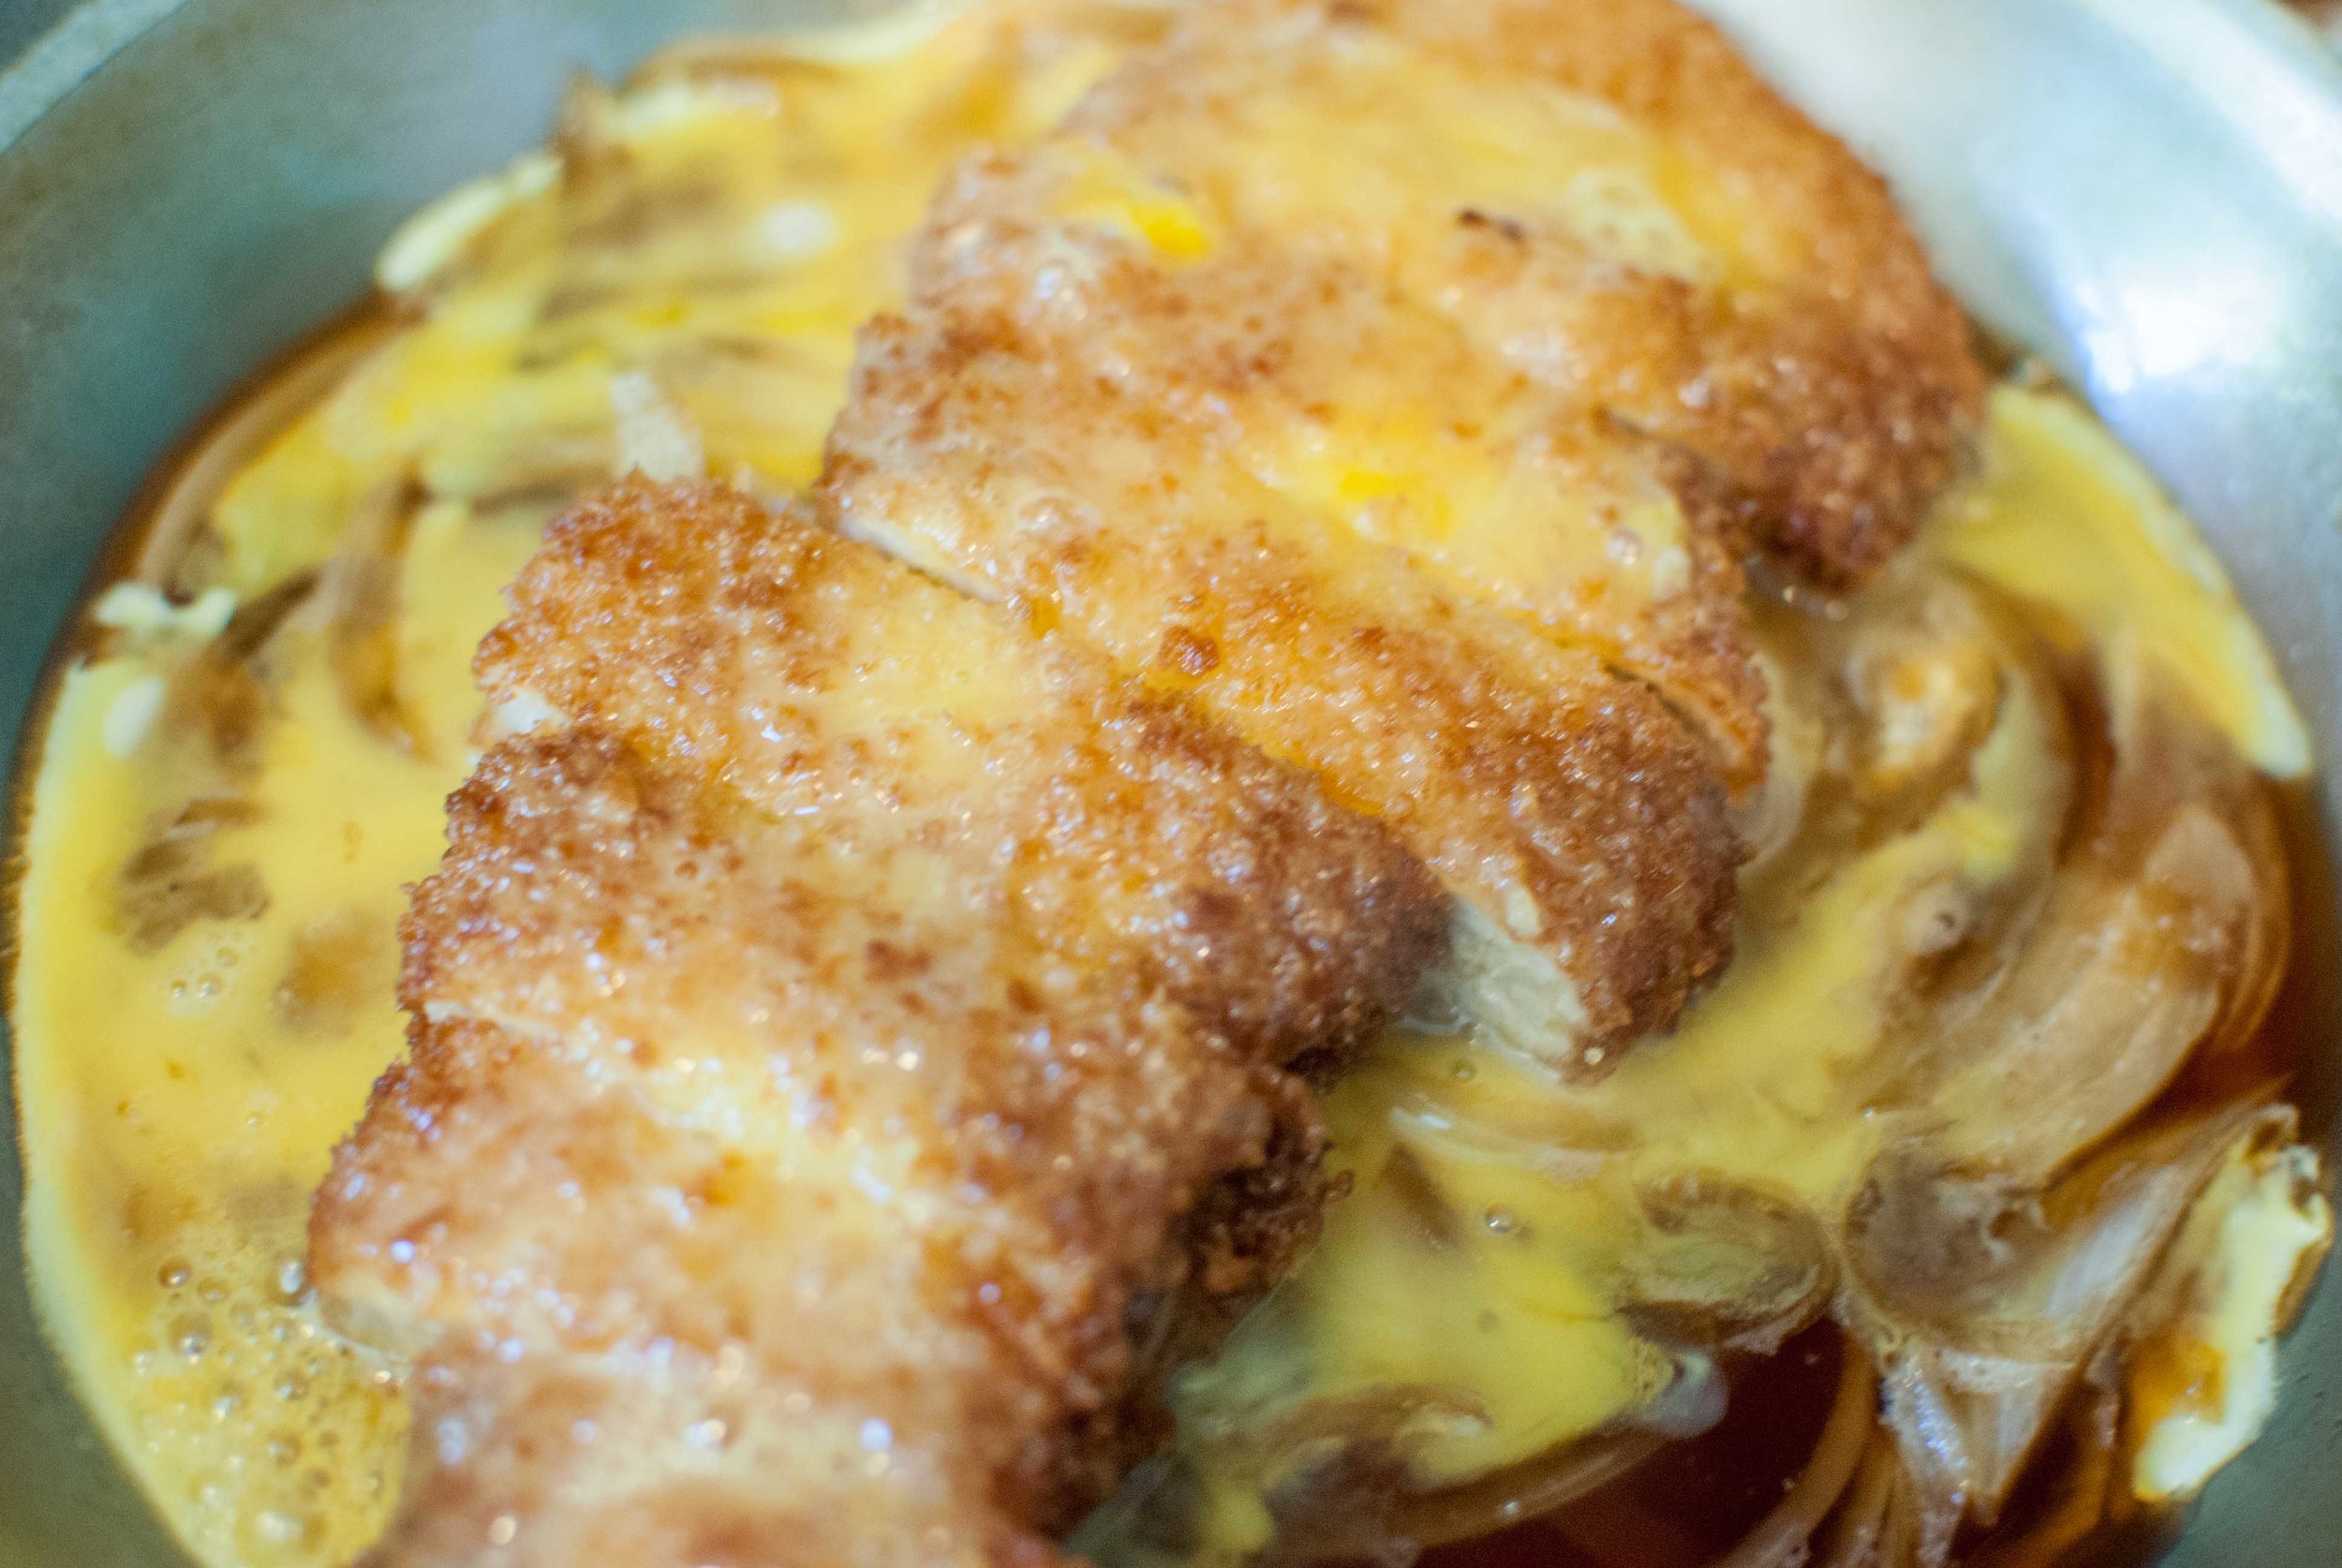
Katsudon is leftover sliced tonkatsu, which is quickly stewed in a sweet-salty broth, with softened onions and bound together with nature's finest: an egg. Once this beautiful mixture is finished cooking, you slip it over a bowl of steaming hot rice. Then you either: 1) pump your fist in excitement, 2) cry a thousand tears into your shirt because "It's so wonderful!", 3) hope no one else smells it so you don't have to share a bite or 4) all of the above. If you have leftover tonkatsu, this comes together quickly and easily. If you don't have any leftover tonkatsu, it's worth an entire batch just to make this dish. 

Notes: Katsudon is generally made from leftover tonkatsu so I wrote this recipe as a serving for one. I don't know why there would be ANY leftover tonkatsu, let alone MULTIPLE leftover servings. It's unfathomable to me and this recipe reflects that. This recipe is easy to scale up and you can do multiple servings in large pans, so don't be dismayed by the serving size. There is enough soy sauce in the recipe to season the sauce, which is why I have not included salt. I used low sodium soy sauce, and I didn't think any more salt was necessary.


Time: 12 minutes
Serves: 1

1/2 cup water (or stock)
3 scant tablespoons soy sauce
1 tablespoon mirin or sake
1 heaping tablespoon sugar
1/2 cup thinly sliced yellow or brown onion
1 portion of tonkatsu, sliced
1 egg, beaten
1 cup white rice
Green onion as garnish

In a small pan, combine water, soy sauce, mirin, sugar and onions. Over medium high heat, cook for 4-6 minutes, shaking the pan occasionally, until onions are soft and the liquid has reduced by 1/3. Add tonkatsu to the sauce and onion mixture. Pour beaten egg over pork and onions and cover the pan to cook the egg through - about 1 minute. Once the egg is cooked through, slip the contents of the pan onto a bowl of rice. Garnish with green onion and serve with Togarashi (Japanese seasoned chili powder). 

Tonkatsu (Japanese Fried Pork Cutlet) by Cynthia Raub

Print Friendly and PDF

Tonkatsu is a western-influenced Japanese dish that most would consider as comfort food. Similar to German wiener schnitzel, it is merely fried pork cutlets with a crumb coating. Tonkatsu is traditionally served over thinly sliced green cabbage with a side of hot yellow mustard and tonkatsu sauce, a fruit and vegetable based sauce (similar to a thickened and sweet Worcestershire sauce). Home-frying might be daunting, but I assure you that this recipe is not. Crank up your vent, prepare a few extra dishes for the dredging process, and make sure you have a handful of paper towels available. 

My mom makes this at home when she is feeding a group of people - it is inexpensive, delicious and easy. She will send leftovers home with me, which we will rewarm in the oven, (or just eat cold,) and it's one of the dishes that initially inspired me to share meals with the people I care about.

Notes: The three-step dredging process is crucial for this recipe and type of frying. Your diligence will result in tremendously flavorful and moist fried pork cutlets. This is a messy process, but it yields great results. If you don't like your fingers to get sticky, you can use tongs to grasp the pork while you coat the chops. BUT! Cooking is supposed to be a little messy and not to mention, you have more control when you use your hands. You can also substitute chicken (skinless, boneless, filleted thigh meat) for the pork, which will give you chicken katsu. I prefer a shallow fry for this dish because it's easier to clean up and just as effective as deep frying. The pork is thin and cooks quickly, so deep frying is not necessary to save time in this instance. If you happen to have any leftover tonkatsu, have your hand at Katsudon: an incredible remix of an already delicious dish.


Time: 40 minutes
Serves: 4

1 1/2 lbs pork loin chops, 3/4"-1" thick
1/2 cup flour
2 eggs, beaten
3/4 cup panko bread crumbs
Kosher salt, divided
Fresh ground black pepper
Vegetable oil

Depending on the size of your pork loin chops, place 2-4 in a gallon freezer bag and close halfway. On a sturdy and flat surface, pound the pork loin chops into 1/2" thick cutlets.

Prepare three shallow dishes for the dredging process. In the first dish, combine 1/2 cup flour and 1/2 teaspoon kosher salt. In the second dish, beat eggs with 1/2 teaspoon kosher salt and 1/4 teaspoon freshly ground black pepper. In the third dish, combine panko breadcrumbs and 1/2 teaspoon kosher salt.

Season pork lightly with salt and pepper. Taking the first cutlet, dredge it in the seasoned flour - coating all sides evenly. Once the pork is coated in flour, carefully dip it into the beaten egg mixture, coating the flour evenly with the egg. Then quickly dredge the flour and egg covered pork into the breadcrumbs for its final seasoning. Pat the pork slightly to make sure all of the breadcrumbs are adhered to the pork. Set aside on a large plate, and continue the process with the remaining pork.

Fill a medium to large skillet (with high, straight sides) with 1/2" vegetable oil. Turn heat to medium and allow the pan and oil to heat through about 3 minutes. Meanwhile, prepare a large plate or cooling rack with two layers of paper towels (to absorb oil from the fried pork).

Once the oil is heated through, place a pork chop into the oil, carefully releasing it away from yourself to avoid splashing oil. If there is enough room in your pan, you can cook multiple pork cutlets simultaneously. Just be sure not to crowd the pan and that each pork cutlet is evenly submerged in the oil.

Fry the pork until the first side is golden brown about 2 minutes. Flip the pork over and continue to cook until golden brown and cooked through - about another 2-3 minutes. Remove the pork from the cooking oil and place it on the paper towels to drain. Continue cooking the remaining pork in the same fashion. Slice into 1/2" strips and enjoy!

Serve with: steamed rice, thinly sliced cabbage, tonkatsu sauce

Cold Brew Coffee with Mint Syrup by Cynthia Raub

Print Friendly and PDF

A couple of months ago when I made Chopped Herb Salad with Farro, I had a serious surplus of mint. It sat in the refrigerator, sad and unused, until my husband came to its rescue. He made a simple syrup with the languid, leftover bunch of mint, and chucked it back in the fridge. A few mornings later, with a cup of cold coffee in my hands, I remembered the mint simple syrup and added it to my coffee on a whim. It was . . . weird. And . . . a revelation! I happily added it to my coffee the rest of the week, until it was sadly gone. A month later, I went out to coffee with a friend, and she recommended the mint iced coffee at her regular spot. I was so confused! I thought I had invented mint iced coffee! Then the other day, as I was chatting with Amy about what we should drink with her yummy Blueberry Streusel Muffins, I mentioned my mint coffee discovery. She mentioned that her favorite drink at Philz Coffee was the Mint Mojito. What?! OK, maybe I didn't invent mint iced coffee after all. Even though I pretty much live under a rock, (trend? what trend?!) it was just surprising how I was inadvertently still in the mix of the world without even knowing it.

Notes: Cold brew coffee concentrate is so convenient to have on hand and is usually more enjoyable for people like me, who rarely get to drink coffee hot. The recipe is simple, but here are a few ideas to make your beverages special. Coffee ice cubes are a special addition to iced coffee, when you are concerned about watering down the potency of your cup of joe. Also, to get beautiful herbs to float in your ice cubes (mint, anyone?!), fill the tray halfway and add small mint leaves. Freeze for a few hours and then top with more water to encase the leaves. I would also recommend trying this delicious beverage with coconut milk in lieu of cow's milk or cream. The combination of mint and coconut milk made this drink fun and almost tropical.


Time: 12-24 hours (inactive)
Yields: 2.5 cups coffee concentrate

For The Cold Brew Coffee:
1 cup coarse ground coffee
3 cups filtered water

Fill a large jar or pitcher with 3 cups of filtered cold (or room temperature) water. Carefully pour in coarse ground coffee and stir to combine. Cover and store in the fridge for 12-24 hours. 

Strain grounds from steeped coffee twice: first through a fine mesh sieve to separate the large grounds; and second, though a coffee filter to remove the fine debris. Store in an airtight container in the refrigerator for up to one week.

For The Mint Syrup:
1 bunch mint (about 1 cup, packed)
1 cup water
1 cup sugar

Combine mint, water and sugar in a small pot. Bring to a rolling boil over medium high heat, stirring occasionally to dissolve the sugar. Allow to cool to room temperature and store in a container with an airtight lid. Mint syrup keeps for 1 week. 

To Serve:
Fill a glass with ice. Leaving room for simple syrup and cream, pour one part coffee concentrate to one part water over the ice. Top with mint simple syrup - stir and taste, adjusting sweetness to your preference. Add cream or milk to taste and stir. Garnish with mint leaves and enjoy!

Blueberry Streusel Muffins by Amy Cantu

Print Friendly and PDF

Blueberry Streusel Muffins are the kind of breakfast I have when I've been eating spinach and egg white scrambles one too many days in a row. (I know some of you are super healthy and don't see a problem with that, and all I can say is that I deeply envy you, and please don't judge me!) The texture of these blueberry muffins is endlessly moist (thank you yogurt), bursting with juicy fruit, and reminds me of cake, thanks to it's delicate, airy crumb. Really, anything cake-like that I can eat for breakfast is instantly my most favorite thing in the whole entire world. (Never mind that I have a long list of "my most favorite" foods.) The streusel is the sweet, crunchy crowning glory of these blueberry muffins, and while you could certainly skip it in the name of health, I would argue that these are not the muffins one chooses for cutting calories. Indulge! Enjoy! Go back to spinach and egg white scrambles tomorrow!

Notes: For once, I don't have a ton of notes. These Blueberry Streusel Muffins are moist and delicious, and sure, you could sub whole wheat flour for half of the all-purpose flour, or grapeseed oil and/or apple sauce for some or all of the butter, but that would be a totally different kind of blueberry muffin. The only optional ingredient that I list is the walnuts - the muffins are lovely if you include them in the streusel, but equally delicious without. So go nuts (or not), but these Blueberry Streusel Muffins (with a glass of Cold Brew Coffee with Mint Syrup,) will definitely perk up any morning!


Adapted from Smitten Kitchen.

Time: 35 minutes
Yield: 9 or 10 muffins

For the streusel:
3 tablespoons sugar
2 tablespoons finely chopped walnuts (optional)
1/2 teaspoon cinnamon
pinch of salt
1/3 cup all-purpose flour
3 tablespoons cold unsalted butter, cut into small pieces

For the muffins:
5 tablespoons unsalted butter, softened
1/2 cup sugar
1 large egg, at room temperature
3/4 cup plain yogurt
1 teaspoon vanilla
1/2 teaspoon cinnamon
1 1/2 cups all-purpose flour
1 1/2 teaspoons baking powder
1/4 teaspoon baking soda
1 teaspoon kosher salt (1/2 teaspoon table salt)
1 cup blueberries, fresh or frozen (do not defrost)

Preheat oven to 375 degrees F. Line a 12 cup muffin pan with paper liners or grease with butter or cooking spray.

In a medium bowl, smash together all streusel ingredients with your fingers, rubbing the butter into the flour and sugar, until well-combined and crumbly. Set aside.

In a medium bowl, whisk together flour, baking powder, baking soda, cinnamon, and salt. Set aside.

In the bowl of an electric mixer, combine butter and sugar. Beat until light and fluffy, about 5 minutes. Beat in egg until well-incorporated. Add yogurt and vanilla, beating well. Pour in the flour mixture and beat until the batter is just mixed. With a rubber spatula, fold in the blueberries. Batter will be very thick and not pourable.

Using an ice cream scoop or a large spoon, fill the muffin cups 3/4 full. Top generously with streusel. Bake for 25-30 minutes, until tops are golden and a toothpick comes out clean when inserted into the middle of a muffin. Let cool for 5 minutes before removing from pan. Delicious warm (with a pat of butter???) or cooled to room temperature.

Mustardy Potato Salad by Cynthia Raub

Print Friendly and PDF

Potato salad isn't the most alluring side dish at the barbecue - often times overcooked potatoes are drenched in mayonnaise, which makes it difficult to tell what other ingredients lurk under the dressing. But, this mustard-heavy, tangy version is bright and flavorful, a perfect counterpoint to rich barbecued meats. The baby potatoes are supple and firm, while the crisp green beans lend a fresh crunch to every bite. All the while, the light and tart mustard dressing showcases the beautiful vegetables in appearance and flavor. 

Notes: This side dish can be made in advance and only gets better after the first 24 hours. Also, adding the seasoned dressing to hot potatoes will yield more flavorful potatoes. The potatoes will absorb the dressing while they are still hot and it makes such a big difference in their flavor! You can also substitute the green beans for practically any other hearty summer vegetable, but I love the crisp snap from the green beans opposed to the dense chew of the potatoes.


Time: 25 minutes
Servings: 8-10

3 pounds baby potatoes
1 pounds green beans, trimmed and cut into 1-inch pieces
1/3 cup finely minced red onion
2 cloves of finely minced garlic
3 tablespoons whole grain mustard
1 tablespoon dijon mustard
2 tablespoons mayonnaise
2 tablespoons apple cider vinegar
1 tablespoon kosher salt (+ more for boiling the potatoes)
1 teaspoon freshly cracked pepper

In a large pot, cover potatoes with 1 inch of water and season water with 1/4 cup of salt. Bring the potatoes to a boil over high heat and cook for 15-20 minutes, until tender and easily pierced with a knife.

As the potatoes are boiling, in small bowl combine the red onion, garlic, whole grain mustard, dijon mustard, mayonnaise, apple cider vinegar, salt and pepper. Whisk to combine and set aside. 

When the potatoes are cooked, strain them carefully into a large colander. Drape a clean kitchen towel on top of the potatoes to absorb any excess moisture. 

In the same pot, bring water to a boil and season with salt. Add the green beans and cook until tender-crisp, about 1 minute. Strain carefully into a colander and toss to release steam, excess water, and to cool slightly. 

Once the potatoes are cooled enough to touch (but still very warm or hot), slice in half and add to a large bowl. Add the mustard dressing to the potatoes while the potatoes are still hot so they can absorb the flavors in the dressing. Add green beans and toss to coat with the dressing.