Pesto Pasta Salad with Roasted Tomatoes by Amy Cantu

Print Friendly and PDF


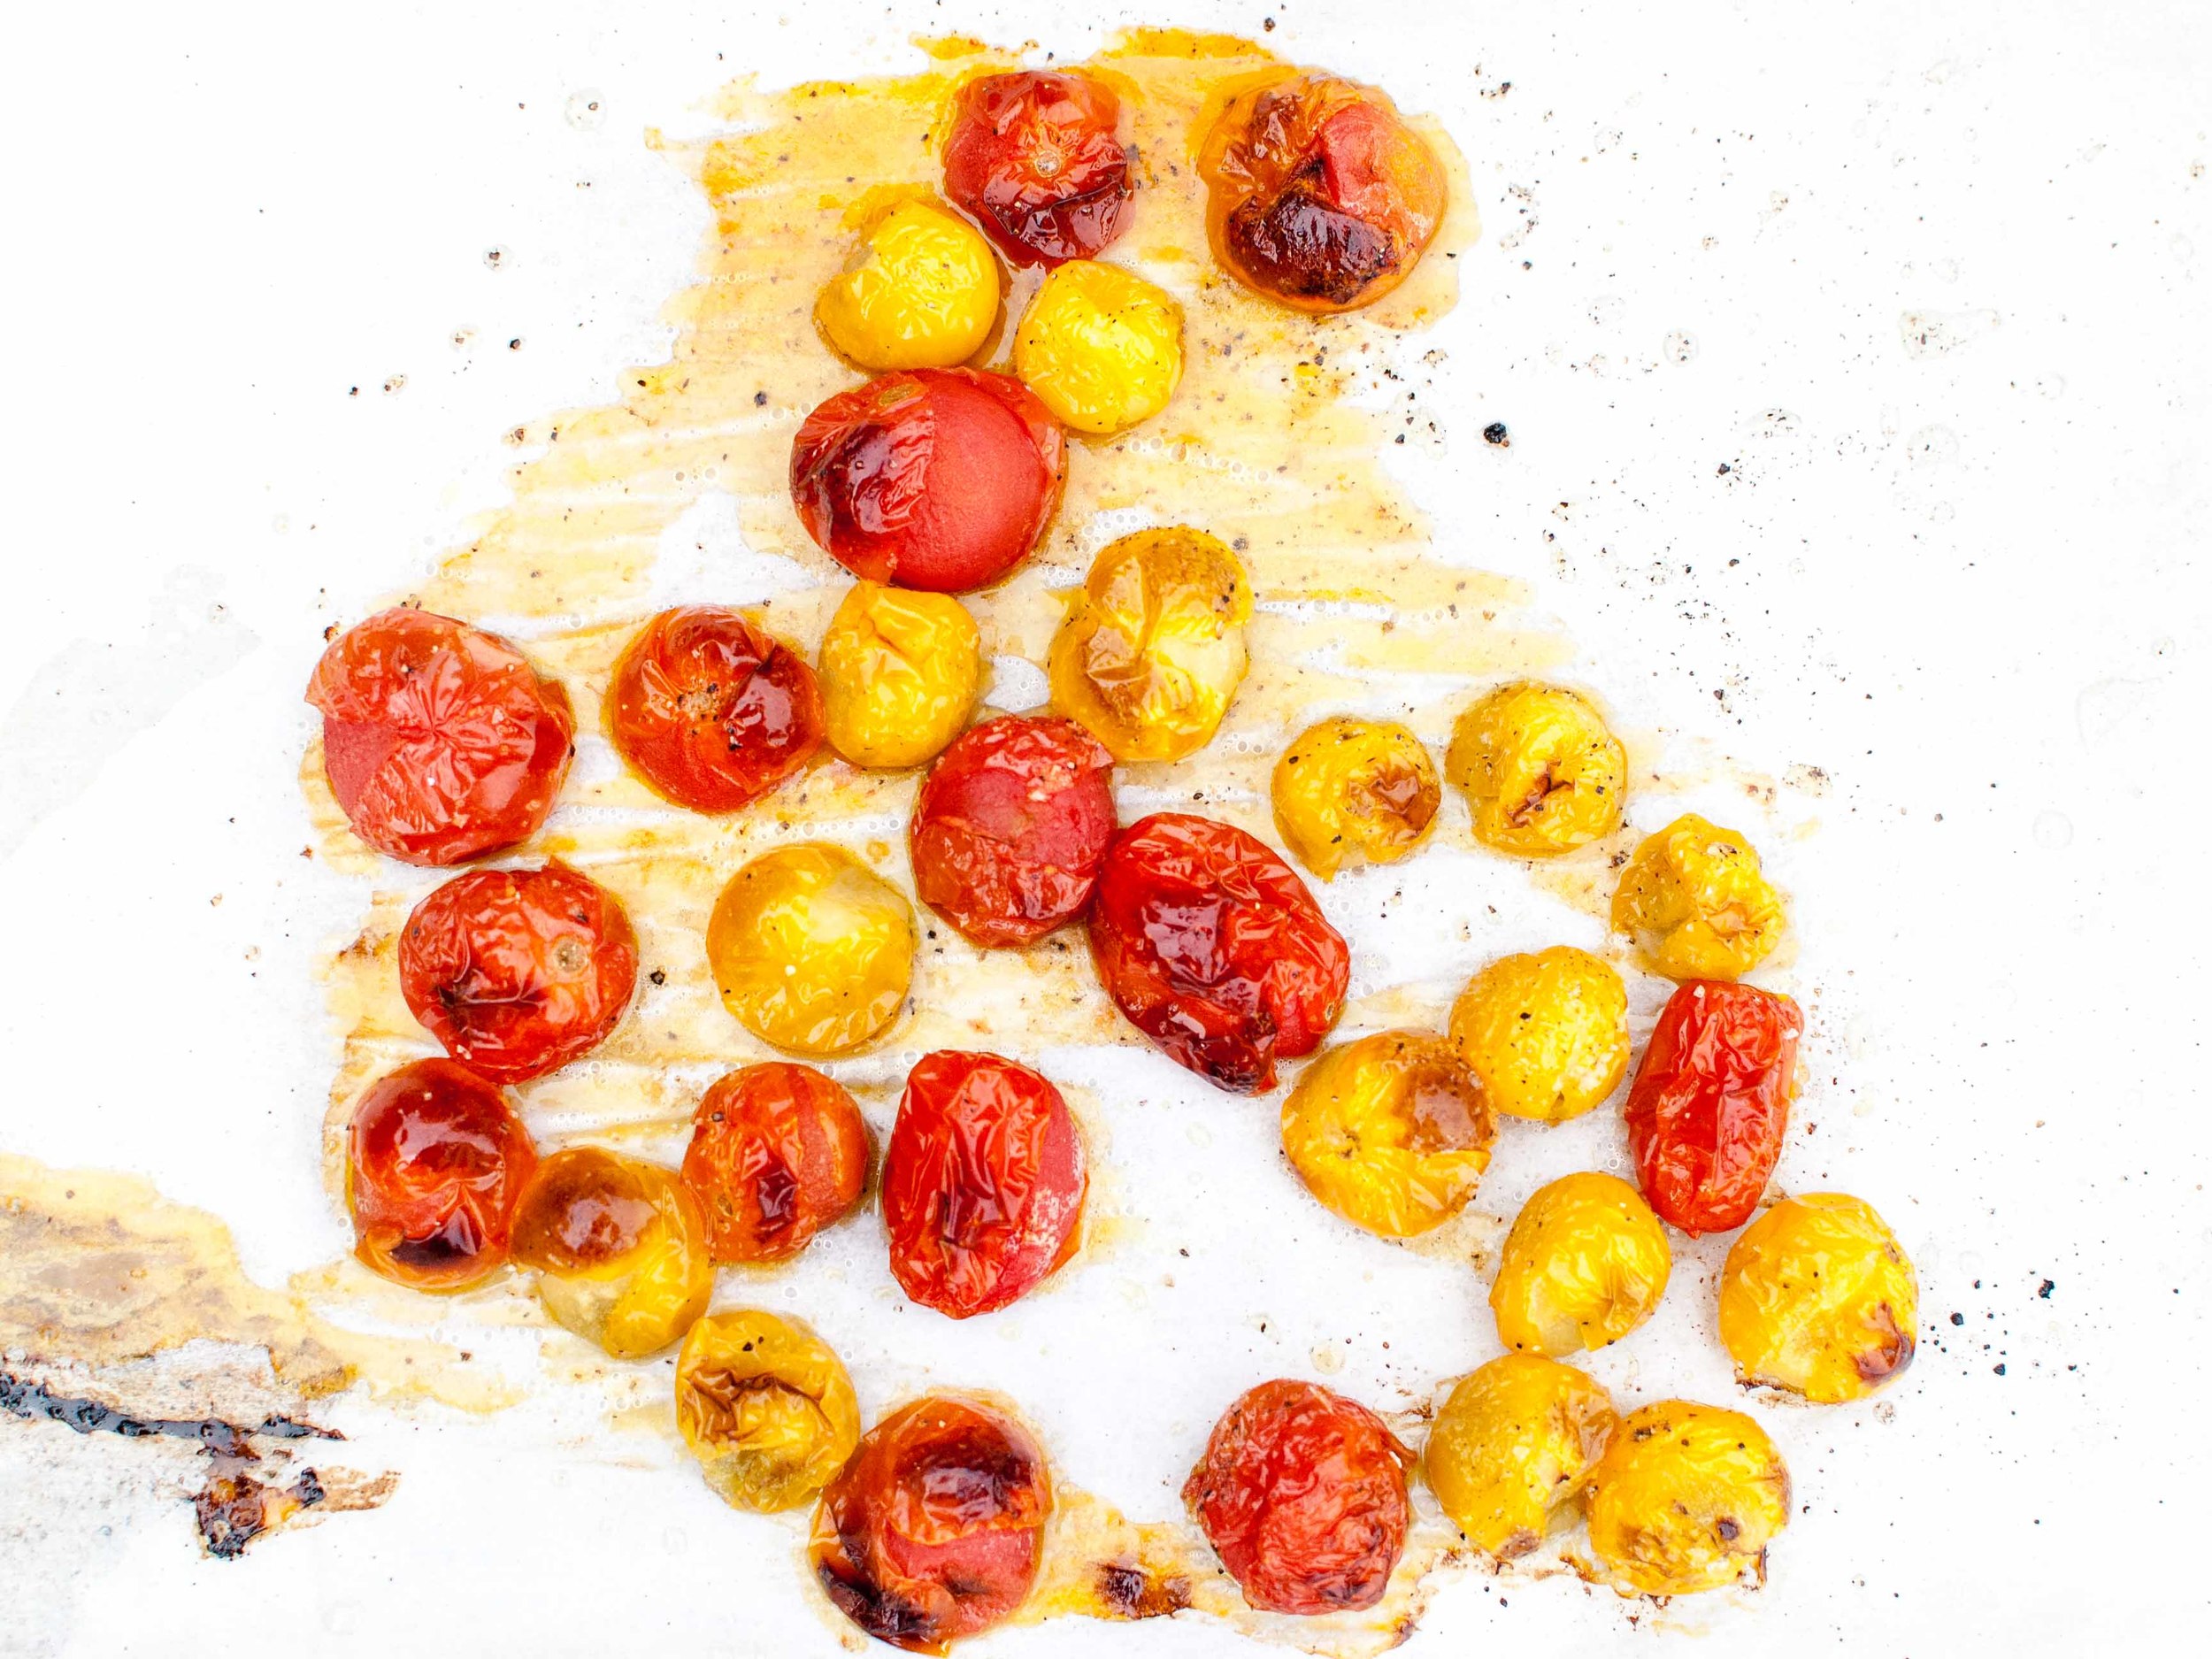
The first time I ever made a Pesto Pasta Salad with store bought pesto, I thought, really? This is it? I was underwhelmed and disappointed because I was looking forward to luscious pesto coating hot, long strands of pasta. The pasta was too firm, (even though I cooked the pasta to al dente,) with only a hint of basil, and it just tasted flat. This recipe for Pesto Pasta Salad with Roasted Tomatoes is not altogether different from that first attempt, but it tastes worlds apart. THIS pesto salad is a glorious celebration of summer, and the difference is all in the details. I made my own pesto sauce (instead of store-bought) using fresh basil. I toasted the pine nuts to bring out their nutty flavor. Beautiful summer cherry tomatoes were roasted to make them taste like candied tomatoes, without adding any sugar. I made sure to check the seasoning and add more salt before serving, to keep the flavors tasting bright and savory. Milky fresh mozzarella provided nuggets of soft, creamy flavor and texture. Each pesto-infused bite of pasta was a revelation in my mouth, with big, bold basil flavor. I was very, very happy.

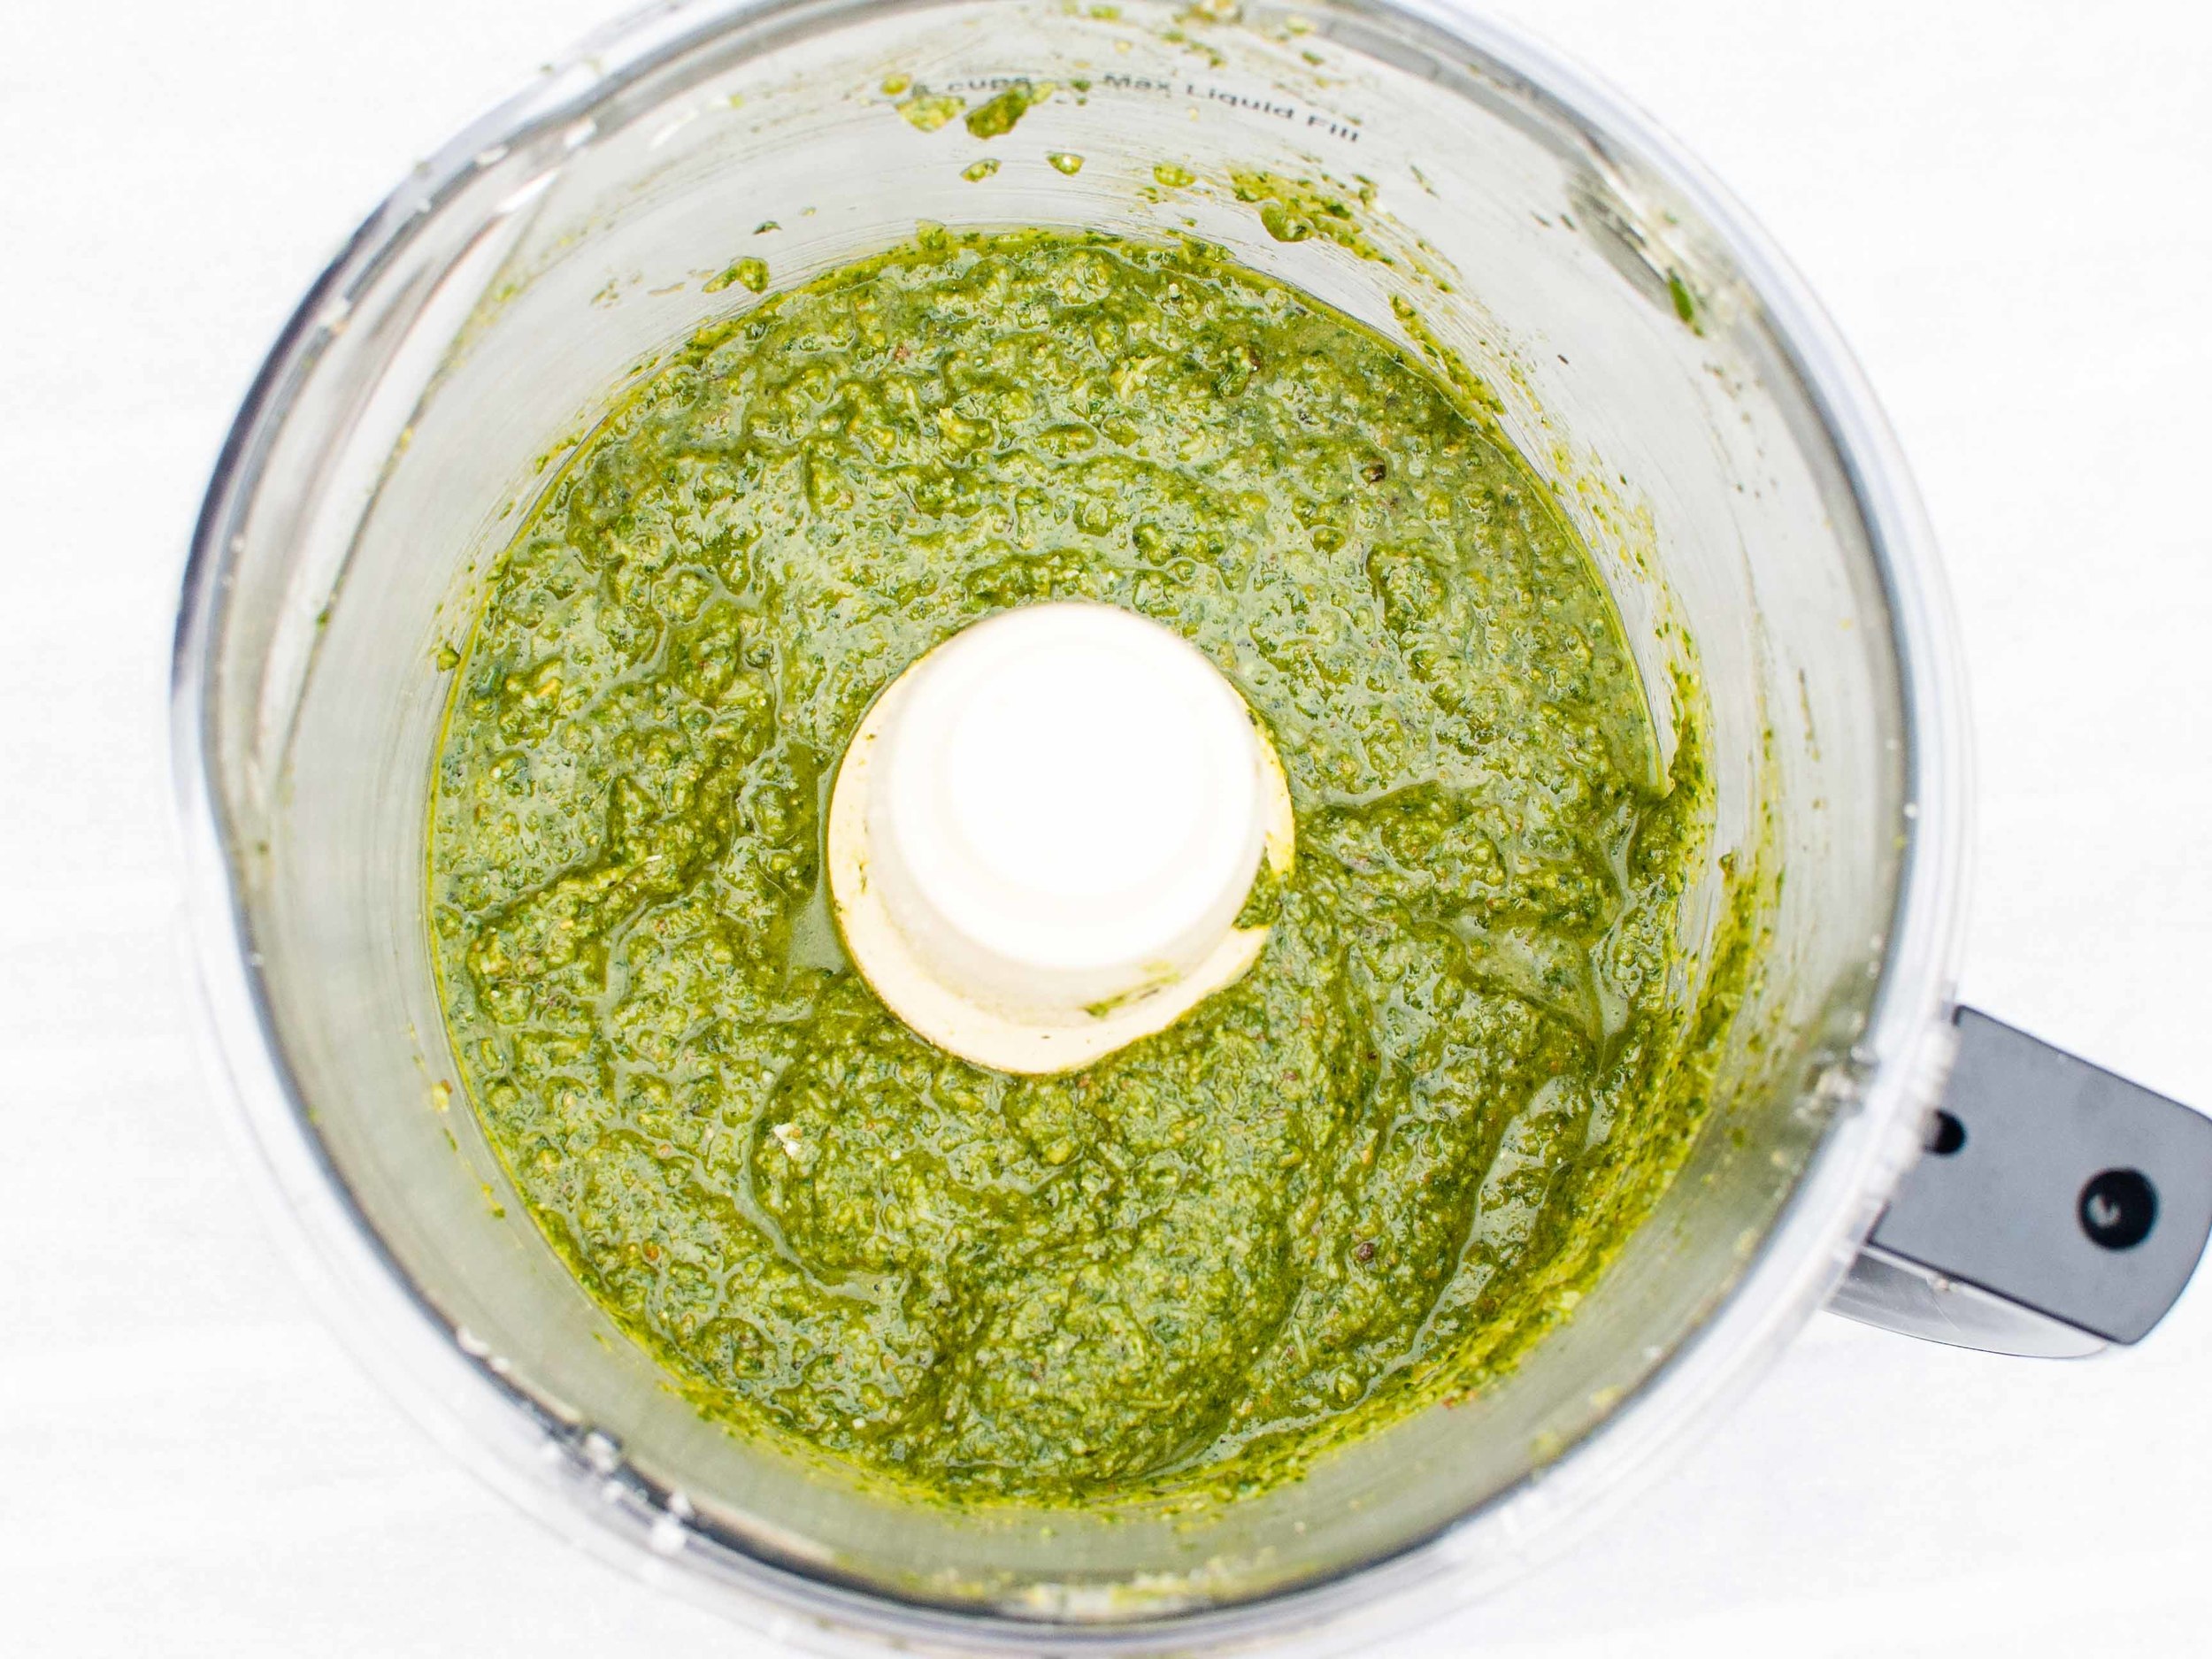
Notes: I beg you to try making your own pesto at least once, (as in this recipe,) before deciding to use the store-bought kind. I have definitely used store-bought before for convenience, but when I developed this recipe, I did a side-by-side comparison of freshly made pesto vs. the store-bought pesto, and the fresh pesto blew my mind. Really. The difference was huge, and if you have a food processor or blender, fresh pesto only takes a few minutes to make. 

I have been overcooking my pasta for pasta salad by a minute or two ever since I read this post on Serious Eats about how pasta gets stiffer when it cools, so over-cooking the pasta a bit for pasta salad is great because it keeps the texture from getting too firm.

Pine nuts are at least half of what makes pesto so darn good, but I realize they are pricey. You can substitute half or all of the pine nuts for walnuts, and it will be a suitable substitution.

This Pesto Pasta Salad alongside Cynthia's Mediterranean Turkey Burgers and Mustardy Potato Salad makes an amazing barbecue. Adding shredded or diced chicken would also make this the perfect light summer meal, rather than a side.


Time: 45 minutes
Servings: 8-10

1 pound cherry tomatoes
1 tablespoon plus 1 cup extra virgin olive oil, divided use
Kosher salt
Freshly ground black pepper
1 cup pine nuts, divided use
1 pound farfalle (bow tie) pasta
1 cup parmesan cheese, grated
4 cups basil leaves, packed (about 5 ounces)
4 cloves garlic, roughly chopped
1/2 cup parsley, finely chopped
1 cup green onions, thinly sliced
pound fresh mozzarella, cut (or torn) into 1-inch piece

Preheat oven to 400 degrees F. Combine cherry tomatoes and 1 tablespoon olive oil on a rimmed sheet pan. Sprinkle lightly with salt and pepper. Roast tomatoes for 20-25 minutes, until tomatoes are soft and releasing some of its juice. Let cool.

Reduce oven temperature to 375 degrees F. Place pine nuts on a rimmed sheet pan, and toast in oven until golden brown, about 5 minutes. Let cool.

Meanwhile, bring a large pot of salted water to boil. Stir in pasta, and adjust heat to maintain a low boil. Cook for two minutes longer than the package instructions. Drain and rinse pasta in cold water until the pasta is no longer warm.

Make pesto: Combine 1/2 cup toasted pine nuts, parmesan, basil leaves, and garlic in a food processor or blender. Process until a paste is formed, stopping to scrape the container down as needed. With the motor running, drizzle in 1 cup olive oil, and process until the oil is fully incorporated and pesto is smooth.

In a large mixing bowl, combine pasta, pesto, chopped parsley, sliced green onions, and remaining toasted pine nuts until pasta is evenly coated. Add half of the roasted tomatoes and half the mozzarella and toss to combine. Taste and adjust seasoning with additional salt and freshly ground pepper. Pour pasta salad into a large serving bowl, and arrange the remaining tomatoes and mozzarella on top. Serve at room temperature.

Polenta Cake with Olive Oil and Lemon by Amy Cantu

Print Friendly and PDF

I had this lemony, moist, squidgy, lightly gritty polenta cake stuck in my head. I knew just how I wanted it to look, taste, and feel in my mouth, but I was having trouble actually baking it. This one took three tries, but the results were totally worth it. I tried it as a loaf cake first, but the middle kept sinking, and the top was unattractively mottled dark brown. The Polenta Cake might seem plain Jane and suspiciously like cornbread, but I promise that its humble looks are deceiving. The olive oil and yogurt keep this Polenta Cake moist and just a bit dense, the lemon lends a bright citrusy flavor, and the polenta adds texture and earthiness. I love it on its own as a snack cake, (I'm determined to make "snack cake" a cake genre,) drizzled with a lemon glaze, in a trifle, or as it is here - topped with billows of lightly sweetened whipped cream and ripe summer fruit. The genius of Polenta Cake with Olive Oil and Lemon is in its simplicity.

Notes: Polenta Cake with Olive Oil and Lemon is perfect for making a Berry Trifle because it's sturdy and textured enough to hold together under the many layers, but also moist and delicious all on its own. If you're not feeding a crowd, the cake can just as easily be sliced into squares and topped with whipped cream (or ice cream!) and any in-season fruit. In the winter, it would be lovely with poached pears or an apple-cinnamon compote - YUM!


Active time: 5 minutes, Inactive time: 35 minutes
Yield: One 9 x 9" cake

1 cup flour
1/2 cup polenta
2 teaspoons baking powder
1/2 teaspoon kosher salt
1 cup plain whole-milk yogurt
1 cup granulated sugar
3 eggs
2 teaspoons grated lemon zest
1/2 teaspoon vanilla extract
1/2 cup olive oil, plus extra to grease the cake pa

Preheat oven to 350 degrees F. Grease a 9 x 9" metal cake pan with cooking spray or olive oil. Line the bottom and two sides with parchment paper, and grease the parchment paper again. Set aside.

Whisk together flour, polenta, baking powder, and salt in a medium bowl.

In a separate large bowl, whisk together yogurt, sugar, eggs, lemon zest, vanilla, and olive oil. Slowly whisk the dry ingredients into the wet ingredients, until just mixed together with no dry spots.

Pour cake batter into the prepared pan and bake for 30-35 minutes, or until a toothpick poked into the center of the cake comes out clean. Let cool completely before slicing. Cut into squares and serve with whipped cream and berries or use to make Berry Trifle.

Recipe inspired by Ina Garten's Lemon Yogurt Cake.

Berry Trifle by Amy Cantu

Print Friendly and PDF

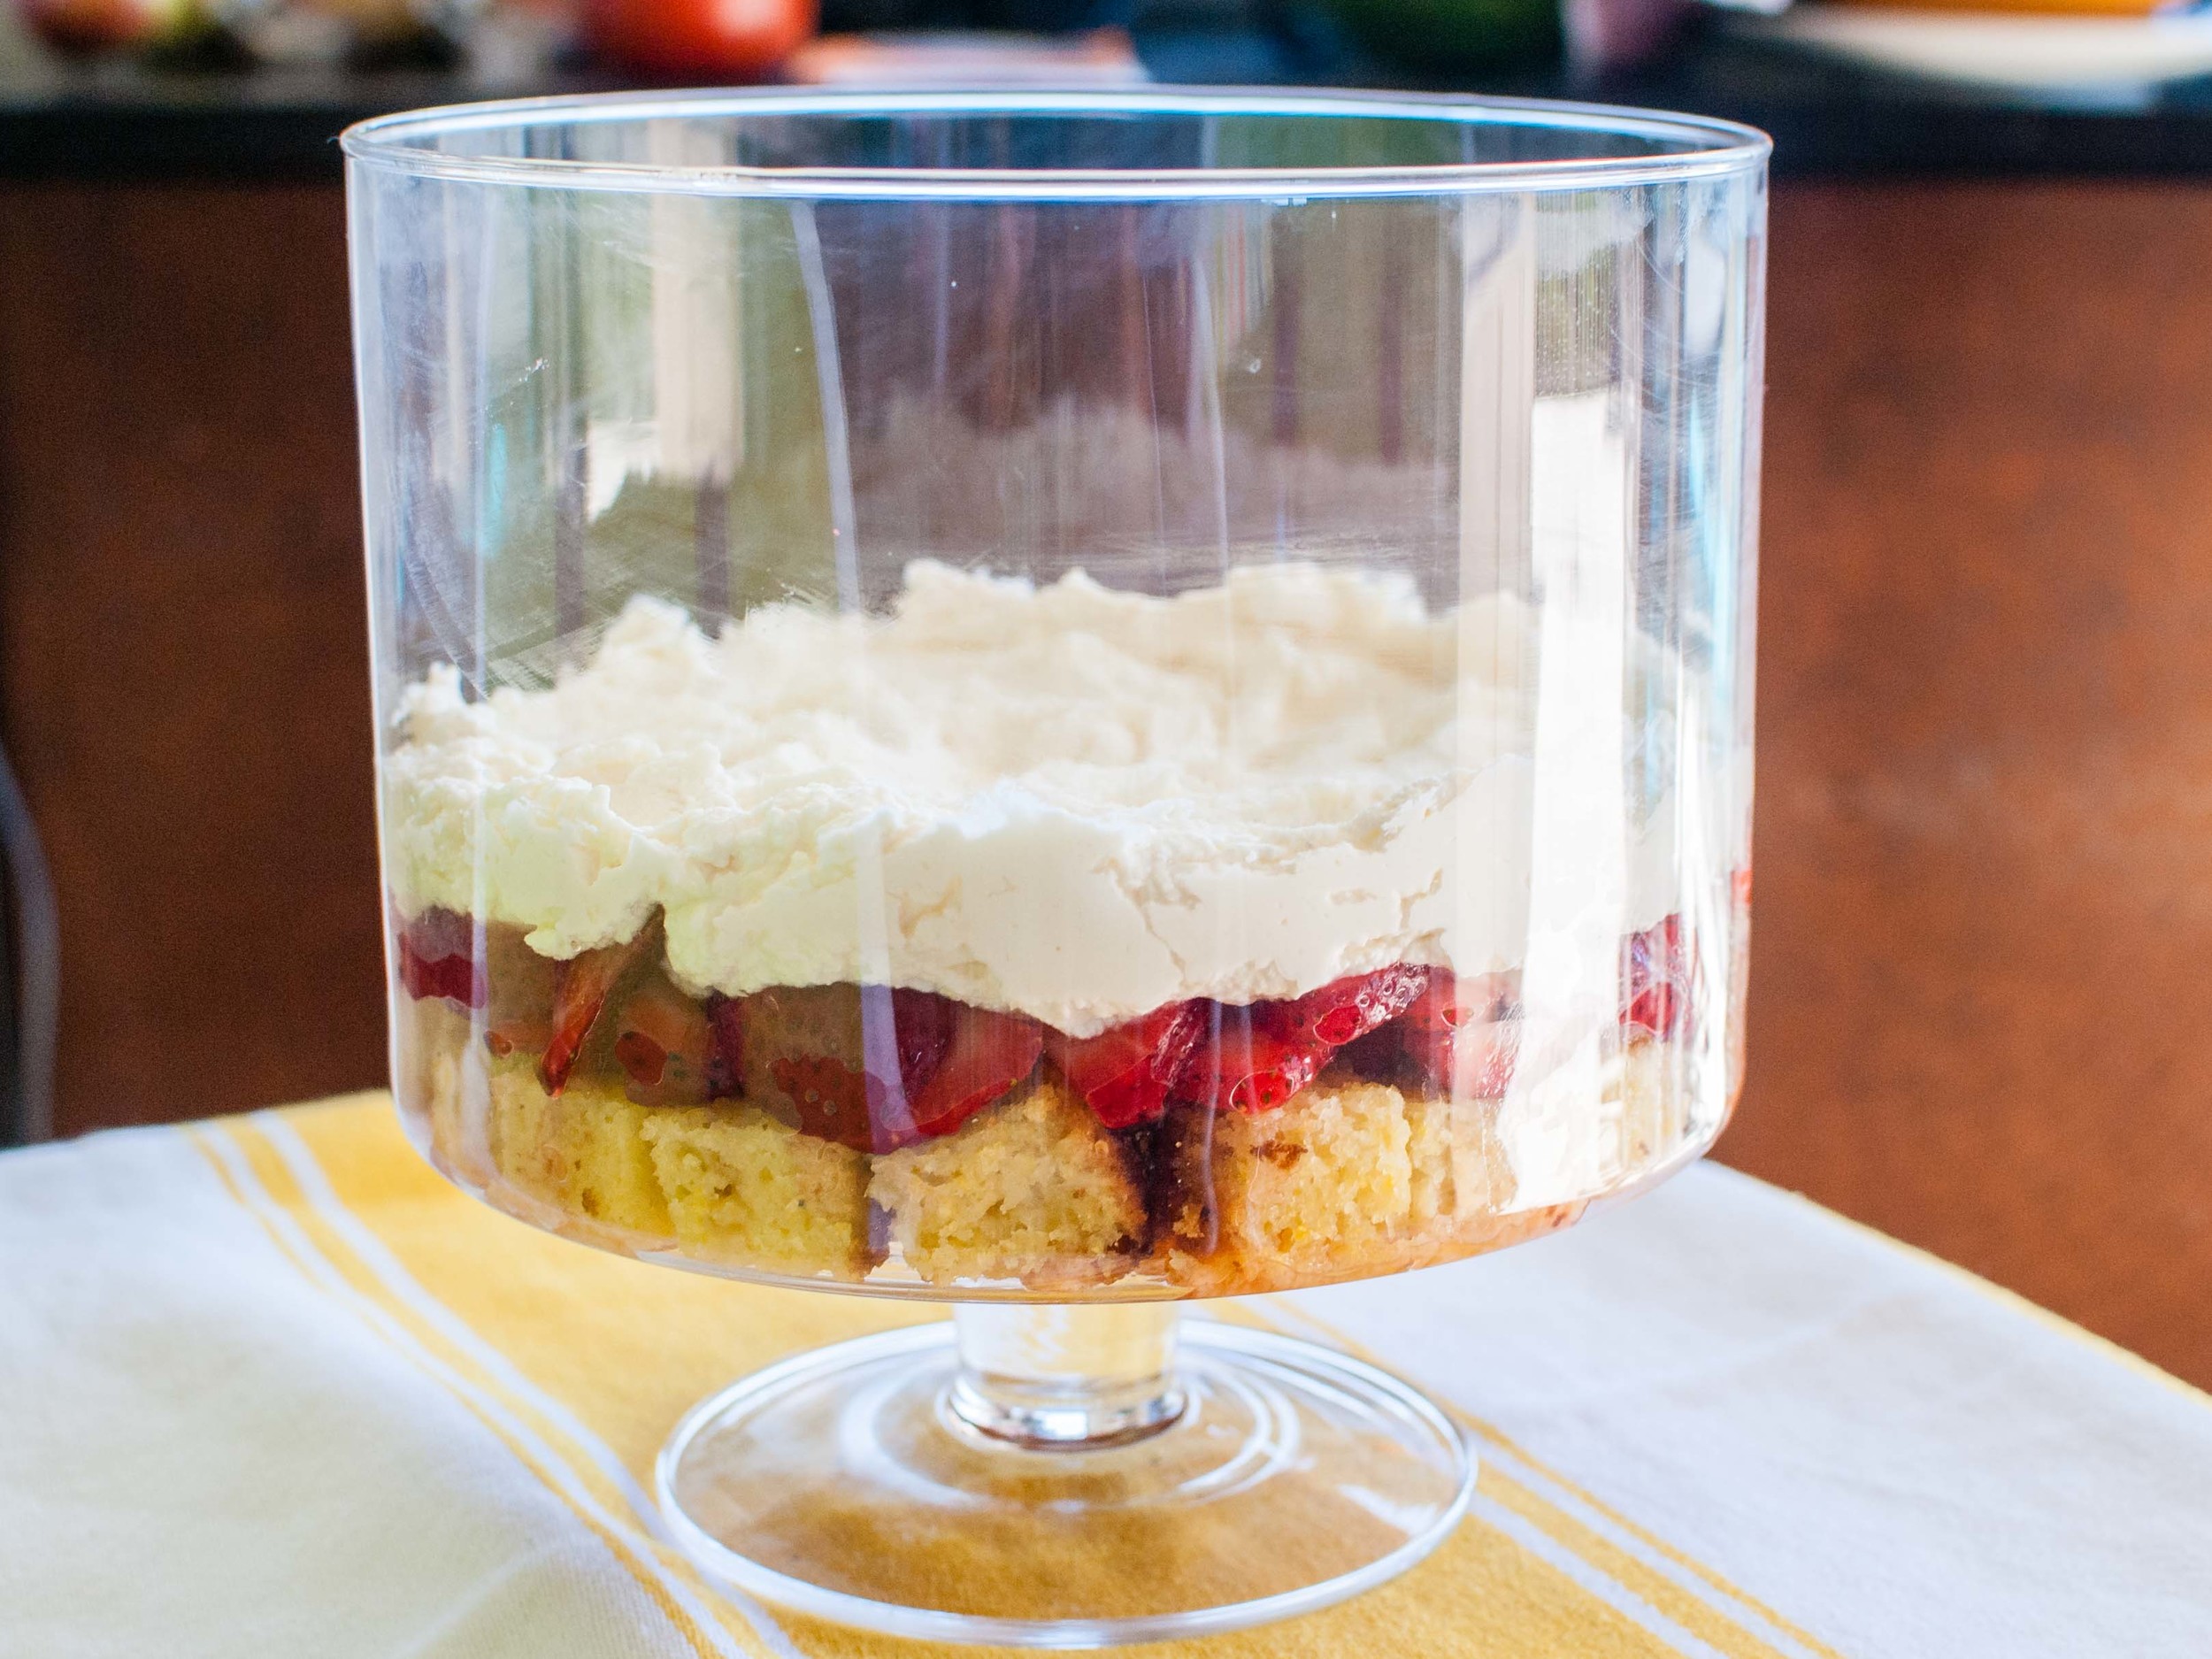
It's summer! Finally! I'm basking in the warmth of the sun. I'm in love with all the brightly colored produce at the farmer's market. The berries are local, sweet-as-candy, and a deep, ripe red. The blueberries pop in my mouth, surrendering their sweet juices. The raspberries are vibrantly tart and sweet. It's the perfect time to have a barbecue (or at least a supper out on the patio,) to celebrate the season! I need a simple dessert that tastes like the height of summer, and this red, white, and blue-hued Berry Trifle is just that. Fresh vibrant berries, clouds of whipped mascarpone cream, and squidgy pieces of cake come together in 15 minutes to create this dreamy Berry Trifle: An impressive, layered masterpiece that tastes as good as it looks. 

Notes: The only special equipment needed is a trifle dish (or a large glass bowl), so that the beautiful layers can be seen. Purchased pound cake or angel food cake make this a no-bake dessert, but Polenta Cake with Olive Oil and Lemon is perfect for this berry trifle and makes it extra-special. It's easy to make - just stir together the ingredients and bake. The Polenta Cake is extra moist from the olive oil and holds up well in the trifle layers thanks to it's sturdy texture from the polenta.


Time: 15 minutes
Servings: 8-10

3/4 pound raspberries
3/4 pound strawberries, tops removed and sliced
3/4 pound blueberries
1/4 cup granulated sugar, divided use
1/4 cup fresh orange juice, divided use
One recipe Polenta Cake with Olive Oil and Lemon or 9" loaf purchased pound cake, cut into 1-inch cubes
1/2 cup confectioners' sugar (powdered sugar)
1 teaspoon vanilla extract
1 pound (16 ounces) mascarpone cheese, at room temperature
Grated zest of 1 lemon
2 cups heavy cream
2 tablespoons seedless raspberry jam or currant jelly

Combine strawberries, 2 tablespoons sugar, and 2 tablespoons orange juice in a bowl. In a separate bowl, combine raspberries with remaining 2 tablespoons sugar and 2 tablespoons orange juice. Set bowls aside.

Using an electric mixer, whip together confectioners' sugar, vanilla extract, mascarpone cheese, and lemon zest at medium speed until well combined. Add heavy cream and continue to mix at high speed until the mixture is fluffy like whipped cream.

To assemble the trifle: Arrange 1/3 of the cake cubes into a 13-cup trifle dish (or a large glass bowl). Next, pour in the strawberries and spread to make an even layer. Spread 1/2 of the whipped mascarpone cream over the strawberries in an even layer. Arrange half of the remaining cake cubes evenly over the cream layer. Top the cake with all the raspberries to create another even layer. Spread the remaining whipped mascarpone cream over the raspberries. Add the remaining cake cubes evenly over the cream. For the final layer, distribute the blueberries evenly over the top.

Melt the jam in a small dish in the microwave or in a small saucepan over low heat. Using a pastry brush, anoint the blueberries with the melted jam to give them a sweet, glossy glaze. 

Cover and refrigerate for at least 1 hour before serving.

Mediterranean Turkey Burger by Cynthia Raub

Print Friendly and PDF

When Amy delivered her second baby almost two years ago, (?! Sniff!), I was in the throes of an obsession with burger patties. Lamb burgers, black bean burgers, salmon burgers, turkey burgers - I loved them all and made them with fierce frequency. A few days after she delivered her beautiful (and huge) bundle of sweetness, I brought these turkey burgers over for her family, with a side salad and dessert. She was the first mama I knew who delivered a baby after I had my own, and it was the first newborn meal I ever gifted. I think back to that day, and I think that's when the spark for intentionally sharing food with frequency began for me. She was grateful as the burden of preparing dinner was lifted, and I was so happy to help in that small way. Since then, I have brought new mamas meals like Harissa Grilled Pork Loin Chops and Swiss Chard and Leek Crostata, but these turkey burgers have a special place in my heart . . . and stomach. I still make them often because they are easy to prepare, delicious, and perfect for sharing with others. These are also a fantastic option for holiday barbecues and parties for anyone looking for a (seemingly) healthier burger!

Notes: Most beef burger recipes will recommend to work the ground meat mixture as little as possible so that the patty remains tender and loose. Because of all of the additional ingredients in this patty, I recommend a through mixing of the ingredients so that the patty is solid and does not fall apart during cooking or eating! These are perfect for preparing in a large batch and freezing for future meals. It's an easy recipe to scale up, and it takes just a little more time to form the extra patties. They are even delicious as meatballs and cooked in tomato sauce!


Time: 25 minutes
Yield: 5-7 patties

1.5 lbs ground turkey
1/2 cup (about 8 ounces) chopped frozen spinach, thawed and drained
1/3 cup crumbled feta
1/3 cup sun-dried tomatoes in olive oil, chopped
1 teaspoon kosher salt
1 teaspoon black pepper
1 teaspoon oregano
1 teaspoon paprika
2 tablespoons olive oil

In a medium microwave safe bowl, thaw frozen chopped spinach by covering the bowl with plastic wrap and nuking for 1 minute on 80% power. Spinach should be warm and thawed. Scatter spinach on a clean kitchen towel (or several layers of quality paper towels) to absorb the water. Gather the edges of the towel and wring out the liquid, drying completely. Loosen spinach into small pieces.

In a large bowl, combine turkey, spinach, feta, sun dried tomatoes, kosher salt, black pepper, oregano, paprika and olive oil. Mix ingredients with clean hands, distributing all of the ingredients throughly.

Depending on the size of your buns, use a 1/3 or 1/2 cup measuring cup to portion out patties. Scoop mixture into your hands and flatten to make a patty, smoothing out the rough edges. Create a shallow indention in the center of your patties, as the center tends to expand while cooking.

To cook: Heat a griddle, grill pan, or cast iron pan on medium-high and add enough neutral oil to coat the bottom of the pan. Once the oil begins to shimmer, carefully lay patties onto the pan, to avoid splattering oil. Don't crowd the pan! Crowding the pan will result in steamed and pale-looking patties. To avoid overcooking, brown the patty on the first side until cooked 2/3 of the way through, about 3-4 minutes. Flip over and finish cooking on the second side, about 2 minutes.

Serving suggestion: whole wheat hamburger buns, sliced tomato, lettuce, mayonnaise

Lemon Poppy Seed Cookies by Cynthia Raub

Print Friendly and PDF

I love lemon poppy seed anything: cookies, muffins, scones, you name it! These cookies are addictively crisp, with a tender crumb and are a perfect addition to any cookie assortment. The lemon zest lends a fragrant floral note in addition to its citrusy sweetness. These cookies are especially delicious with tea because of they are delicate and subtly sweet. This recipe is simple, adaptable, and perfect for preparing in advance for your special occasions. 

Notes: I have adapted this recipe from Smitten Kitchen, who has adapted a simple slice and bake recipe from cookie queen Dorie Greenspan. Deb of Smitten Kitchen recommends different add-ins such as cranberries and orange, or lime and cornmeal - the possibilities of substitutions are endless with this recipe. To get a beautifully round cookie, roll the log tightly in the plastic wrap as described in the instructions. If you have an empty paper towel roll handy, cut through it lengthwise and nestle the dough roll inside of it to protect the roll's round edges.


Read More: The Shared Cookies


Time: 30 minutes active,  2.5 hours inactive
Yield: About 30 cookies

2 sticks (1 cup) unsalted butter, at room temperature
2/3 cup confectioners’ sugar, sifted
2 large egg yolks, at room temperature
Pinch of salt
1 teaspoon vanilla extract
1 teaspoon lemon extract
2 cups all-purpose flour
Zest of 2 lemons (about 2 heaping tablespoons)
1/3 cup poppy seeds

Beat room temperature butter on medium speed in a stand mixer with the paddle attachment until smooth. Add sifted confectioners sugar and continue to beat on medium until smooth. Once smooth, add egg yolks, one at a time until incorporated. Add salt, vanilla extract, lemon extract, lemon zest and poppy seeds- beat until combined and smooth. Lower the mixing speed and add the flour, a 1/2 cup at a time. Continue to mix until wet mixture binds to the flour but do not over mix. 

Turn the dough out onto a clean work surface and gently gather it into a ball. Divide the ball into two and wrap each half in plastic wrap- refrigerate for 30 minutes.

After 30 minutes of resting and firming in the refrigerator, remove one dough ball from its plastic wrap and roll gently into a log (about 1.5 inches thick) on a clean and flat surface. Place the rough log onto a clean sheet of plastic wrap, wrapping the plastic wrap around the length of the log to secure the shape. Take the ends of the plastic wrap and roll the log of dough against the table away from your body until the plastic wrap is taught and the ends are secure. Repeat with the second roll, and refrigerate for at least 2 hours. *Optional: Cut a toilet paper roll or paper towel roll through its length and place the log(s) into the roll- this will protect the log from developing a flat side.

Preheat oven to 350°F and line baking pans with parchment paper. Remove the dough logs from the refrigerator, unwrap it from its plastic and place on a cutting board. With a sharp knife, slice log into 1/4" thick cookies. Gently pat the rough cut edges of the cookies with your fingers, rounding out any flat or uneven spots and place on baking pan with 1 inch space between cookies.

Bake the cookies for 12-15 minutes until crisp and barely golden. Rotate the baking sheet halfway through baking to ensure even cooking. Transfer to a wire rack to cool to room temperature.

Salted Tahini Chocolate Chip Cookies by Amy Cantu

Print Friendly and PDF

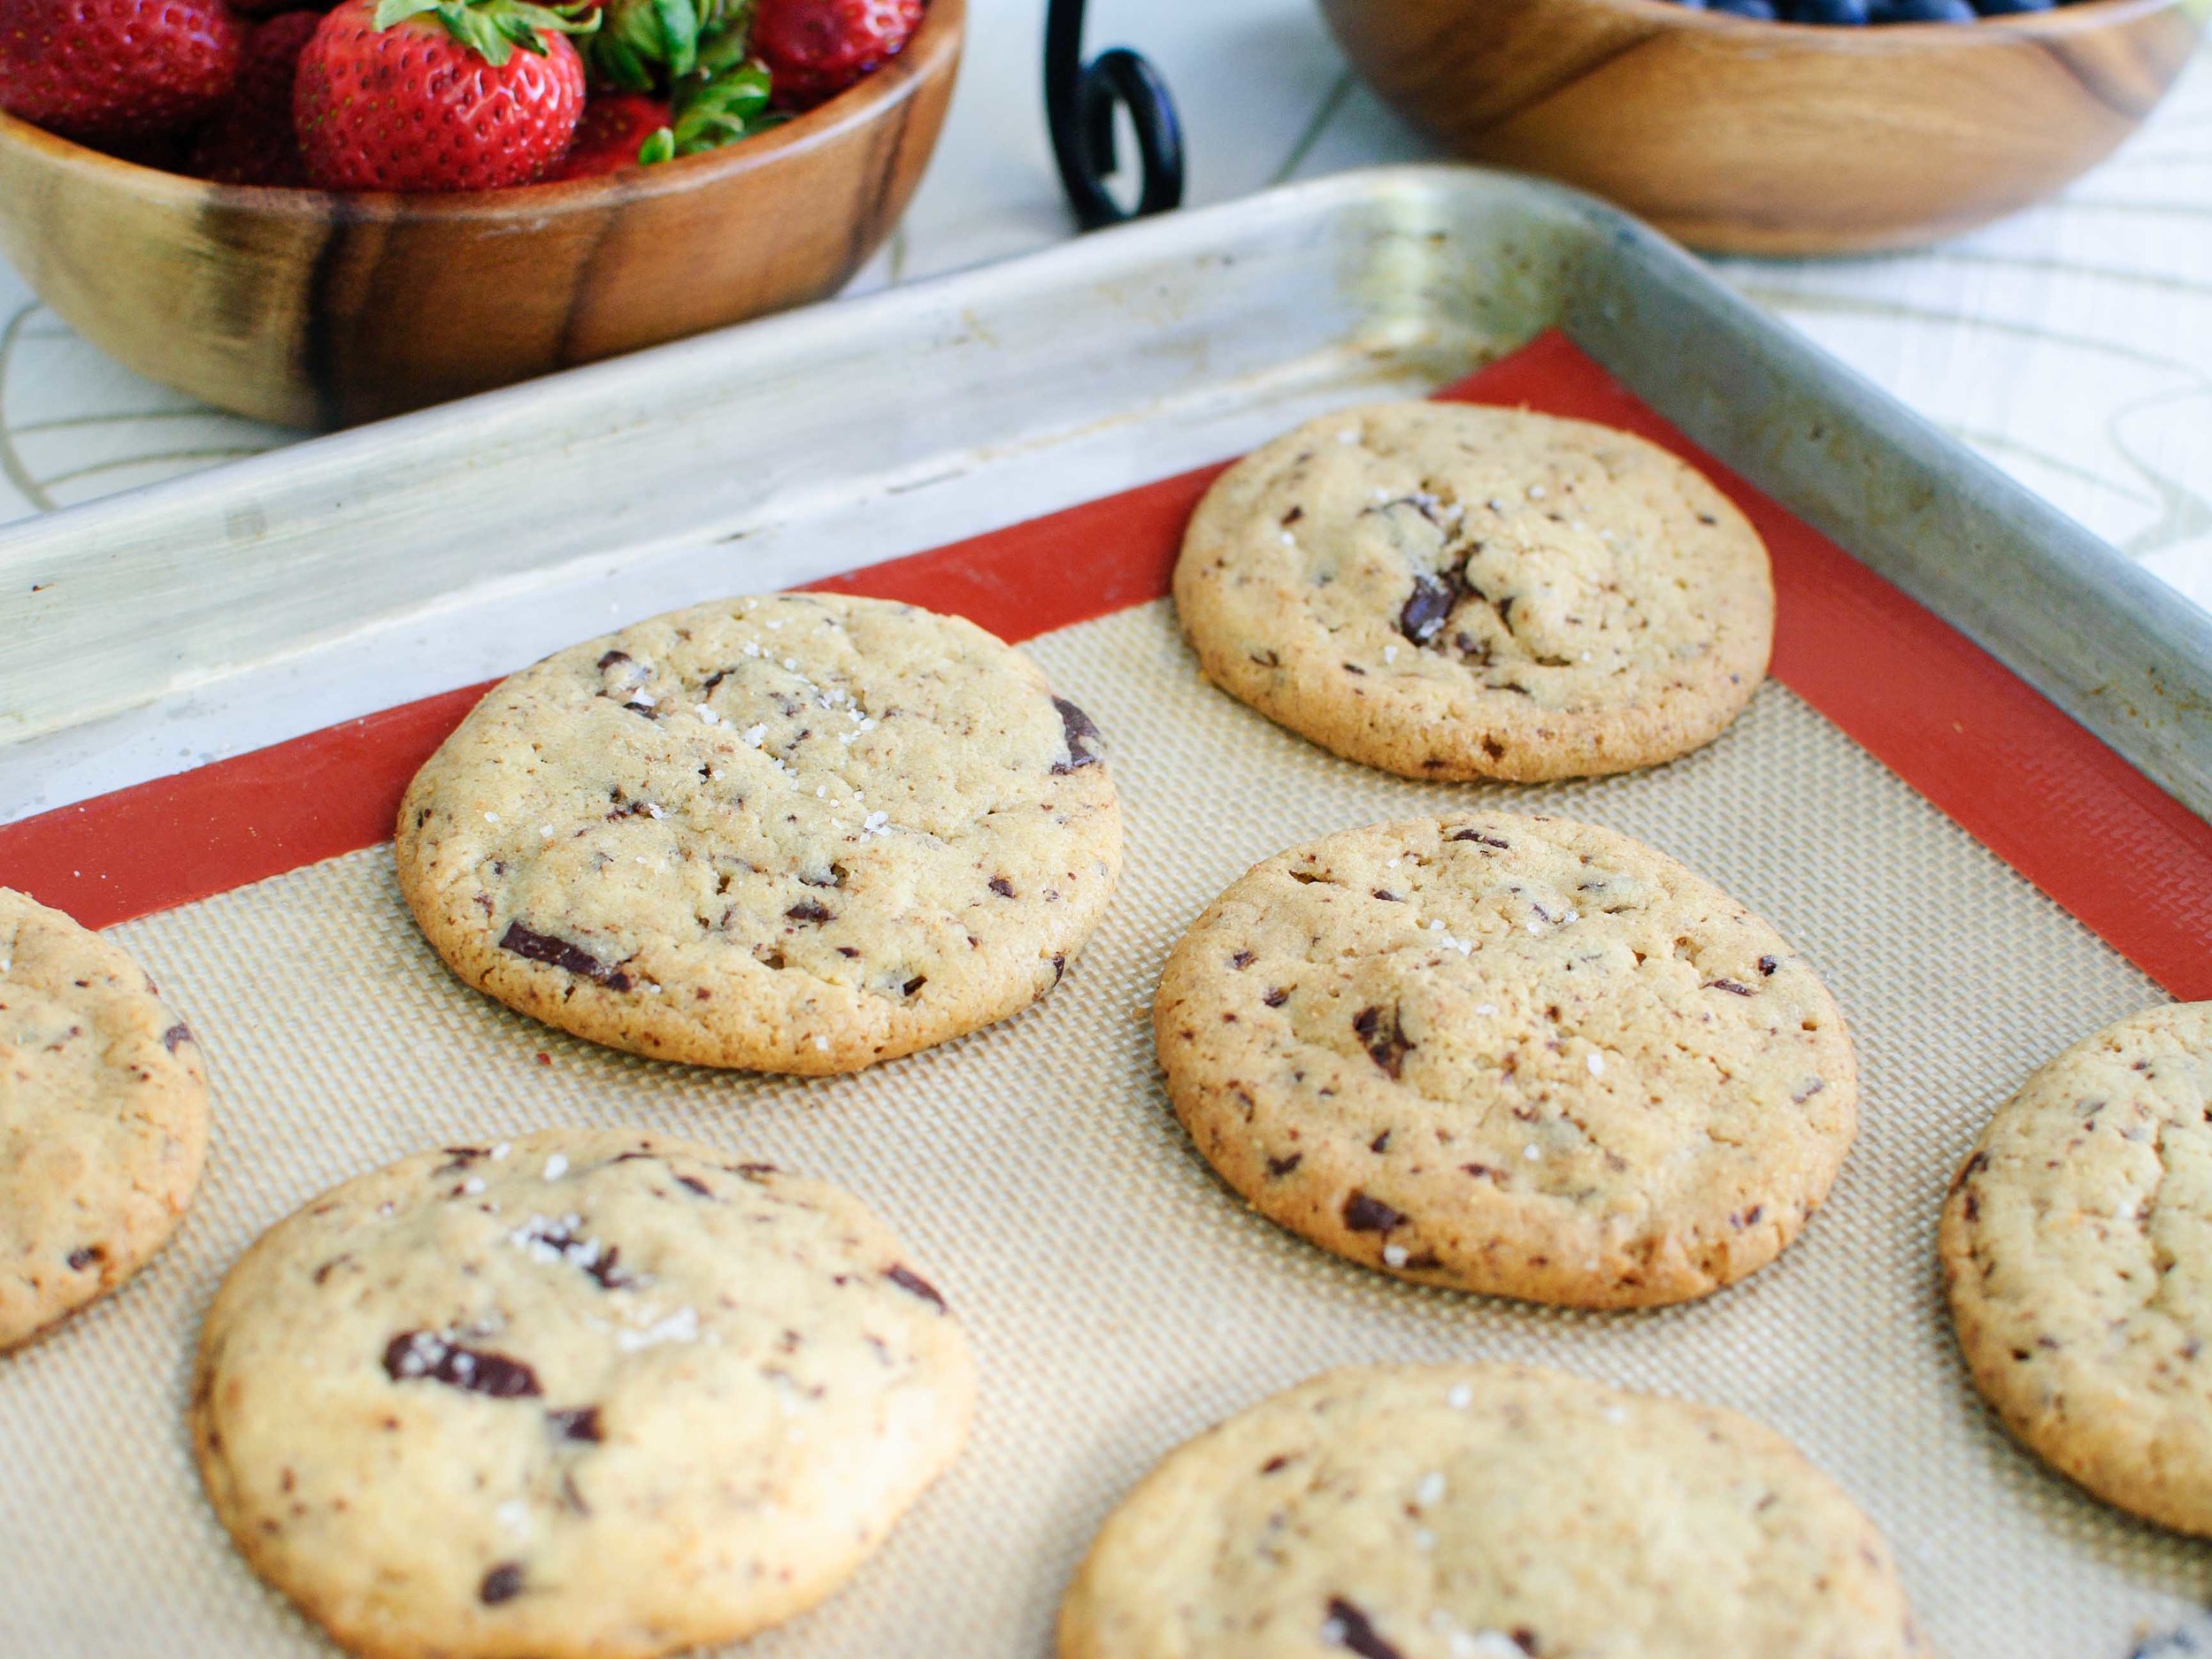
Everyone has a favorite chocolate chip cookie recipe, and everyone says theirs is the best. They are all wrong. These Salted Tahini Chocolate Chip Cookies are the best chocolate chip cookies I have ever put in my mouth, and I have for sure eaten more chocolate chip cookies than any one person should ever eat in their whole lifetime. This fact obviously makes me an expert on the matter. (This obviously does NOT make me an expert on anything, except eating too much and too frequently. I digress.) What I can say with complete accuracy is that the cookie dough and baked cookies were so delicious, that I had to make a second double batch because I (and Cynthia, and my friend Christine, and my husband AJ, and my kids) couldn't stop eating them. The smell of them baking in the oven was so intoxicating that Cynthia and I couldn't wait for them to cool, so we burnt our fingers prying them off the cookie sheet and our tongues from the hot, oozing chocolate: It was absolutely worth it. The edges of the Salted Tahini Chocolate Chip Cookie were crisp and crunchy, while the centers were soft, yielding, and chewy. The tahini flavor was subtle, but added a deep, nutty base that stood up to the velvety, rich dark chocolate. AJ (who doesn't crave sweets) couldn't stop at one cookie, while my kids speedily cleaned up their toys to share one more. I'm not saying these cookies are magical (O.K. that IS what I'm saying), but I think they might be the answer to world peace, happiness, and well-being . . . maybe.

Notes: The tahini flavor is pronounced in the cookie dough, but is much more subtle in the baked cookie. I added a tablespoon of sesame oil to play up the flavor a bit, but it does result in a more crisp cookie. 

The cookie dough really does need to rest in the fridge for 12 hours, so the flavors can mingle and the cookies don't spread too much when baked. I have doubled the quantities in the recipe included here because 25 cookies is the minimum to prevent a fist fight (or at the very least, Ro Sham Bo,) to determine who gets the last cookie. Save the angst and make enough for everyone to enjoy!

Also, the cookie dough freezes beautifully. Freeze the cookie dough balls in a single layer on a cookie sheet until hard, then transfer them to a sealed container or bag. Bake the dough balls straight from the freezer, adding a couple extra minutes to the baking time.


Read More: The Shared Cookies


Time: 20 minutes (active), 12 ½ hours (inactive)
Yield: About 25 cookies

1 cup (1/2 lb) unsalted butter at room temperature
1 cup tahini, well stirred
1 tablespoon roasted sesame oil (optional)
2 cups granulated sugar
2 large eggs
2 egg yolks
2 teaspoons vanilla extract
2 ¼ cups all-purpose flour
1 teaspoon baking soda
1 teaspoon baking powder
2 teaspoons kosher salt
2 ½ cups chocolate chunks or chips, bittersweet or semisweet
Flaky salt, like fleur de sel or Maldon

In the bowl of an electric mixer fitted with the paddle attachment, cream butter, tahini, sesame oil (if using), and sugar at medium speed until light and fluffy, about 5 minutes. Add eggs, egg yolks and vanilla and continue mixing at medium speed for another 5 minutes.

Combine flour, baking soda, baking powder and kosher salt into a large bowl and mix with a fork or whisk. Add flour mixture to butter mixture at low speed until just combined. Use a rubber spatula to fold in chocolate chunks. Dough will be soft, not stiff. Refrigerate at least 12 hours; this ensures tender cookies.

When ready to bake, preheat oven to 325 degrees and line a baking sheet with parchment paper or nonstick baking mat.  For each cookie, roll a heaping tablespoon of dough into a ball, and drop onto ungreased baking sheets, spacing 3 inches apart. (Cookies will spread while baking.)

Bake 13 to 16 minutes until just golden brown around the edges but still pale in the middle to make thick, soft cookies.  Or for crisp cookies, bake until evenly golden brown (about 1-2 minutes further). As cookies come out of the oven, sprinkle sparsely with salt. Let cool for 5 minutes on cookie sheet before transferring to a rack to cool completely.

Pork and Broccolini Sandwich by Cynthia Raub

Print Friendly and PDF

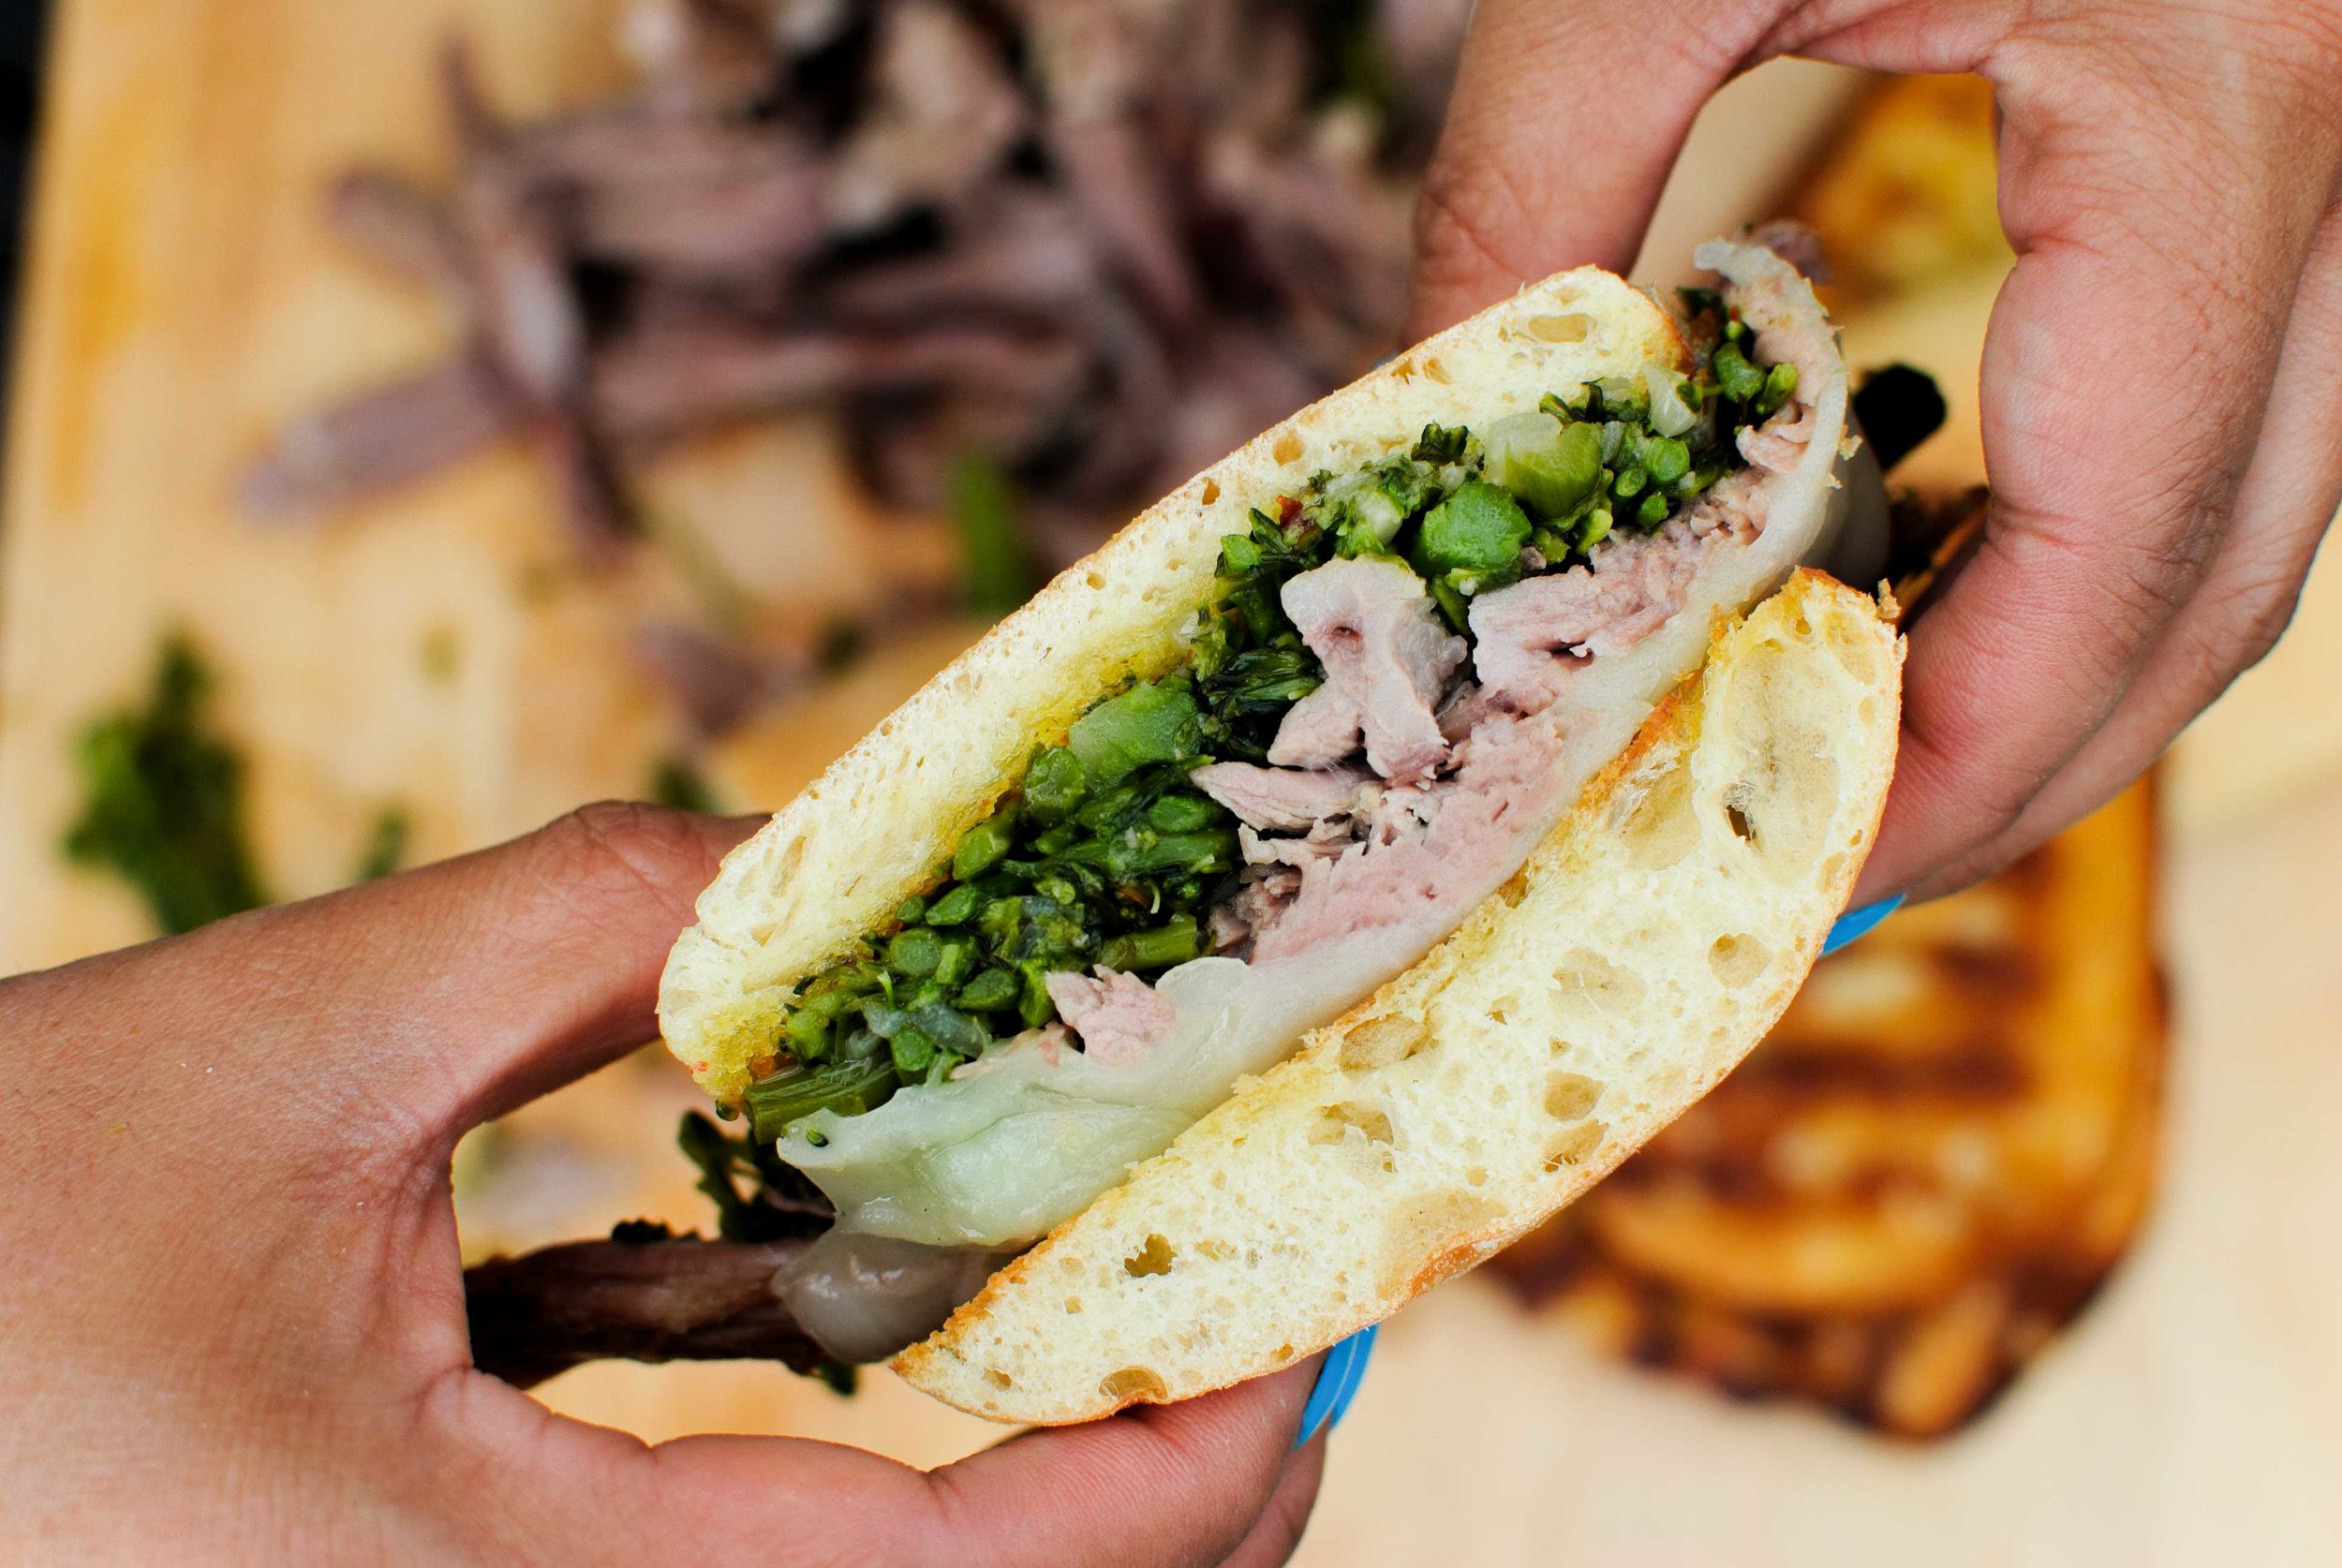
A pork shoulder roast is a gift that keeps on giving. Its meaty girth, gristle, and crisp skin provides a generous and impressive roast, without breaking the bank, which is perfect for a large group. Or, you can make one for your family and reserve the leftover meat for future meals! Amy gifted me with an enormous chunk of her roast and I wanted to do something different from my typical uses of leftover pork. I normally default to pulled pork sandwiches or use it as a taco filling, but somewhere in the depths of my memory, I recalled a pork sandwich I had at Salumi in Seattle eons ago as inspiration. The earthy and tender broccolini, with luscious and slightly crisped pork on a toasted roll, was held together by melted provolone. This decadent sandwich is my new favorite way to enjoy leftover pork shoulder.

Notes: This sandwich is pretty straightforward with few ingredients, so it's important that each component is the best that is can be. A substantial sandwich roll is crucial to a sandwich like this - a ciabatta or torta roll with good structure will not fall apart under the cooked down broccolini and loose pork. I loved the variations in texture that the broccolini had: from the firmer stems to the soft cooked heads, but I can see other greens used as a substitute. If you don't care for broccolini, I would recommend green swiss chard with stems and leaves.


Time: 20 minutes
Servings: 4

For the broccolini
2 bunches broccolini
2 tablespoons olive oil
1 teaspoon red pepper flakes
4 cloves garlic, sliced
2 shallots, sliced
1 teaspoon kosher salt
1 tablespoon lemon juice

For the sandwich
4 sandwich ciabatta rolls
4 tablespoons olive oil, divided
1 1/3 cups pork shoulder (pulled or sliced)
4 slices provolone

Preparing the broccolini
Make an ice bath to cool the broccolini, by filling a large bowl with water and ice. In a large sauté pan, fill halfway with water and bring to a boil on high heat. Trim the ends of the broccolini stems, about 1 inch. Cut the broccolini in half, place in boiling water, and cook for 2 minutes until barely cooked through.

Drain the broccolini, and put it in the ice bath to halt cooking. Drain cooled broccolini and set aside.

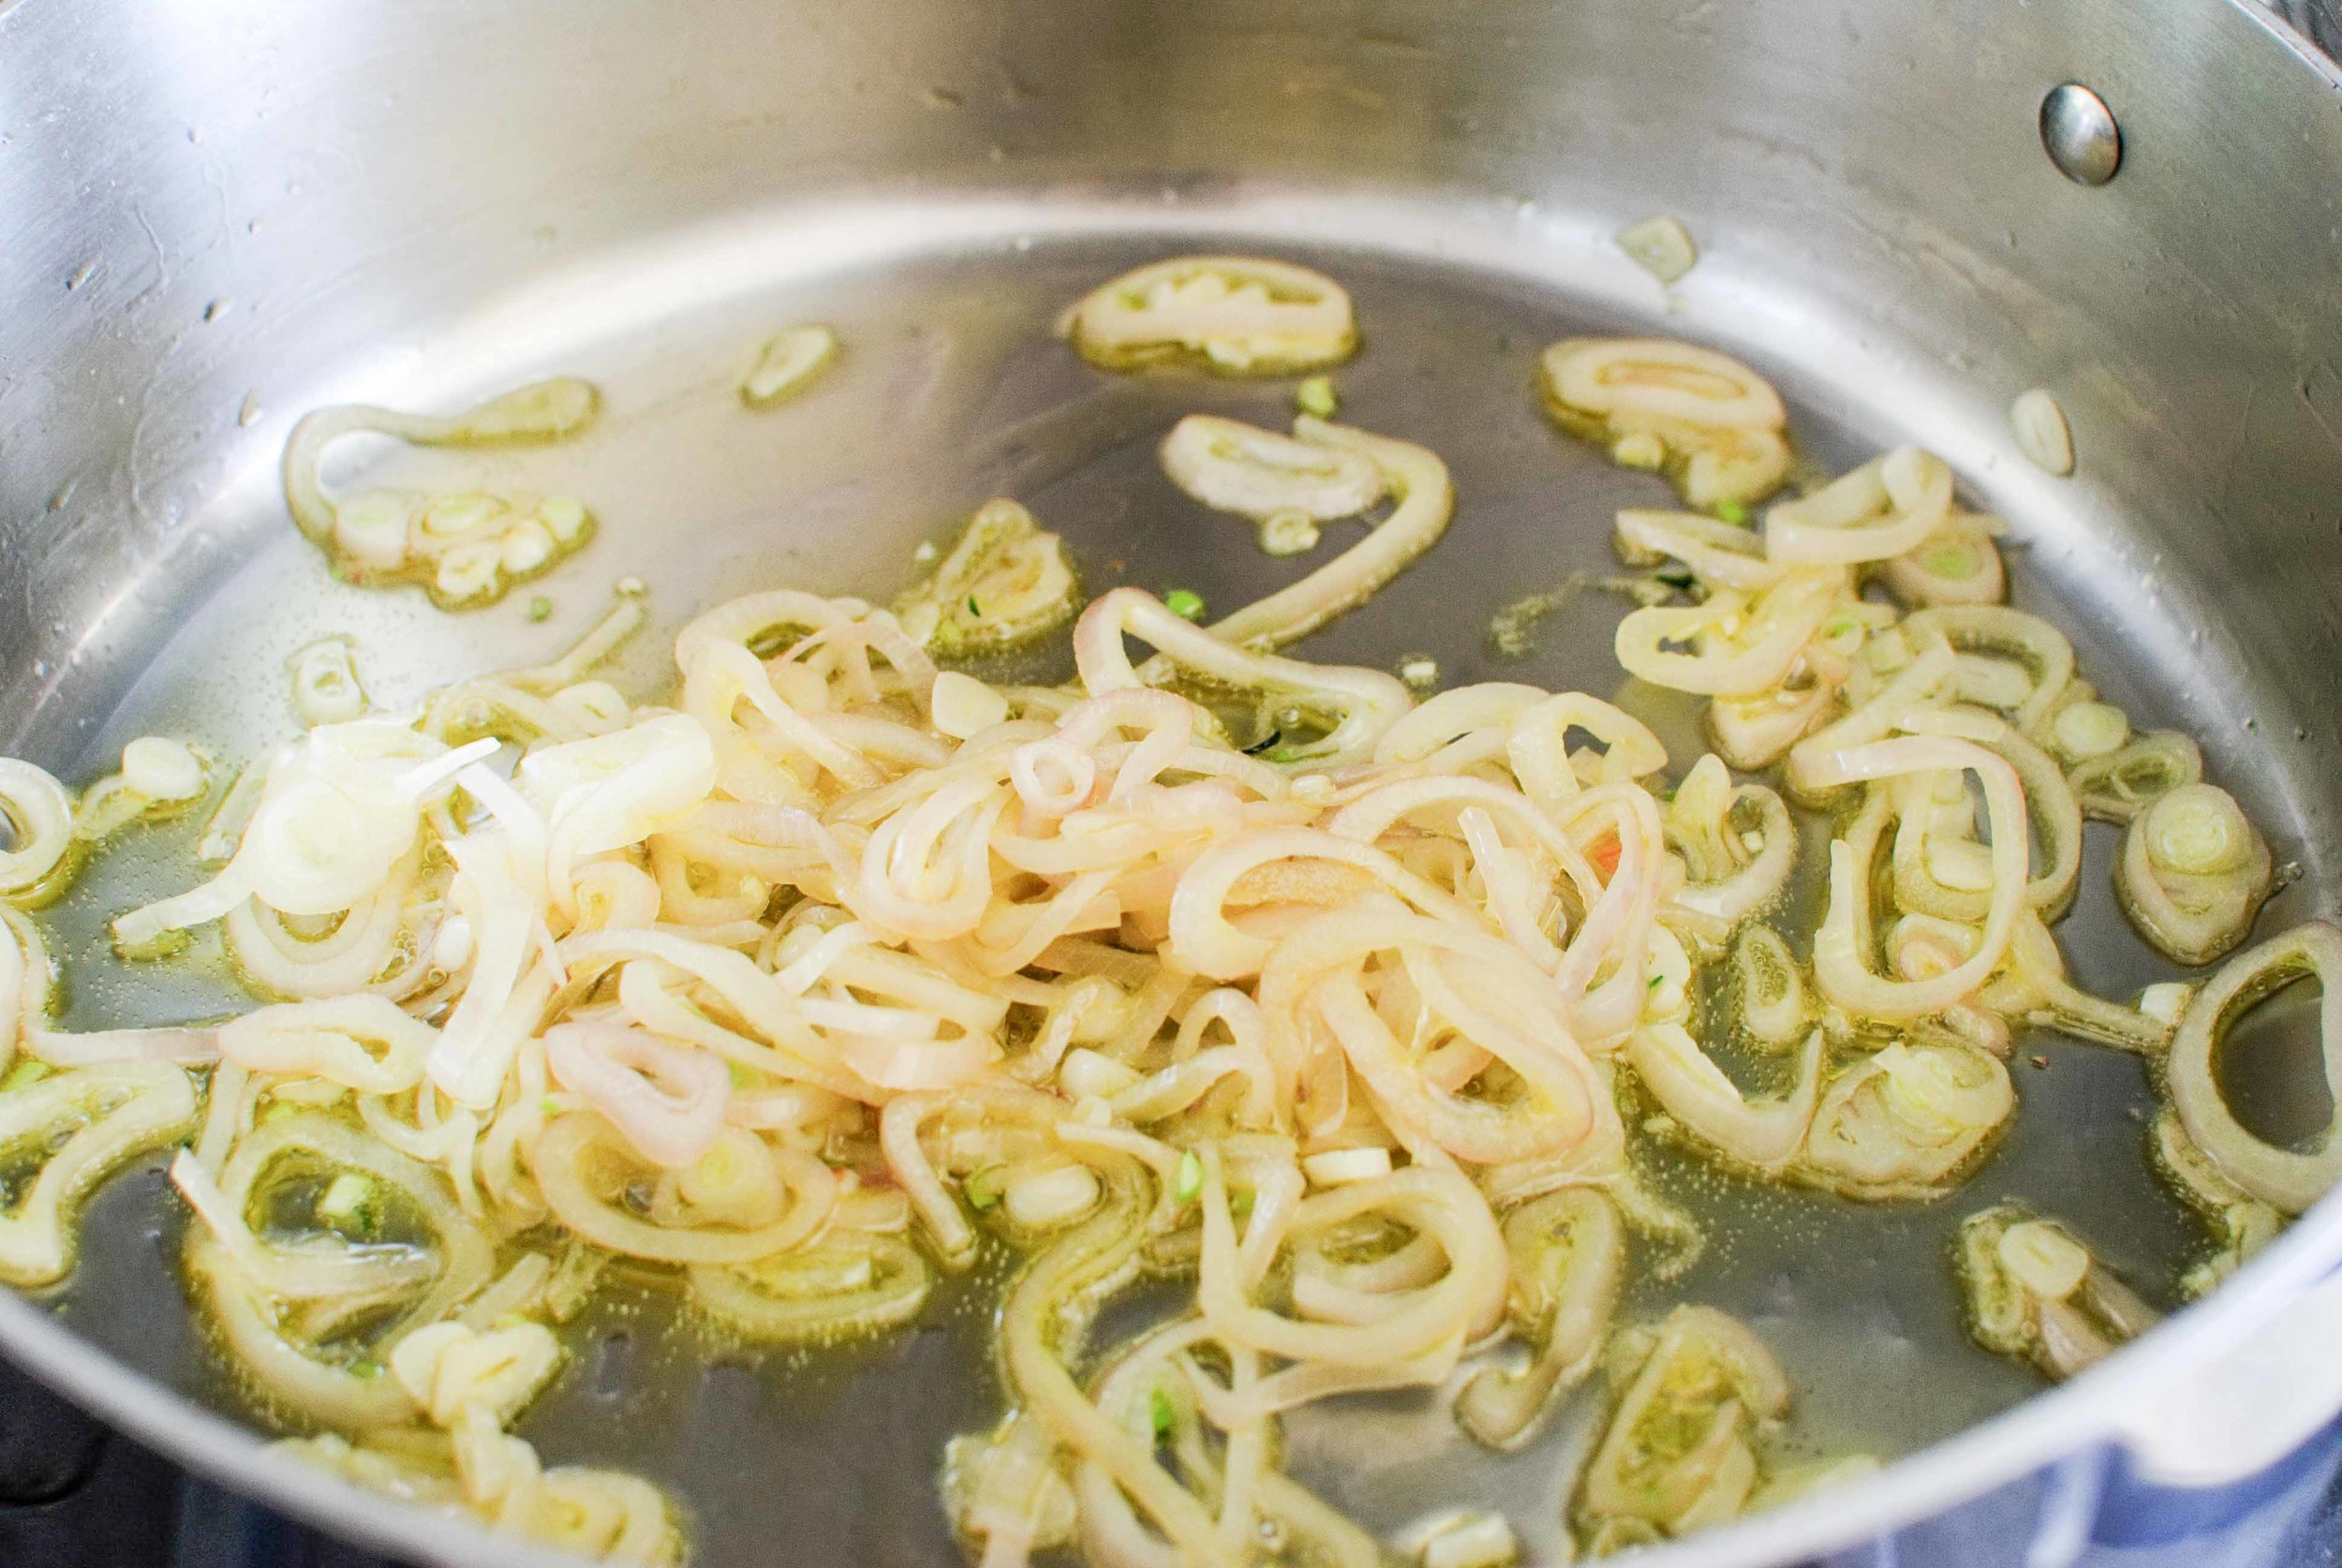
In the same sauté pan, heat 2 tablespoons of olive oil on medium heat. Add red pepper flakes, sliced garlic, and shallot rings- sweat until translucent and tender but not falling apart.

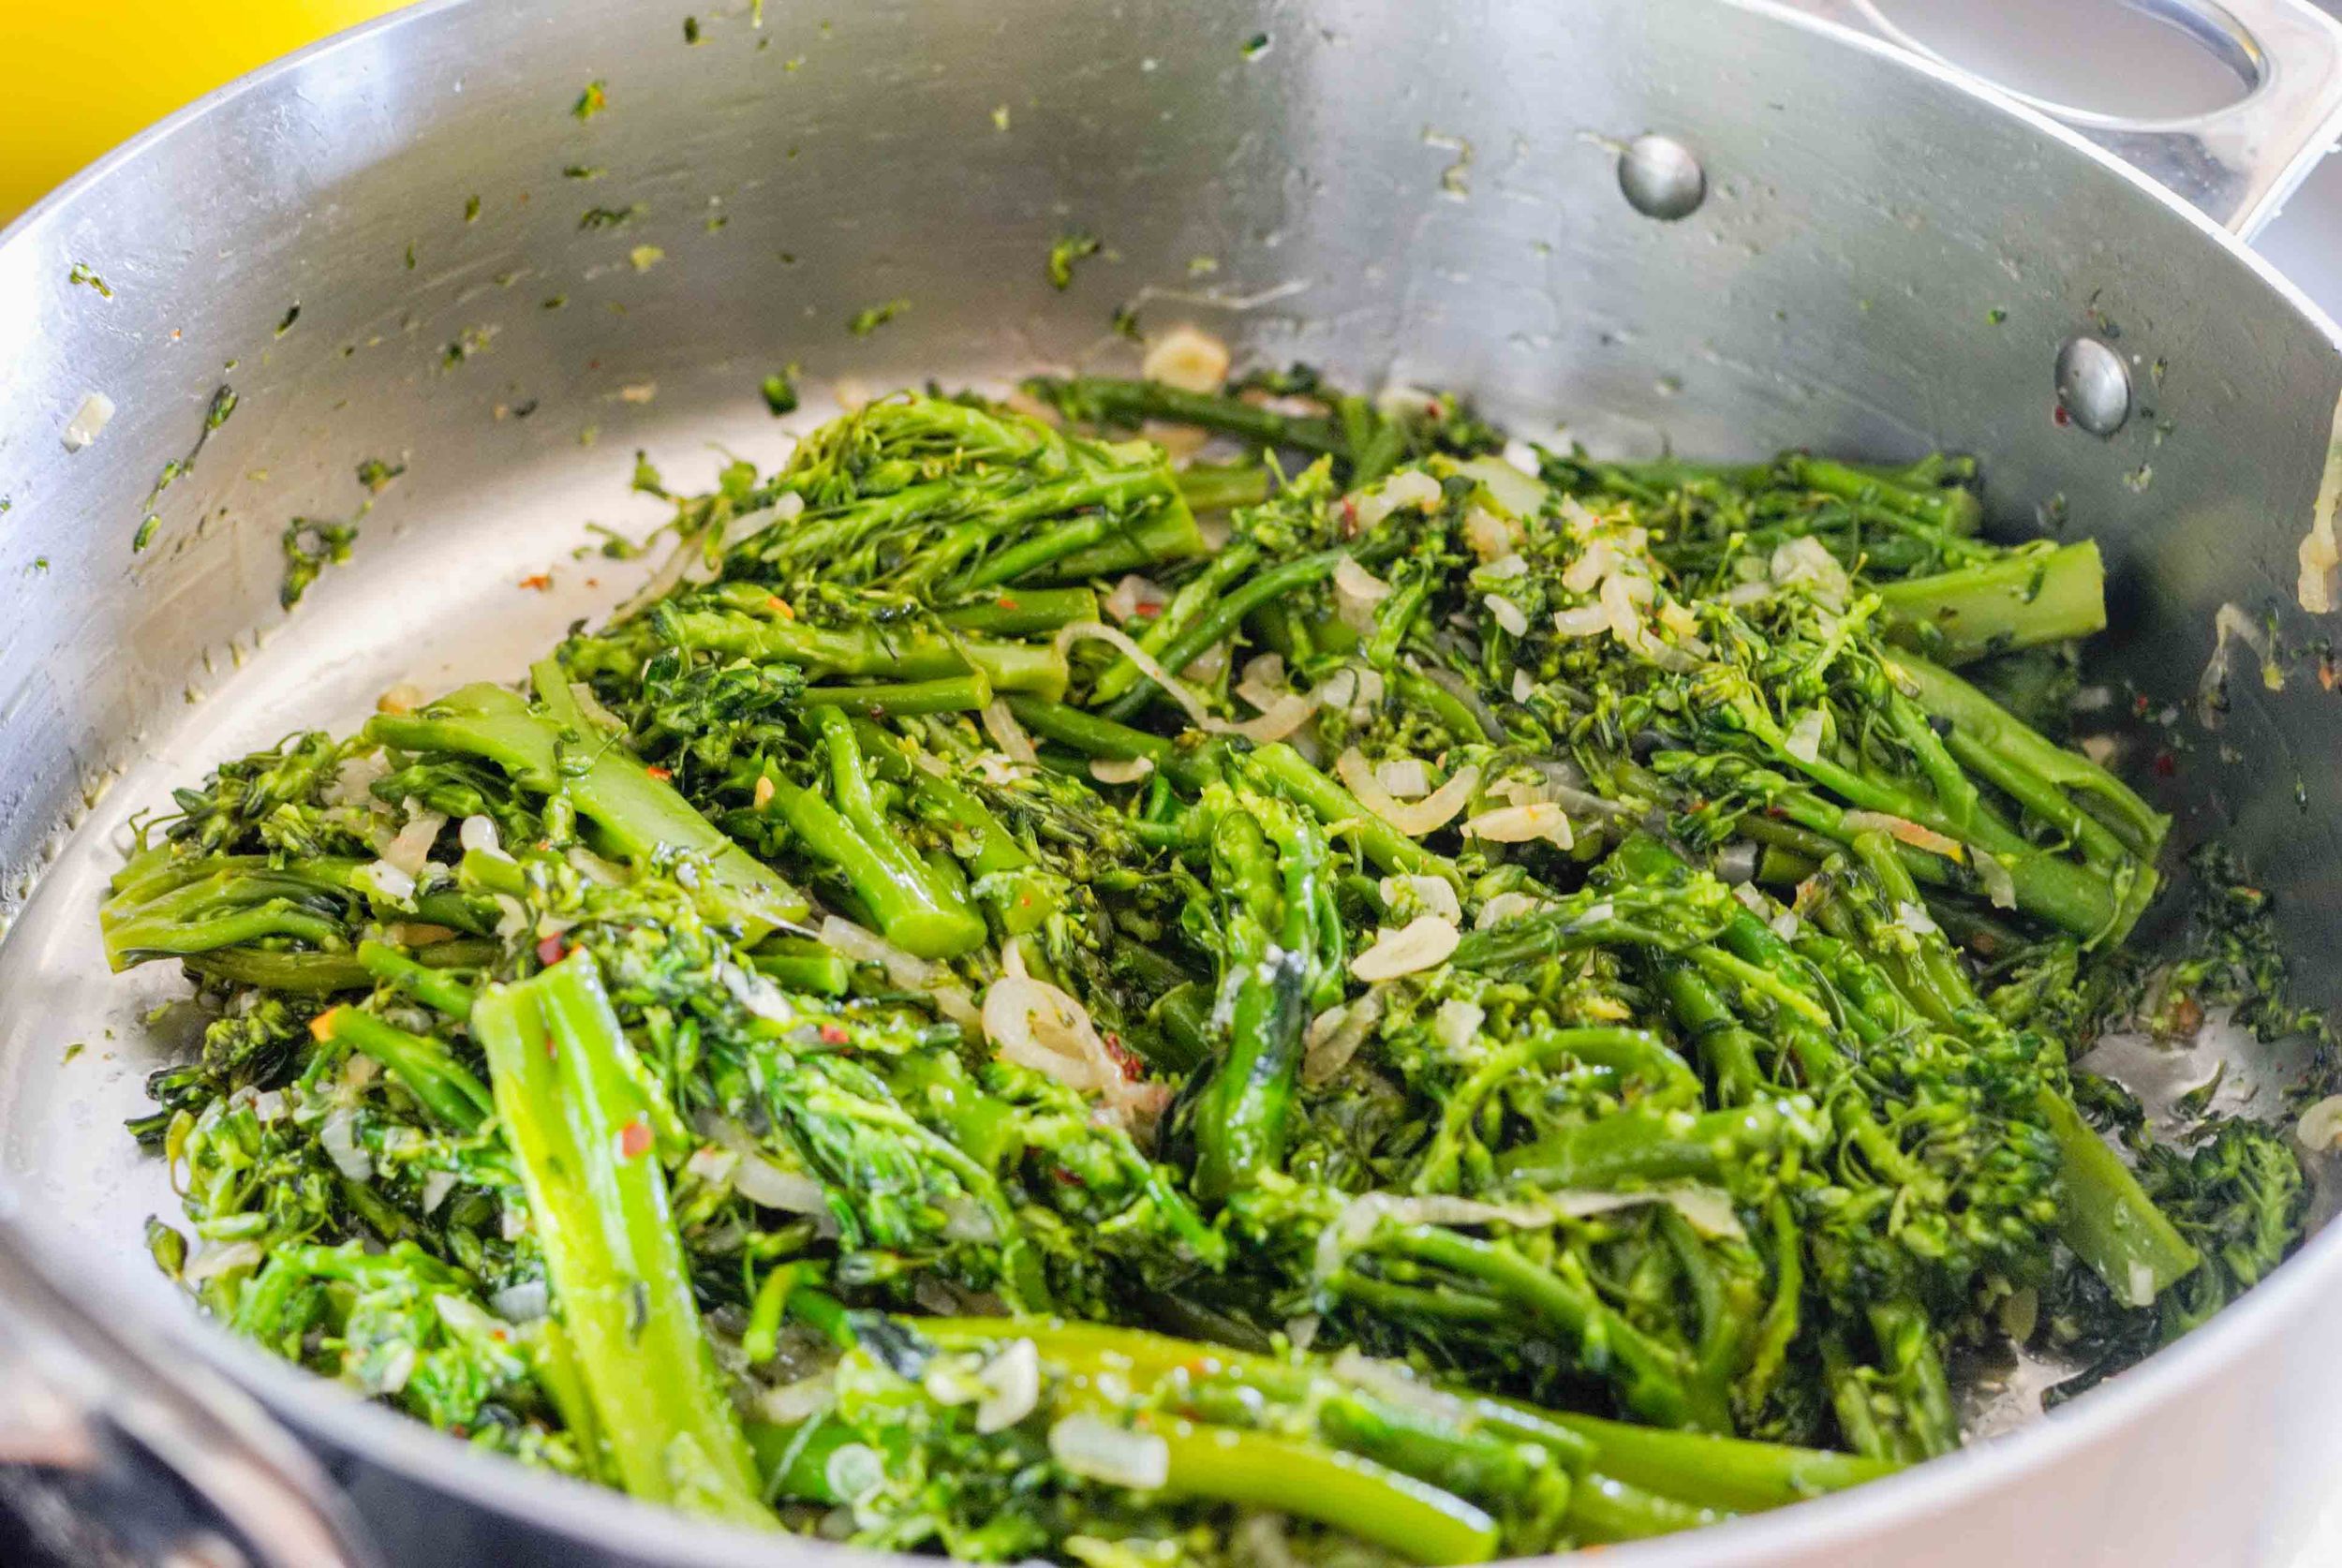
Add the broccolini and stir to combine. Cook on medium heat for 5-7 minutes, stirring occasionally, until tender and soft. Season with salt, and taste to adjust seasoning. Squeeze 1 tablespoon lemon juice on top of the broccolini to finish.

Assembling the sandwich
Slice sandwich rolls in half, drizzle with olive oil and, and toast until golden on a griddle or skillet. Set aside.

Drizzle skillet with remaining olive oil, and warm pork through, until some edges are brown and crisp.

Assemble sandwich by spooning broccolini on the bottom slice, then topping it with the supple and crisp pork. Place a slice of provolone on the pork and place under the broiler in your oven, until the cheese is melted. Devour immediately.

Slow-Roasted Pork with Crunchy Skin and Chimichurri Sauce by Amy Cantu

Print Friendly and PDF

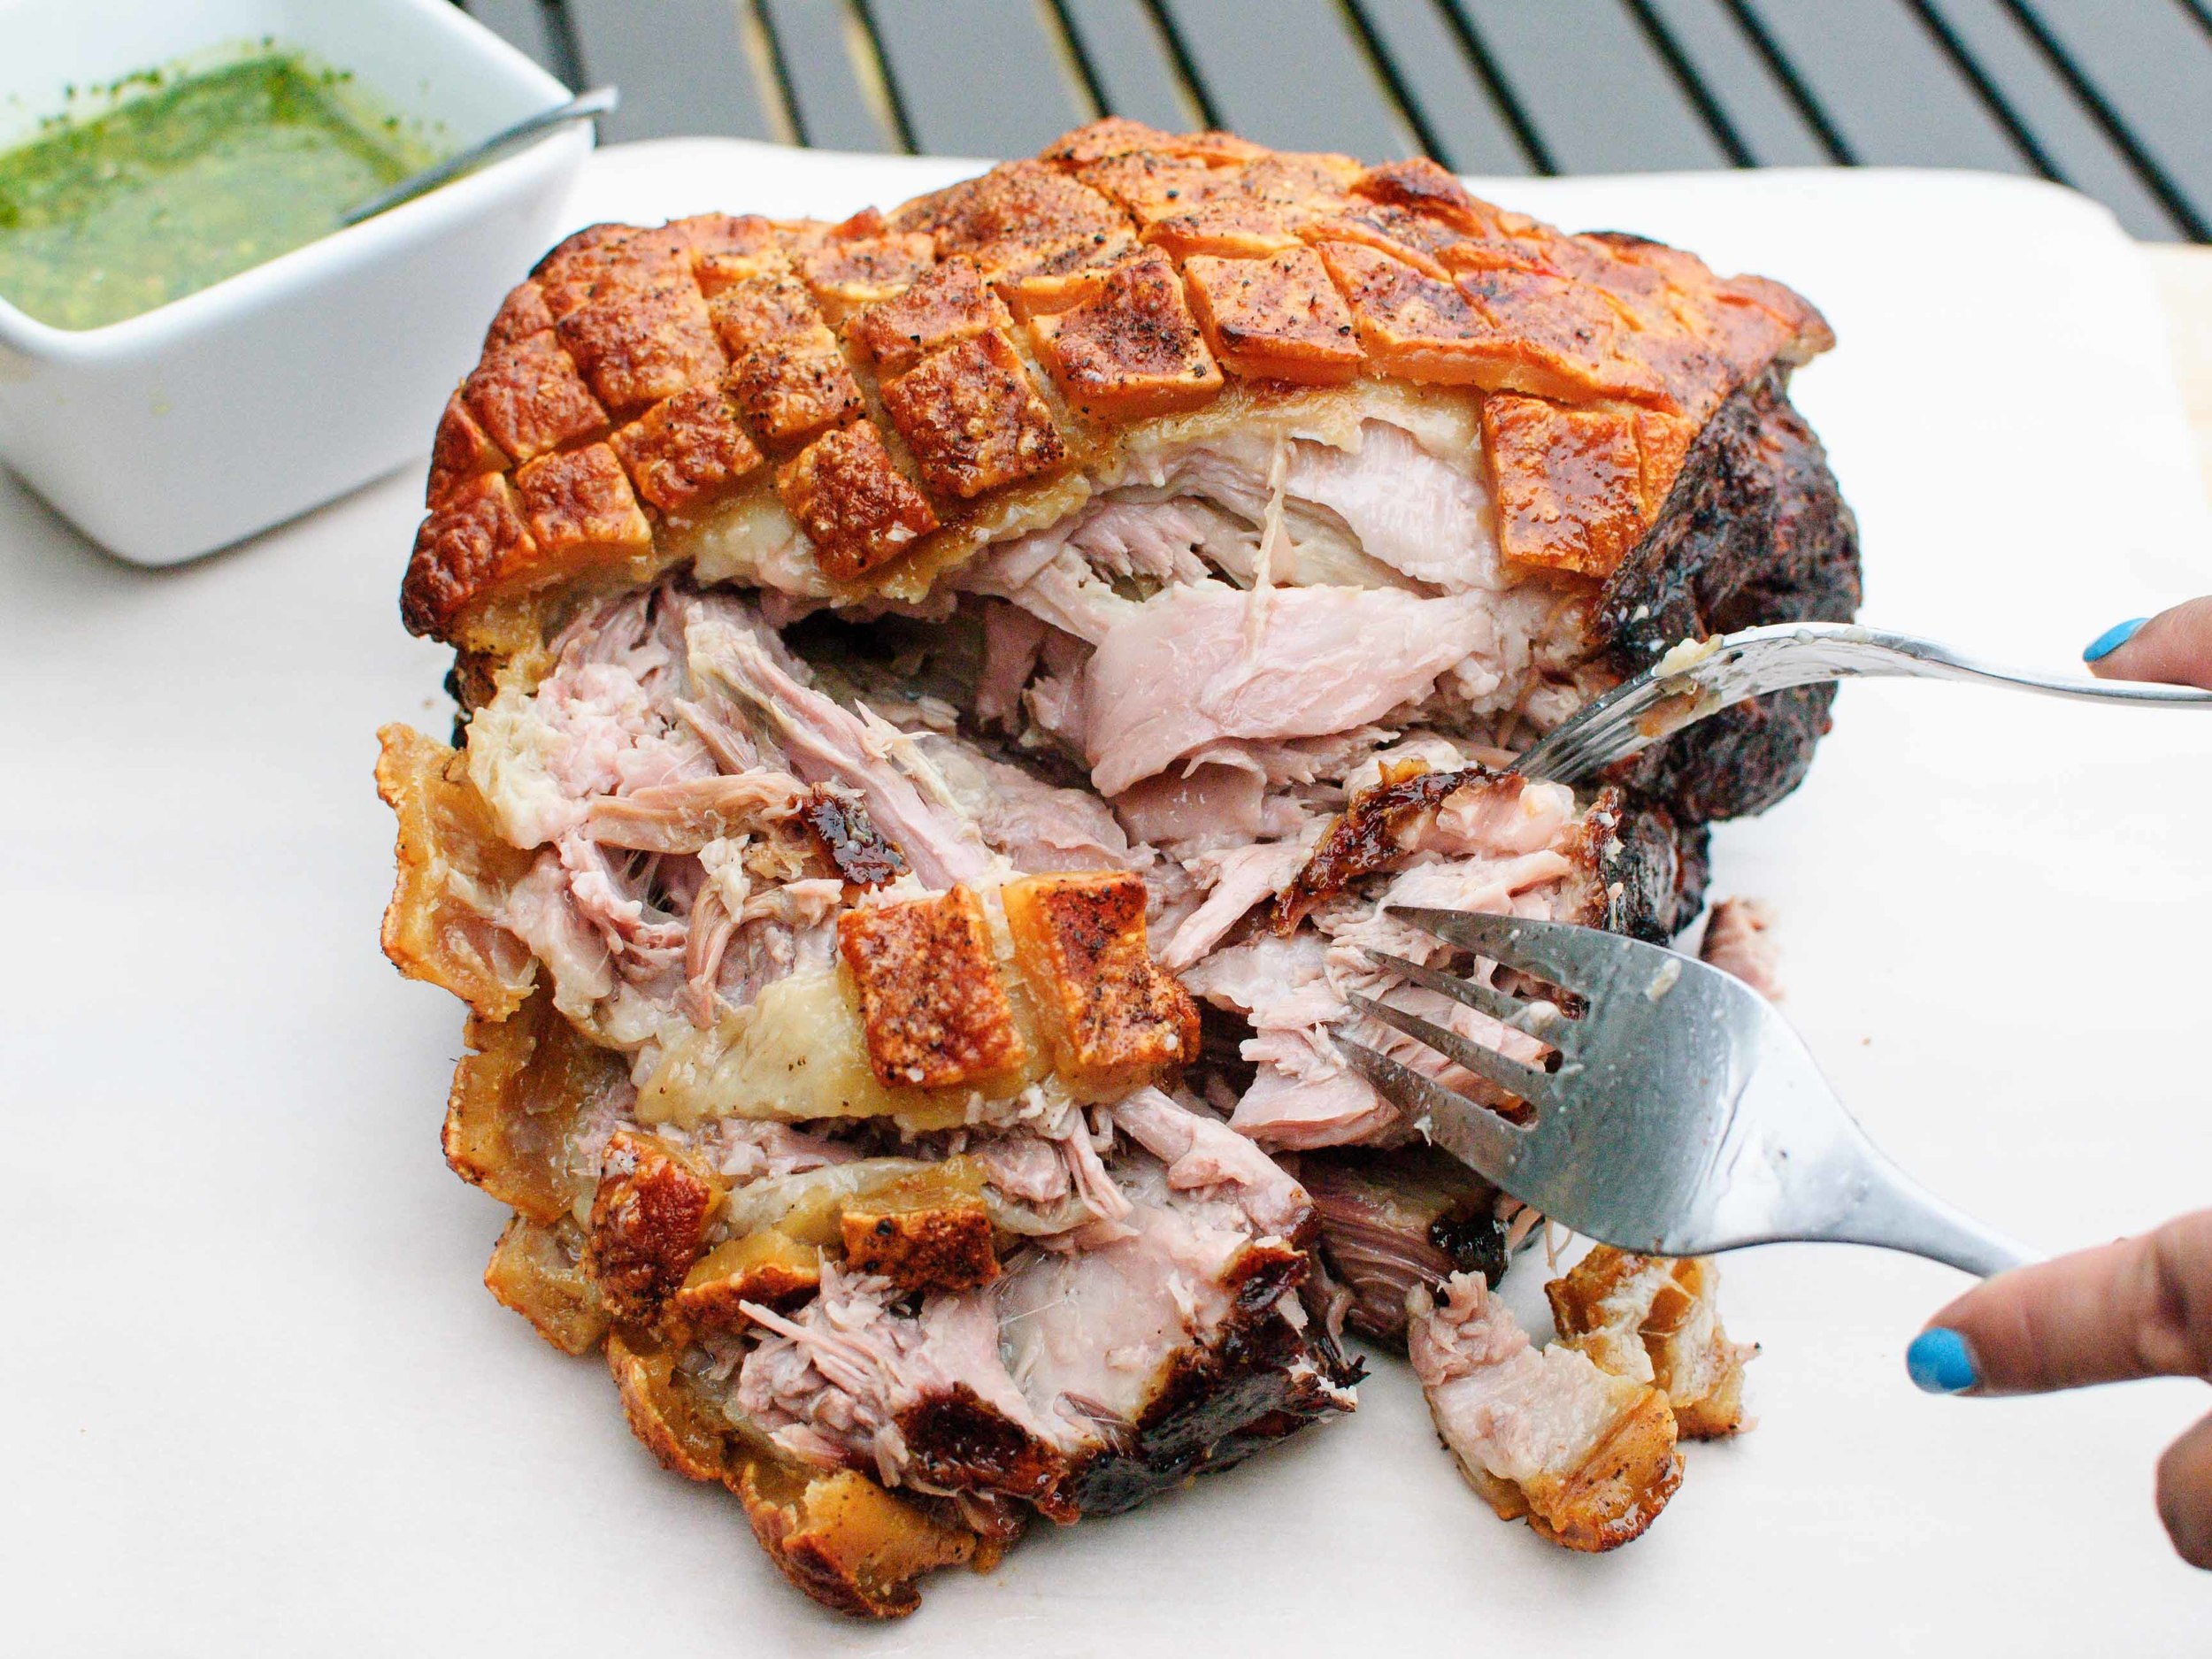
When faced with a very large, beautiful, bone-in, skin-on, fatty beast of a pork shoulder, do not be afraid. Revel in awe in its size, richness, and sacrifice to our privileged bellies. I gathered up my courage and treated this beast the best way I know how - with love and simplicity. I love pork so much. I especially love this slow-roasted, juicy, succulent, messy, pork shoulder complete with its crunchy, puffy, crackling skin. I really can't fully describe the love, joy, and pure elation that Cynthia and I felt, as we pulled this meat into thick shreds. I honestly just felt thankful. Thankful for the plentiful gifts of the pig. Thankful to have Cynthia to share it with. Thankful that Father's Day gave us an excuse to roast such a beast. As for the simplicity, just salt and pepper season this pork to allow all of its sweet, meaty flavor to shine through. I served it next to a bowl of bright green, tangy Chimichurri Sauce to cut through some of the pork's richness and contrast the slow-roasted flavors with fresh herbs. Even now, I breathe a deep, happy sigh at the thought of it.

Notes: I bought my pork from a butcher, so I asked for the skin to be scored and the meat tied (what you see in the photos below).  It never hurts to ask if the meat counter will do the same! Scoring the skin encourages crunchy pork skin (or pork rind), and it looks pretty. Tying the meat helps the roast keep its shape for even cooking. All of that said, it’s not totally necessary to score and tie the roast for great results, so don’t sweat it if you don’t feel like the hassle.
 
To score the skin on your own, use a really sharp knife or a clean box cutter to cut a diamond pattern into the skin. The cuts should go through the skin and into the fat, but not the meat. (See photos below for an example.)
 
No need to get fancy with tying the meat. Just use kitchen twine and tie the meat in 2-inch intervals. If you want to learn how to tie butcher knots, you can Google lots of tutorials.

This recipe is very simple and straightforward, but do notice that the cooking time has a wide range for a couple different reasons. 1) The time it takes for the meat to achieve the soft, shredding stage depends on the amount of fat and connective tissue. A thermometer is not super helpful here – check it with a fork to see if the meat is soft and giving. 2) This is a two-step process: Once the meat is cooked, the pork comes out of the oven to rest for at least 15 minutes, before going back into a very hot oven for another 20 minutes or so to crisp up the skin to its proper crunchy glory.

The seasoning on this pork roast is deliberately simple to allow for limitless options in the pork’s destiny. I have included a recipe for Chimichurri Sauce, which Cynthia and I used to judiciously dunk thick shreds of pork with our greasy fingers. (Forks were just getting in our way!) We also devoured Cynthia's Pork and Broccolini Sandwich made with this pork - so amazing. My family made various fun tacos with the leftover meat throughout the week. To reheat the meat, crisp the meat in either a hot pan (no extra oil needed), or in an oven/toaster oven at 400 degrees Fahrenheit for about 10 minutes. Some ideas: dollops of Pico de Gallo and Guacamole, topped with Harissa and plain yogurt, drizzled with spicy Korean Bi Bim Bap sauce, and heaped with Thai Cucumber-Peanut Relish. The pork recipe comes from the venerable Serious Eats, which has its own fun list of suggested sauces.


Time: 8-12 hours
Servings: 8-12
 
1 whole bone-in, skin-on pork shoulder, 8-12 pounds
Kosher salt
Black pepper, freshly ground

Set the oven rack to the middle position. Preheat the oven to 250 degrees Fahrenheit.

Line a rimmed baking sheeting with heavy-duty aluminum foil and set a wire rack inside it. Place a piece of parchment paper on top of the wire rack. (This prevents the pork from sticking to the wire rack.)
 
Optional: Score pork skin with a diamond pattern, using a very sharp knife or clean box cutter - cut through the skin and into the fat layer. Tie the meat in 2-inch intervals using kitchen twine.

Season the pork all over with a liberal shower of salt and pepper. Place skin-side up on top of the parchment paper.

Roast in the oven for 8-10 hours. Start checking for doneness at 8 hours, by twisting a fork into the meat – the fork should be met with little resistance.

Remove pork from oven, and let rest for 15 minutes and up to 2 hours with a piece of foil tented over it.
 
Preheat the oven to 500 degrees Fahrenheit. If the roast was tied, remove the string. Return the pork to the oven to crisp the skin.  Rotate the sheetpan every 5 minutes, for a total of about 20 minutes. The skin should be puffy and blistered, and you should be completely beside yourself with glee at this point!

Tame your beating heart, tent the pork with foil, and let rest for 15 minutes before serving. (And by serving, I really mean tearing into the meat and crunchy skin with your fingers and dunking the juicy morsels into your sauce of choice – see Notes.)

Recipe very slightly adapted from Serious Eats.

Chimichurri Sauce

½ cup packed fresh parsley leaves, washed and dried
½ cup packed fresh cilantro leaves, washed and dried
5 medium cloves garlic, peeled
2 tablespoons oregano leaves
½ shallot, roughly chopped
¼ cup red wine vinegar
1 teaspoon Kosher salt
¼ teaspoon red pepper flakes
½ cup extra-virgin olive oil

In the bowl of a food processor, pulse together parsley, cilantro, garlic, oregano, shallot, vinegar, salt, and pepper flakes until roughly chopped. With the motor running, drizzle in the olive oil, until just combined. Drizzle a little extra oil, if sauce seems too thick. Do not over-process – you should still see distinct flecks of herbs.

Alternatively, finely chop the herbs, garlic, and shallot. Combine chopped aromatics with vinegar, salt, and pepper flakes in a medium bowl. Whisk in olive oil, drizzling in extra if the sauce seems too thick. 

Use immediately or store up to 2 days in the refrigerator. (Also makes a great marinade.)

Korean Stewed Tofu with Green Onion Salad and Crisp Bacon by Cynthia Raub

Print Friendly and PDF

Notes: This recipe is easily made vegan or vegetarian by omitting the bacon garnish. 


Serves: 2-4
Time: 20 minutes

2 slices of bacon
1 tablespoon fermented bean paste (Korean dwen-jang is recommended but miso is fine, too.)
2 tablespoons gochujang (Korean fermented red pepper paste)
1 tablespoon soy sauce
1 tablespoon honey
1 tablespoon + 1 pinch gochugaru (Korean red pepper flakes) 
1 teaspoon black pepper, coarse ground
1 teaspoon kosher salt
1/4 cup onion, small dice
3 medium cloves of garlic, sliced thin
14 oz firm tofu, cut into 1/2" cubes
1/3 cup water
1 tablespoon sesame seed oil
3 medium green onions
2 teaspoons rice wine vinegar

Slice bacon into lardons, place in nonstick skillet and cook on medium heat until crisp and fat is rendered- about 7 minutes.

Meanwhile, in a small bowl add: fermented bean paste, gochujang, soy sauce, honey, coarse black pepper and kosher salt. Stir to combine, set aside. Cut onion into a small dice, slice garlic, and cube tofu- set aside.

Once the bacon is cooked, drain on a paper towel and drain all but 1 tablespoon of bacon fat from the pan. On medium high heat, add the onion and garlic and sweat until translucent.

Add tofu to the pan and turn heat up to high, lightly frying the tofu in the bacon fat. Toss and brown until heated through- about 3 minutes. Add the spicy sauce and 1/3 cup of water to the tofu, stirring gently to prevent breaking up the tofu. Cook on high for 4-6 minutes until sauce has thickened and coated the tofu. Turn off heat and drizzle tofu with sesame oil. 

Slice green onions on a bias and place in a small bowl. Dress the green onions with a pinch of gochugaru (red pepper flakes) and 2 teaspoons of rice wine vinegar.

Spoon tofu into a shallow bowl and garnish with dressed green onions and crisp bacon. Serve with white rice and devour immediately. 

Salted Maple-Oat Scones by Amy Cantu

Print Friendly and PDF

The first time I ever made these scones was in the year 2000, and I was still in college. I had just purchased Ina Garten's The Barefoot Contessa Cookbook on a whim because the full-page color photos called to me at the bookstore (this was before everyone bought everything on Amazon). I saw her "Maple-Oatmeal Scones" and immediately needed to bake them. Like right that moment. I had a big midterm paper due the next day, but I needed a study snack, right?! Yes. I really, really needed these scones. I had never made scones before - it was a bit daunting. I imagined hard, brown stones coming out of the oven, but the photo of the scones was so enticing, that I just had to try. They were not dry - instead, these Maple-Oat Scones were a tender, small miracle. They are at once earthy and decadent - the oats and whole-wheat flour provide extra "health", texture, and flavor; but the butter and maple syrup ensure that these scones are still an indulgent treat. The addition of coarse salt sprinkled on top balances out the sweet maple glaze. In good faith, I've tried baking other maple-oat scone recipes or sampling them at bakeries, but these are still the best ones that I've found. And for the record, they were also the perfect study snack: it helped me score a big fat "A" on that English midterm.

Notes: This recipe is an old, tried and true friend from my early days of cooking. Ina Garten's The Barefoot Contessa Cookbook was one of my early cookbook muses, with her easy-to-follow recipes, bright enthusiasm, and beautiful, large photos that convinced me that I could and needed to cook each recipe. The original recipe called for a sprinkle of raw oats on top for garnish, but I like the update of a sprinkling of coarse salt instead. The salty-sweet craze is one of my favorite food fads that I'm willing to embrace whole-heartedly, and it works perfectly with these scones!

I rarely have buttermilk just hanging out in the fridge, so I substitute with a mix of milk and vinegar. Stir 2 teaspoons of white vinegar or lemon juice into 1/2 cup of milk (or 1 tablespoon vinegar and 1 cup milk) and let sit for a minute or two, until slightly thickened. Voila - "buttermilk" for use in baked goods and pancakes!

Lastly, this recipe makes a lot of scones. Ina's original recipe suggest 14 (very) large scones, but I find that it makes more like 20 medium scones. I have adjusted the baking time for the smaller size, but if you want to make mini scones, reduce the baking time by a few minutes, or if making the large size, add a few minutes. The fully baked scones (without the glaze) can be cooled to room temperature and frozen. Reheat frozen scones in a 350 degree Fahrenheit oven for 8-10 minutes (mini scones may only need 5-8 minutes). Unbaked scones can also be frozen - place on a baking sheet and freeze until solid (about 1 hour). Transfer to an airtight container to store in the freezer. To bake, pop as many frozen scones as needed onto a baking sheet and add an extra 5 minutes or so to the baking time. Don't forget to glaze them after they come out of the oven!


Read More: The Shared Scones


Time: 1 hour
Yield: About 20 scones

For the Scones:
3 1/2 cups all-purpose flour
1 cup whole-wheat flour
1 cup quick-cooking oats
2 tablespoons baking powder
2 tablespoons granulated sugar
2 teaspoons salt
1 pound cold unsalted butter, diced
1/2 cup cold buttermilk
1/2 cup pure maple syrup (preferably grade B)
4 eggs, lightly beaten
1 egg beaten with 1 tablespoon milk or water, for egg wash
Maple Glaze (see recipe below)
Coarse salt for sprinkling on top (such as Fleur de Sel, Sel Gris, or Coarse Sea Salt)

Preheat the oven to 400 degrees F.

In the bowl of an electric mixer fitted with a paddle attachment, combine the flours, oats, baking powder, sugar and salt.

Blend the cold butter in at the lowest speed and mix until the butter is in pea-size pieces.

Combine the buttermilk, maple syrup and eggs and add quickly to the flour-and-butter mixture. Mix until just blended. The dough will be sticky.

Dump the dough out onto a well-floured surface and be sure it is combined. Flour your hands and a rolling pin and roll the dough 3/4 to 1 inch thick. You should see lumps of butter in the dough.

Cut into 3-inch rounds with a plain or fluted cutter and place on a baking sheet lined with parchment paper.

Brush the tops with egg wash. Bake for 15 to 20 minutes, until the tops are crisp and the insides are done.

When the scones are done, cool for 5 minutes and drizzle each scone with 1 tablespoon of the Maple Glaze (recipe below). Sprinkle a bit of coarse salt on the top, for garnish. The warmer the scones are when you glaze them, the thinner the glaze will be.

Maple Glaze

1 1/4 cups confectioners' sugar
1/2 cup pure maple syrup (preferably grade B)
1 teaspoon pure vanilla extract

To make the glaze, combine the confectioners' sugar, maple syrup and vanilla. 

Rosemary-Cheddar Scones by Amy Cantu

Print Friendly and PDF

Scones seem like a special treat in a way that muffins seem ordinary. Don't get me wrong, I will never turn down a good muffin, but a scone is a bakery good that I eat slowly and savor with a big mug of coffee or tea. (I can't be bothered with those dainty tea cups at home.) These Rosemary-Cheddar Scones are stuffed with little cubes of cheddar cheese that ooze out when baked to form lacy, crunchy bits of crispy cheese around the scone. This might be my favorite part. It's like the bit of crunchy cheese that's left at the bottom of a fondue pot, or the cheese that escapes a grilled cheese sandwich onto the griddle. The Rosemary-Cheddar Scone itself is moist and tender, flecked with bits of fragrant rosemary, and happily cheesy. (Please don't compare these to the dry hockey puck scones that seem to be everywhere. Those scones are an abomination and should be banned from being sold.) Getting me up in the morning is like waking a sleeping monster, but this monster absolutely will get up early to bake these scones, because the results are so worth it!

Notes: This recipe is an old, tried and true friend from my early days of cooking. Ina Garten's The Barefoot Contessa Cookbook was one of my early cookbook muses, with her easy-to-follow recipes, bright enthusiasm, and beautiful, large photos that convinced me that I could and needed to cook each recipe. The original recipe called for dill, but I have substituted any fresh herb that I have hiding in the fridge - rosemary, chives, thyme, tarragon, etc. are all delicious. I happen to have an enormous rosemary bush in the backyard, so it's a convenient choice for me! Other delicious add-ins could be bacon bits, peeled and diced apple, jalapeño pepper, sun-dried tomatoes, or corn. You can also vary the type of cheese - brie, gruyere, mozzarella, jack . . . the possibilities are endless.

Lastly, this recipe makes a lot of scones. Ina's original recipe suggest 16 (very) large scones, but I find that it makes more like 24 medium scones. I have adjusted the baking time for the smaller size, but if you want to make mini scones, reduce the baking time by a few minutes, or if making the large size, add a few minutes. The fully baked scones can be fully cooled and frozen. Reheat frozen scones in a 350 degree Fahrenheit oven for 8-10 minutes (mini scones may only need 5-8 minutes). Unbaked scones can also be frozen - place on a baking sheet and freeze until solid (about 1 hour). Transfer to an airtight container to store in freezer. To bake, pop as many frozen scones as needed onto a baking sheet and add an extra 5 minutes or so to the baking time.


Read More: The Shared Scones


Time: 45 minutes
Yield: About 24 scones
 
4 cups plus 1 tablespoon all-purpose flour, divided
2 tablespoons baking powder
2 teaspoons salt
3/4 pound cold unsalted butter, diced
4 eggs, beaten lightly
1 cup cold heavy cream
1/2 pound extra-sharp yellow Cheddar, small-diced
1/3 cup minced fresh rosemary leaves
1 egg beaten with 1 tablespoon water or milk, for egg wash

Preheat the oven to 400 degrees F.

Combine 4 cups of flour, the baking powder, and salt in the bowl of an electric mixer fitted with a paddle attachment. 

Add the butter and mix on low speed until the butter is in pea-sized pieces. Mix the eggs and heavy cream and quickly add them to the flour-and-butter mixture. Combine until just blended.

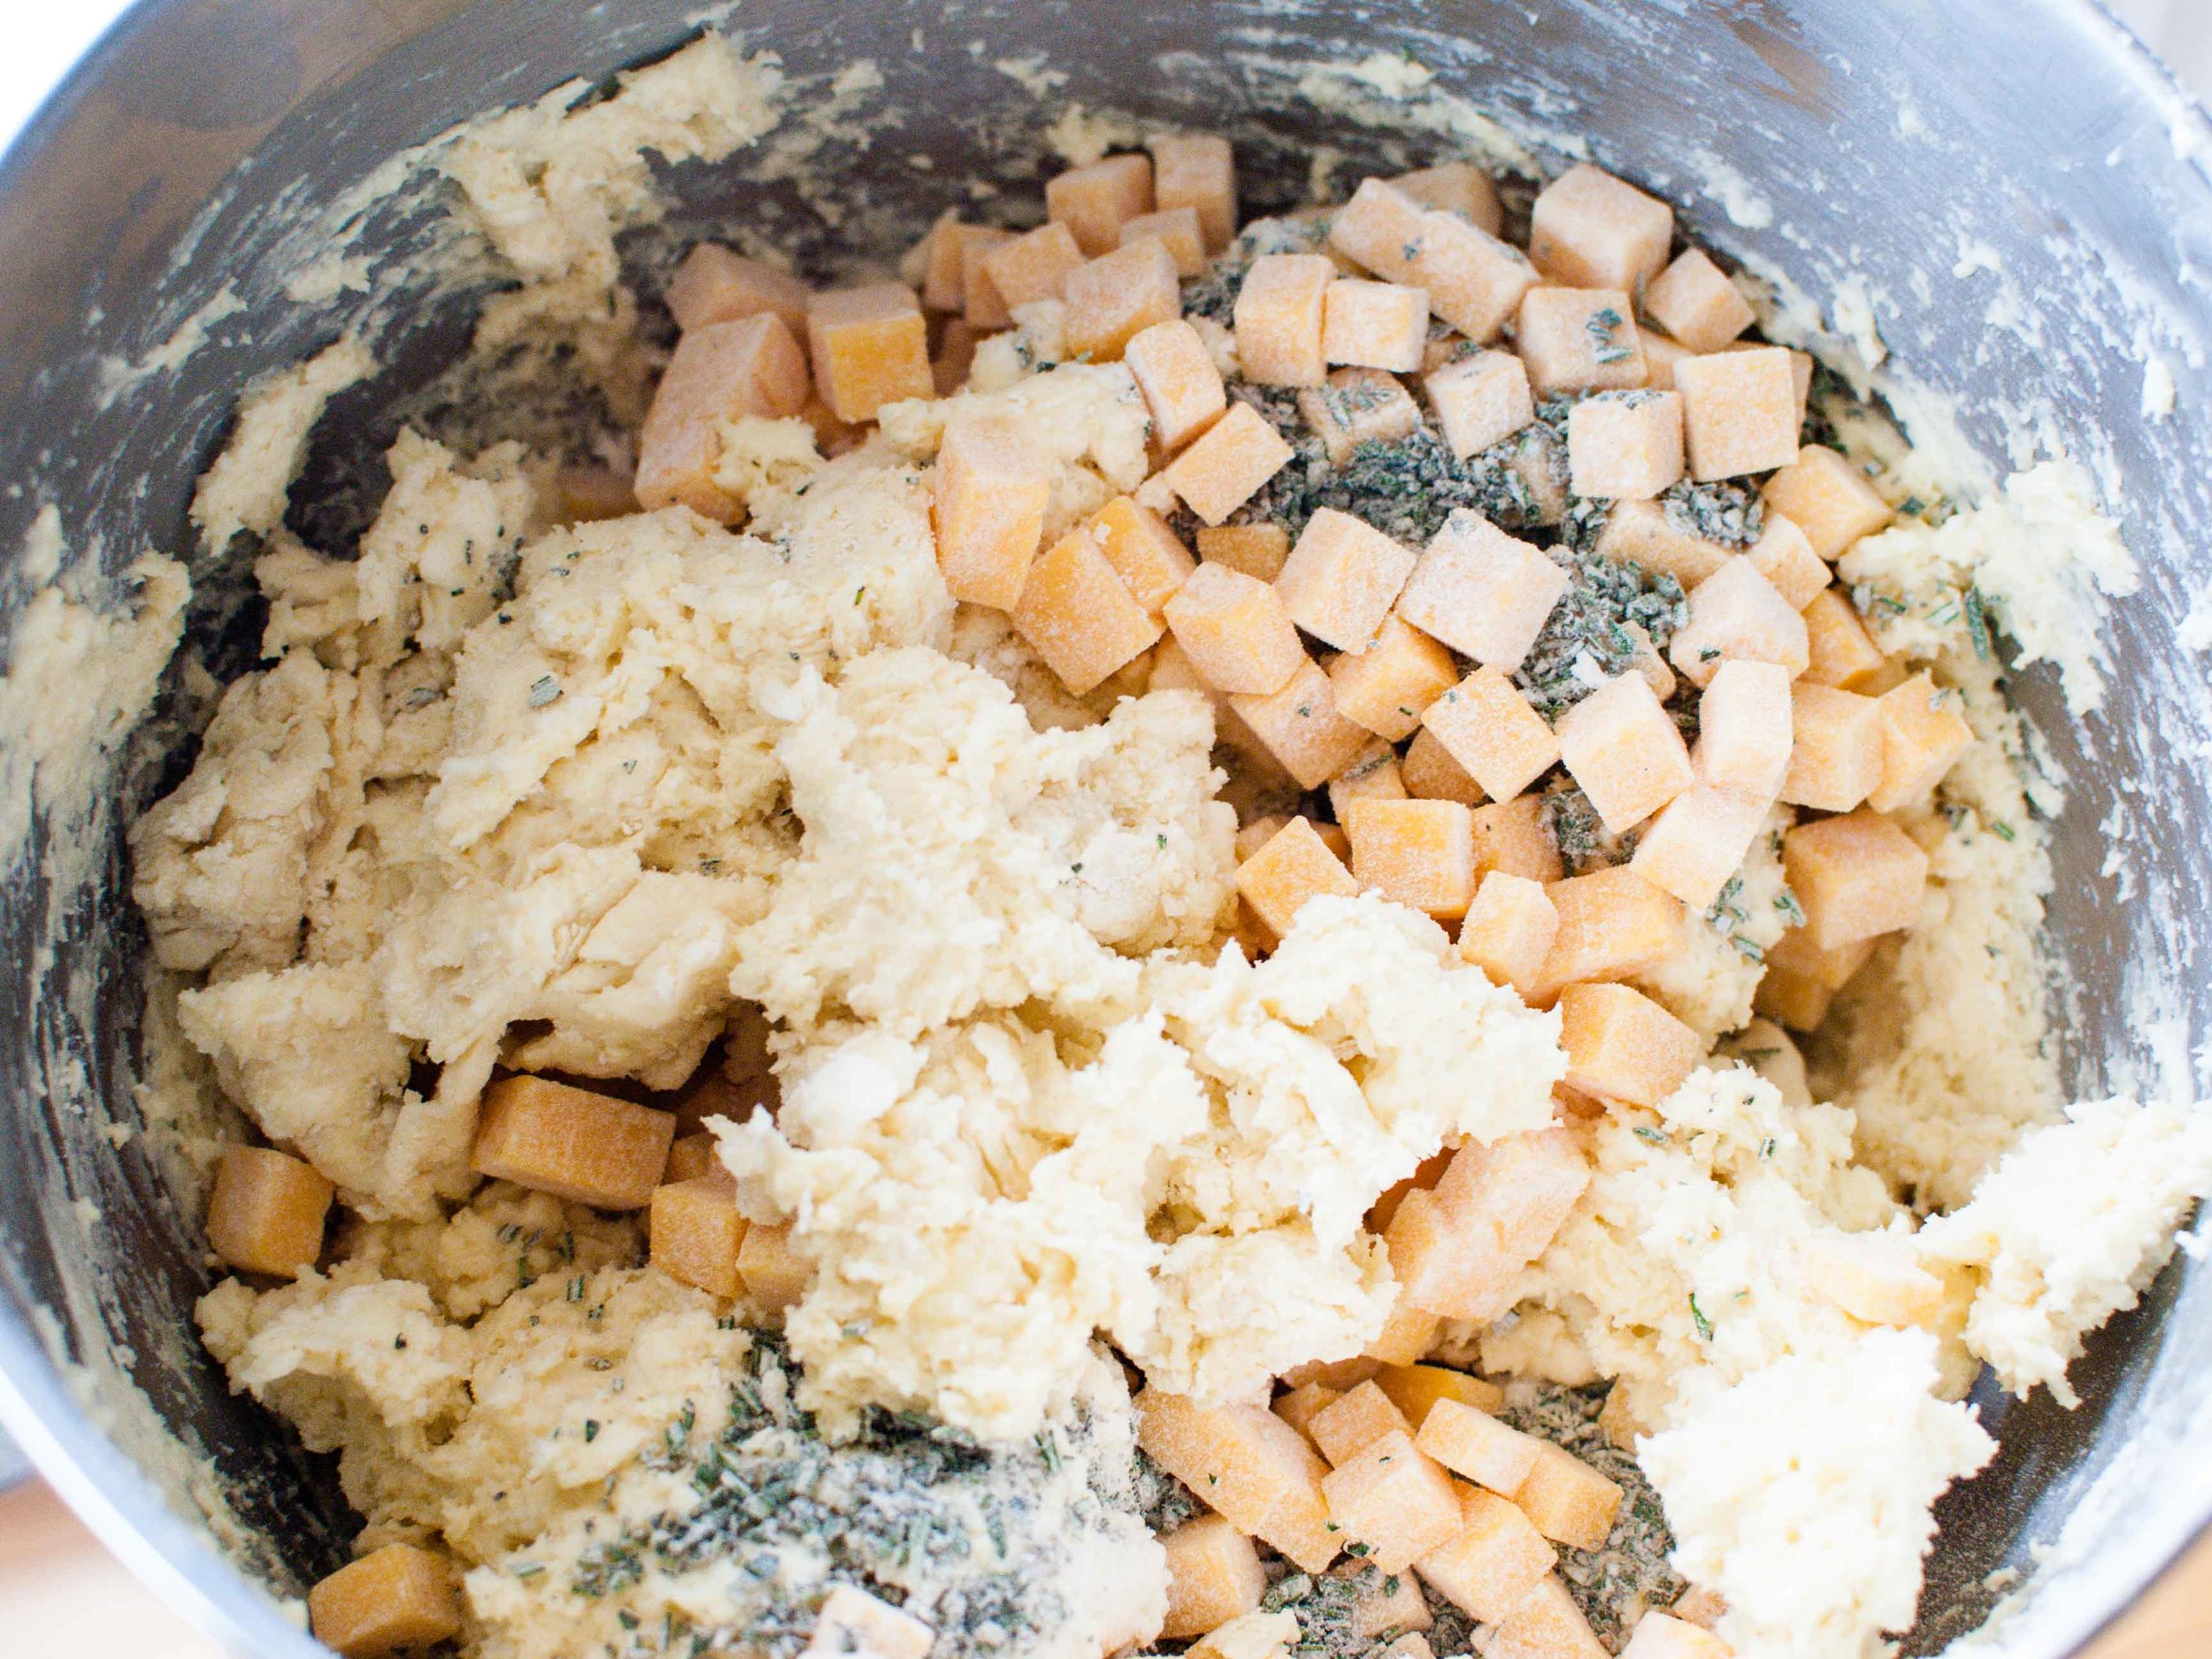
Toss together the Cheddar, rosemary, and 1 tablespoon of flour and add them to the dough. Mix until they are almost incorporated.

Dump the dough onto a well-floured surface and knead it for 1 minute, until the Cheddar and rosemary are well distributed.

Roll the dough 3/4-inch thick. Cut into 3-inch squares and then in half diagonally to make triangles. Brush the tops with egg wash.

Bake on a baking sheet lined with parchment paper for 15 to 20 minutes, until the outside is crusty and golden, and the inside is fully baked.

Bi Bim Bap with Beef and Spicy Sauce by Cynthia Raub

Print Friendly and PDF
Bi Bim Bap with Beef and Spicy Sauce (Korean Mixed Rice)

I love the Perfect Bite. Salty, a hint of acid, some sweetness, something crunchy, something soft, and a little chew all comprised of vegetables, carbs and protein. This is why I love sandwiches, loaded nachos, burritos or rice salads! Last week, I shared Ottolenghi's Rice Salad with Nuts and Sour Cherries. Similar to that recipe, bi bim bap (translated from Korean it means "mixed rice") has multiple facets, steps, and ingredients that come together to make a delicious bowl of food. The cold vegetables temper the steaming hot rice and beef, which is bound by a luscious and sticky egg yolk. Each heaping spoonful is balance of cold, hot, crunch, soft, sweet, salt and heat. This dish may take a bit of preparation and organization, but don't let that dissuade you from making it! I like to make bi bim bap in large quantities as it stores well in the fridge for a few days. It can then be thrown together from the fridge in the amount of time that it takes you to fry an egg.

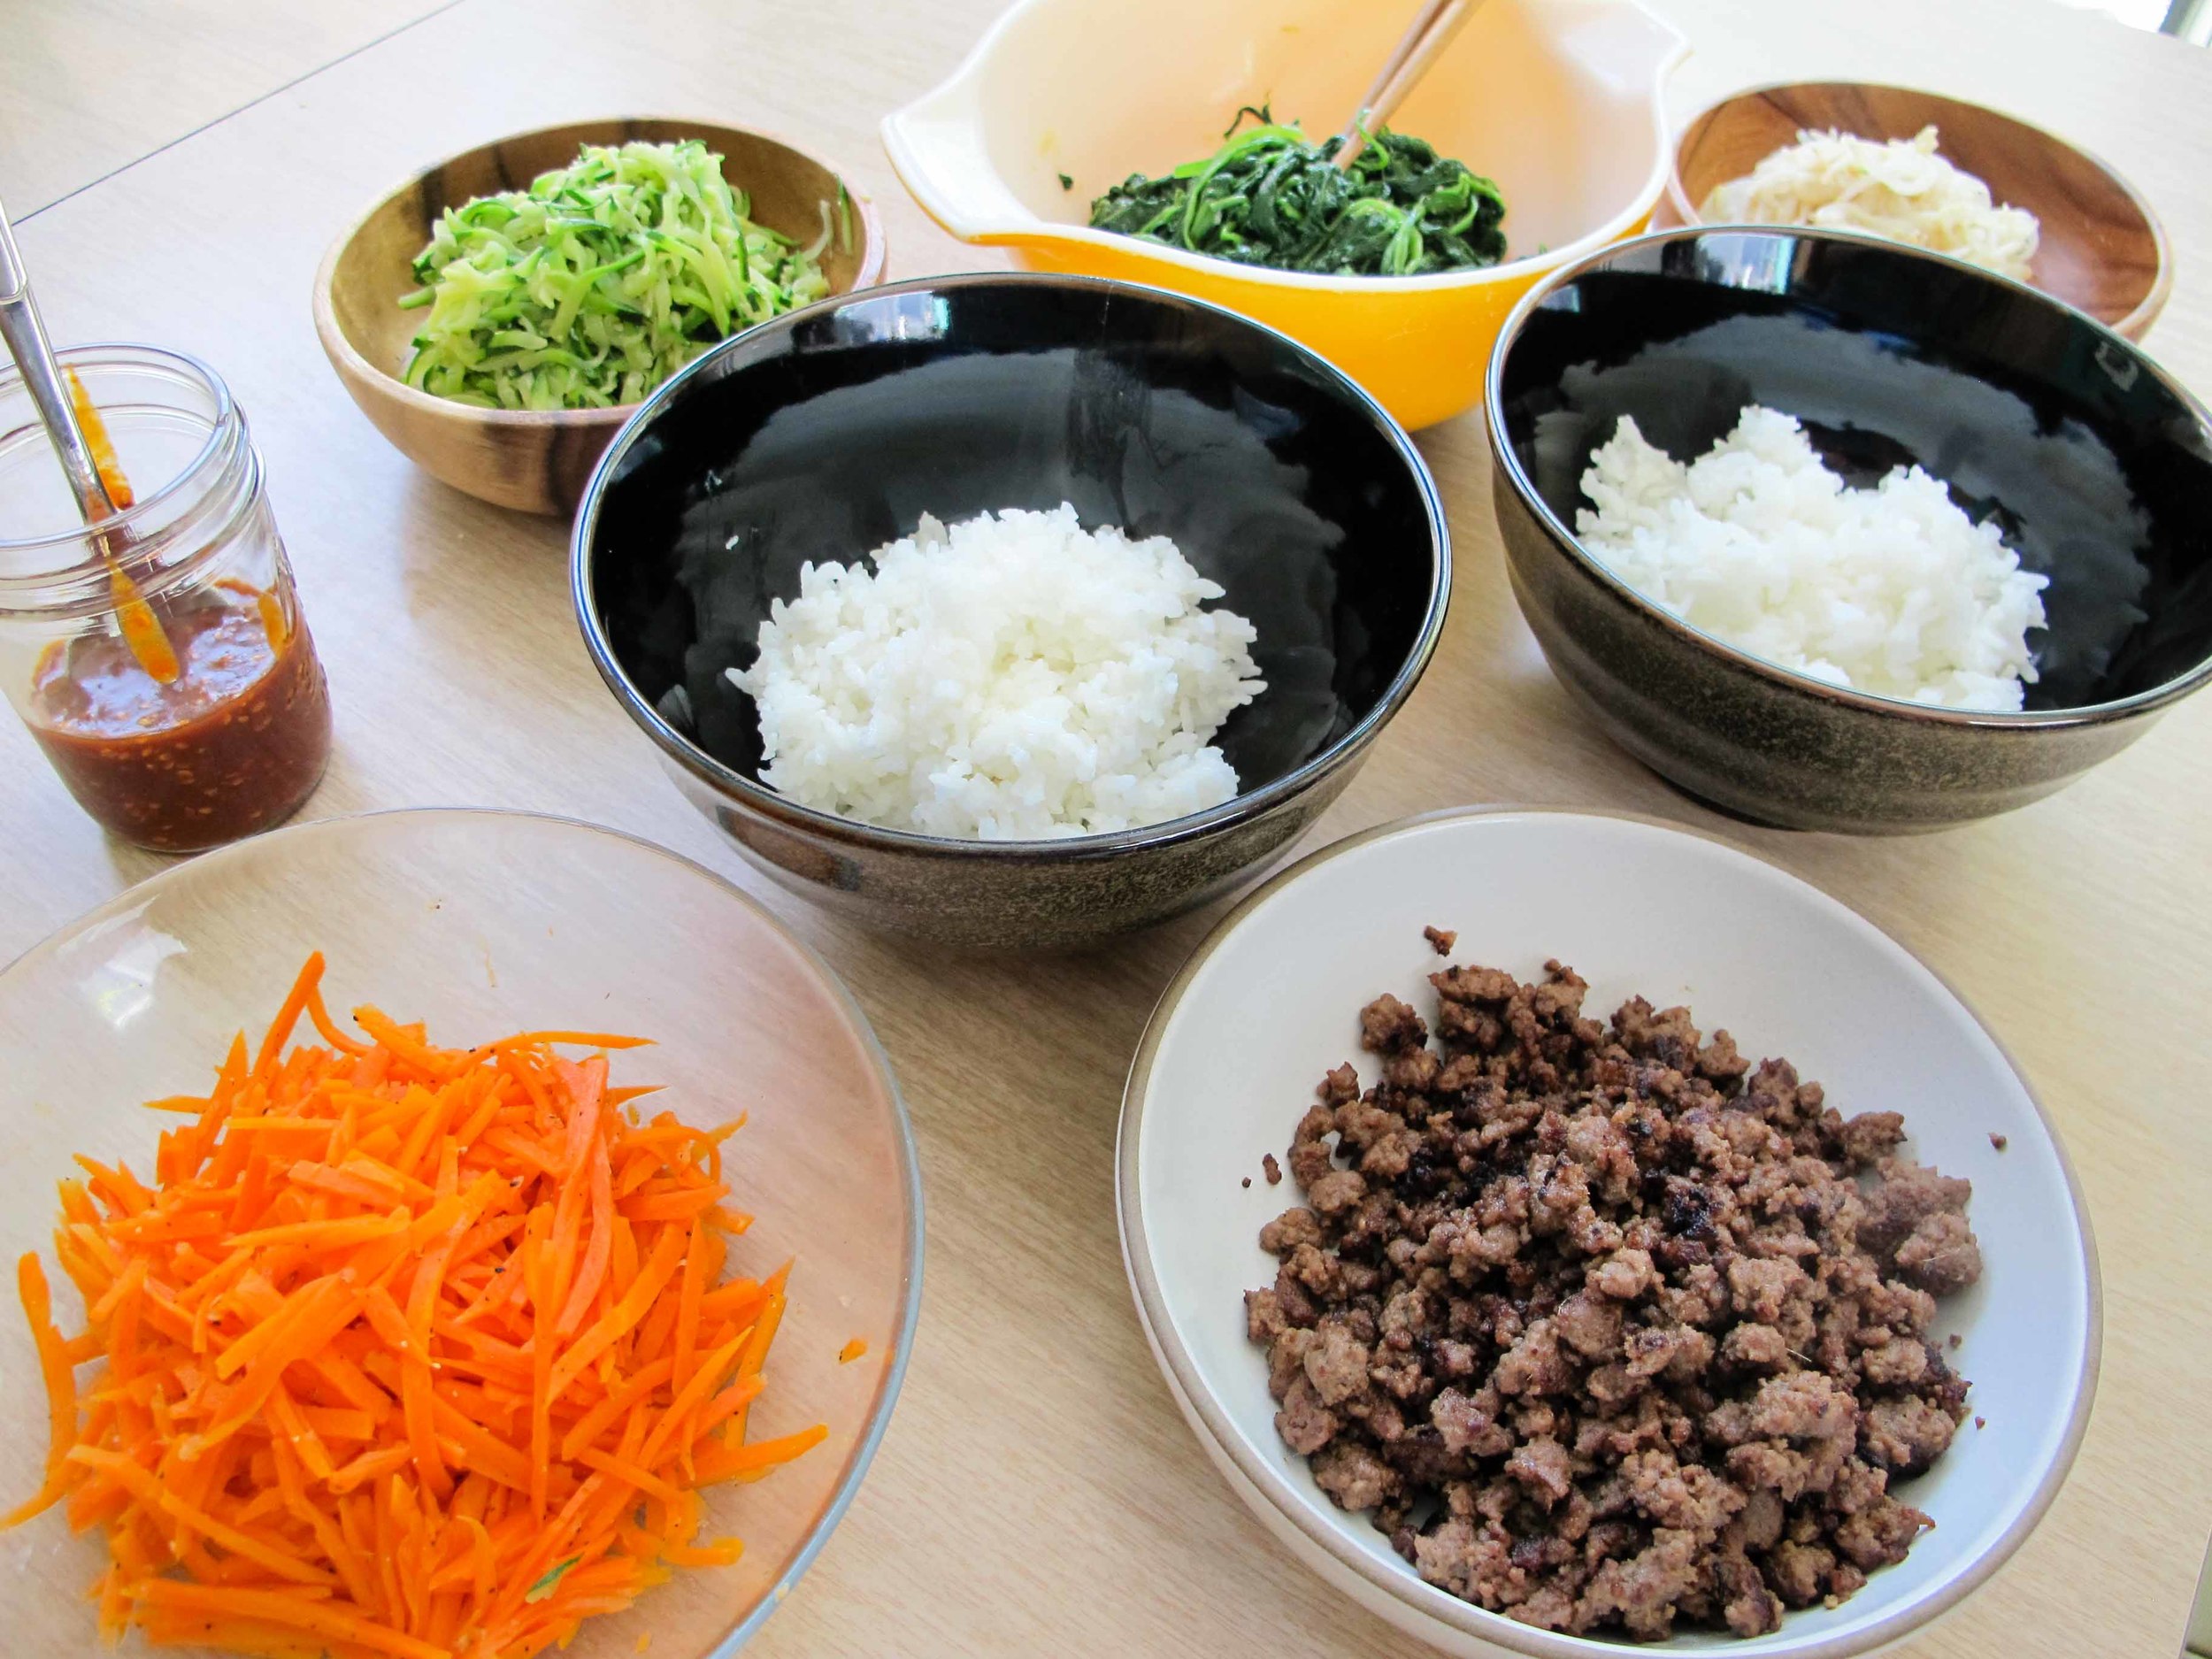
Notes: In this recipe I am using and preparing very common vegetables to make a delicious bi bim bap (Korean mixed rice). But to make your own, the vegetable world is your oyster. You can include: sautéed mushrooms, lightly pickled radish, or kale instead of spinach . . . the possibilities are endless! The beauty of this dish is it's inherent flexibility. When storing the different vegetables, it's best to store each vegetable by itself. This way, when you go to make a bowl from the fridge, the vegetables keep their individual characteristics even when they are eventually mixed together. My mom always reminds me to not aggressively season the vegetables, so I'm going to tell you the same thing. This dish is most harmonious when the vegetables are a tad under seasoned to delicately balance the rich egg yolk, spicy sauce and flavorful beef.

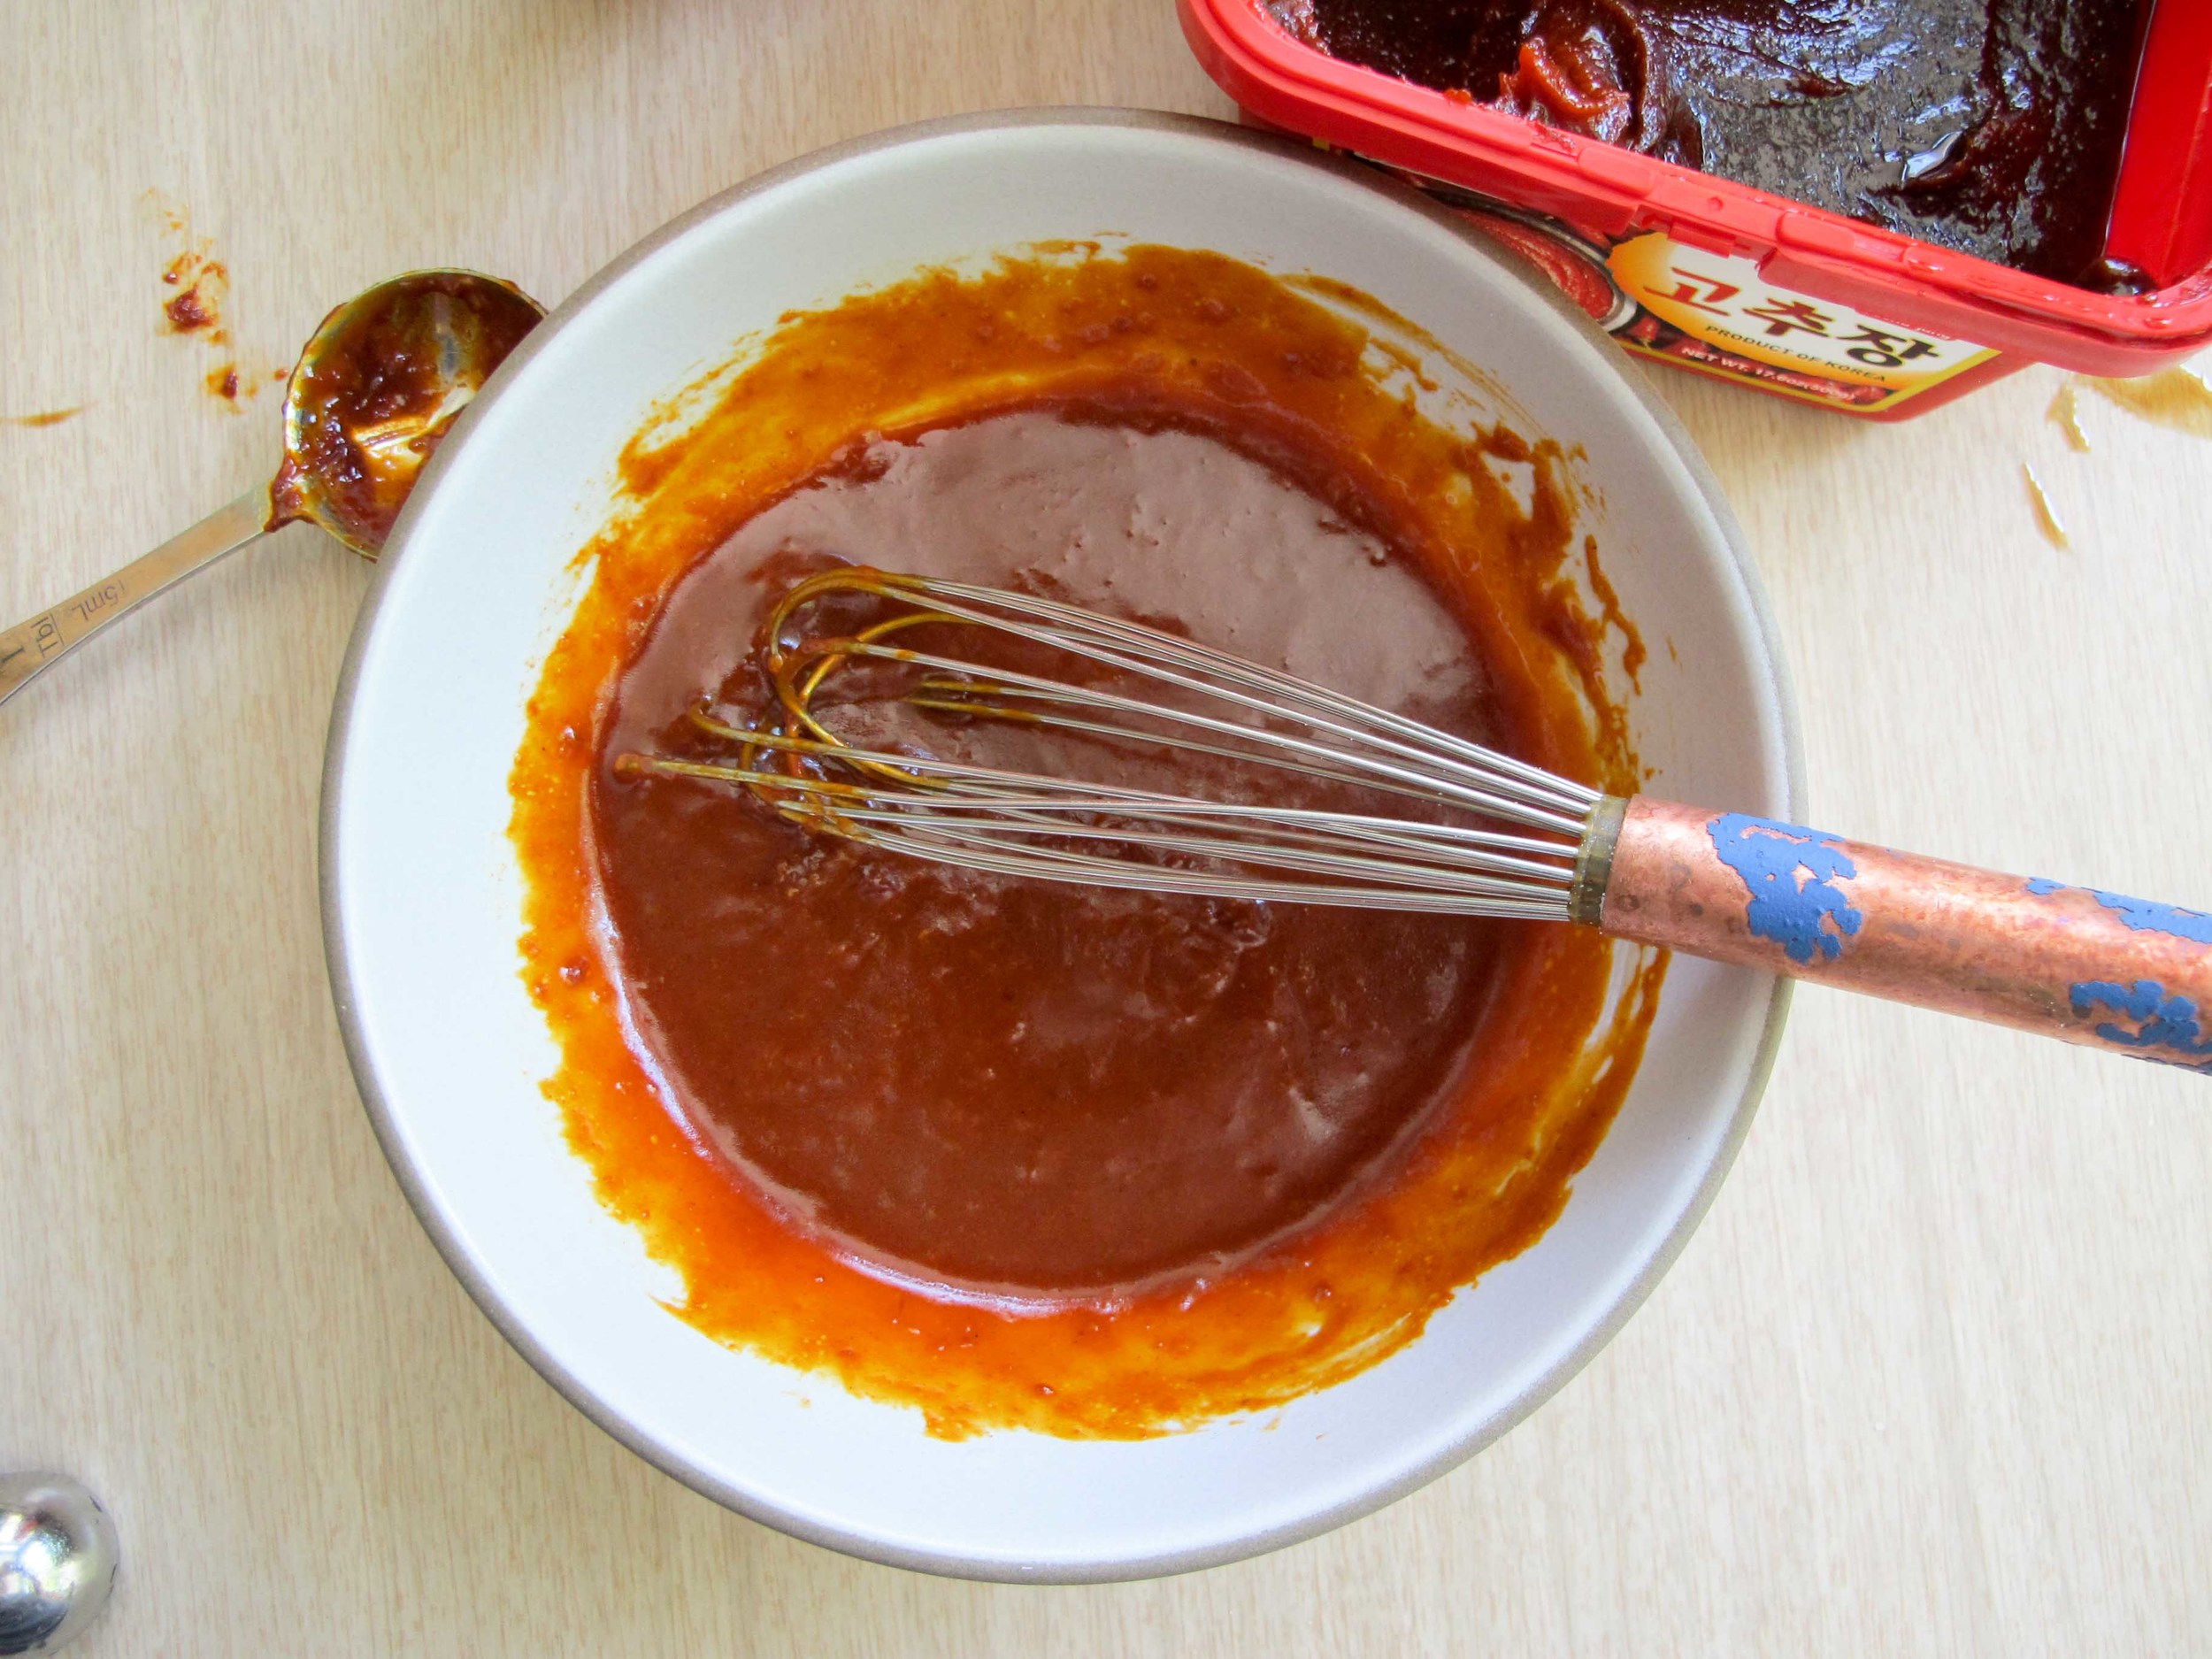
Additionally, the bi bim bap sauce recipe I've shared is a versatile sweet and spicy condiment that is delicious and addictive. It's sweeter and less acidic than sriracha, making it a great addition to your hot sauce arsenal. Gochujang, used in the bi bim bap sauce recipe, is a Korean fermented chili paste (kind of like a spicy miso paste), that can be found in the refrigerated section of most Asian supermarkets. 


Serves: 4
Time: 1 hour

For the Marinated Beef
1 pound ground beef
4 garlic cloves
1/2 yellow onion
1" piece of peeled ginger
6 tablespoons soy sauce
1 tablespoon roasted sesame oil
1 tablespoon vegetable oil
3 tablespoon light brown sugar or honey
1 teaspoon black pepper
1 teaspoon kosher salt

Combine all of the ingredients in a blender or food processor and liquify. Place beef in a large bowl and add marinade, combining until well incorporated. Cover and keep in the refrigerator until ready to cook. Marinate for at least 30 minutes up to 2 hours.

Bi Bim Bap Sauce (fermented red pepper paste sauce)
2 tablespoons gochujang (Korean chile paste, found in most Asian markets)
1 teaspoon kosher salt
1 tablespoon rice vinegar
2 cloves garlic, minced
1 tablespoon toasted sesame seeds
2 tsp honey
1 teaspoon sesame oil

Combine all of the ingredients in a medium bowl, whisk to combine, taste to adjust seasoning and set aside.

For the Bi Bim Bap
2 medium zucchini, julienned
12 oz mung bean sprouts
3 carrots, julienned
2 small bunches of spinach (standard size, not baby), washed with root ends trimmed
3 tablespoons sesame seed oil
1 tablespoon vegetable oil
Pinch of sugar
3 teaspoons kosher salt (divided)
2 teaspoons crushed garlic (divided)

To Serve
4 cups of prepared rice (short grain white rice is traditional, but brown rice would be delicious, too!)
4 eggs
Bi Bim Bap Sauce (recipe above)
Marinated Beef (recipe above)

Bring a large pot of water to a boil. Place julienned zucchini in the boiling water for about one minute until cooked through. Remove the zucchini (delicately with tongs or a strainer) and plunge it into an ice bath. Remove, strain well and set the zucchini aside in a small bowl. Dress with 1 heaping teaspoon of kosher salt and 1 tablespoon of sesame seed oil. Taste and adjust seasoning.

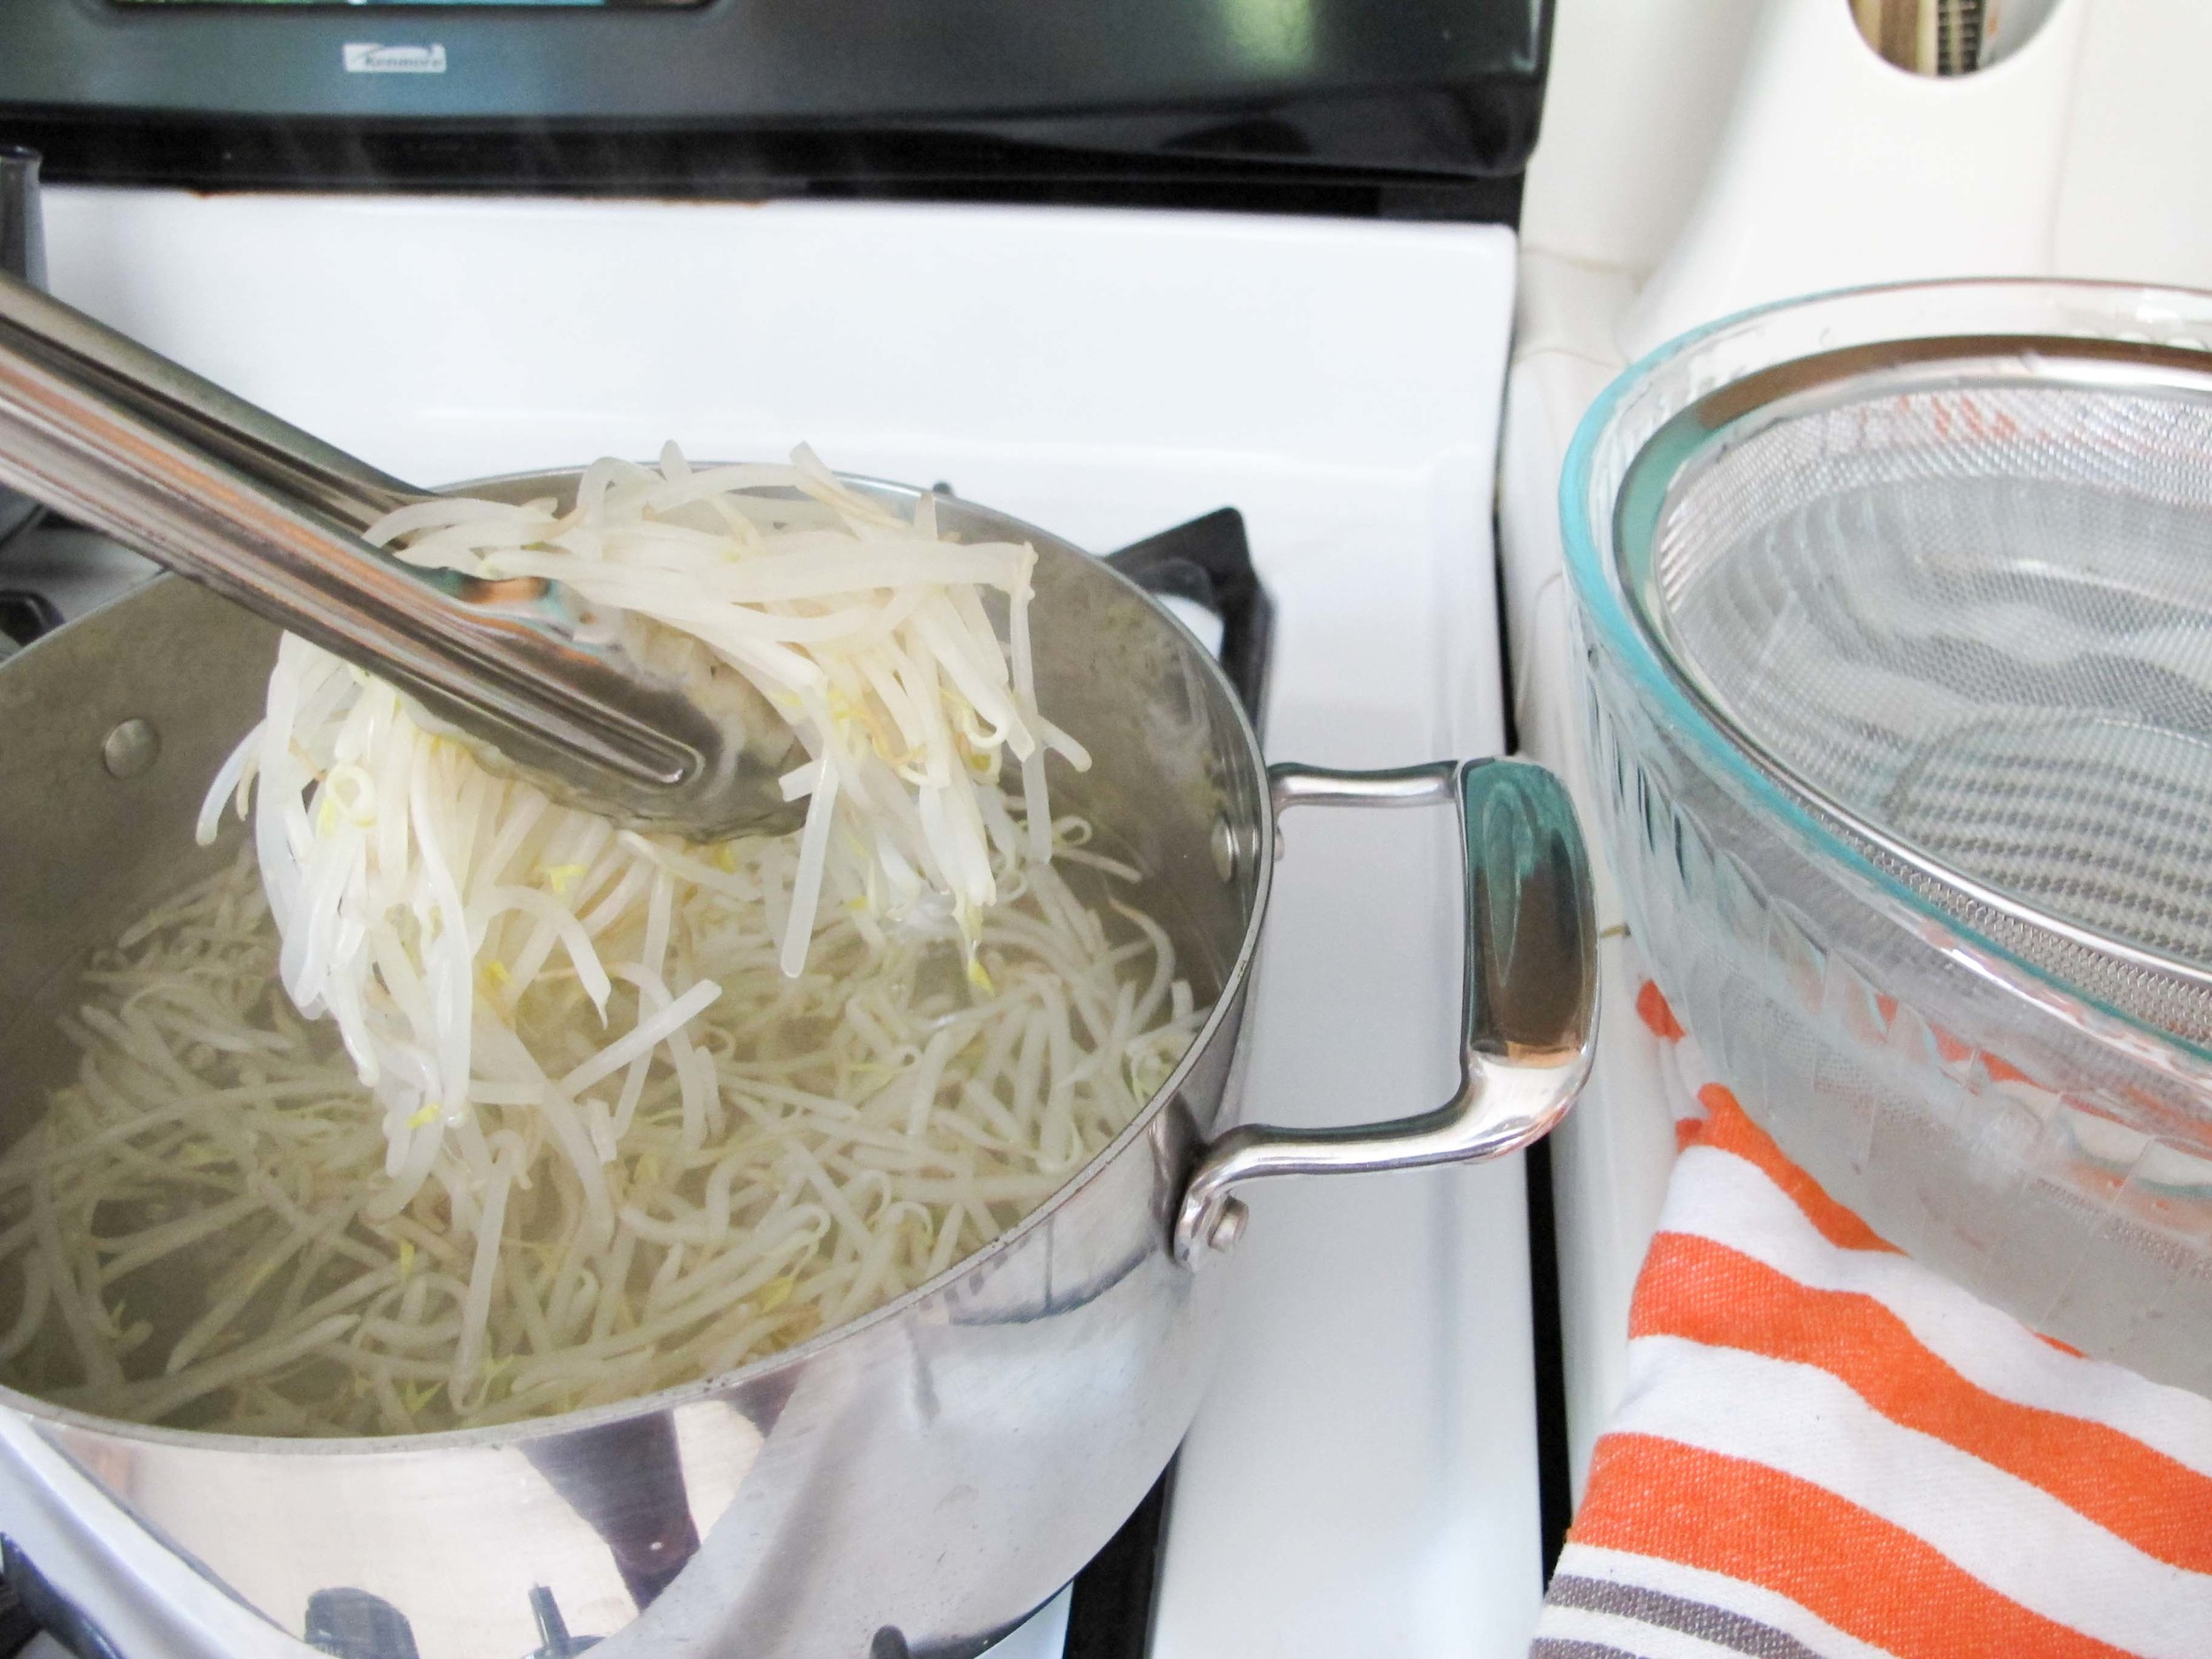
In the same boiling water, place mung bean sprouts in the water for 3-5 minutes until just translucent and limp. Remove the mung bean sprouts and plunge into the previously used ice bath. Remove, strain and squeeze sprouts of excess liquid, and set the mung bean sprouts aside in a small bowl. Dress with 1 heaping teaspoon of kosher salt, 1 tablespoon of sesame seed oil and 1 teaspoon of crushed garlic. Taste and adjust seasoning.

Refresh the ice bath. In the pot of boiling water, place carrots in the boiling water for 1 minute until cooked through and limp. Remove the carrots and plunge into the ice bath. Remove, strain very well and set the carrots aside in a small bowl. Dress with 1 teaspoon of kosher salt, a pinch of sugar, 1/4 teaspoon of black pepper, and 1 tablespoon vegetable oil. Taste and adjust seasoning.

Clean spinach of dirt and trim the ends. In the pot of boiling water, place spinach in the boiling water for 1 minute until cooked through and the stems are tender. Remove the spinach and plunge into the previously used ice bath. Remove, strain well (pressing out any additional liquid) and set the spinach aside in a bowl. Dress with 1 heaping teaspoon of kosher salt, 1 tablespoon sesame seed oil and 1 teaspoon crushed garlic. Taste and adjust seasoning. A note on spinach: I would not recommend using bagged baby spinach - it doesn't cook the same as large bunch spinach, and it doesn't hold up well during the final mixing process.

Cook the beef by heating a large skillet on medium-high heat and cook the beef until browned, fragrant, and cooked through. You may have to cook the beef in two batches to avoid overcrowding the pan.

Meanwhile, heat a nonstick pan on medium-high heat and coat with cooking oil. Crack eggs into pan and fry until the whites are opaque and the bottoms of the eggs are crisp and brown.

To Assemble: In a large bowl, scoop 1 cup of fluffed rice into the center. Around the perimeter, arrange 1/4 of each vegetable around the rice, spoon 1/4 of the beef mixture. Top with a fried egg.

Serve the bowl with the spicy Bi Bim Bap sauce on the side and a spoon to eat with. Immediately before eating, mix and toss all of the ingredients in the bowl together: break up the egg white, incorporate the yolk into the rice, while tossing the vegetables together. Dress with sauce and enjoy!

Rice Salad With Nuts and Sour Cherries by Cynthia Raub

Print Friendly and PDF
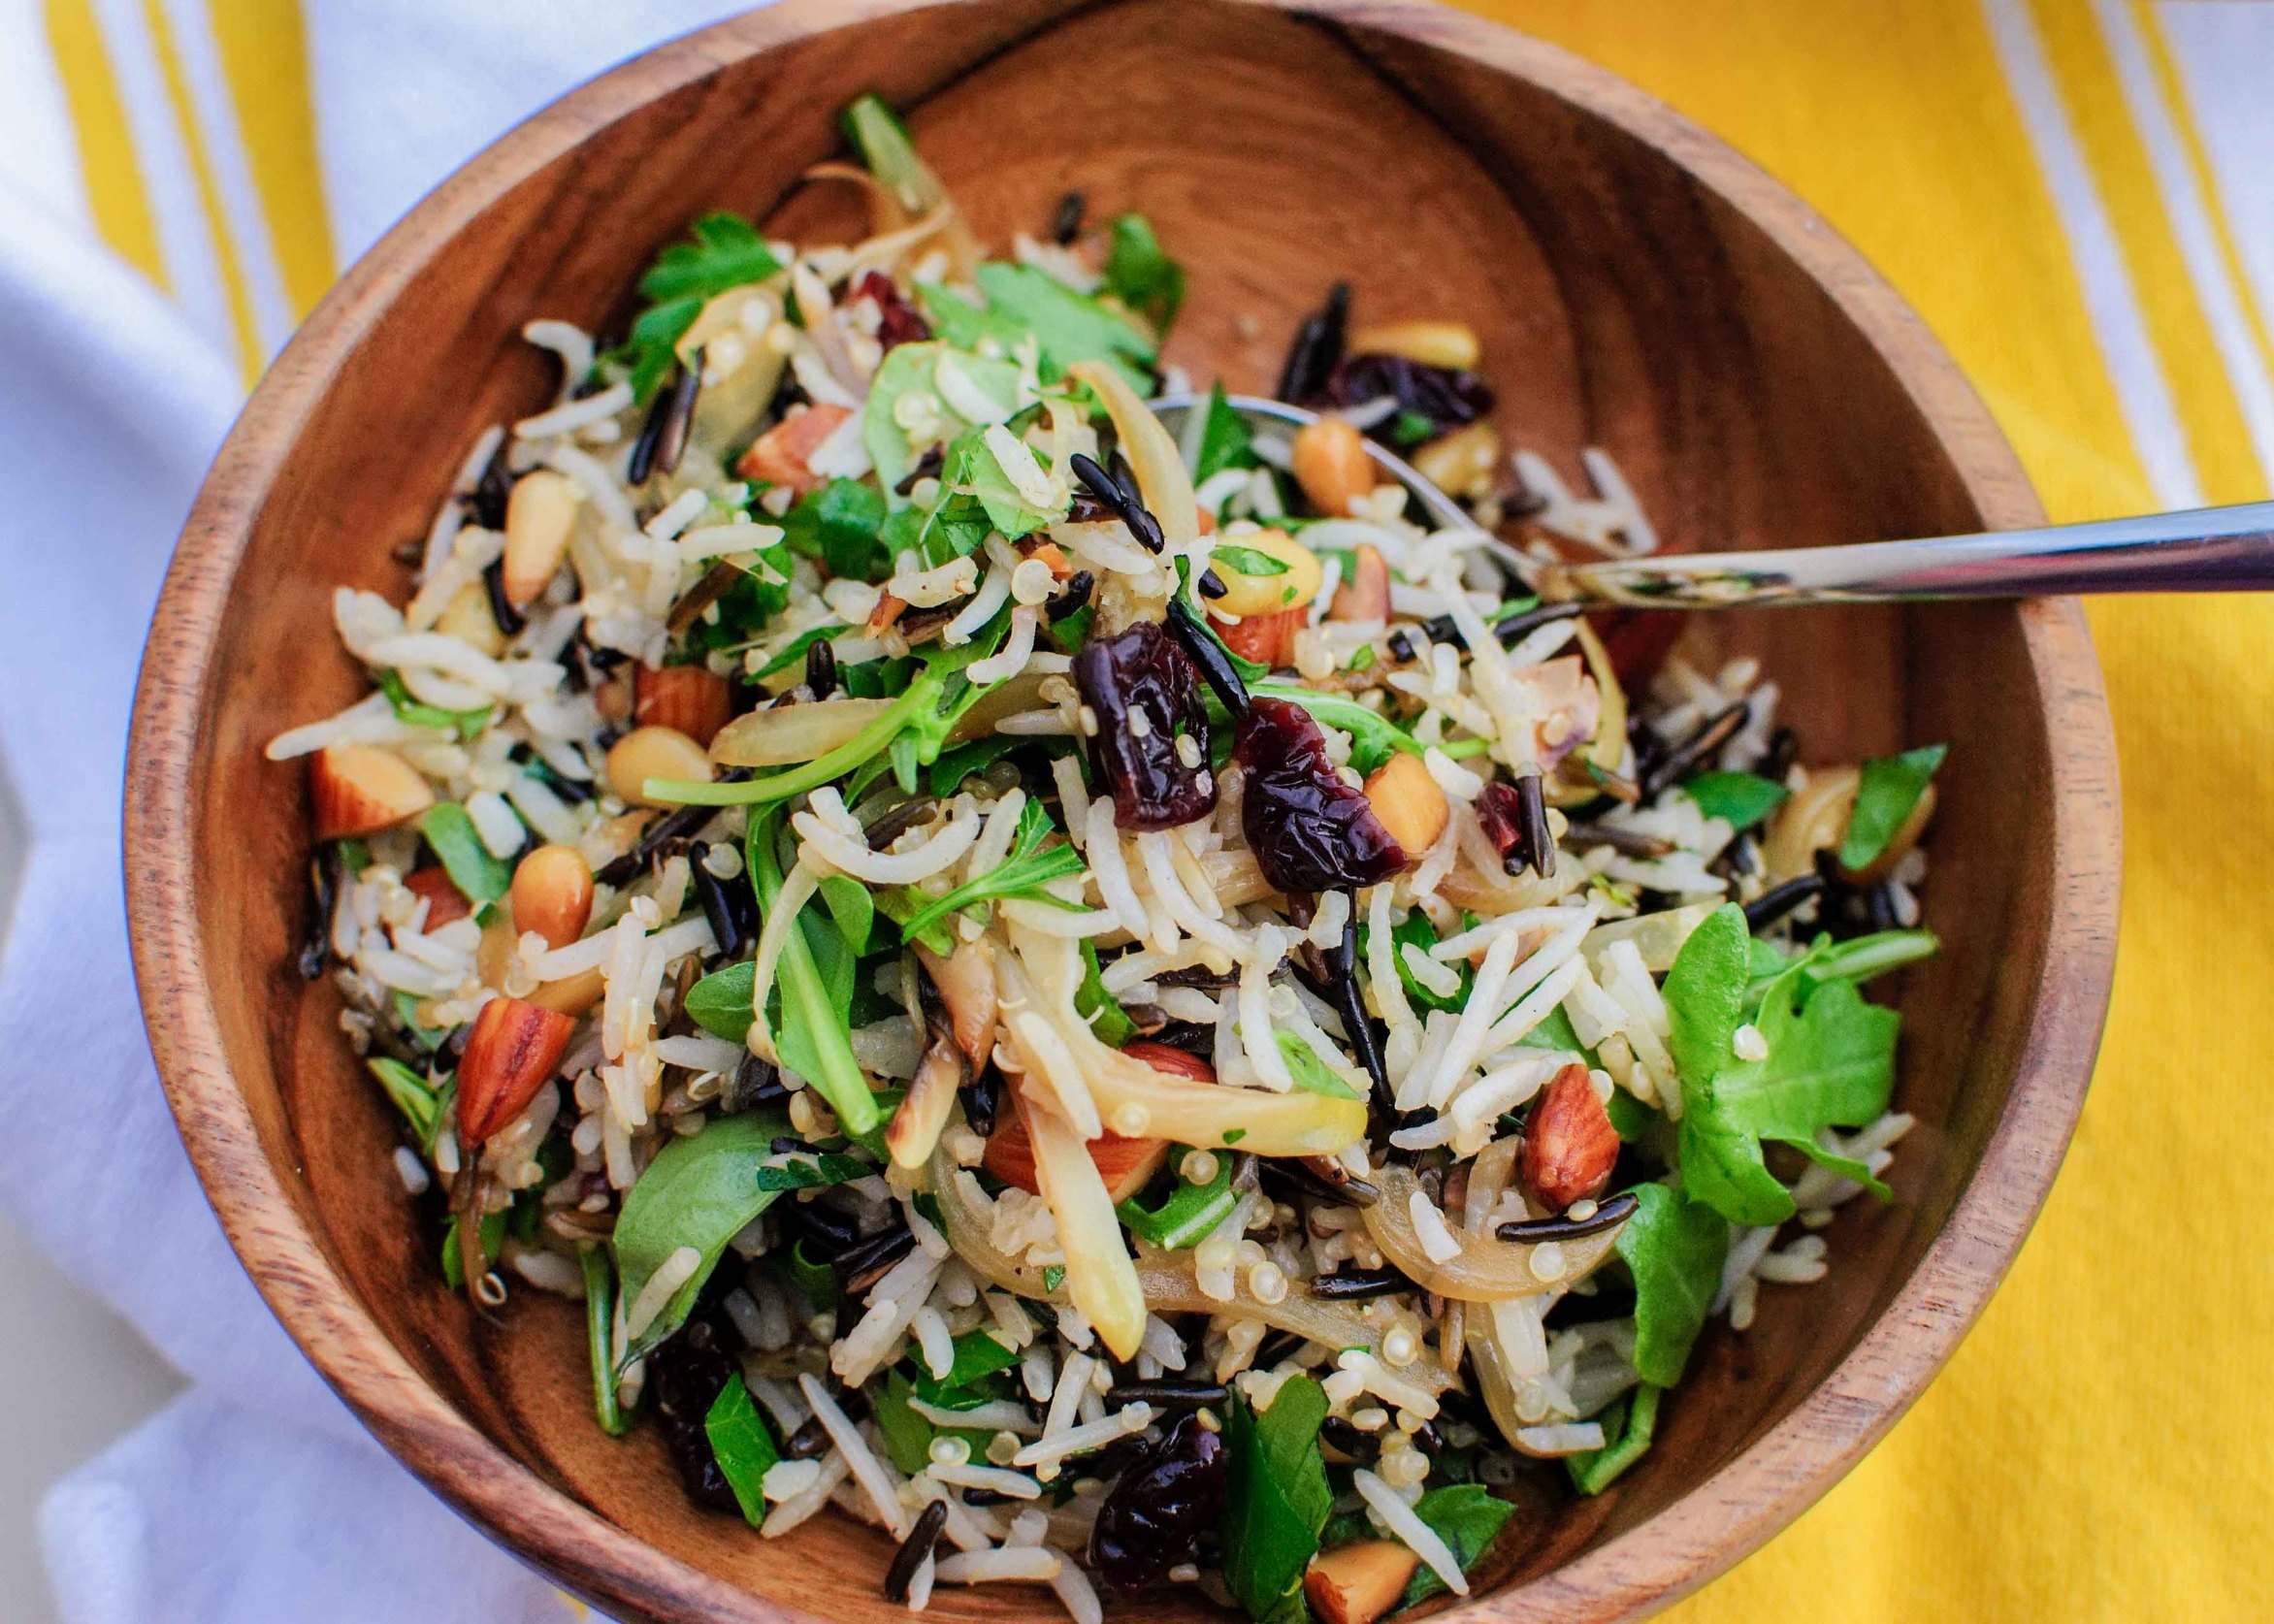
rice salad with nuts and sour cherries

I love me a rice salad. A bit ago, I cooked a Korean meal for us complete with Seafood and Green Onion Pancake (Pa Jun) and a Soft Tofu Stew (Soondoobu Jjigae). Bi Bim Bap is also a traditional Korean dish with rice, various barely-cooked vegetables and topped with an egg. I like to describe Bi Bim Bap as a rice salad dressed with a browned and runny egg. This is what attracted me so much to this recipe: the various textures, temperatures and flavors make for an elegant statement dish. Ottolenghi' rice salad is nutty from the rice and quinoa, crunchy and rich from two kinds of nuts, and has a surprising subtle sweetness courtesy of the cherries and browned onions. Finished with herbs and spicy arugula for brightness, it's a wonderful side dish to practically anything.

Notes: This recipe yields a staggering amount of food. As written, it is at least 8 if not 12 generous servings. Tart dried cherries may be cumbersome to acquire, so I think that dried cranberries or even dried apricot would be complementary substitutes. This is a wonderful dish to bring to a potluck or a holiday gathering because of its versatility and because it makes such a large amount.


Scant 1 cup/150 g wild rice
Scant 1 1/4 cup/220 g basmati rice
5 1/2 tbsp/80 ml olive oil
2/3 cup/100 g quinoa
6 1/2 tbsp/60 g almonds, skins on, coarsely chopped
7 tbsp/60 g pine nuts
1/4 cup/60 ml sunflower oil
2 medium onions, thinly sliced (about 3 cups/320 g)
1 cup/30 g flat-leaf parsley leaves, coarsely chopped
2/3 cup/20 g basil leaves, coarsely chopped
1/3 cup/10 g tarragon leaves, coarsely chopped
2 cups/40 g arugula
2/3 cup/80 g dried sour cherries
1/4 cup/60 ml lemon juice, plus the grated zest of 1 lemon
2 cloves garlic, crushed
Salt and black pepper

Place the wild rice in a saucepan, cover with plenty of water, bring to a boil, and then turn down to a gentle simmer and cook for 35 minutes, until the rice is cooked but still firm. Drain, rinse under cold water, and set aside to dry.

Mix the basmati rice with 1 tablespoon of the olive oil and 1/2 teaspoon salt. Place in a saucepan with 1 1/3 cups/ 330 ml of boiling water, cover, and cook over the lowest possible heat for 15 minutes. Remove from the heat, place a tea towel over the pan, replace the lid, and set aside for 10 minutes. Uncover and allow to cool down completely.

Bring a small saucepan of water to a boil and add the quinoa. Cook for 9 minutes, then drain into a fine sieve, refresh under cold water, and set aside.

Place the almonds and pine nuts in a small pan with 1 tablespoon of the olive oil and a pinch of salt. Cook over medium-low heat for about 5 minutes, stirring frequently. Transfer to a small plate as soon as the pine nuts begin to color and set aside.

Heat the sunflower oil in a large sauté pan and add the onions, 1/4 teaspoon salt, and some black pepper. Cook over high heat for 5 to 8 minutes, stirring often, so that parts of the onion get crisp and others just soft. Transfer to paper towels to drain.

Place all the grains in a large bowl along with the chopped herbs, arugula, fried onion, nuts, and sour cherries. Add the lemon juice and zest, the remaining 3 1/2 tbsp olive oil, the garlic, 1/2 teaspoon salt, and some pepper. Mix well and set aside for at least 10 minutes before serving.

Lentils with Broiled Eggplant by Amy Cantu

Print Friendly and PDF

Luxurious. I would not have ever imagined that I might describe a lentil salad this way, but luxurious is exactly the perfect word. Smoky, silky, creamy, spicy, and a bit tangy: All of these sensations tangle together into one luxurious bite after another. Eggplant can be sensual. Yes, I said it. The broiled eggplant lifts ordinary lentils into a sensual tizzy of textures and flavors, and I don't think I've been the same ever since! Please eat this. It's a feast of colors for the eyes, sustaining nutrients for the body, and sensual luxury for the mouth and tongue. I understand completely now why Yotam Ottolenghi's approach to treating and eating vegetables can become an obsessive experience. I am forever changed, and now seeking to cook every single recipe in his cookbooks. (Speaking of which, Cynthia shared Ottolenghi's Rice Salad with Nuts and Sour Cherries with us, and I will be making this immediately. So good.)

Notes: The smoky broiled eggplant is what makes this dish so special. Roasting them directly over a gas stove is the fastest way to cook them and achieve that smoky flavor, but it definitely made a mess that took scrubbing to clean up. If you can lay down aluminum foil around the flame to catch some of the drippings, that would help a lot, but this was hard to do with my particular stovetop. Using the oven broiler to roast the eggplant is a less messy alternative, but it does take an hour instead of 15 minutes. If you choose the broiler method, please ensure that you poke the eggplant all over with a small sharp knife, to allow steam to escape. Otherwise, the eggplant may explode all over the oven - an even bigger mess to clean up!

The harissa is optional, but I was so happy to have a jar of homemade harissa gifted to me from Cynthia. It elevated this already excellent lentil salad into something truly special.


Time: 45 minutes to 1 hour, 30 minutes (depending on your method for roasting the eggplant)
Servings: 4

2 medium eggplants
2 tablespoons top-quality red wine vinegar
salt and black pepper
1 cup small dark lentils (such as Puy or Castelluccio), rinsed
3 small carrots, peeled
2 celery stalks
1 bay leaf
3 thyme sprigs
1/2 white onion
3 tablespoons olive oil, plus extra to finish
12 cherry tomatoes, halved
1/3 teaspoon brown sugar
1 tablespoon each roughly chopped parsley, cilantro and dill
2 tablespoon crème fraîche (or natural yogurt, if you prefer)
2 tablespoons harissa (purchased or homemade), optional

To cook the eggplants on a gas stovetop, which is the most effective way: Start by lining the area around the burners with foil to protect them. Put the eggplants directly on two moderate flames and roast for 12 to 15 minutes, turning frequently with metal tongs, until the flesh is soft and smoky and the skin is burnt all over. Keep an eye on them the whole time so they don’t catch fire.

To broil the eggplants in an oven instead: pierce the eggplants all over with a sharp knife. (This creates exit points for the steam to escape the eggplant; otherwise, the eggplant will explode and make a giant mess!) Put them on a foil-lined tray and place directly under a hot broiler for 1 hour, turning them a few times. The eggplants need to deflate completely and their skin should burn and break.

Remove the eggplants from the heat. If you used an oven broiler, change the oven to its normal setting. Heat the oven to 275°F. Cut a slit down the center of the eggplants and scoop out the flesh into a colander, avoiding the black skin. Leave to drain for at least 15 minutes and only then season with plenty of salt and pepper and 1/2 tablespoon of the vinegar.

While the eggplants are broiling, place the lentils in a medium saucepan. Cut one carrot and half a celery stalk into large chunks and throw them in. Add the bay leaf, thyme and onion, cover with plenty of water and bring to the boil. Simmer on a low heat for up to 25 minutes, or until the lentils are tender, skimming away the froth from the surface from time to time. Drain in a sieve. Remove and discard the carrot, celery, bay leaf, thyme and onion and transfer the lentils to a mixing bowl. Add the rest of the vinegar, 2 tablespoons of the olive oil and plenty of salt and pepper; stir and set aside somewhere warm.

Cut the remaining carrot and celery into 3/8-inch dice and mix with the tomatoes, the remaining oil, the sugar and some salt. Spread in an ovenproof dish and cook in the oven for about 20 minutes, or until the carrot is tender but still firm.

Add the cooked vegetables to the warm lentils, followed by the chopped herbs and stir gently. Taste and adjust the seasoning. Spoon the lentils onto serving plates. Pile some eggplant in the center of each portion and top it with a dollop each of crème fraîche or yogurt and harissa. Finish with a trickle of oil.

Lime Bars with Pistachio Crust by Amy Cantu

Print Friendly and PDF

One of my best friends often craves anything tart and citrusy, and has an especially deep love for key lime anything, as well as lemon bars. This recipe is undoubtedly for her. Not quite key lime pie and not quite lemon bars, these Lime Bars with Pistachio Crust are intensely creamy, cooling, tangy, and perfectly complemented by the nutty, sweet crust. This recipe is somewhat adapted from a Martha Stewart recipe for Key Lime Bars and also one I found for Lemon-Pistachio Bars on NYT Cooking. I found the Martha Stewart one, while delicious, always fell apart due to an overly delicate crust. So I loosely adapted a crust from the latter recipe to come up with this one. It holds together a bit better, but is still a creamy (even a bit gooey) bar.

Notes: Don't skip any of the cooling steps, or the bar will not hold together. The limey tanginess is fairly intense, so you can cut the bars into 16 small squares, rather than the 9 large squares I have pictured here - a little can go a long way! Make sure to store any leftovers (what??!) in the fridge.


Time: 20 minutes (active), 2 hours (inactive)
Yield: 9 large squares or 16 small squares

For the crust:
1 cup whole wheat pastry flour
1/4 cup wheat bran, toasted
1/4 cup confectioners' sugar
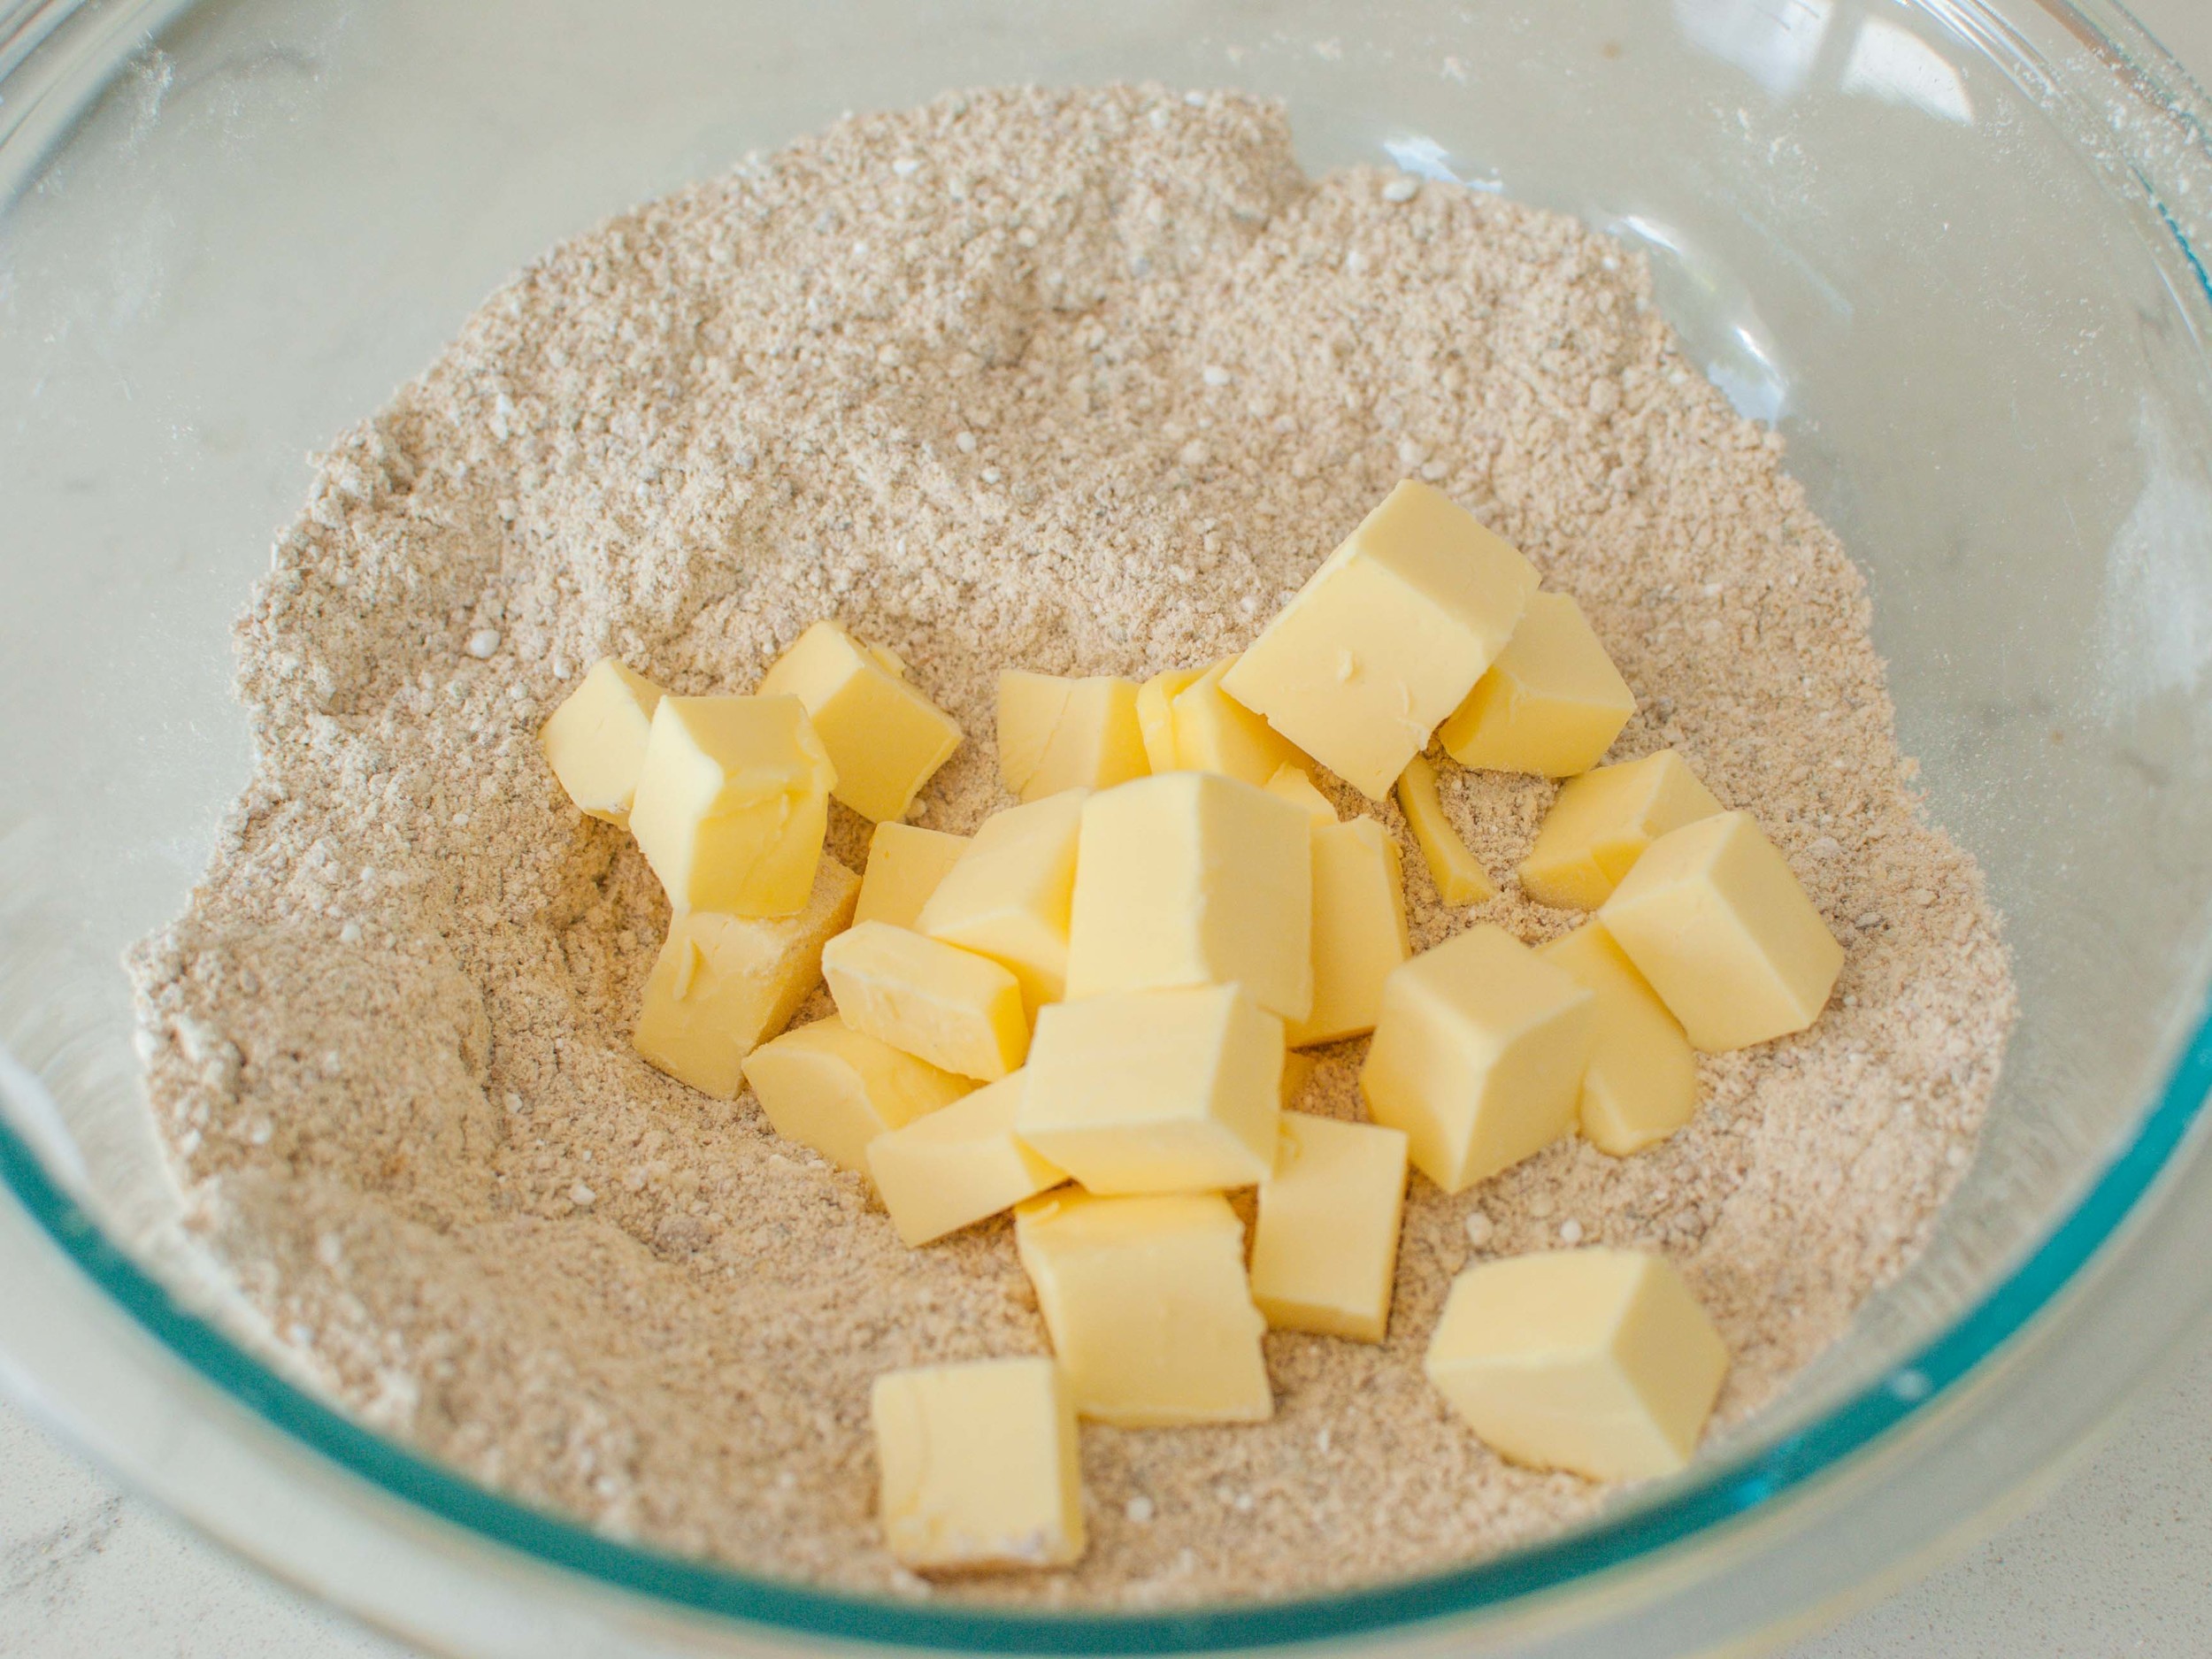
1/2 cup cold, unsalted butter, cut into small pieces
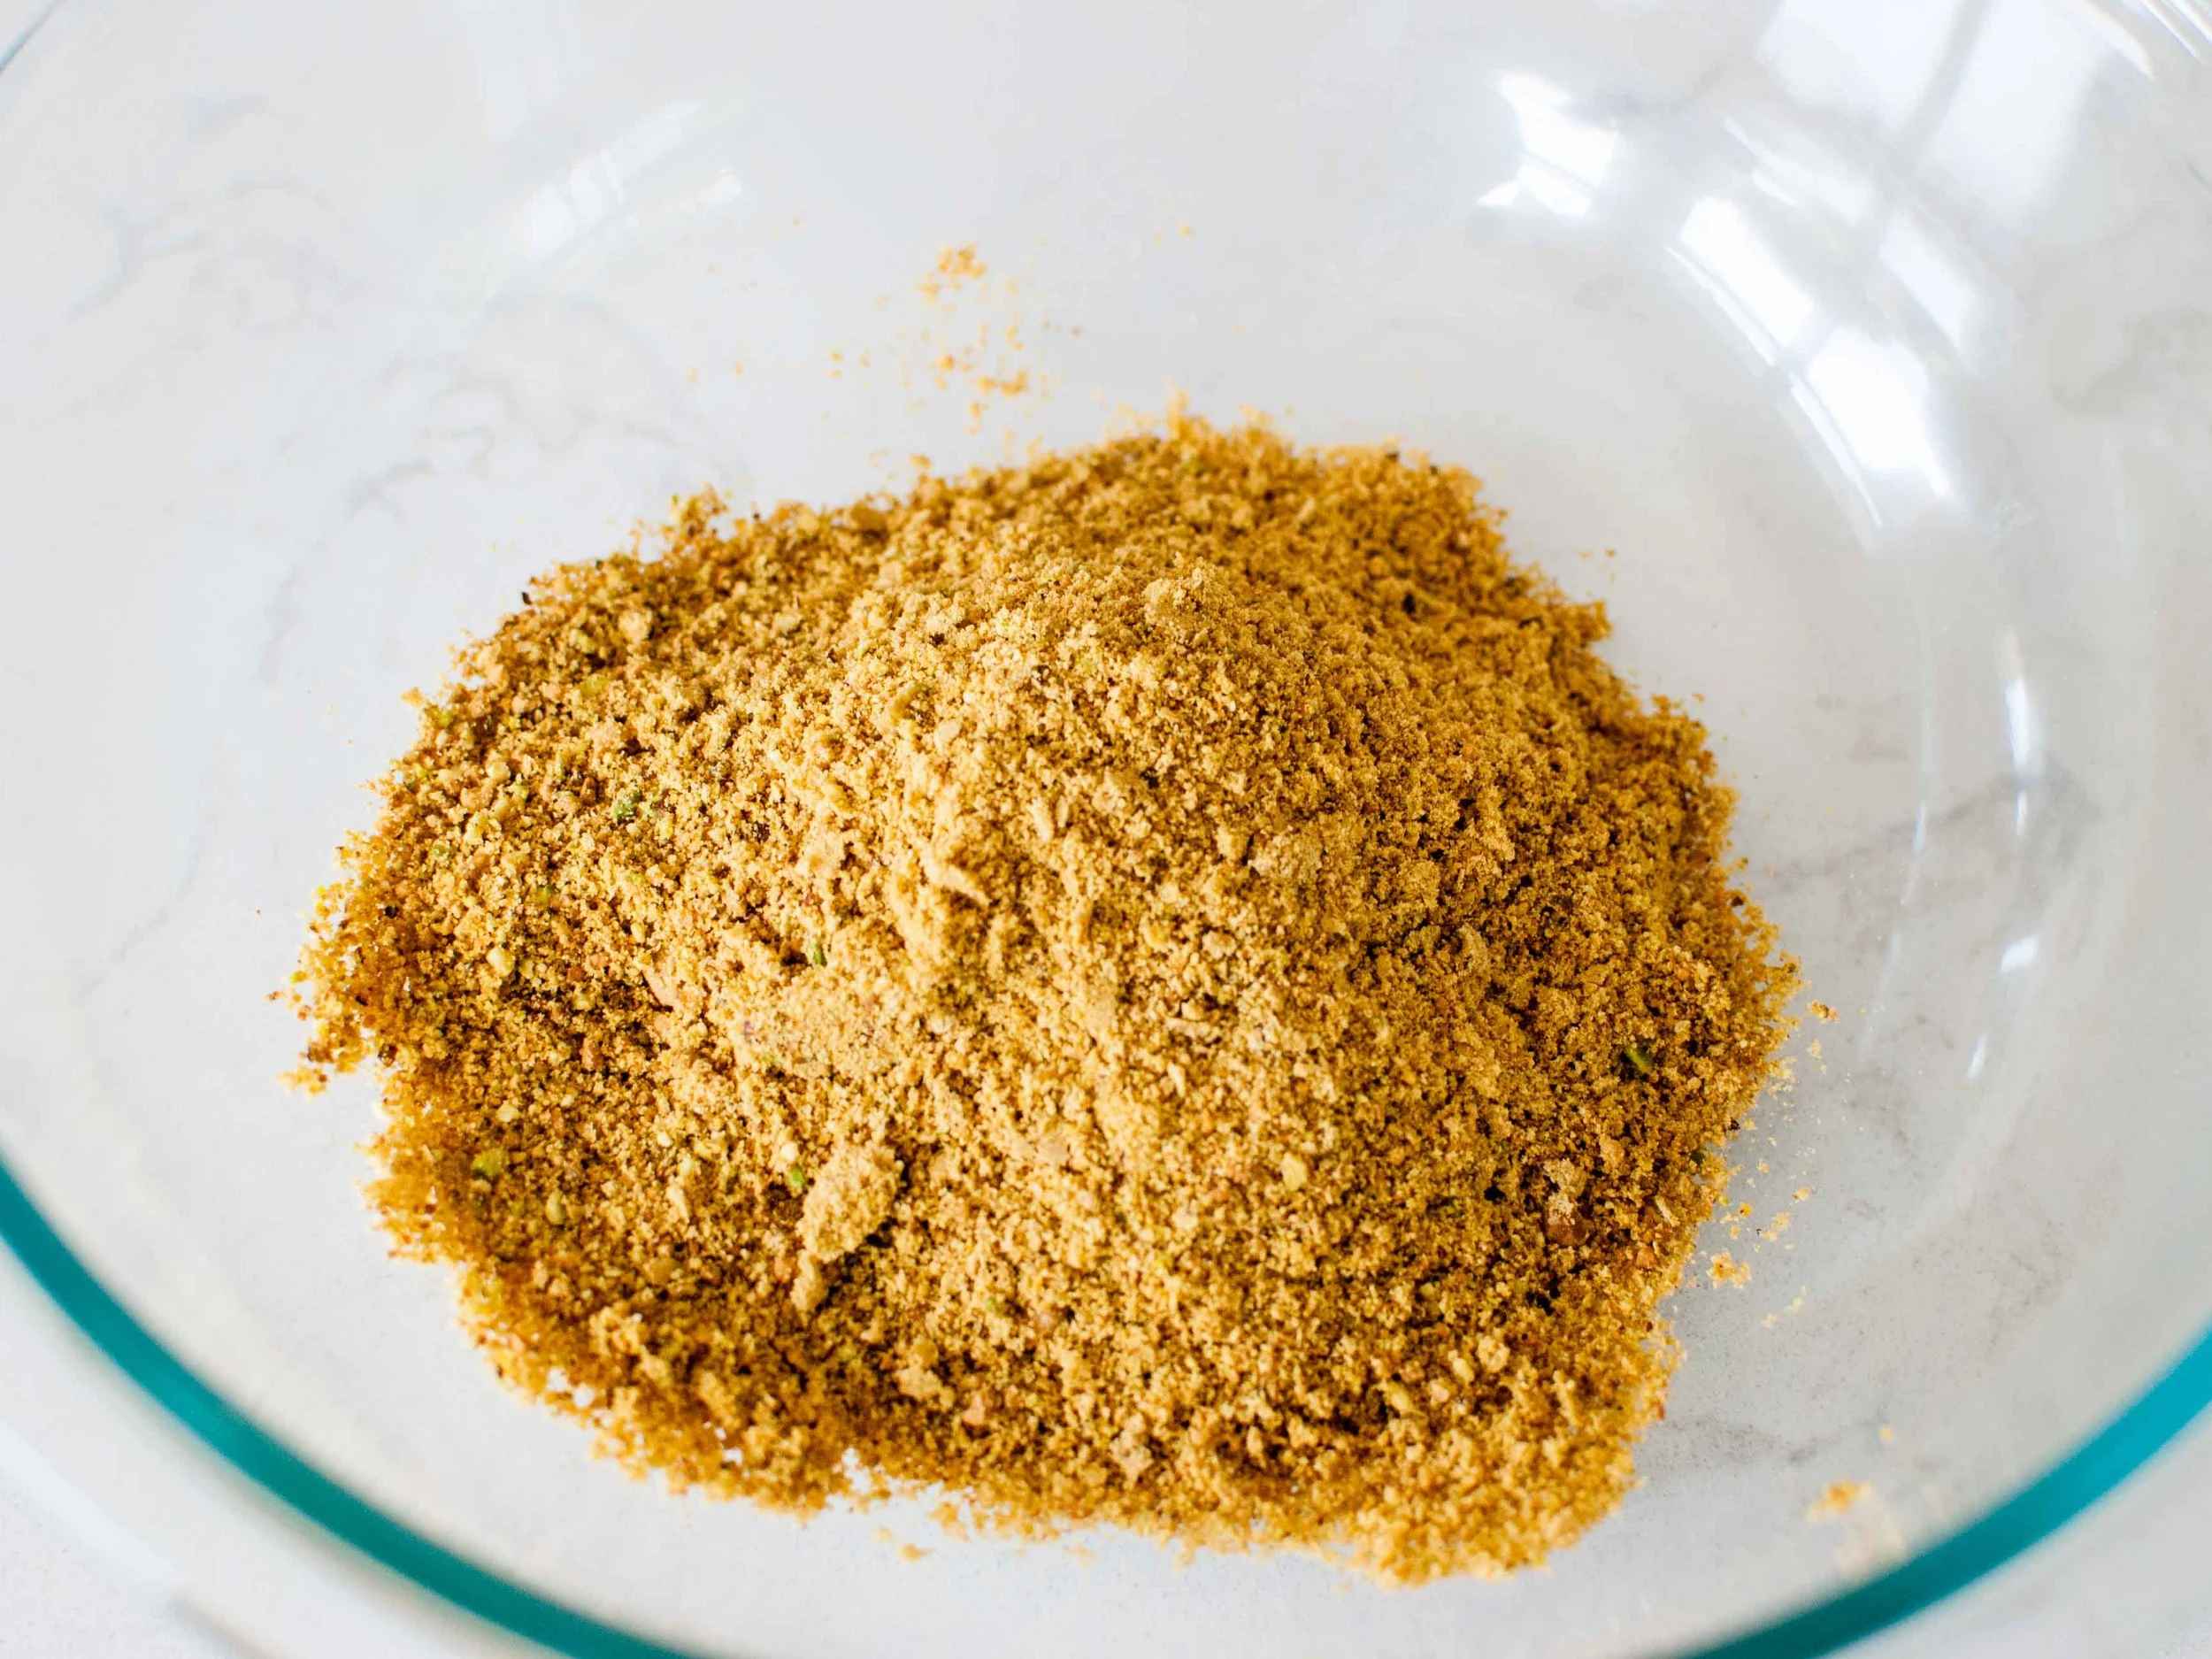
1/3 cup shelled salted pistachios, finely ground

For the filling:
2 large egg yolks
1 can (14 ounces) sweetened condensed milk
1/2 cup fresh lime juice
1 teaspoon finely grated lime zest

Preheat oven to 350 degrees.  Grease a n 8-inch square baking dish with non-stick cooking spray or  melted butter. Line bottom with parchment paper, leaving a 2-inch overhang on two sides.

In a small food processor or a clean coffee bean/spice grinder, finely grind pistachios.  In a large bowl, combine ground pistachios with flour, wheat bran, and sugar. Dump in the butter pieces and use your fingers to squish the butter pieces into the flour mixture, until everything looks like lumpy wet sand. You should still see streaks of butter.  (This can also be done completely in the food processor. Add all the dry ingredients and pulse until finely ground. Add butter and pulse a few times, until only pea-sized pieces of butter remain.) 

Press mixture into bottom and 1 inch up sides of prepared pan. Bake until lightly browned,  about 20 minutes. Cool crust, 30 minutes.

In a large bowl, whisk together egg yolks and condensed milk. Add lime juice; whisk until smooth. Pour filling into cooled crust; carefully spread to edges.

Bake until set, about 15 minutes. Cool in pan on rack; then chill at least 1 hour before serving. Using parchment paper overhang, lift out of pan, and transfer to a cutting board. With a serrated knife, cut into  9 large squares or 16  small squares, wiping knife with a damp kitchen towel between each cut. Eat with delight (or store in refrigerator until ready to serve).

Adapted from here and here.

Strawberry Rhubarb Crisp Bars by Cynthia Raub

Print Friendly and PDF

These Strawberry Rhubarb Crisp bars are the whole package: delicious, uncomplicated and healthy! (Or at least healthy enough to pass for breakfast, which we were all too happy to eat!) The crisp oat layer on the bottom comes together in the baking dish without dirtying another bowl. The bright rhubarb and sweet strawberry are diced finely and scattered over the crust, which is then finished with some reserved oats as a golden crumble topping. The result is a thick, chewy bar oozing with lightly sweet and tangy fruit, that promises to be an all-occasion go-to recipe.

Notes: These Strawberry Rhubarb Crisp Bars can be dressed up with a scoop of vanilla ice cream or a dollop of whipped cream to create a dessert no one in their right mind would ever turn down. They can be drizzled with a bit of yogurt and masquerade as breakfast (so good!) or brunch. As-is, these bars are delicious and sturdy enough to cart to a summer BBQ, picnic, or bake sale. It's the go-anywhere, anytime, for anyone bar! I have made several iterations of this recipe, swapping out the fruit, and it’s always a tasty treat. 


Yield: 9 large bars
Time: 55 minutes

1 cup rolled oats
3/4 cup plus up to 2 tablespoons extra all-purpose flour
1/2 cup light brown sugar
Heaping 1/4 teaspoon kosher salt
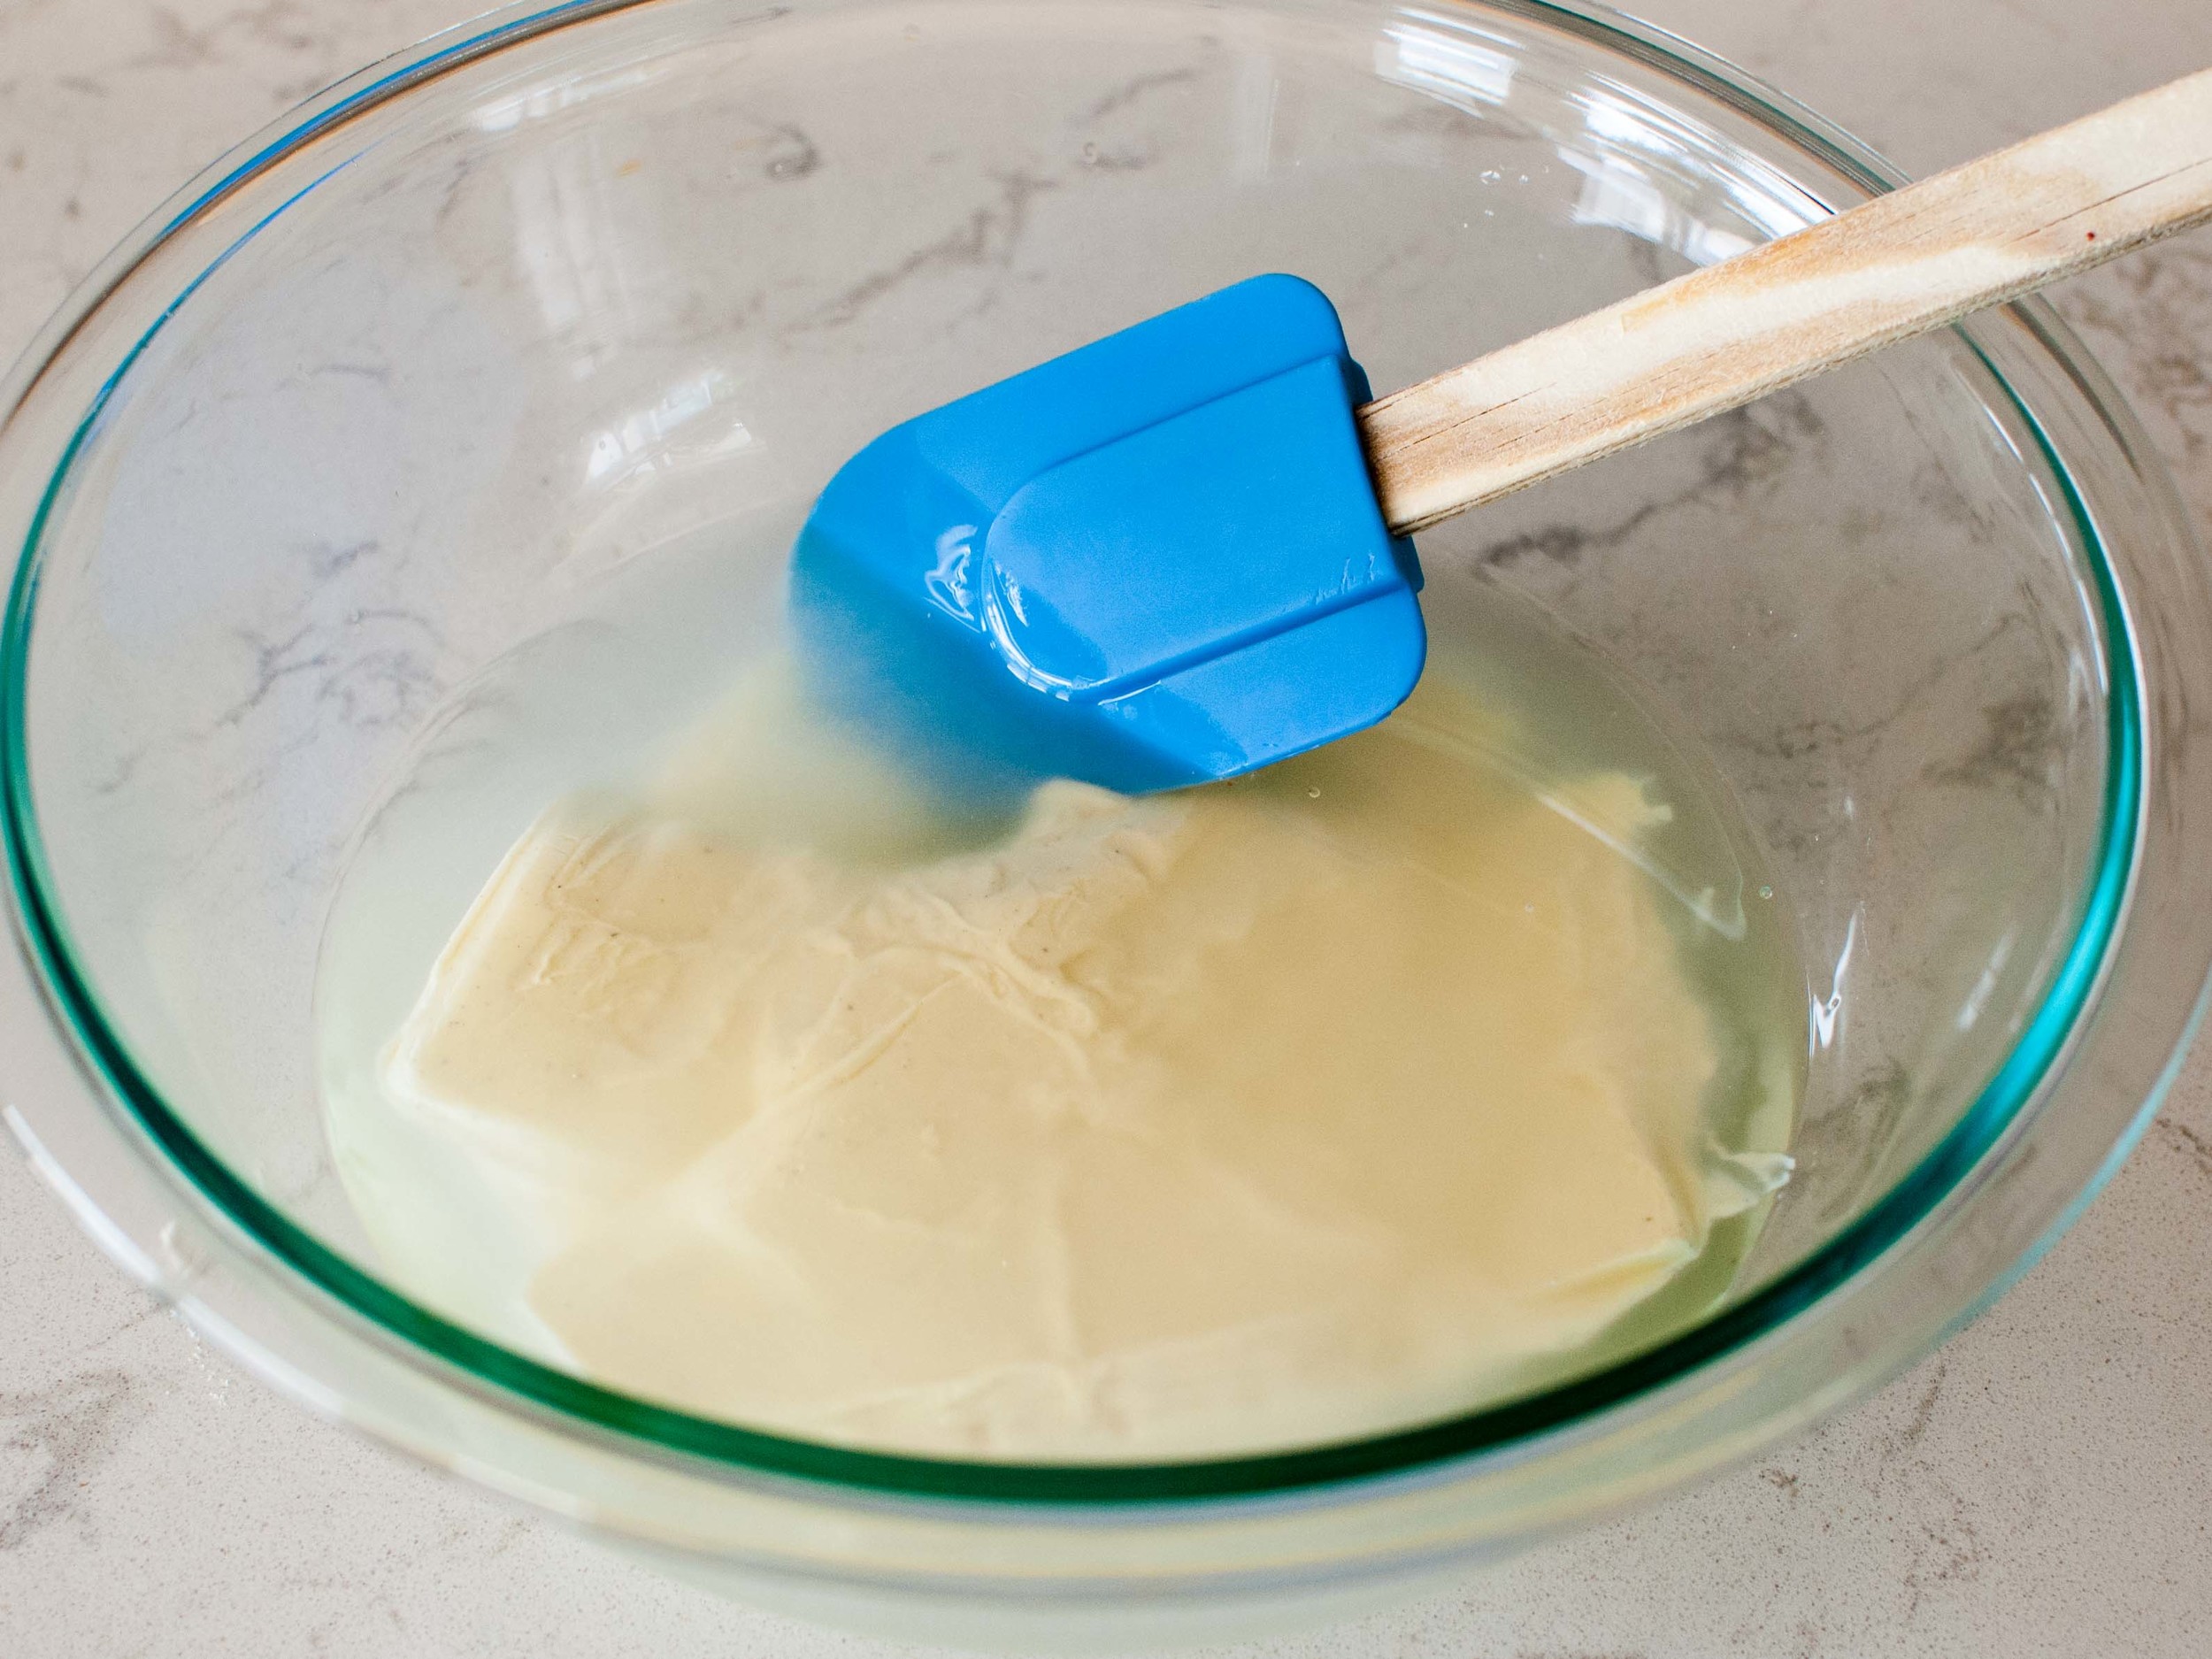
6 tablespoons unsalted butter, melted
1 teaspoon cornstarch (optional, but helps firm up the filling)
1 tablespoon lemon juice
1 tablespoon granulated sugar, divided
1 cup small-diced rhubarb (from about 1 1/2 medium stalks)
1 cup small-diced strawberries

Heat oven to 375 degrees F. (For easy removal, line bottom and two sides of 8-by-8-inch square baking pan with parchment paper.)

Place oats, 3/4 cup flour, brown sugar and salt in bottom of baking pan and mix. Pour melted butter over, and stir until clumps form. If the clumps feel soft or look overly damp, add the remaining 2 tablespoons flour. Set aside 1/2 cup of the crumble mixture. Press the rest of the crumb mixture evenly in the bottom of the pan.

Spread half the fruit over the crust. Sprinkle it evenly with cornstarch, then lemon juice, and 1/2 tablespoon of granulated sugar. Spread remaining fruit over this, and top with second 1/2 tablespoon sugar. Scatter reserved crumbs over fruit and bake bars for 30 to 40 minutes (firmer fruits will take longer), until fruit is bubbly and crisp portion is golden.

Let cool in pan. For a crisper crust, serve cold straight from the fridge.

Recipe adapted from Smitten Kitchen

Coconut Bars by Amy Cantu

Print Friendly and PDF

My obsession with all things coconut continues: I present to you these Coconut Bars, perfect for all of your afternoon tea and picnic treats! Even better - these coconut babies are nut-free, gluten-free, and vegan, so you can share these without displaying any warning signs. You can thank me later. These Coconut Bars are sweet, chewy, very coconut-y (obviously), and rich. The coconut flavor comes three-fold from coconut oil, coconut extract, and coconut flour - they are like eating macaroons in bar form, or like eating white chocolate covered coconut. Yes, please.

Notes: The original recipe uses all white sugar, but I swapped some out for brown sugar, which gives it a bit of caramel flavor. These Coconut Bars are good at room temperature, but I found that I loved them even more chilled. They became chewy and dense, rather than soft and crumbly. You can choose how you like to eat them, but alongside tea or coffee, they have found their match made in heaven.


Time: 1 hour
Yield: 12 large squares or 24 small triangles

8 oz. high quality white chocolate
1 cup coconut oil
1/2 cup granulated sugar
3/4 cup brown sugar, packed
1 teaspoon coconut extract
1/2 teaspoon vanilla extract
1/2 teaspoon kosher salt
6 egg whites, lightly beaten
1 /2 cups coconut flour

Heat oven to 350 degrees Fahrenheit. Grease a 9-inch by 13-inch baking pan and line the bottom and two sides with parchment paper. (Leaving a bit of overhang makes it easy to lift the cooled bars from the pan).

Break white chocolate into small pieces and dump into a large mixing bowl. Heat the coconut oil in a small saucepan over low heat or in the microwave for 1 minute, until oil is hot when touched. Pour oil over the white chocolate, and whisk until smooth. Add coconut and vanilla extracts, salt, and egg whites, stirring well to combine.

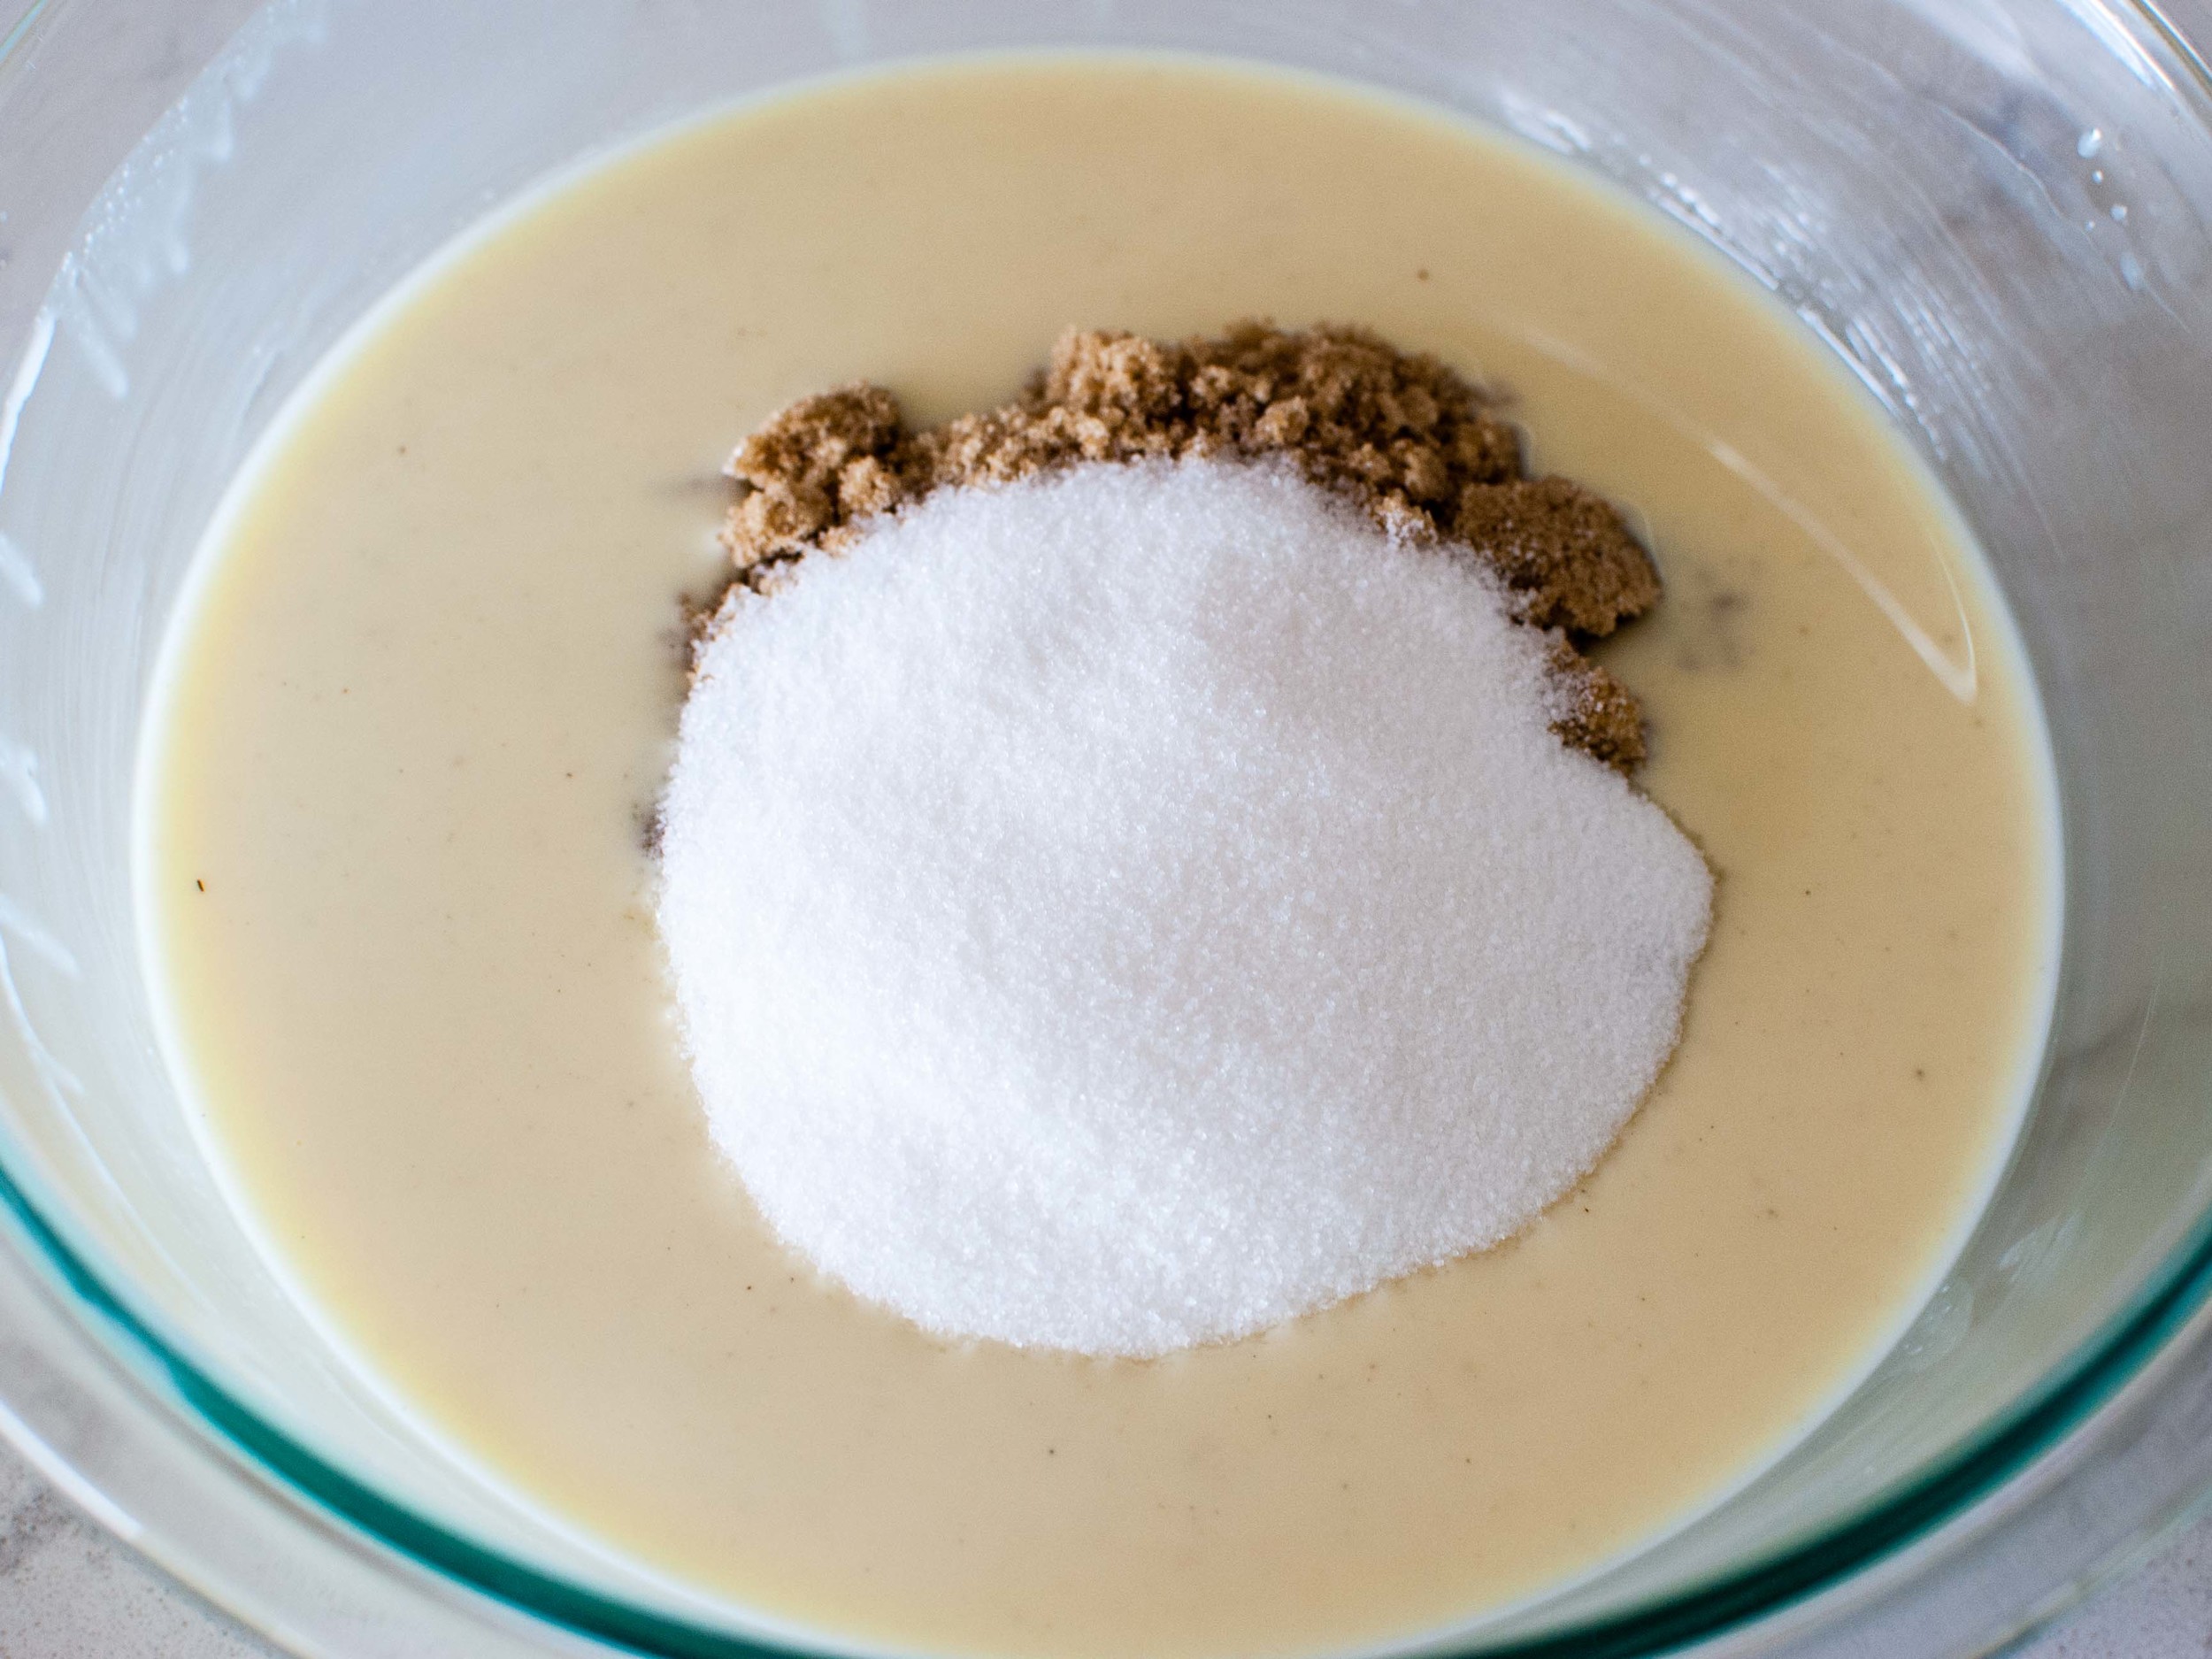
n a separate bowl, hisk together both sugars. (If brown sugar is very lumpy, microwave for a few seconds to soften the brow sugar and press lumps with the back of a spoon or sif.) Stir sugars into the white chocolate mixture - a few small lumps are just fine.  Stir in the coconut flour, until just combined.

Pour batter evenly into the prepared baking pan, and smooth out the top with a spatula. Bake for 30-35 minutes, until the top is set and golden. Cool completely in the baking dish set on top of a rack. Once cool, remove the Coconut Bars from the pan and cut into desired pieces. Devour at room temperature or chilled.

Adapted from Saveur Magazine.

Korean Soft Tofu Stew (Soondoobu Jjigae) by Cynthia Raub

Print Friendly and PDF

At a Korean table, a variety of side dishes (banchan) will clutter and cover an entire table to the corners and edges. Each diner is set with their own bowl of rice, a spoon, and chopsticks. A soup or stew is a standard for every mealtime during a Korean meal. As such, a single pot of soup is set in the middle of the table for everyone to eat from directly. Due to the long reach to the communal pot, Korean spoons have longer handles than other culture's spoons for this reason. Interesting, right? You're welcome for that tidbit of trivia knowledge. Don't ever say I never gave you anything. 

This tofu soup comes together in no time, and as I explain in the notes below, is very flexible in ingredients as well. The silken tofu's luscious and soft texture is carried through a mildly spicy soup base with small nibbles of vegetables and meat along the way. Share this pot of stew with your family or some friends, or eat the whole thing by yourself. There's no wrong way to enjoy this fragrant and bubbling mess. 

Notes: This soup can easily be made vegetarian or even vegan! You can also swap the seafood for beef or pork and it will be just as delicious. I made this version of tofu soup to accompany Korean Green Onion and Seafood Pancakes (Pa Jun) so I used the same seafood for both dishes to make it easier on myself. If you omit the animal broth and/or meat, I recommend a spoonful more of kimchi and a bigger glug of sesame oil for more flavor. This is a mild version, so feel free to add Korean red pepper flakes (gochugaru) or sliced spicy peppers to your liking. Also, I had a difficult time tracking down silken tofu - so don't be discouraged if you can't find it, either. Soft tofu is a perfectly delicious substitute for this soup.


Serves: 1 - 4
Time: 20 minutes

1/4 cup chopped seafood (I used shrimp and squid.)
3 clams
1 tablespoon grape seed oil (or any other neutral oil)
1/4 cup chopped kimchi
2 cloves garlic, minced
1/4 cup diced mushrooms
1/4 cup diced zucchini
1 cup of stock (vegetable, seafood, chicken, beef) or water
14 ounces silken tofu
1 teaspoon kosher salt
1 tablespoon sesame oil
1 tablespoon green onion, thinly sliced
1 egg

Cut seafood into small dice and clean and sort clams. Set aside.

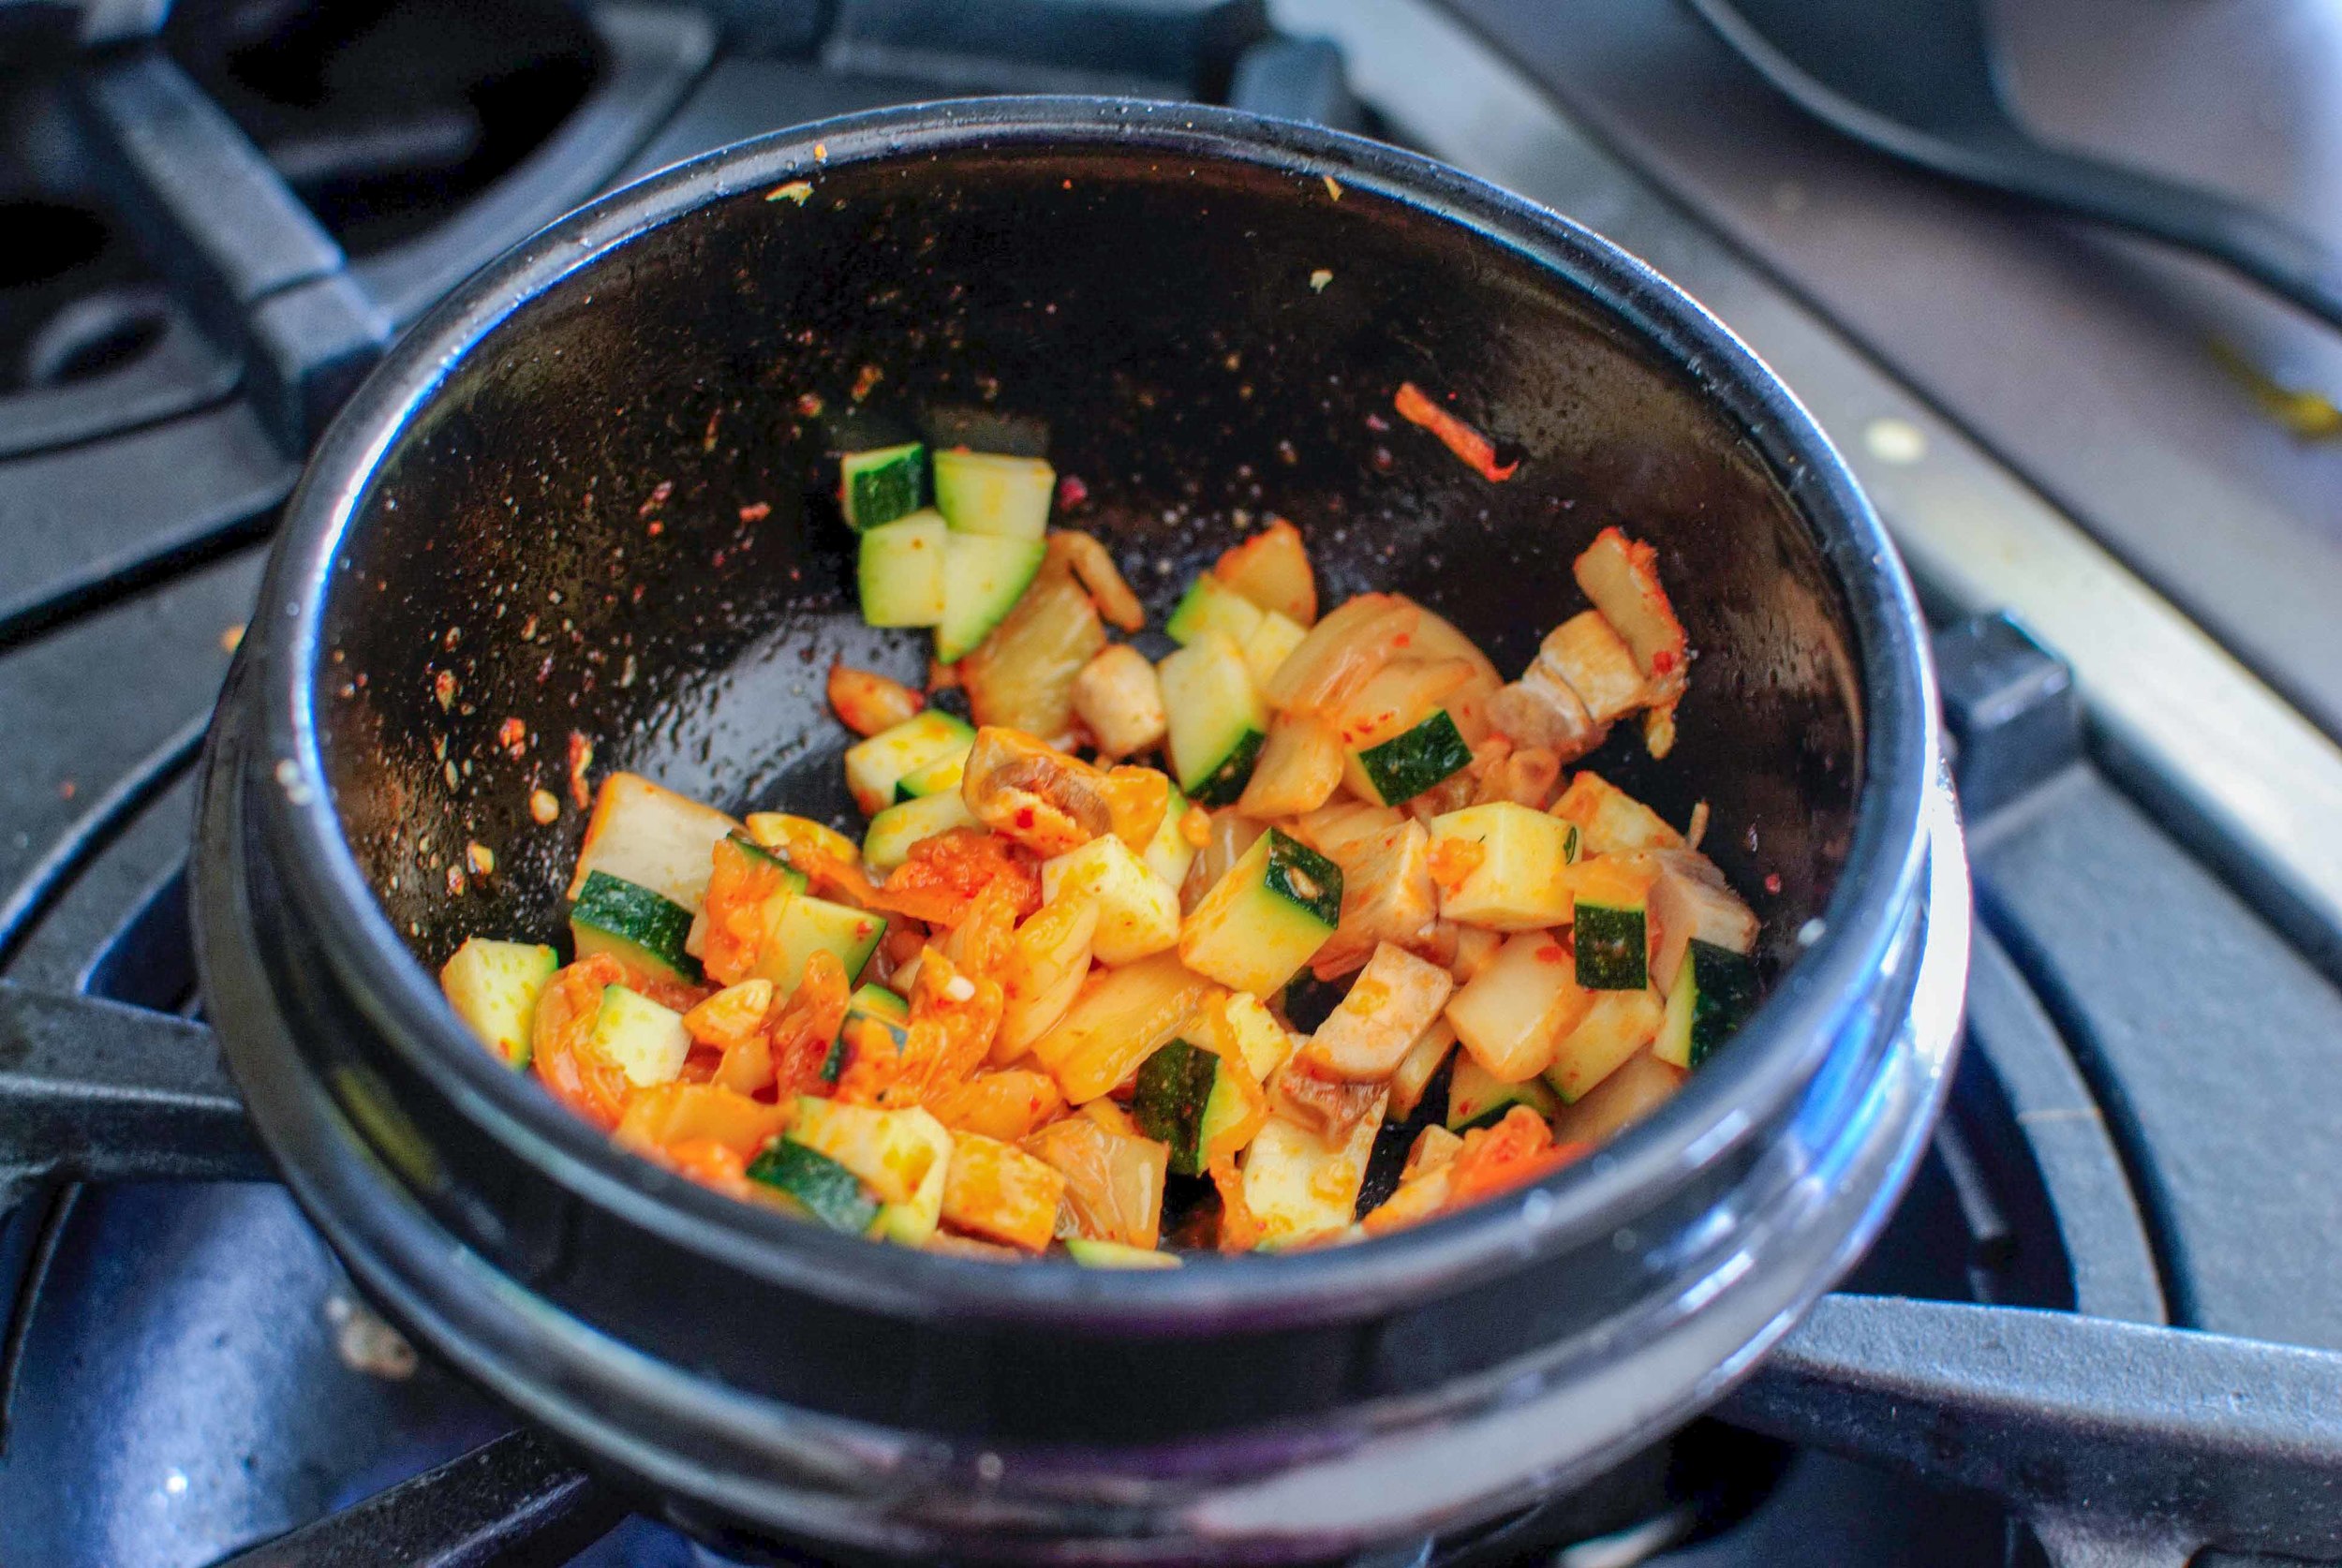
In a small saucepan, heat grape seed oil on medium high heat. Add kimchi, garlic, mushrooms, and zucchini; cook until tender and barely browned, about 2-3 minutes. Add stock and bring to a boil. Scoop large spoonfuls of silken tofu from its package into the boiling soup base. Reduce heat to medium and bring back to a hard simmer, stirring occasionally to break up the tofu. Simmer for 3 minutes until tofu is heated through. Season with kosher salt. Add seafood and cook until cooked through, about 2 minutes. Taste and adjust seasoning.

Reduce the heat to low and drizzle the soup with sesame oil and scatter green onions. Crack an egg into a small bowl and gently pour on top of the soup; the hot soup with cook the egg. Serve from your saucepan and enjoy!

Korean Green Onion and Seafood Pancakes (Pa Jun) by Cynthia Raub

Print Friendly and PDF

Korean people love their pancakes! Kimchi pancakes, green onion pancakes, sliced fish pancake fritters, mung bean pancakes, chive pancakes with a million jalapeños . . . the list is seemingly endless. If it's a thing, it can be pancaked. I love them all, but I especially like this one because it doesn't require any ingredients you couldn't find in a standard grocery store. I can confidently speak for myself, for you, and every other living being in the world when I say: when you are craving Korean food, it must be satisfied immediately. Mung beans, Asian chives and kimchi can often require a special trip to an Asian market. Ain't nobody got time for that! These green onion pancakes are tender, crisp and beautifully golden. The mild sweetness of the cooked and aromatic green onion is absolutely addictive. If you've never made Korean food before, this is an accessible and tremendously delicious place to start.

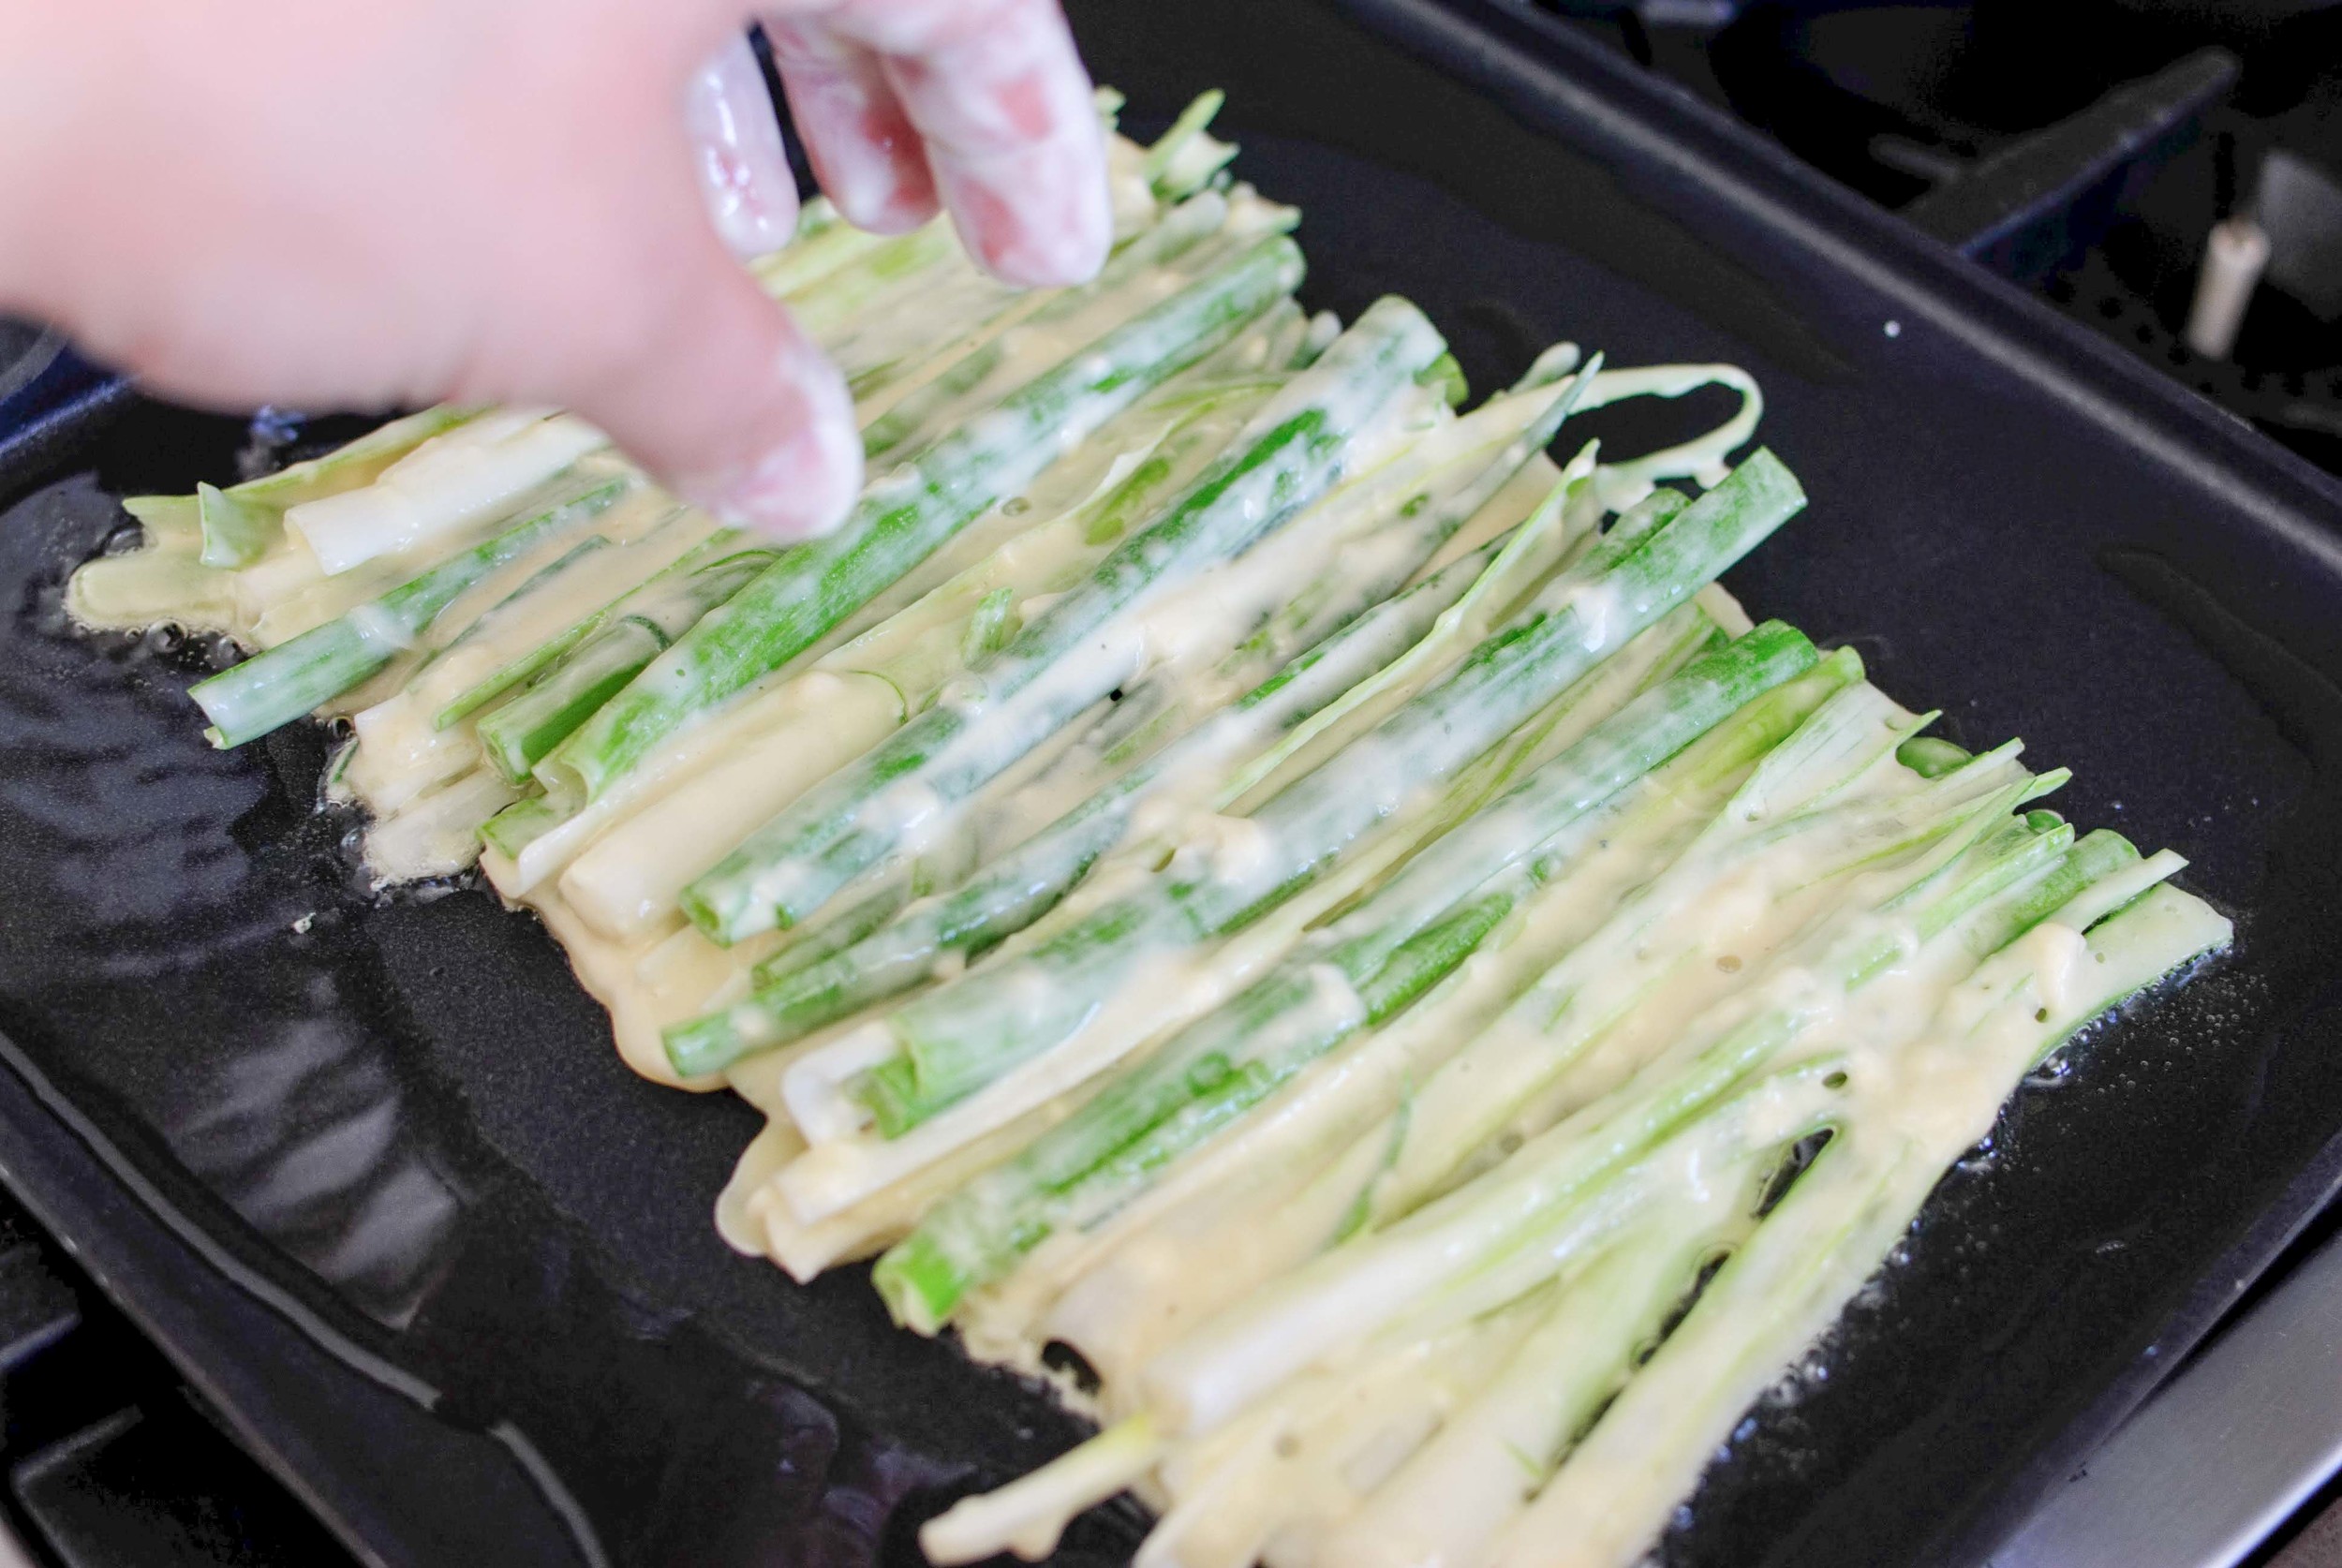
Notes: The green onion pancake my mom made at her restaurant was 80% green onion and that's the recipe I'm sharing with you. Some people prefer less green onion and more batter and this recipe is flexible enough for you to suit your own preferences. This is a very hands on cooking process as you can tell by the photos. I use my hands to lay the battered green onions into the pan, to distribute the raw egg, and to press the pancake to create a crunchy crust. Don't be afraid to use your hands - it will be so much easier than a multitude of utensils. To reheat the pancakes, place them in a non-stick pan on medium heat and heat through on both sides to enjoy them again. Please don't put them in the microwave; that will make everyone sad.

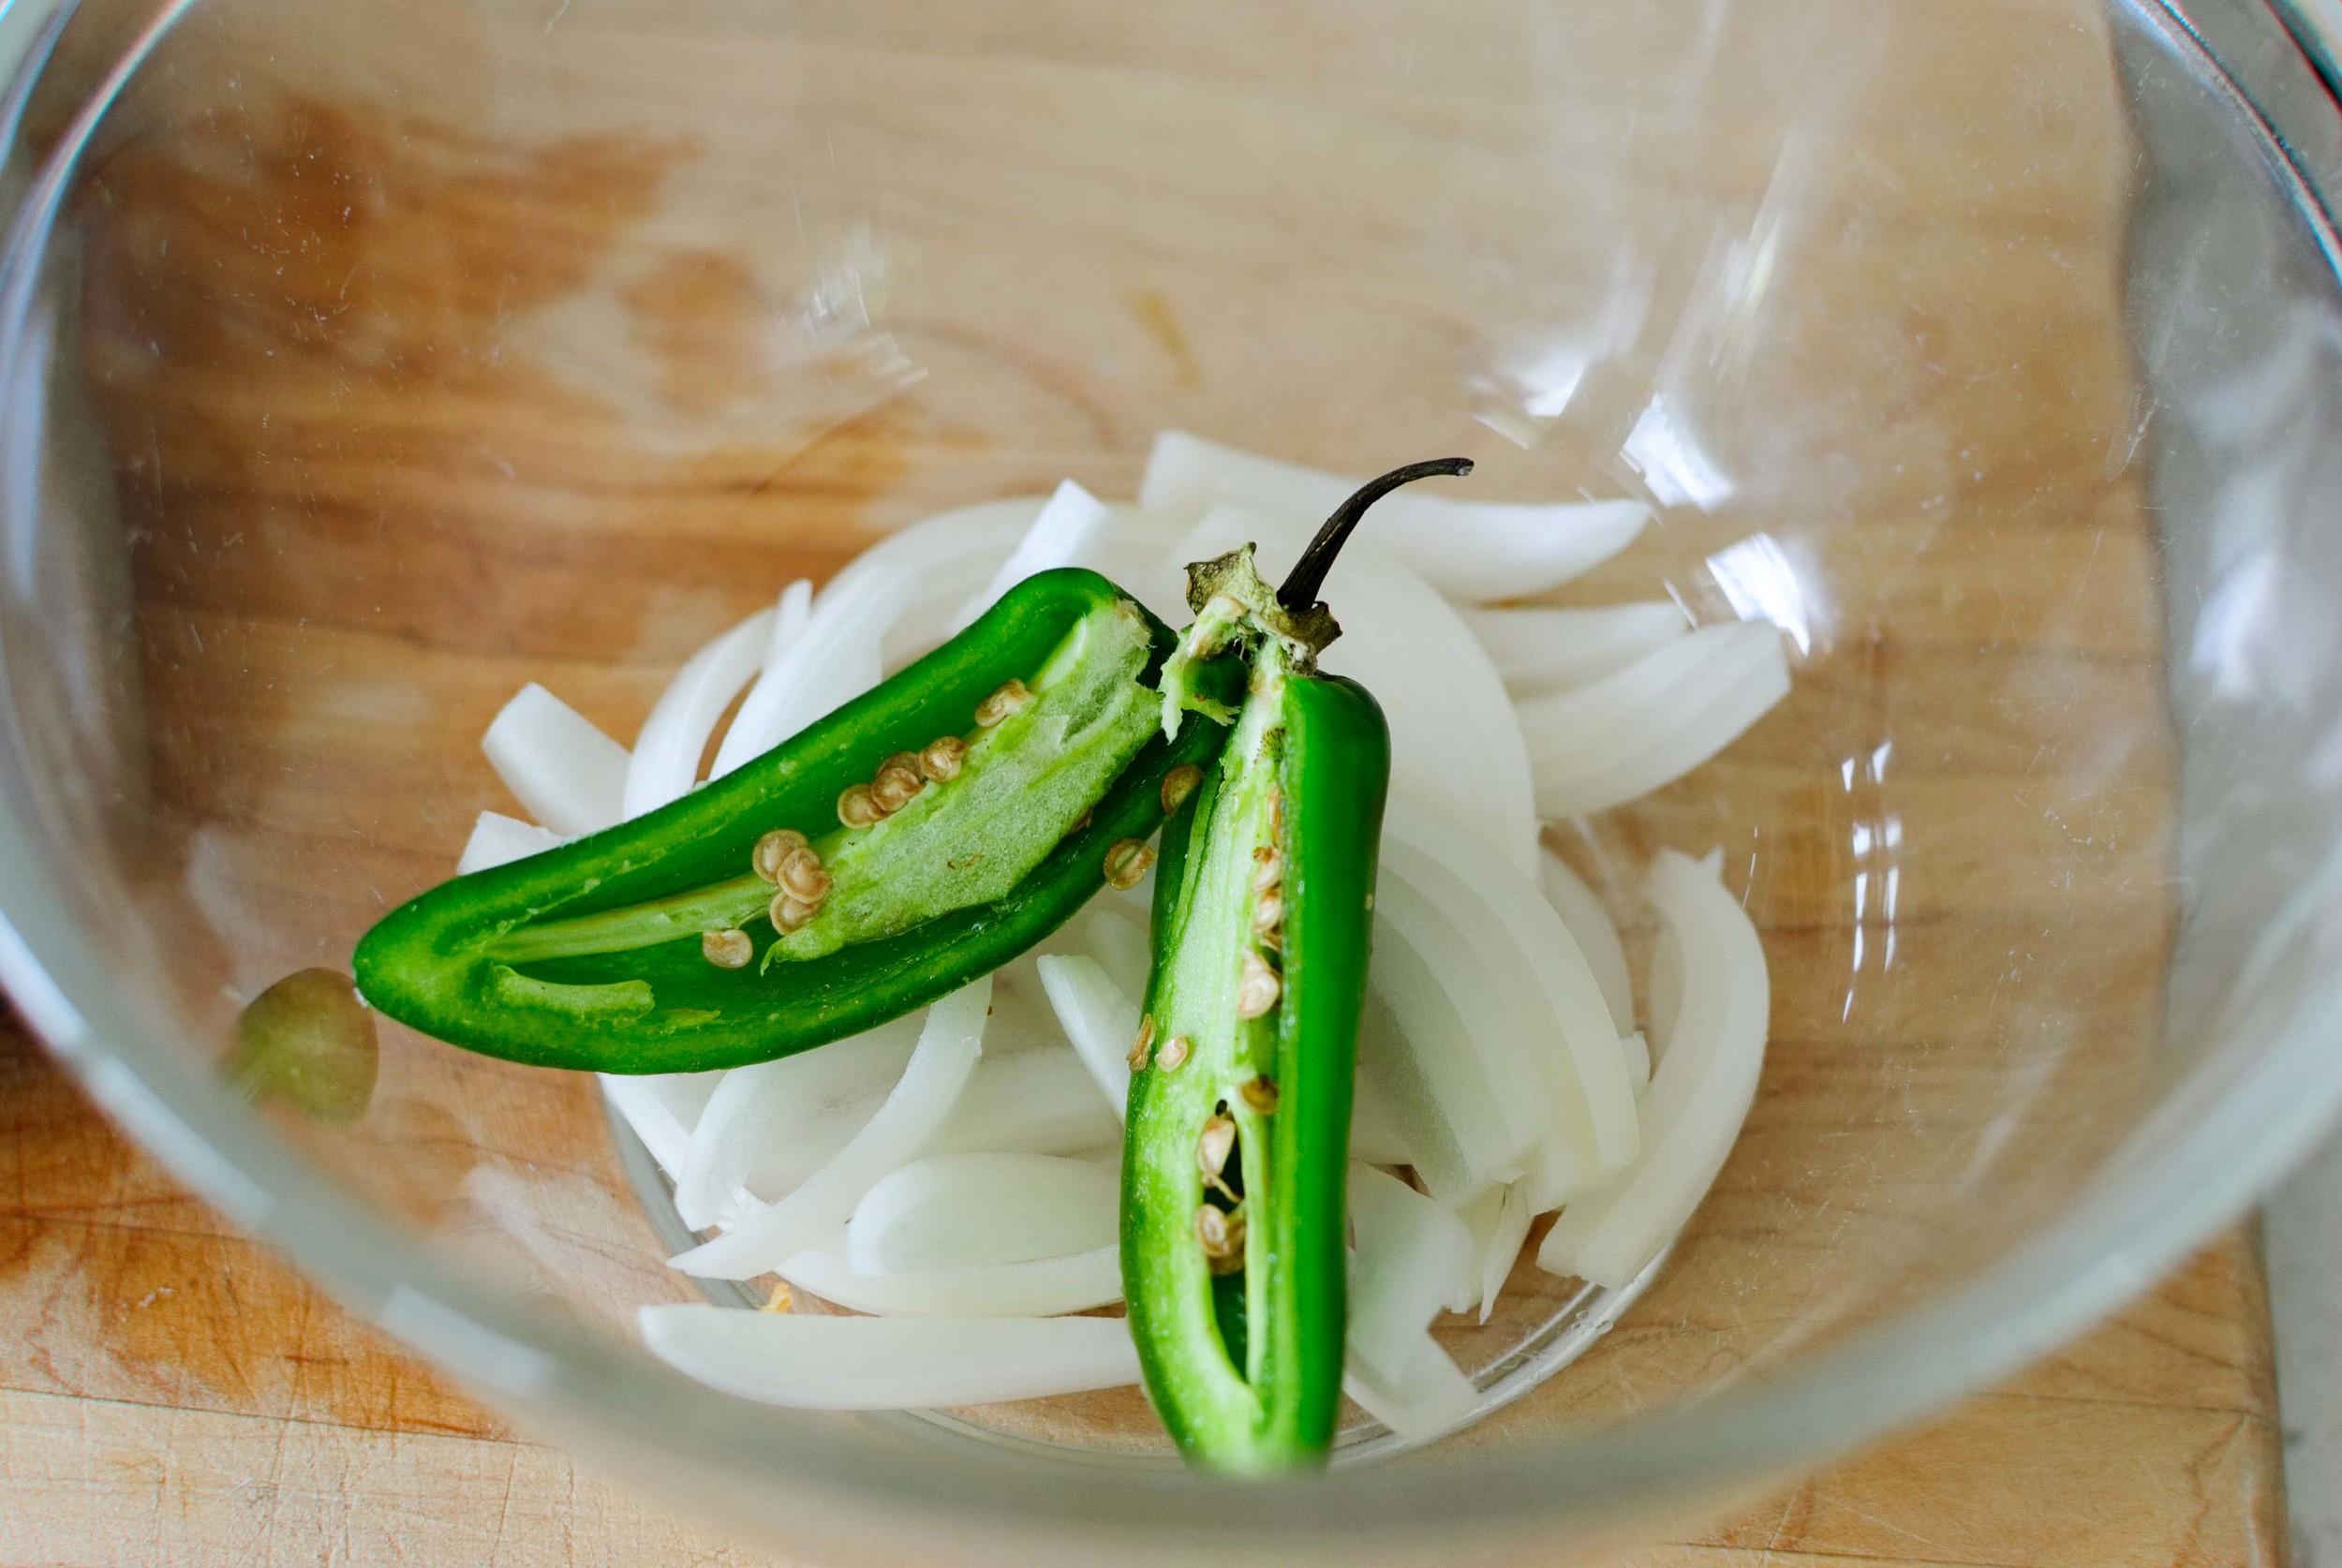
The dipping sauce is such a great accompaniment to the pancakes - it's worth the added few steps. The onions and jalapeño impart their flavors into the liquid and the hot liquid quickly pickles the onion and jalapeño to tone down their harshness and heat.


Yield: 3 large pancakes
Time: 40 minutes

2 large bunches green onions
4 eggs, divided
1 1/2 cups water
1 cup flour
1/4 cup cornstarch
2 tablespoons salt
6 tablespoons grape seed oil (or any other neutral oil), divided
1/2 cup chopped raw shrimp, divided
1/2 cup chopped raw squid, divided

Pancake Dipping Sauce for serving (see recipe below)

Rinse green onions and remove tops. Trim bottoms to make all of the green onions similar in length. Lay them on the cutting board and slice through the entire length of the vegetable - this will make biting through the cooked green onion easier and less stringy. Halve the green onions and set aside.

In a medium bowl, combine water and one egg and whisk until foamy. In a shallow pan (I used an 8 x 13 cake pan) combine flour, cornstarch and salt. Start by pouring 1 cup of foamy water/egg mixture into dry ingredients and stir gently until roughly combined - like a standard pancake mixture, wet and dry patches are OK since you don't want to over-mix the batter! From there, add more liquid a few tablespoons at a time until the batter is thick enough to hold together and coat the green onions, but is not gloopy and sticky, nor runny.

Heat a large pan or griddle on medium high heat with 2 tablespoons of grape seed oil. Add 1/3 of the green onions to the batter and toss until fully coated. Turn the heat down and arrange batter covered green onions in the pan in a single row with no space between the green onions. Turn the heat back up to medium-high and press the green onions into the pan to create a cohesive crust. Once the batter begins to brown and the green onions are heating through, scatter 1/3 of the seafood over the top of the pancake. Beware of oil popping at this point!

Press the seafood down into the pancake. Crack an egg into a small bowl and whisk lightly. Pour the egg over the top of the pancake, making sure to cover the seafood (the egg will help to secure the seafood to the pancake). When the seafood begins to warm and 70% of the pancake is cooked through (4-6 minutes), flip the pancake over to finish cooking and brown the second side (about 2 minutes). The pancake is done when the batter throughout the green onions is throughly cooked the edges are deeply browned and crisp. Flip the pancake onto a cutting board with the seafood and egg mixture facing up. Cut into generous bite sized pieces. Repeat two more times for a total of 3 pancakes. Serve immediately with the Pancake Dipping Sauce.

Pancake Dipping Sauce

1 cup soy sauce
1/2 cup water
1/4 cup sugar
1/4 white vinegar
1 jalapeño, halved
1 small onion, sliced thin

In a small sauce pan over medium heat, combine soy sauce, water, sugar and vinegar. Bring to a simmer until all of the sugar is dissolved. In a medium heat-proof bowl, place sliced onion and halved jalapeño. Pour the simmered soy sauce mixture over the onions and jalapeño and allow to fully cool before serving.

Fresh Egg Pasta by Amy Cantu

Print Friendly and PDF

I never fully understood why anyone liked pasta with butter and parmesan. It always just sounded bland and boring to me. I filed it under "picky kid food". This luscious and ethereal fresh egg pasta changed my entire understanding of what pasta with butter and parmesan could actually mean. These wide ribbons were at once delightfully delicate and richly filling. A quick toss with a pat of butter and shower of grated parmesan infused the springy strands with a bit of luxury and saltiness without masking its simple glory. Cynthia and I went mad for it - dancing around the kitchen, swooning, moaning, eyes-rolling-into-the-back-of-our-heads, madness. This fresh pasta meets and exceeds any and all expectations you might have for homemade noodles.  If eating a bowl of nothing but plain pasta is too one note for you, (I promise that I struggled to consider eating anything else with it,) Cynthia's spring vegetables are a bright and punchy (if not guilt-appeasing) match to the simple indulgence of homemade pasta.

Notes: Homemade pasta is not terribly difficult to make, even for a novice. It can even be made with no special equipment, except perhaps a rolling pin. I had a pasta machine collecting dust in the closet (I almost forgot I even had it and only used it once 10 years ago), so I pulled it out to see if it still worked. It does, and it's been getting a lot of use ever since we tested this recipe. I pulled inspiration and direction from both Serious Eats, which has yet to fail me, and also a recipe from Melissa Clark in New York Times Cooking. I love the delicate richness of an extra egg yolk and detailed, fool-proof directions from Serious Eats; I also liked the addition of olive oil in Melissa Clark's version, which added flavor and made the dough easier to roll out. My first batch of pasta sported some ragged edges and uneven texture, but it still tasted better than any pasta I'd ever eaten. So, don't toss out any uglies - close your eyes and enjoy the perfect taste!

If the recipe makes more pasta than you need, the strands can be twisted together into a few loose nests and then frozen to cook later. The frozen pasta can be cooked without thawing, adding an extra minute or two to cook through.


Time: 1 hour
Serves: 4-6

2 1/4 cups all purpose flour
1 teaspoon kosher salt
1 tablespoon extra version olive oil
2 eggs
4 egg yolks

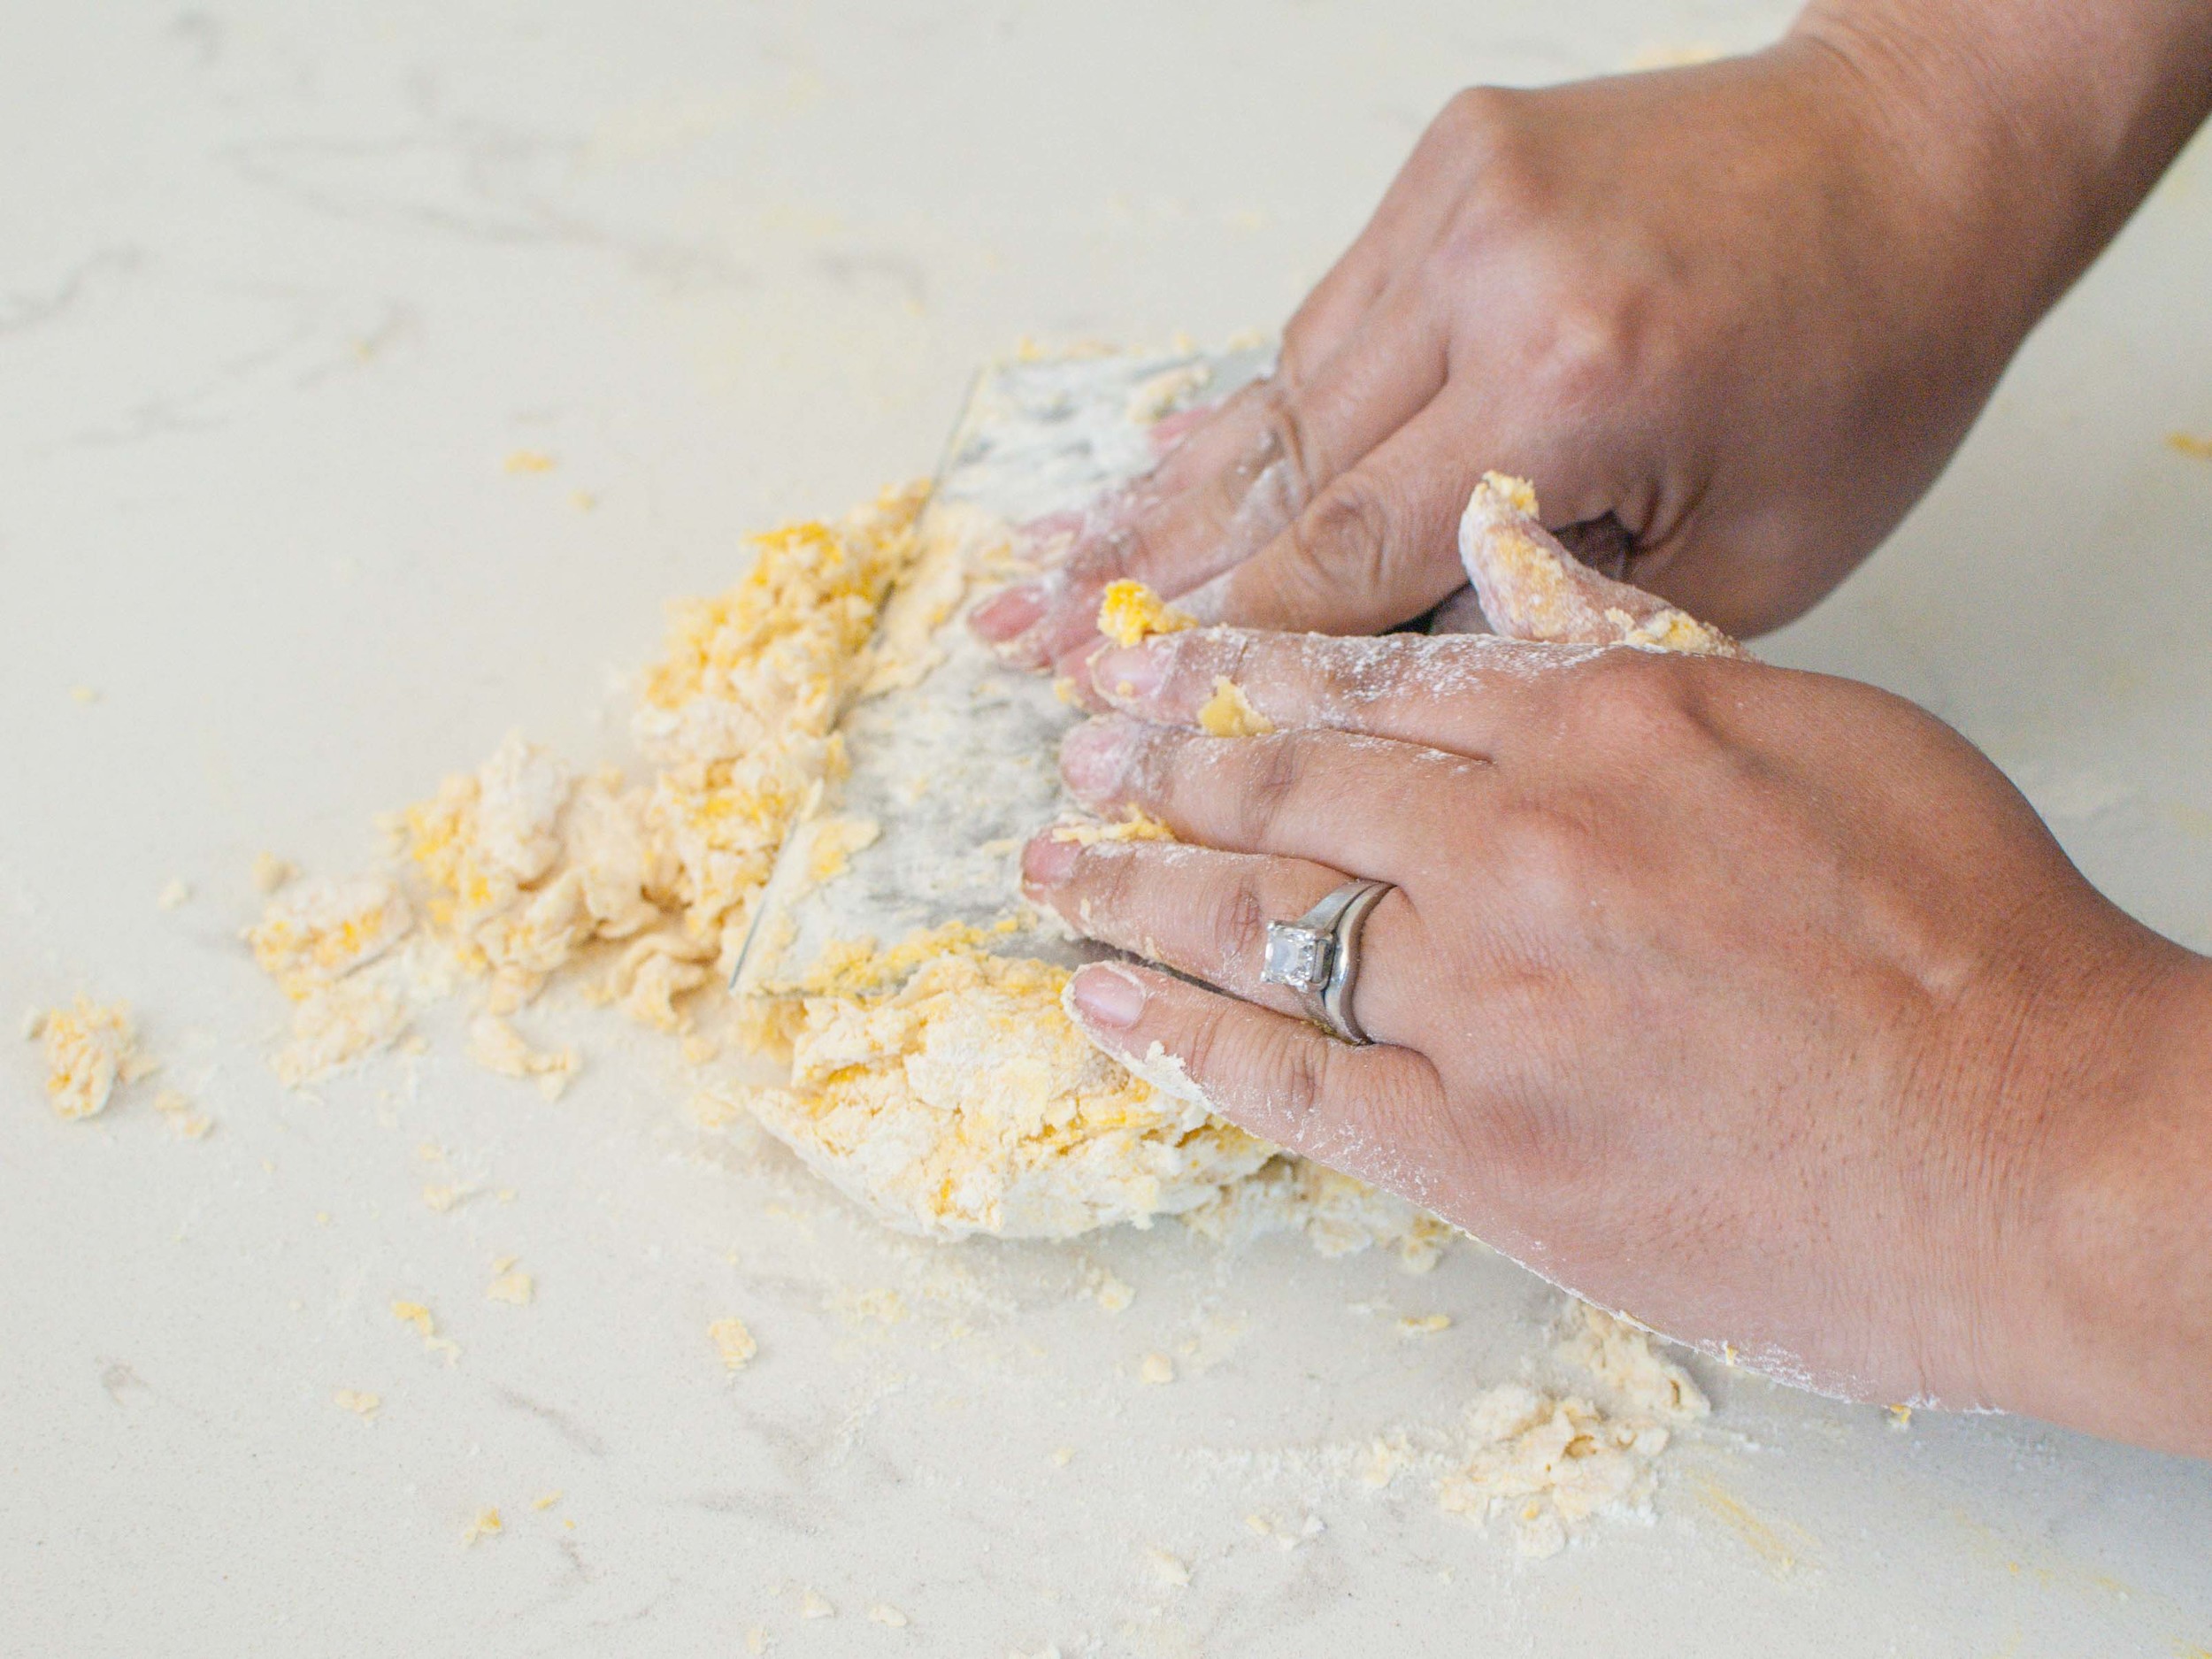
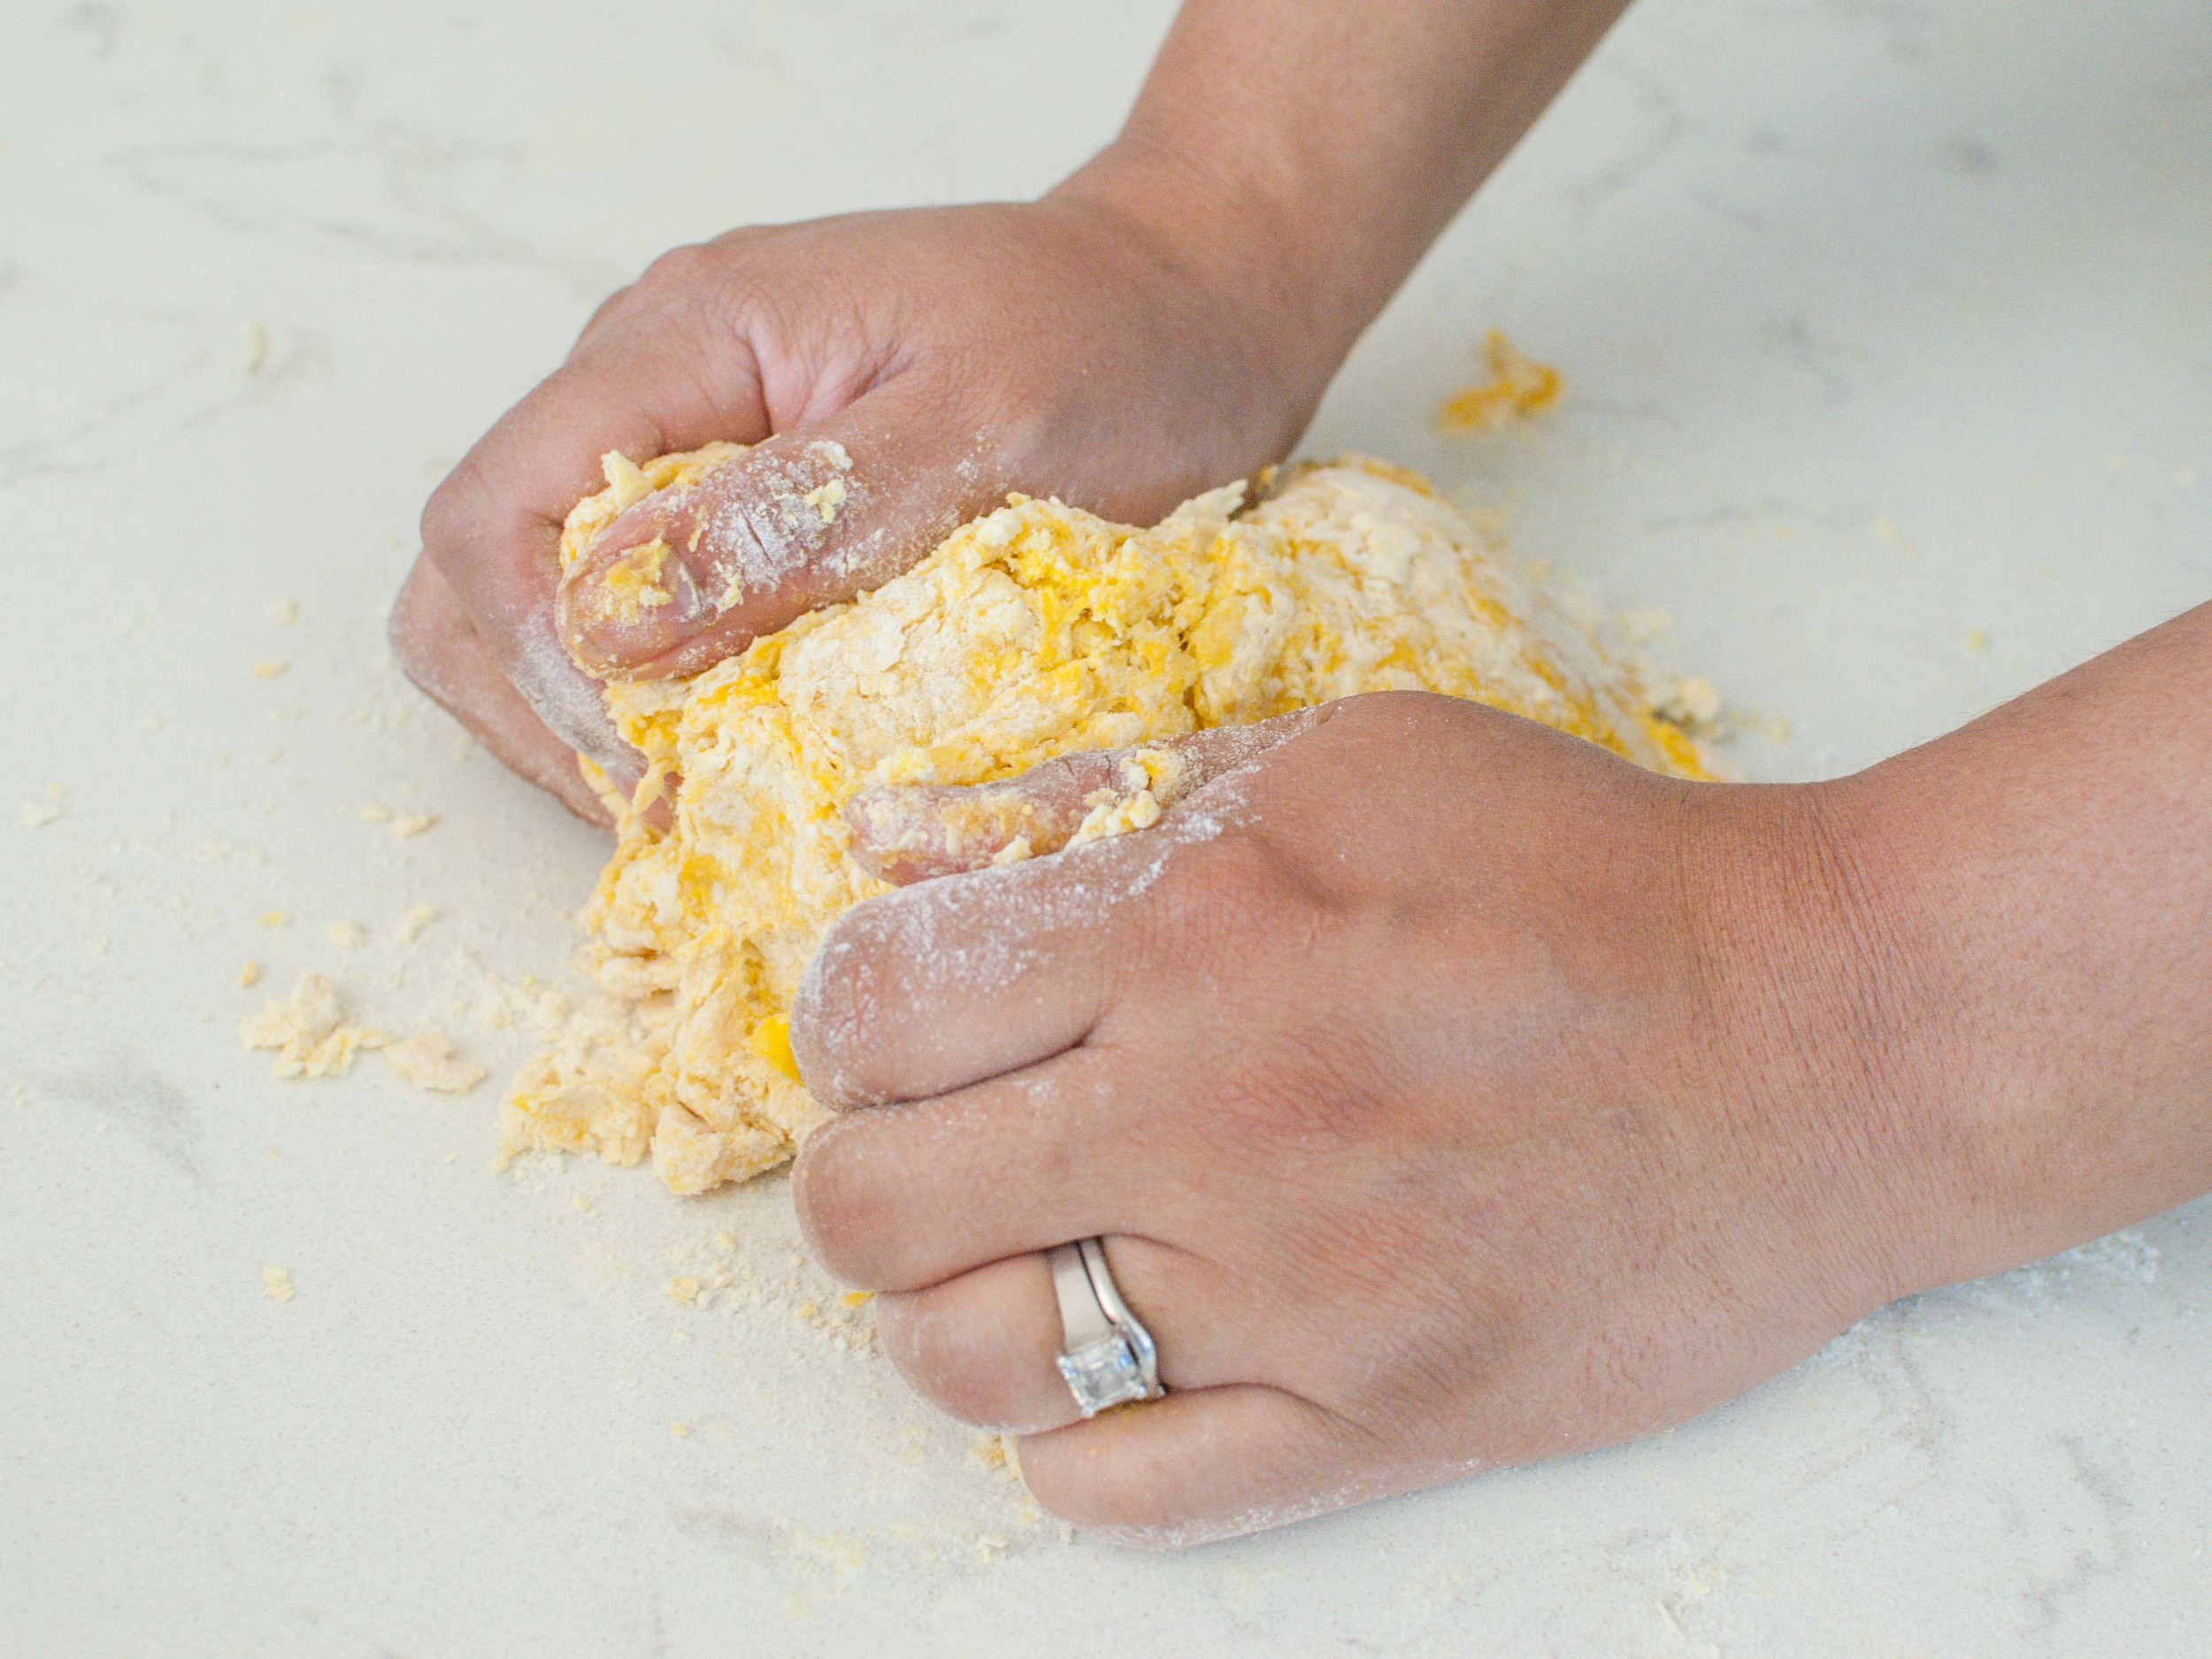
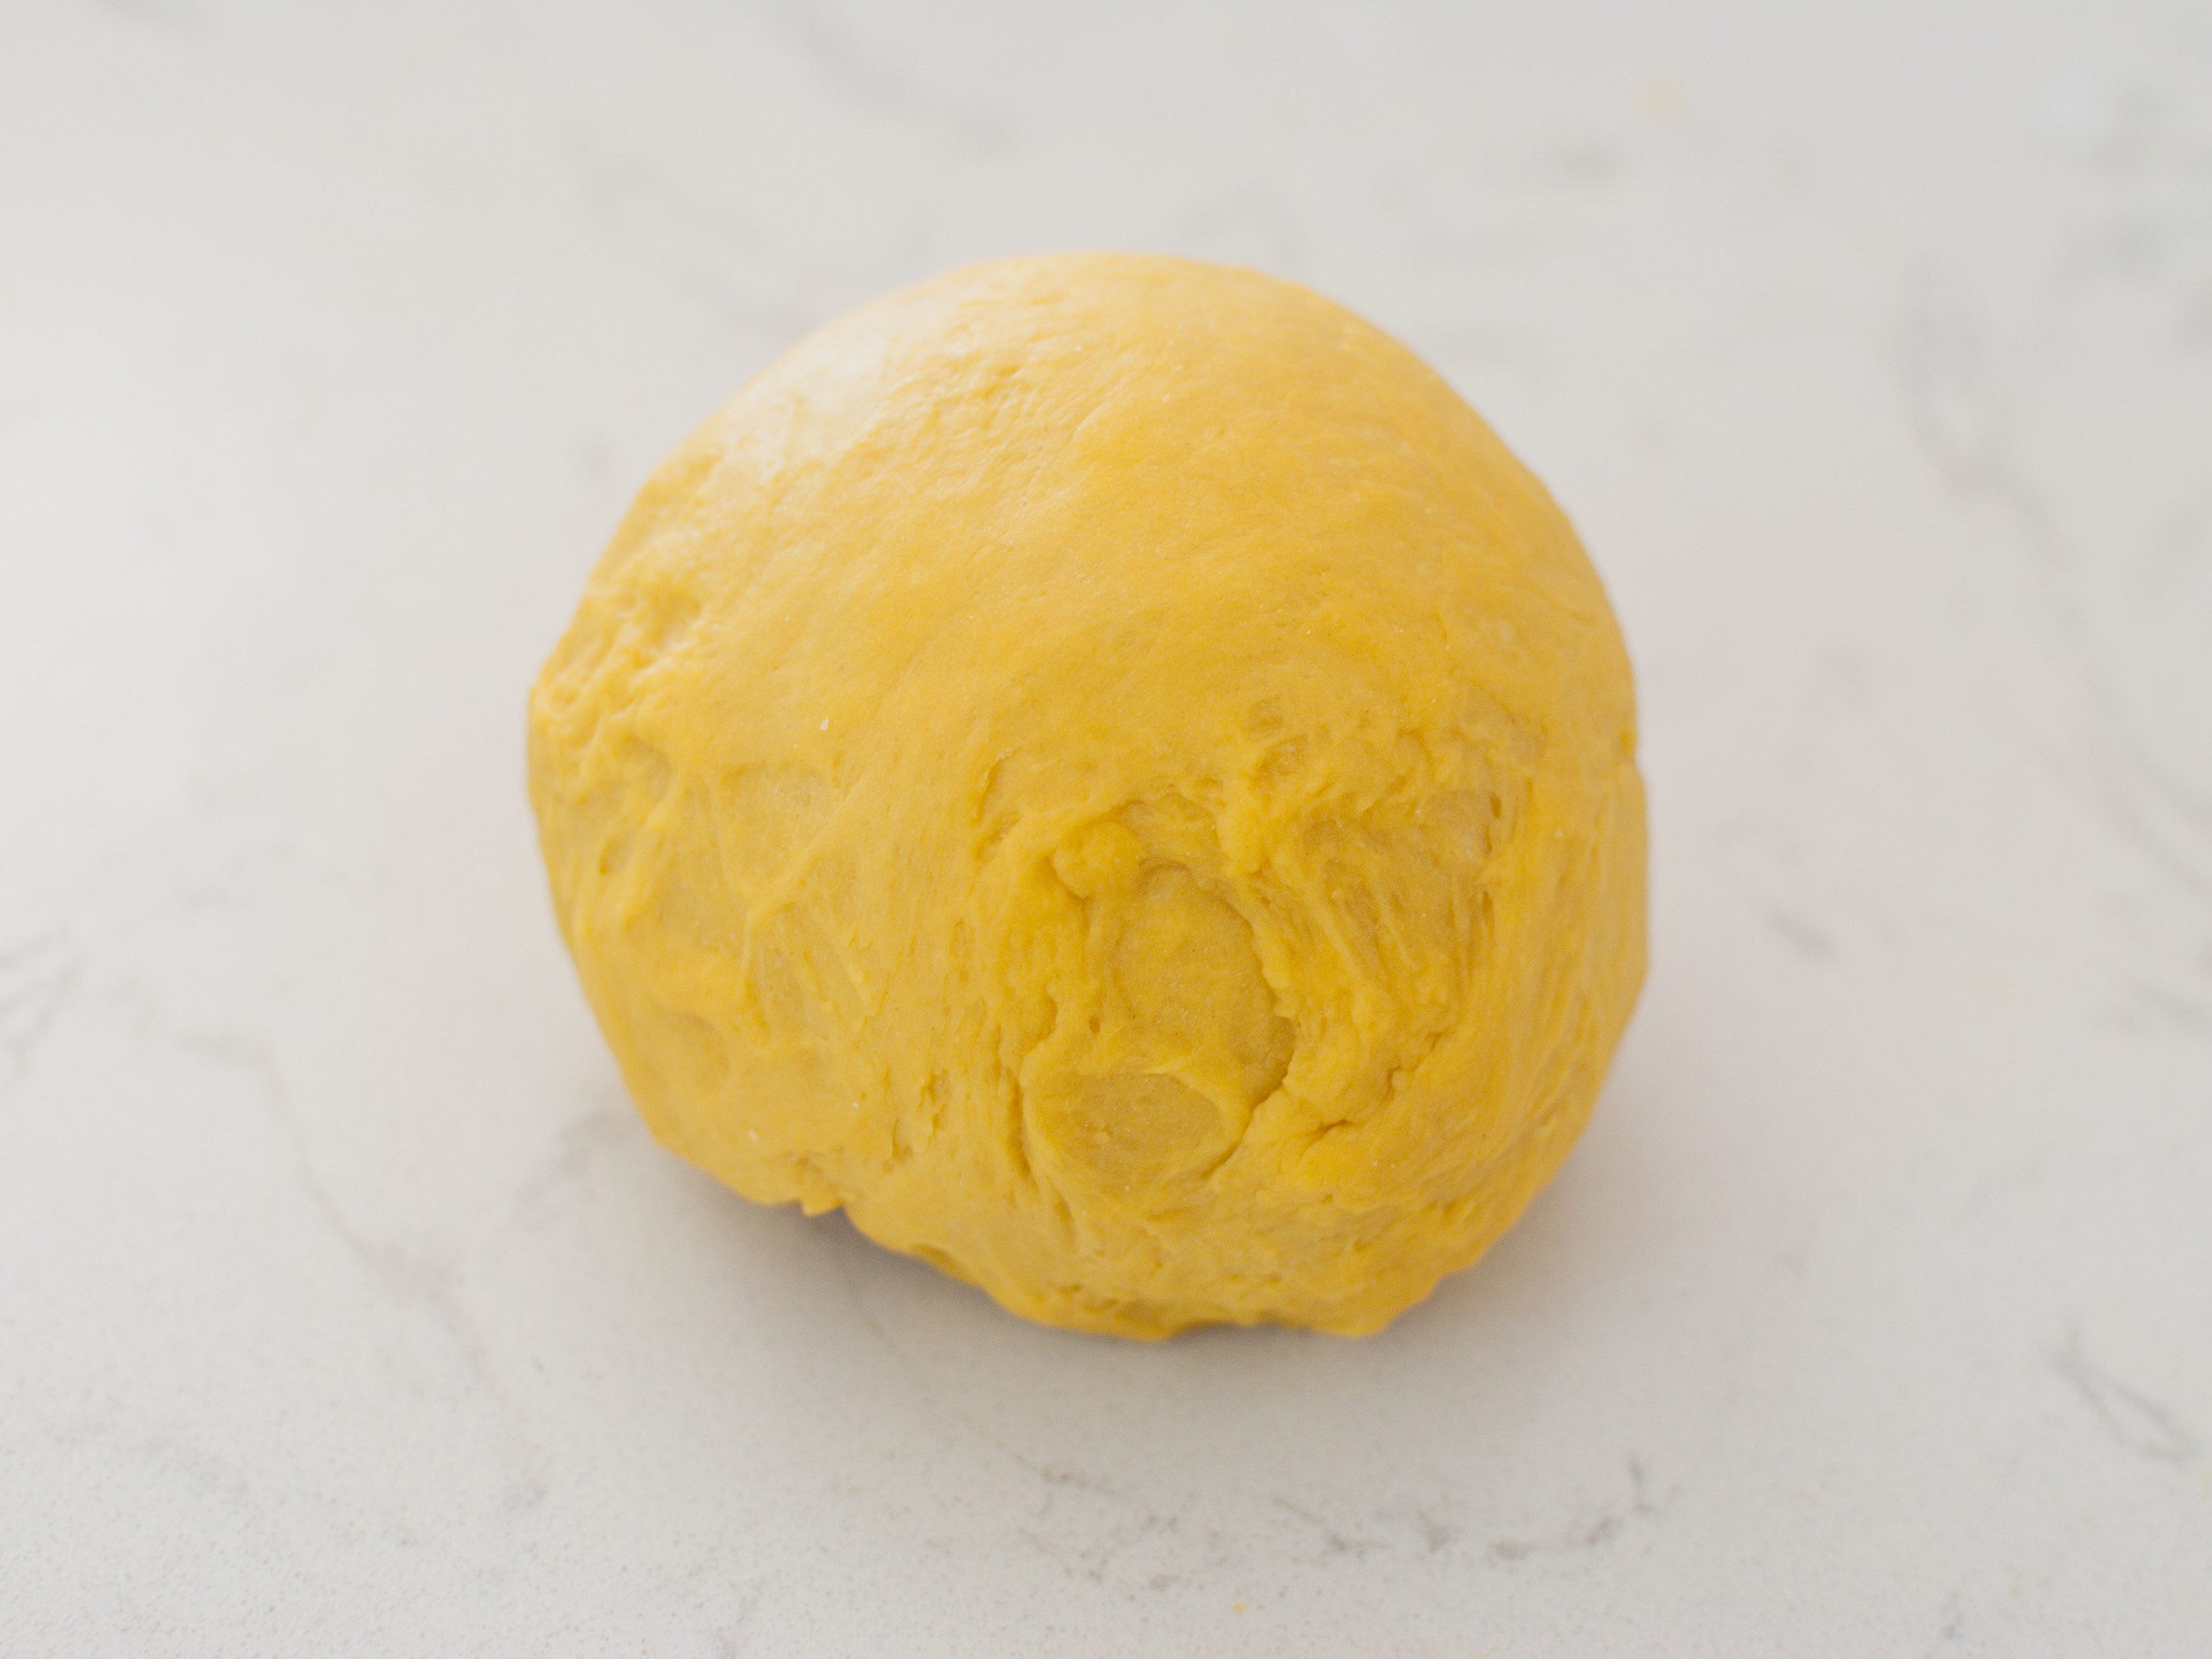
Dump the flour onto a clean work surface, making a large well in the center. Sprinkle the salt and drizzle the olive oil over the flour. Carefully pour the eggs and egg yolks into the well. Use a fork to break up the egg yolks and beat well. With a bench scraper, fold flour into the egg, creating a shaggy dough ball. Scrape the dough from fingers then continue to knead the dough using the heels of your hands until the dough is very smooth and elastic. Add additional water 1 tablespoon at a time, if the dough feels too dry, or add additional flour 1 tablespoon at a time, if the dough feels too wet. Wrap dough in plastic wrap and let rest at least 30 minutes on the countertop or overnight in the fridge.

To use a pasta machine:

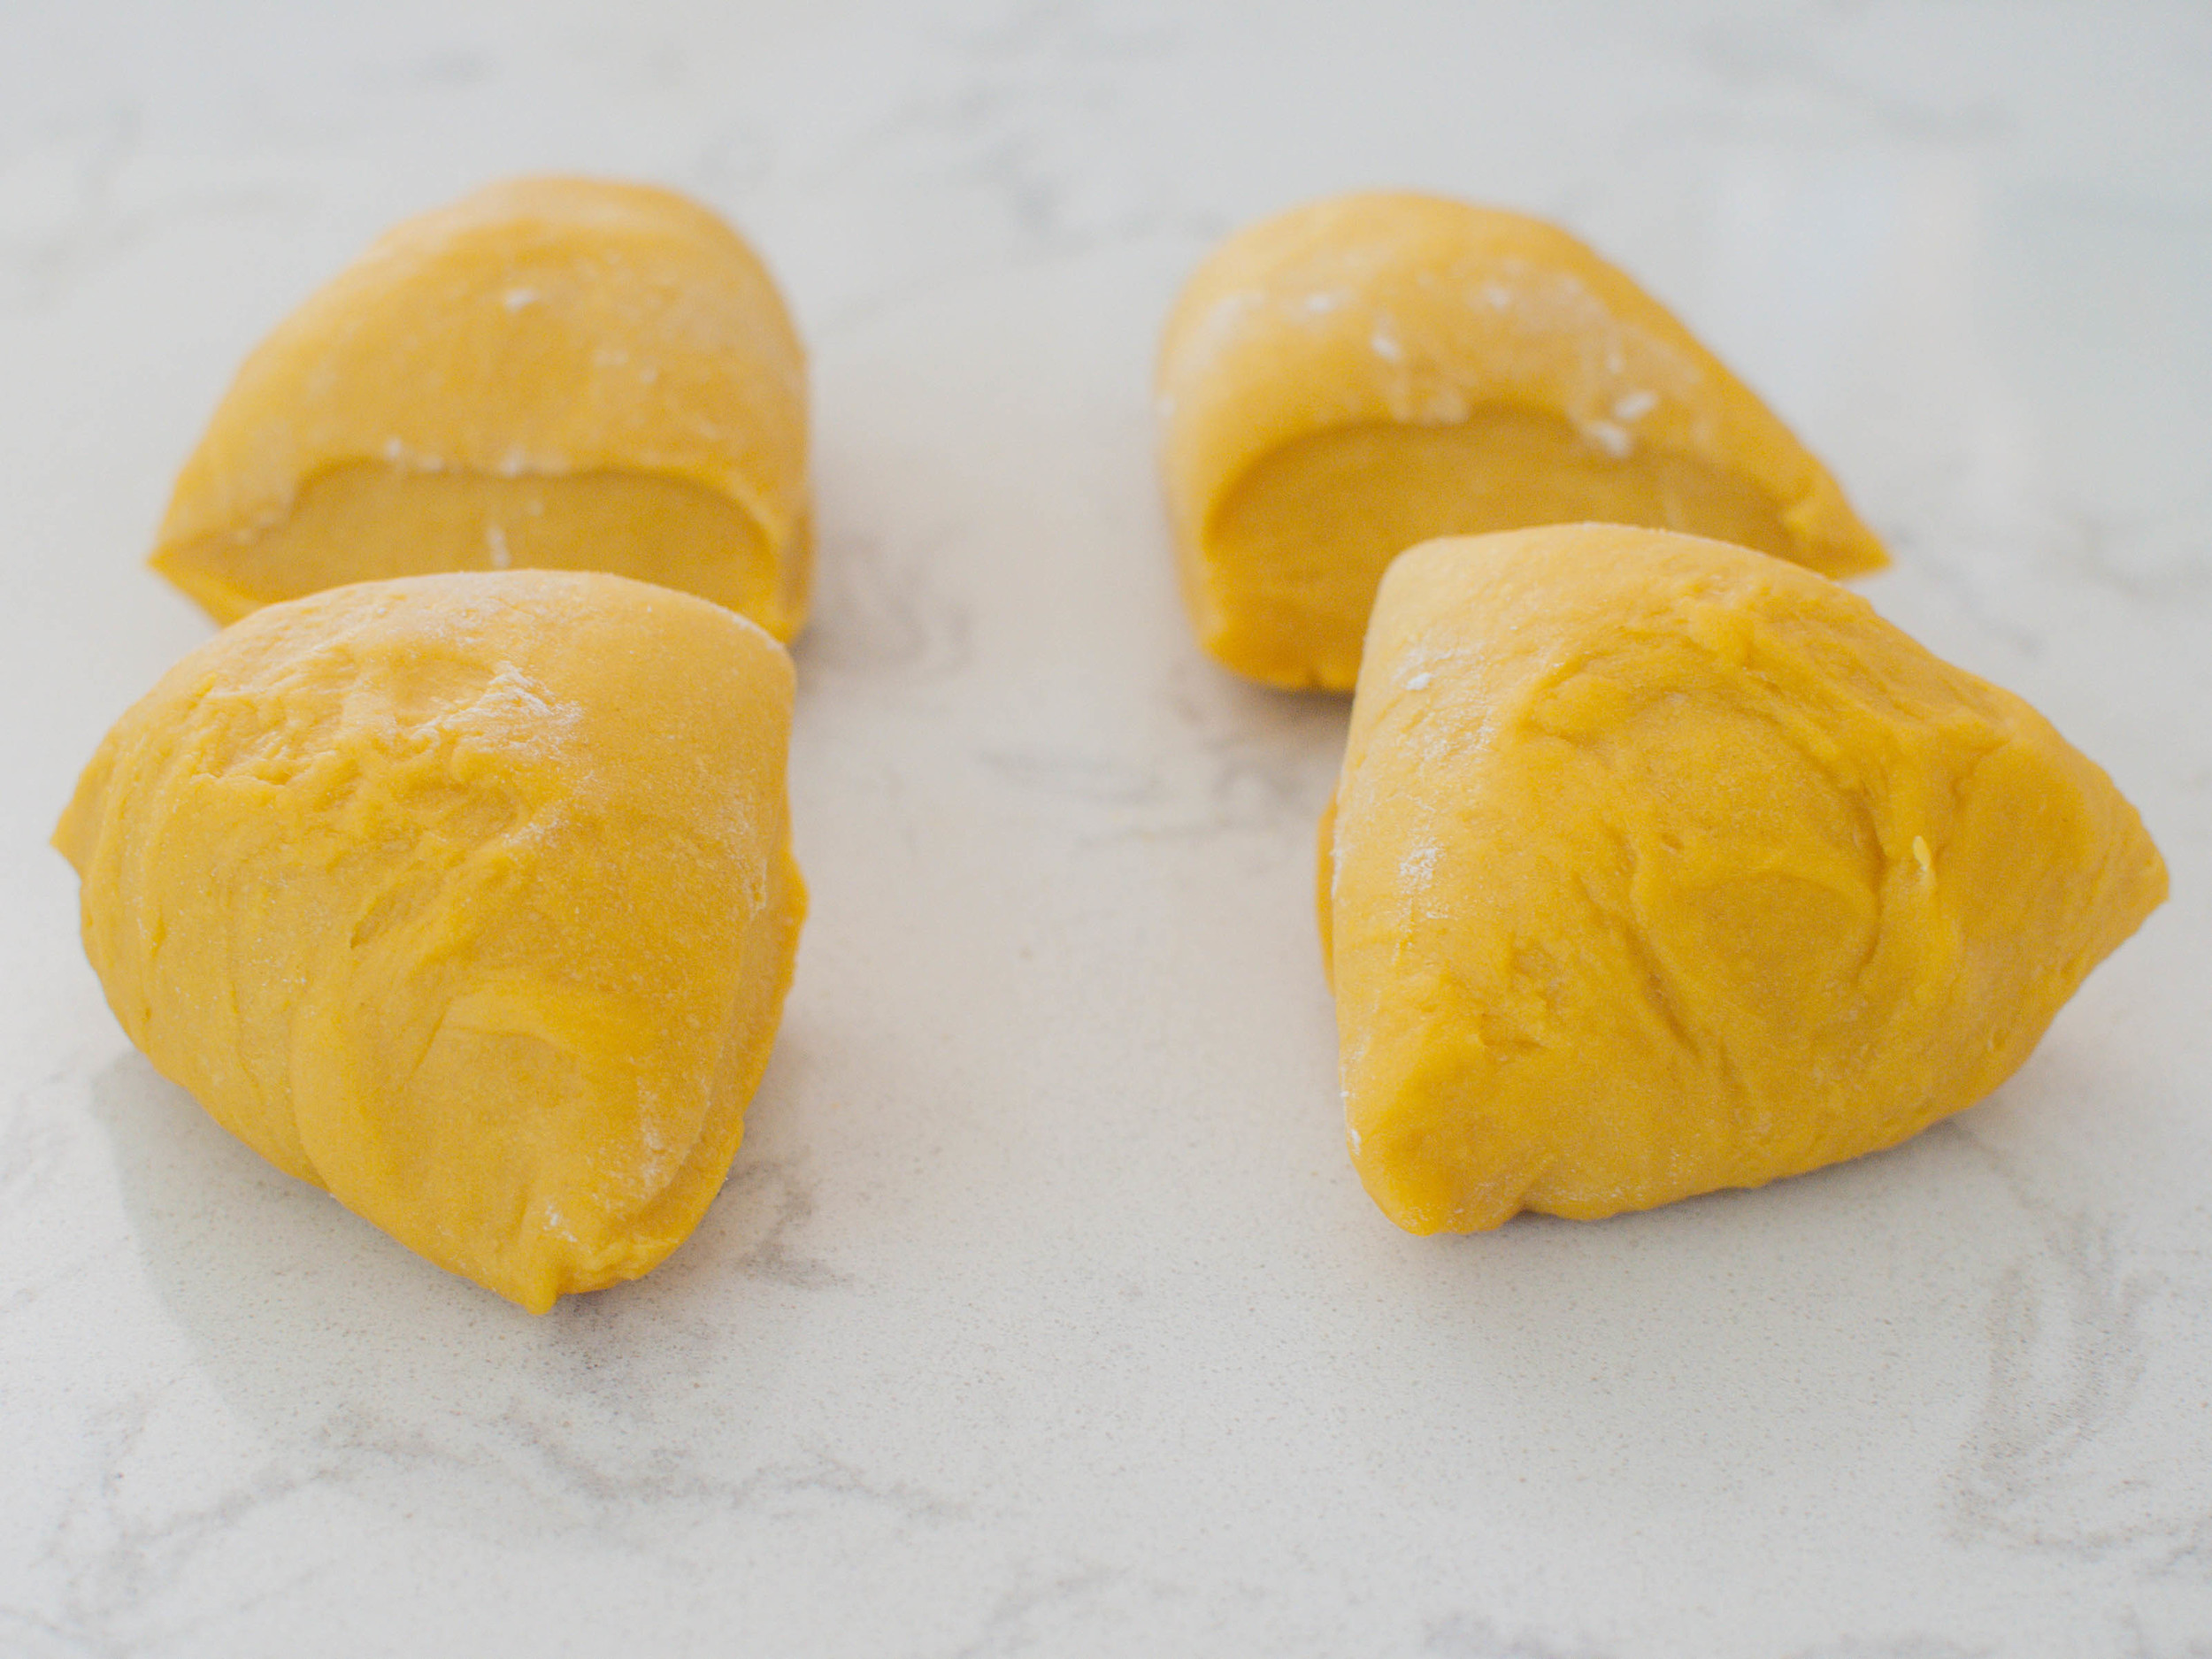
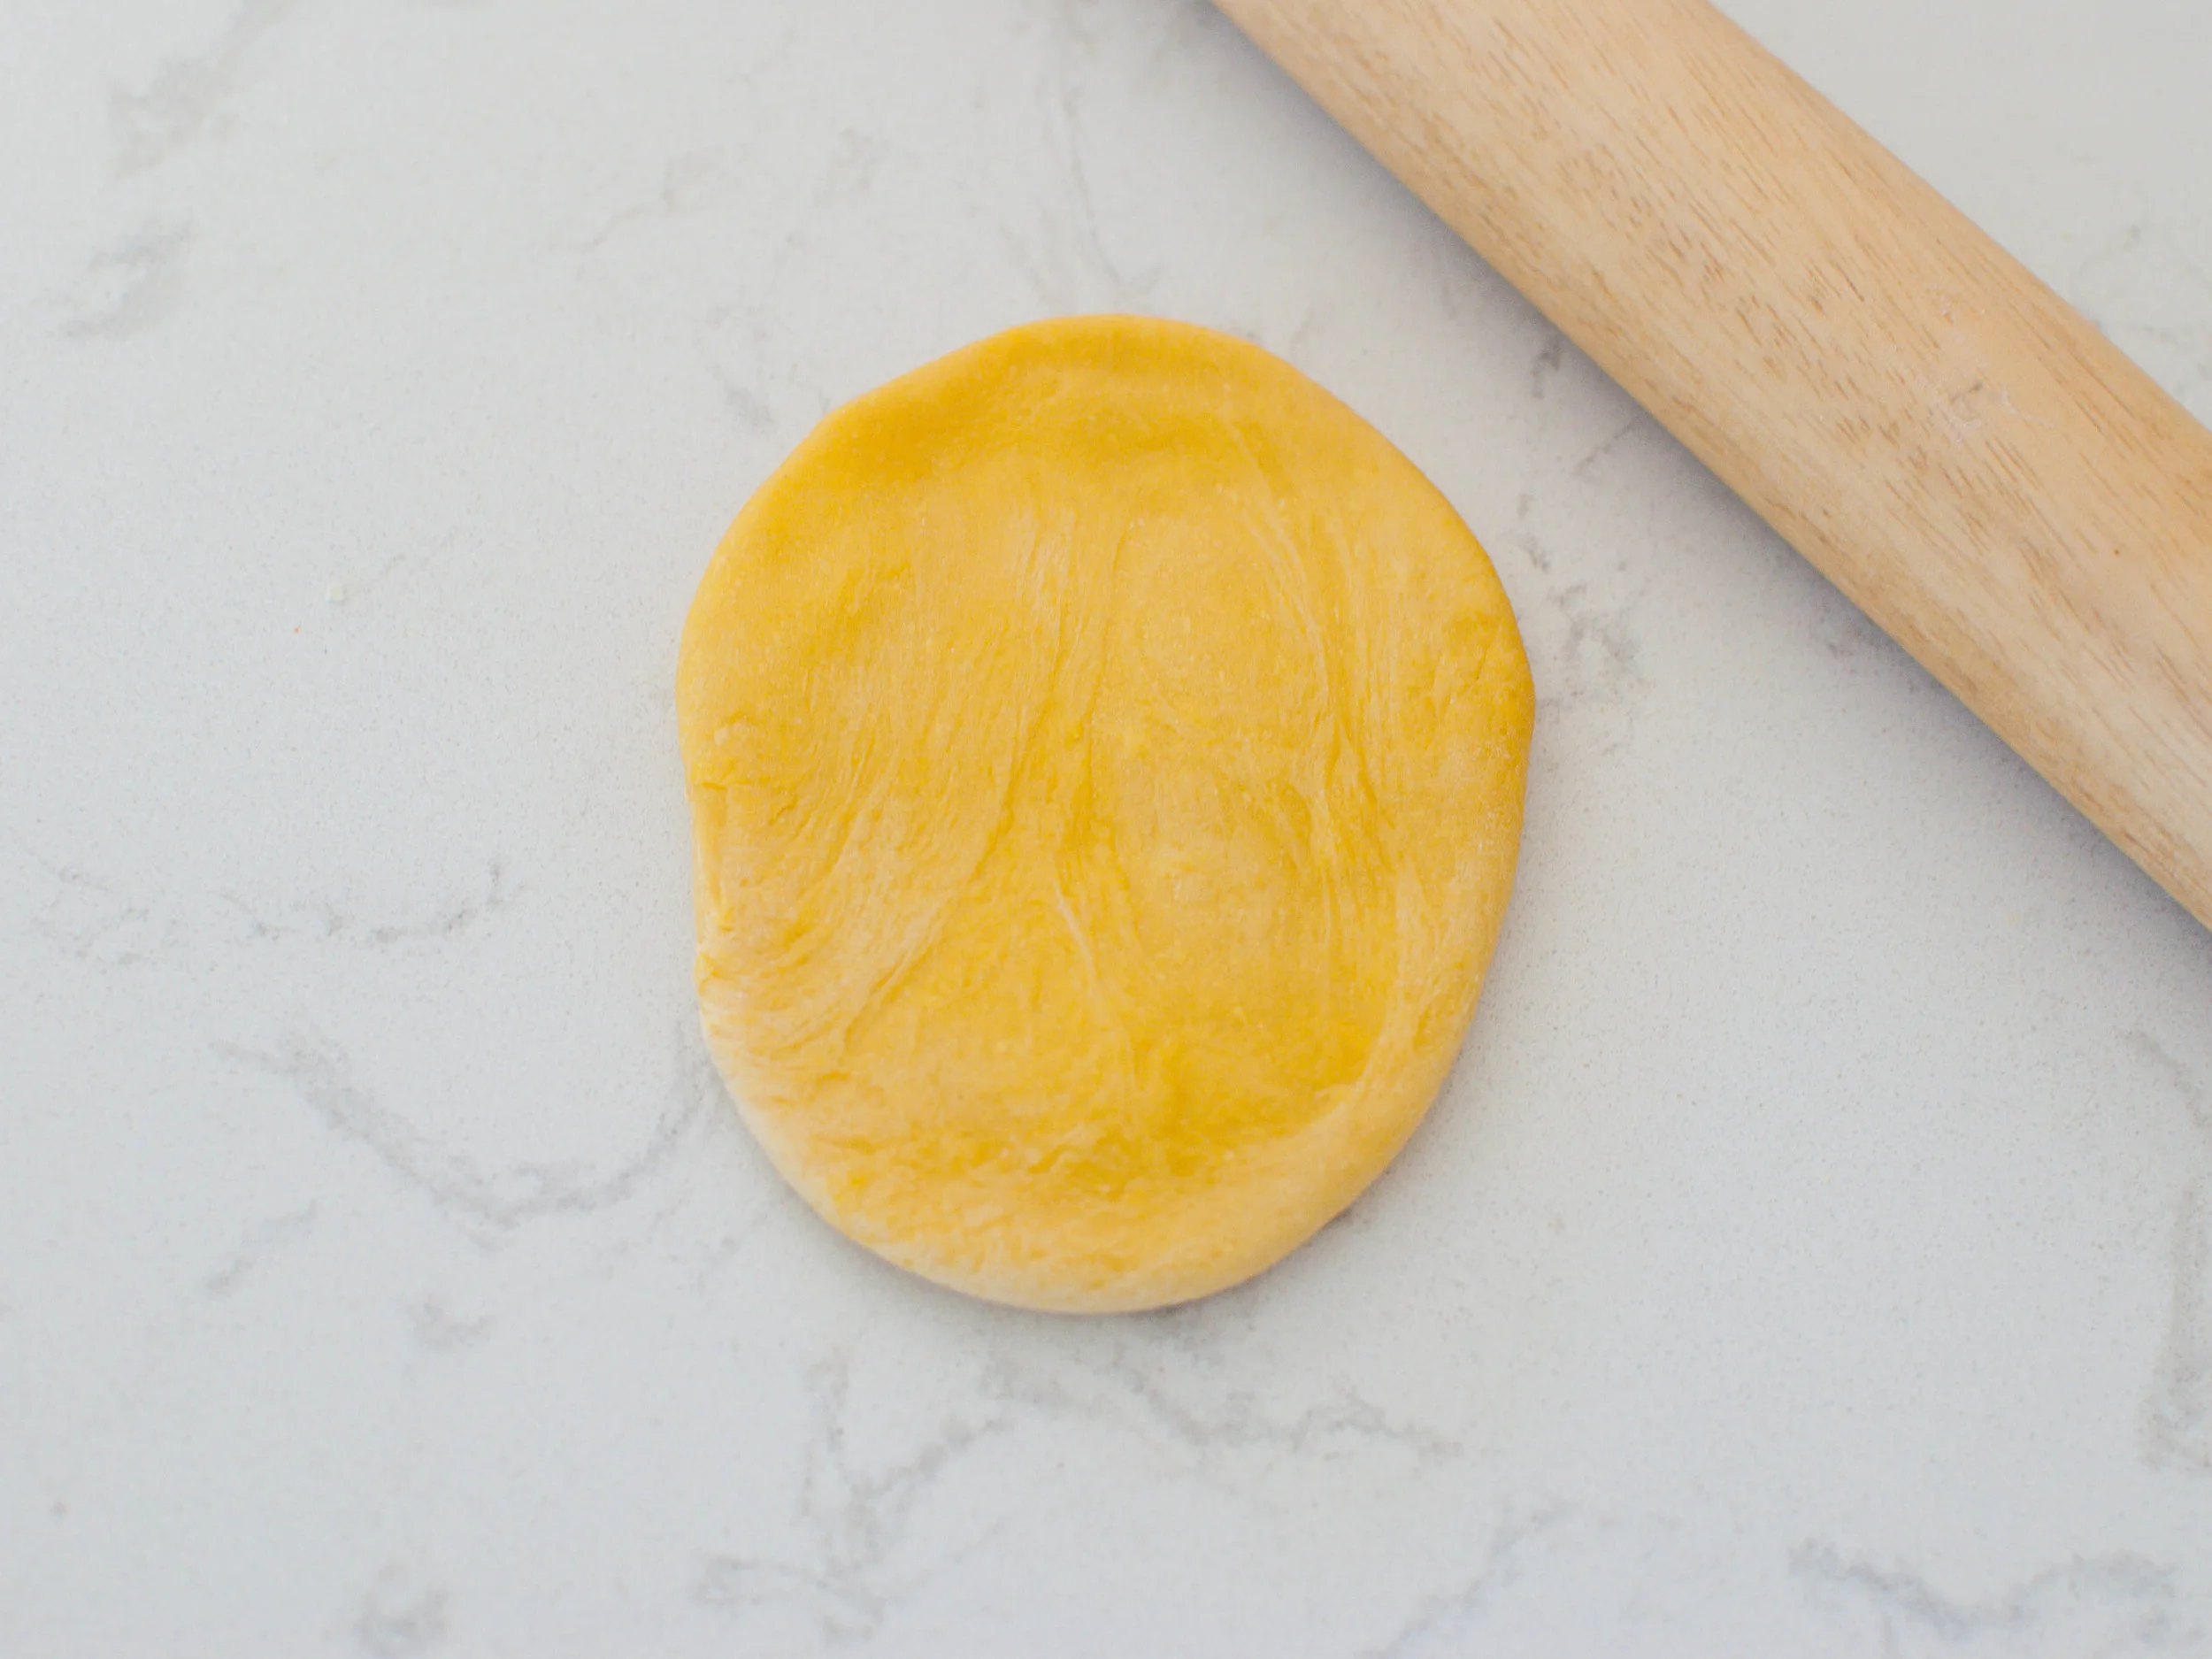
Cut dough into quarters. Place one quarter on a lightly floured work surface and re-cover the remaining dough. Using a rolling pin, roll the dough into an oblong shape about 1/2-inch thick.

Set the pasta machine to the widest setting. Pass the dough through the pasta machine to make a sheet, then repeat 2 more times. 

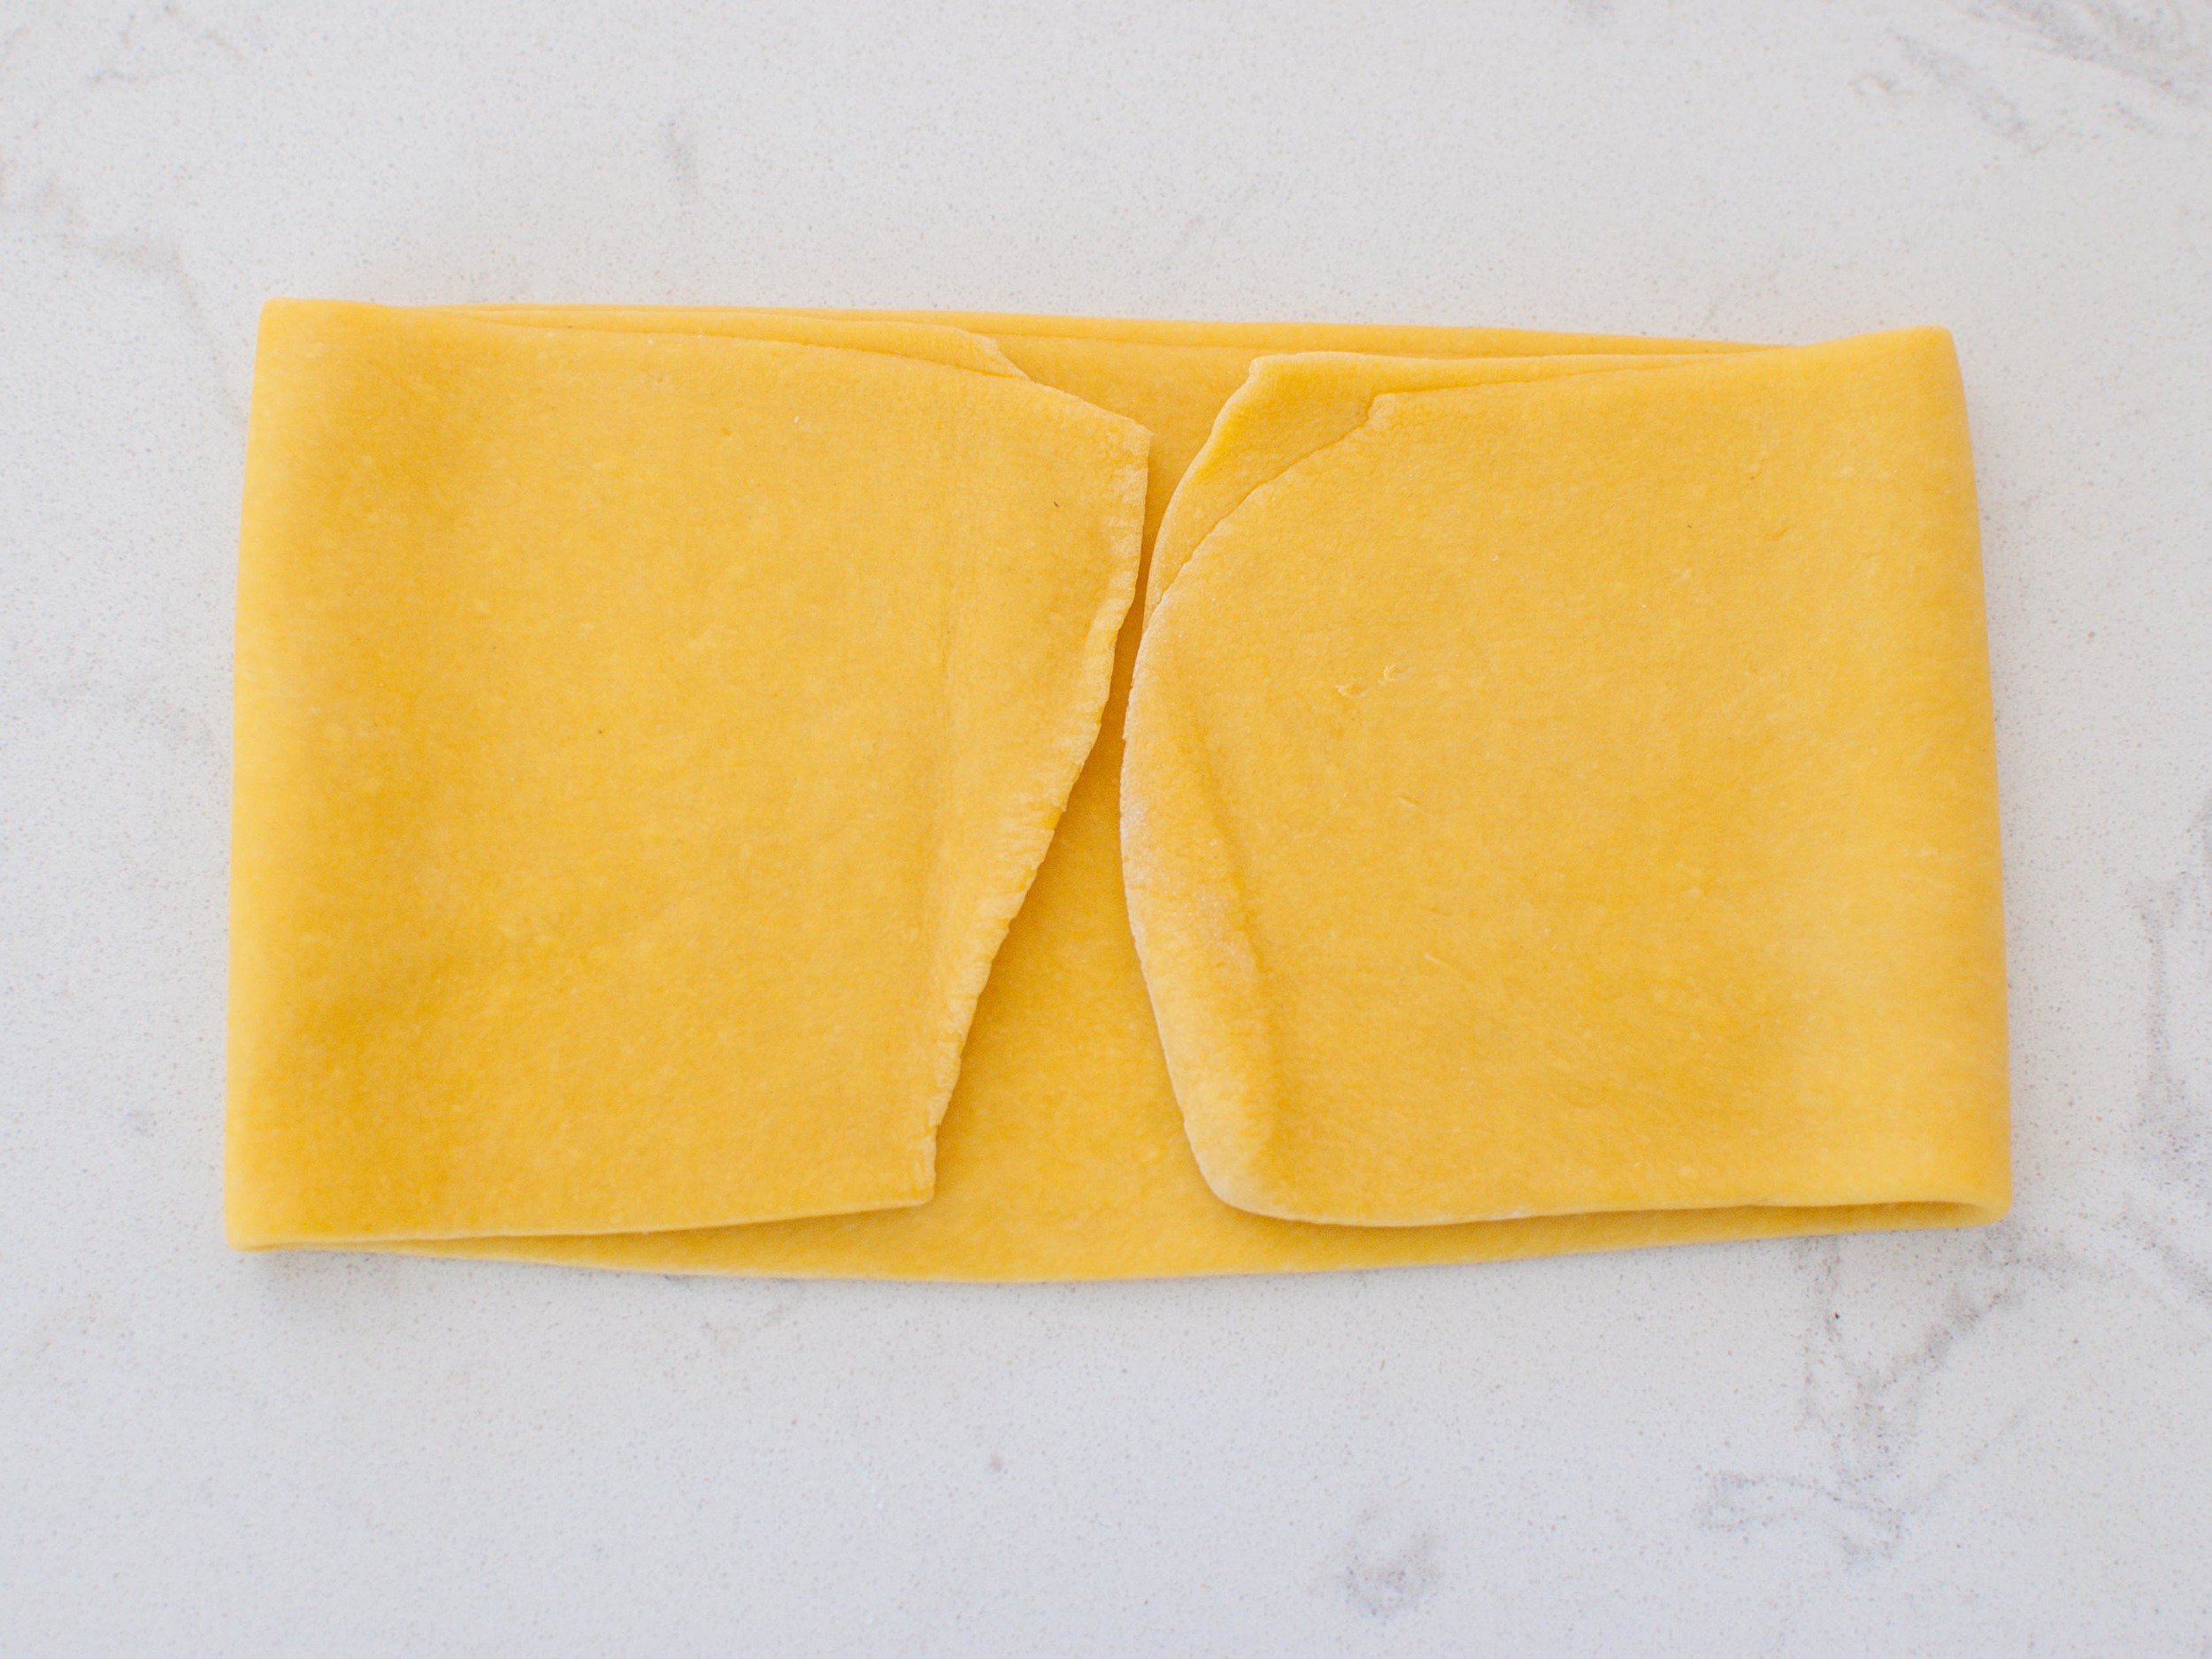
Place dough on a lightly floured work surface. Fold both ends in so that they meet at the center of the dough, and then fold the dough in half where the end points meet, trying not to incorporate too much air into the folds. Using rolling pin, flatten dough to 1/2-inch thick. Pass through the rollers 3 additional times.

Reduce the setting, and repeat rolling and folding the dough, passing it through the machine 2 or 3 times before going to the next setting. For pappardelle and fettuccine, stop rolling when the dough is about 1 or 2 settings wider than the thinnest one on your roller. For lasagna noodles, and for ravioli and other stuffed or filled pasta, go to the thinnest setting. 

Narrow the setting by 1 notch and repeat the folding and rolling process. Repeat once more (the dough should now have passed through the third widest setting). Continue passing the dough through the rollers, reducing the thickness by 1 setting each time until it reaches the desired thickness. It should now be very delicate and elastic to the touch, and slightly translucent.

Place rolled dough onto a work surface or baking sheet lightly dusted with flour or lined with parchment paper, folding the dough over as necessary so that it fits; sprinkle with flour or line with parchment between folds to prevent sticking.

Cover dough with plastic wrap or a kitchen towel to prevent drying, then repeat rolling and folding process with remaining dough quarters. If making noodles, cut dough into 12- to 14-inch segments. Run the dough through the pasta machine again using the cutter attachment, or cut the dough into your desired width using a pizza cutter or chefs knife.

If rolling by hand:

Cut the rested dough into 2 pieces, keeping them covered with plastic wrap or a dish towel when not in use. Use a rolling pin to flatten the dough until it is as thin as a penny for fettuccine and pappardelle, or even thinner for lasagna sheets. This will take some time and arm strength, but the process is easy and the results are rewarding! Cut the noodles to the desired width and length using a pizza cutter or chefs knife.

To cook the pasta:

Bring a large pot of well-salted water to a boil, add fresh pasta and boil for 1 to 3 minutes, depending on thickness of the pasta. Drain well. 

To enjoy this simple indulgence, toss noodles with butter, a light sprinkling of coarse salt, and a heavy shower of freshly grated parmesan cheese. Perfection!