Main

Autumn Harvest Buddha Bowls by Amy Cantu

Print Friendly and PDF


September is the month of birthdays in my family–there are at least four. As evidenced here, here, here, and here, I have a very soft and tender spot for cake. And so, more than anything this month, I've been craving foods that I could feel good about eating. I'm talking nutritionally dense foods that are also filling and easy to source, as the bountiful summer produce disappears from the market. A beautiful, colorful Autumn Harvest Buddha Bowl filled with hearty quinoa, bright orange butternut squash, earthy roasted mushrooms, deep green wilted spinach, and protein-rich tofu make me feel good about the meal, while the richly satisfying peanut sauce keeps me eating to the very last bite. I told my 5-year-old that it was "peanut butter sauce", which made him grin from ear to ear and eagerly eat the entire buddha bowl. (Because who doesn't love peanut butter?)

Notes: Buddha Bowls are highly customizable. The quinoa can be replaced with quick-cooking farro, barley, or brown rice. The roasted vegetables could be pumpkin, carrots, sweet potatoes, and/or kale. The tofu could be chickpeas, beans, or lentils. If you're feeling more like having a Dalai Lama bowl, shredded or chopped rotisserie chicken would be a great substitute for the tofu. The optional fish sauce will also deepen the flavor or the peanut sauce.

The chiles in the peanut sauce are there for flavor and can easily be modified for your heat preferences. Smaller red or green Thai chiles provide the most heat, especially if you leave the ribs and seeds intact. Jalapeños with the seeds and ribs removed will be super mild–I used one and no one noticed any spiciness at all.

Peanut sauce adapted from Bon Appetit.


Time: 40 minutes
Servings: 4

For the vegetables and tofu:
1 14-ounce block Firm or Extra-Firm Tofu
2 pounds butternut squash, peeled, seeded, and cut into 1" pieces (about 1 large butternut squash)
8 ounces crimini (brown) mushrooms, quartered
5 ounces baby spinach
3 tablespoons grape seed or olive oil, divided use
Kosher salt
Freshly ground pepper

For the quinoa:
2 cups quinoa
4 cups water
Kosher salt
1 lime, juiced

For the peanut sauce:
1 or 2 Jalapeño or Thai chiles, chopped (see notes above)
2 garlic cloves, grated or minced
1 cup creamy peanut butter
3/4 cup unsweetened coconut milk
2 tablespoons maple syrup
2 tablespoons soy sauce
2 teaspoons fish sauce (optional)
1/2 cup water
Kosher salt

For the garnishes:
Finely sliced green onions
Chopped cilantro
Chopped peanuts

For the vegetables and tofu: Preheat oven to 450 degrees F., with one rack in the top third of the oven and the second rack in the bottom third.

Cut tofu block in half horizontally (width-wise), and cube into roughly 1" pieces. Lay tofu in a single layer on top of a double-layer of paper towels to drain while preparing the vegetables.

Arrange butternut squash in a single layer on a rimmed baking sheet. Drizzle with 1 tablespoon oil and season with kosher salt and pepper; toss to coat squash evenly. Push the butternut squash to one side of the pan, keeping them in a single layer. 

Blot the tofu cubes dry with another paper towel, pressing down on them gently to release any excess liquid. Arrange tofu next to the butternut squash. Drizzle with 2 teaspoons oil and season with kosher salt and pepper; toss gently to coat evenly. Space tofu so that they are in a single layer.

On a second rimmed baking sheet, toss quartered mushrooms with 2 teaspoons of oil, kosher salt and pepper; arrange in a single layer.

Place the butternut squash and tofu on the top oven rack and the mushrooms on the bottom rack. Roast for 25 minutes. 

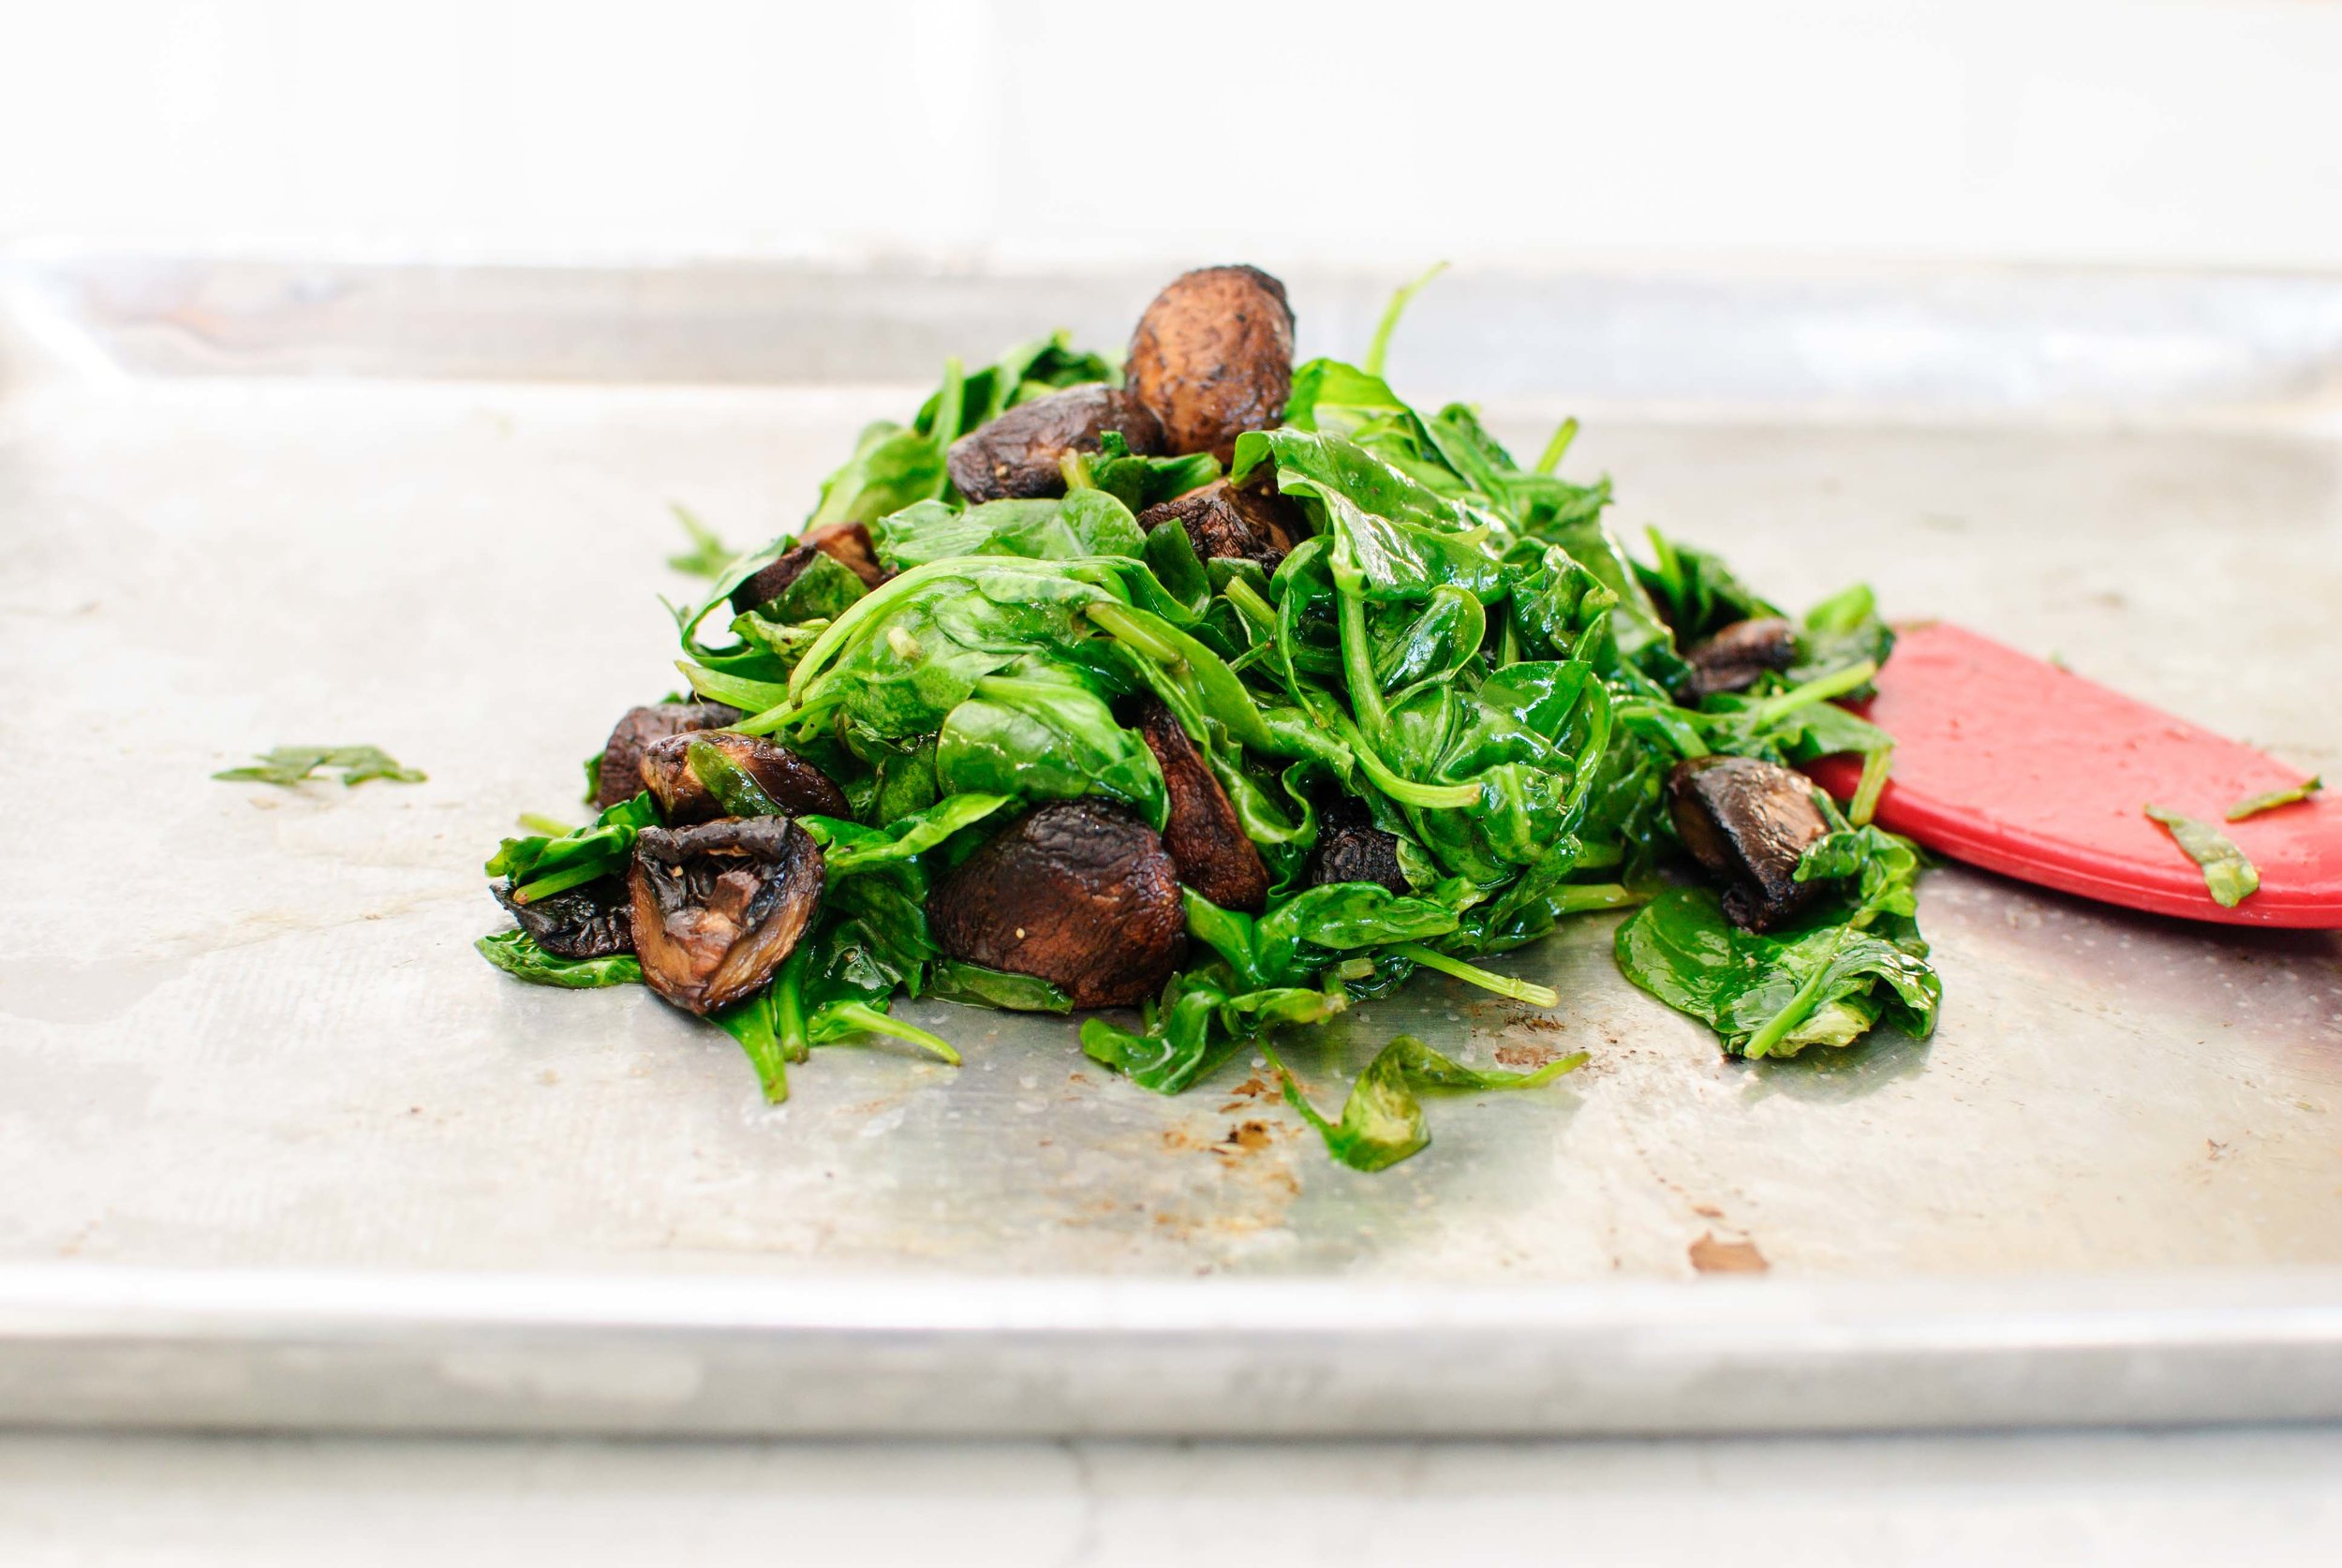
Add spinach to baking sheet with mushrooms, drizzle with 1 tablespoon of oil, kosher salt, and pepper; toss to combine. Continue to roast for 2 more minutes or until spinach is wilted. Remove both baking sheets from oven. Check the butternut squash with a fork–there should be little resistance. If squash is not done, return baking sheet to the oven for another 5 minutes.

For the quinoa: Bring 2 cups of quinoa, 4 cups of water, and a generous pinch of salt to a boil, then reduce to low, cover, and simmer for 15 minutes. Remove from heat and let sit for 5 minutes, before fluffing with a fork. Drizzle with lime juice and stir with a fork to combine.

For the sauce: Pulse all the ingredients, except water and salt, together in a blender until smooth. Pour into saucepan with water and whisk together over medium-low heat until hot. Remove from heat.

To assemble: Place quinoa at the bottom of a bowl. Heap roasted vegetables over the quinoa and drizzle generously with peanut sauce. Garnish with green onions, cilantro, and chopped peanuts.

Orecchiette with Roasted Broccoli by Cynthia Raub

Print Friendly and PDF

Olivia has a spectacular appetite, and she really enjoys eating, much like her mommy and daddy. This year, in Junior Kindergarten, she is required to bring her own lunch every day. This excited both of us, and we made quick work to brainstorm ideas of things she loves. She started a journal and began drawing pictures of meals that she enjoyed, so we could remember what to include for lunch. Her very first idea was pasta and broccoli, and this recipe is a version with seasoned breadcrumbs that she really loves. This pasta dish is light and tasty and simple to make. The reserved pasta water and a pungent cheese make a light sauce and the tender-crisp broccoli is the perfect texture for kids. I find that kids cannot be fooled and really just want to eat delicious food like cheesy pasta! This is a healthier alternative to macaroni and cheese, so it's imperative to season these simple and few ingredients very well. 

I find that involving my kids in any part of the planning or cooking of meals makes them more enthusiastic to eat. The foods I send with Olivia to school are an extension of our food priorities at home: I focus on homemade and simple. Because Olivia has such an impressive appetite, satisfying meals are another priority since a variety of snacks will most likely not fill her up when she's hungry. This makes a filling lunch or an easy weeknight dinner!

Notes: This recipe can be simplified even further by skipping the blanching step for the broccoli before roasting it; you can even oven roast the broccoli for a nuttier flavor and a less hands on step. Substitute the cheese for any other finely grated hard cheese like Parmesan, but personally, I like the more pungent flavor of Pecorino-Romano with broccoli. These breadcrumbs are delicious on EVERYTHING and you can also enhance them in so many ways. A while back, I cooked them in rendered pancetta fat and herbs, which would be spectacular in this dish too.


Time: 35 minutes
Servings: 6

1 lb pasta
5 cups broccoli florets
6 tablespoons olive oil (divided)
2/3 cup bread crumbs
Kosher salt
Freshly cracked black pepper
1/2 teaspoon garlic powder
2 cloves of garlic, smashed
1 cup finely grated Pecorino-Romano
1 teaspoon lemon zest (about 1 small lemon)

Cook pasta according to package directions and your preference. Don't forget to season the boiling water liberally with salt! Strain pasta, reserving 2/3 cup of pasta water. Fill your pot back up with water and bring to a boil (for the broccoli).

While your pasta is cooking, make the breadcrumbs. In a large skillet, heat 3 tablespoons of olive oil on medium heat. Add breadcrumbs to the hot oil and stir to combine. Season breadcrumbs with 1/2 teaspoon of salt, garlic powder, and a pinch of black pepper. Cook breadcrumbs until golden and crunchy. Set aside.

Cut broccoli into large bite sized pieces. Blanch broccoli florets: bring water to a boil in a large pot and season with salt. Drop in broccoli and cook for 60-90 seconds or until desired doneness has been reached. Plunge broccoli into an ice bath, (large bowl filled with ice and water,) to stop broccoli from overcooking. Once cooled, drain, dry on a clean kitchen towel and set aside.

In a large skillet, add 3 tablespoons of olive oil and garlic and cook garlic until fragrant and barely browned. Remove garlic from oil and dispose. Add strained broccoli to the oil and season with salt and pepper. Over high heat, roast broccoli on the first side until crisp and browned. Toss the broccoli to roast on another side. Once browned, remove broccoli from the pan and set aside.

In the same large skillet, heat reserved pasta water and pasta together. Add finely grated cheese and stir to combine until pasta becomes creamy. Add roasted broccoli and lemon zest and heat through together. Transfer to a serving plate and garnish with breadcrumbs.

Mango-Shrimp Tacos with Honey-Lime Slaw by Amy Cantu

Print Friendly and PDF

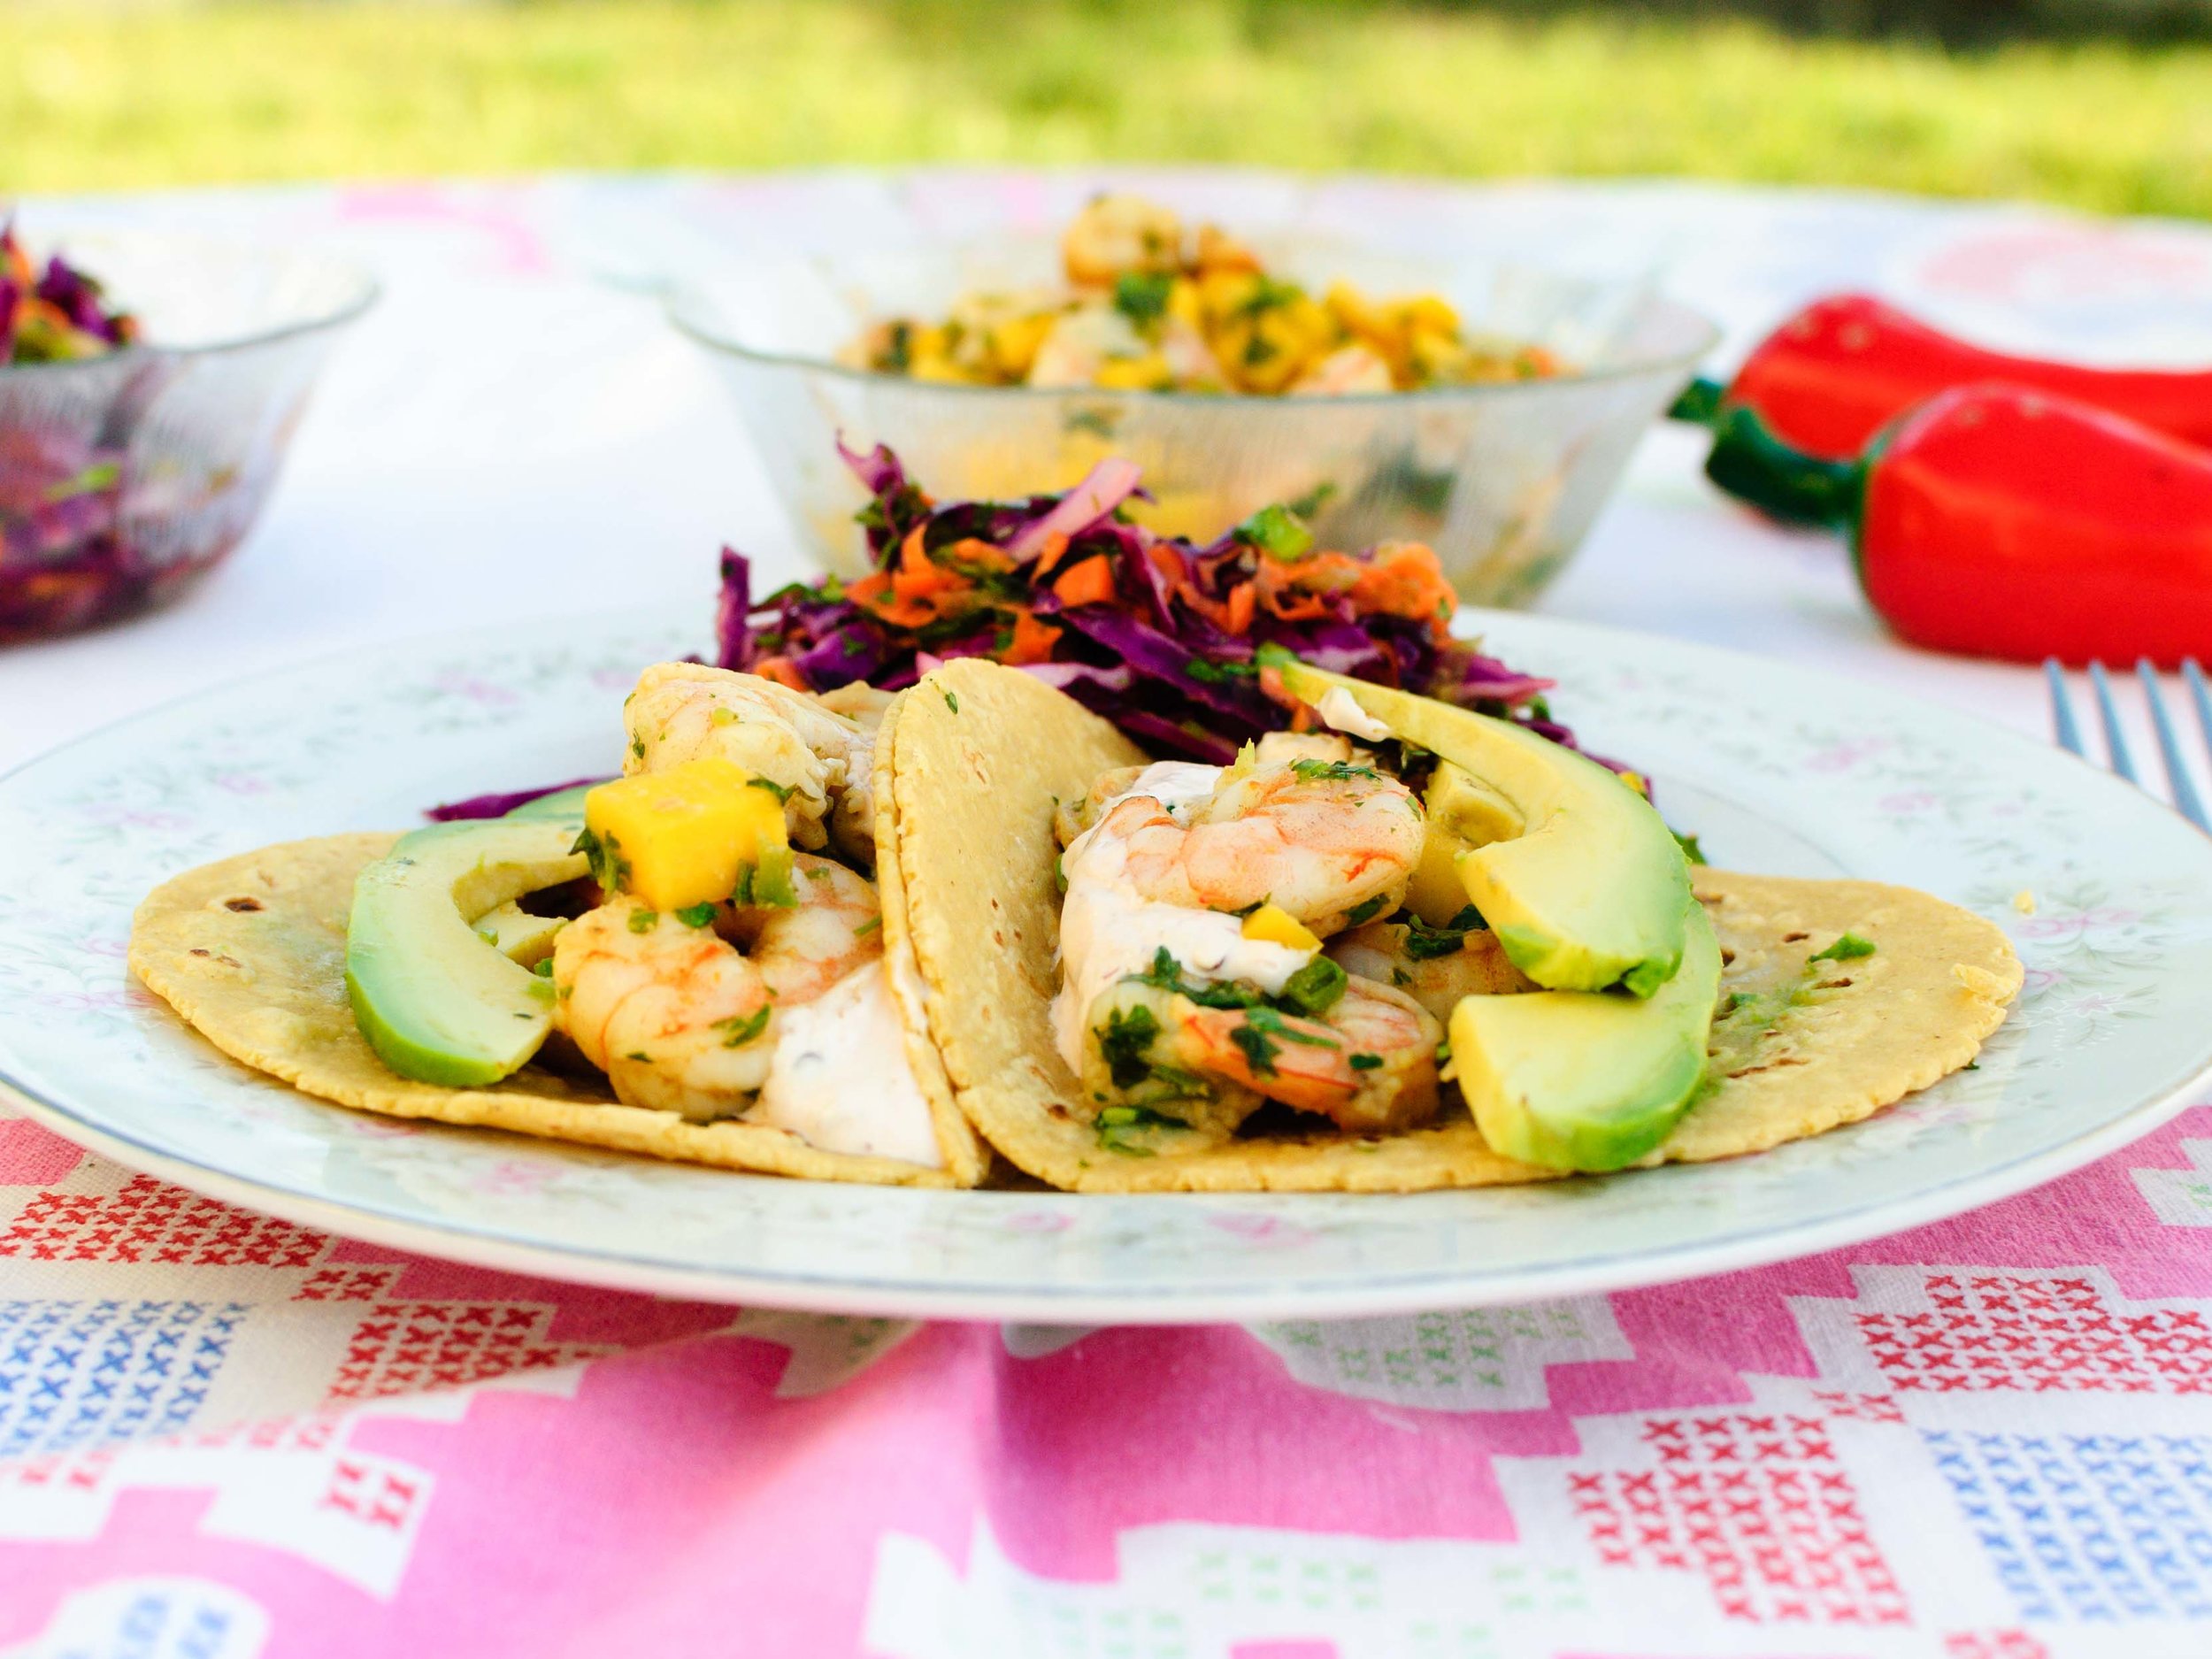
Sometimes, I close my eyes and try to imagine that I'm stretched out in the sand somewhere warm and tropical with waves lapping at my feet. This is when I'm usually painfully interrupted by, "MOM! Mommmmmm!" and my reverie comes to an abrupt halt. So, I shove a giant bite of Mango-Shrimp Tacos in my mouth, squeeze my eyes closed tight, and suddenly for a few more seconds that vacay is a reality. (I suspect that this island dream might also be why I love coconut so much too.) Oh yeah, and those kiddos yelling for my attention? They just want a bite too. Plump, juicy shrimp tangled together with bits of sweet mango, all heaped over a warm tortilla and topped with mildly spicy and smoky chipotle sour cream and crunchy honey-lime slaw. Excuse me, I need to close my eyes again and take another bite. See you in paradise!

Notes: I heart mangos so much! I usually try to get the smaller manila or Ataulfo mangos if possible, since they are so much sweeter, but I found that even the larger (and more common) Kent mangos work well in this recipe. I removed the seeds from all the peppers to keep this dish mild enough for my kids. (I could barely detect any heat.) Feel free to leave the seeds in or swap the jalapenos for spicier serrano peppers, if you like things spicy! The honey-lime slaw is delicious heaped over the tacos or on the side as a salad. It has enough going on to be it's own side dish without the tacos too!


Time: 40 minutes
Servings: 4-6

1 cup sour cream
1-2 chipotle peppers in adobe sauce

2 teaspoons ground cumin
1 1/2 pounds medium shrimp, peeled and de-veined
3 garlic cloves, sliced thin
Kosher salt
2 mangos, small-diced
1 large jalapeno, seeded and minced
1/4 cup cilantro, minced
2 limes, juiced

Sliced avocados
Corn tortillas
Honey-Lime Slaw (recipe below)

Mince 1 or 2 chipotle peppers, removing the seeds if you don't want it spicy. Stir peppers into the sour cream and set aside.

Heat a large pan over medium-high heat. Add ground cumin and stir frequently for one minute or until it smells fragrant and toasty. Add shrimp, sliced garlic, and about 1 teaspoon of kosher salt, stirring and flipping the shrimp frequently, until shrimp are mostly pink and opaque (about 4-5 minutes). Add mango, jalapeno, and cilantro to the pan and continue to cook for 1 minute or until the shrimp are just cooked through. Turn off the heat and stir in lime juice. Taste and adjust seasoning as needed. 

To serve, spoon mango and shrimp over warm tortillas with a couple slices of avocado and a big dollop of chipotle sour cream. Top with Honey-Lime Slaw or serve the slaw on the side. Open up wide and devour!

Recipe adapted from Martha Rose Shulman at NYT Cooking.

Honey-Lime Slaw

2 limes, juiced (about 1/4 cup)
1-2 tablespoons honey (to taste)
1/2 cup grape seed oil (or vegetable oil)
Kosher salt
Freshly ground pepper
1/2 head red cabbage, cored and sliced thin
2 carrots, peeled and coarsely grated
1 jalapeno, seeded, and sliced thin
2 stalks green onion, thinly sliced
1/2 bunch cilantro leaves, roughly chopped (about 1/2 cup)

In a small bowl, whisk together lime juice, honey, oil, about 1 teaspoon kosher salt, and 1/4 teaspoon ground pepper. Set aside.

In a large bowl, combine cabbage, carrots, jalapeno, green onions, and cilantro. Drizzle dressing over the vegetables and toss well. Taste and adjust salt and pepper to taste. Serve heaped over Mango Shrimp Tacos or on the side.

Flatbread with Chicken Shawarma, Eggplant, and Caramelized Onions by Cynthia Raub

Print Friendly and PDF

Recently, I got an email from NYT Cooking that was sharing Sam Sifton's Oven-Roasted Chicken Shawarma. It is one of those invaluable and easy pantry dishes that come together with very little prep and even less hands-on cooking. Throw marinade and chicken into a bag, let sit, dump on a sheet tray and toss it in the oven. And then what emerges is fragrant, multi-dimensional, and tasty chicken. The chicken is highly versatile as it can be served alongside typical Mediterranean sides and dishes like pita, cucumber and tomato, hummus, and rice. Or, I thought, you could throw it on a flatbread (a.k.a. pizza dough) and feel like a real, true and actual genius. Do you know what else is genius? Outsourcing the luscious spread to marry the flatbread and chicken together. You see, I am all too familiar with Amy's love for eggplant and I decided to exploit it. I told her I was planning on making the chicken shawarma, and I thought about putting it on a flatbread but that's where my ideas ended. Dang, shoot, crud - I'm plum out of ideas! Oh what could possibly be irresistibly delicious to spread on the flatbread? Then like a horse out of the gate, Amy threw out a dozen ideas, and it ended with roasted eggplant with caramelized onions. That was it. We are going to make this together, eat it, and be happy.


Notes: I used this recipe for the flatbread and pre-cooked the bread before adding any of the toppings. Like pizza, flatbread can be topped with nearly anything, so in the words of Melania Trump (just kidding, FLOTUS Michelle Obama) about flatbread toppings, "the only limit to your achievement is the strength of your dreams and your willingness to work for them." #foodwisdom


Read More: The Shared Craving


Time: 15 minutes to assemble
Makes 2 flatbreads

2 flatbreads, pre-baked
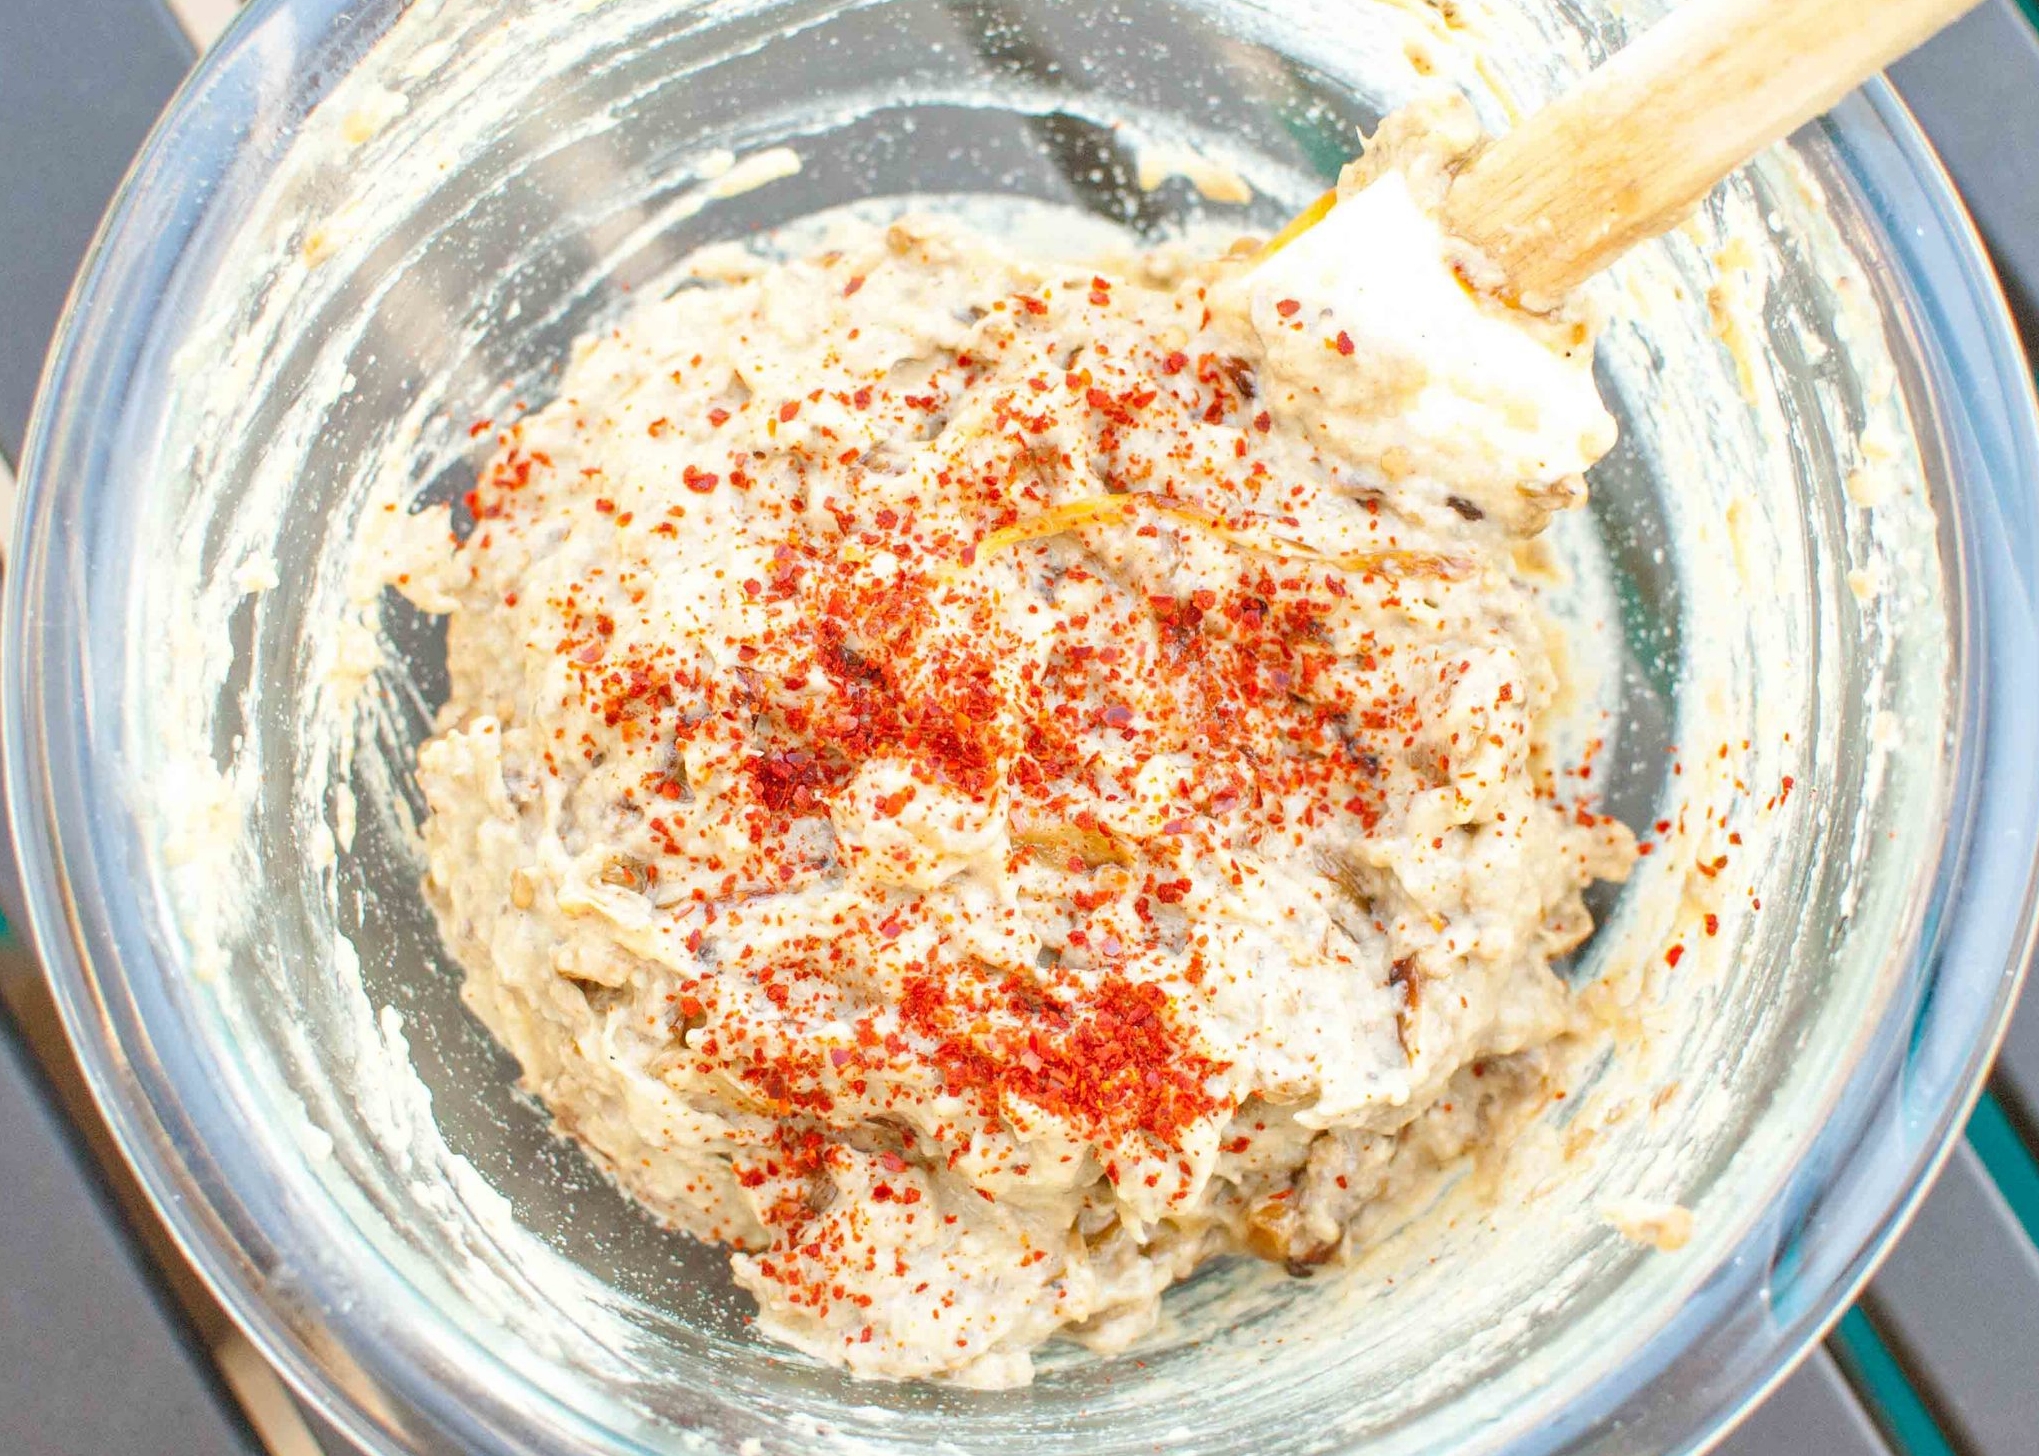
1 cup Eggplant Dip with Caramelized Onions and Tahini
1 1/2 cups shredded Chicken Shawarma
1 cup crumbled feta cheese
1/4 cup mint, chopped or chiffonade
Olive oil for finishing
Lemon wedges for serving

Preheat oven to 400 degrees. Place pre-baked flatbread dough on a full sheet tray. Spread eggplant dip generously over each flatbread and top with shredded chicken shawarma. Split feta between the two flatbreads and sprinkle evenly. Drizzle or brush edges of crust with olive oil.

Put the flatbread in the oven and cook until edges of the bread are golden and crisp and the spread, chicken and cheese are warmed through, about 6-8 minutes. Slice the flatbread and garnish with mint chiffonade and lemon wedges. 

Katsudon by Cynthia Raub

Print Friendly and PDF

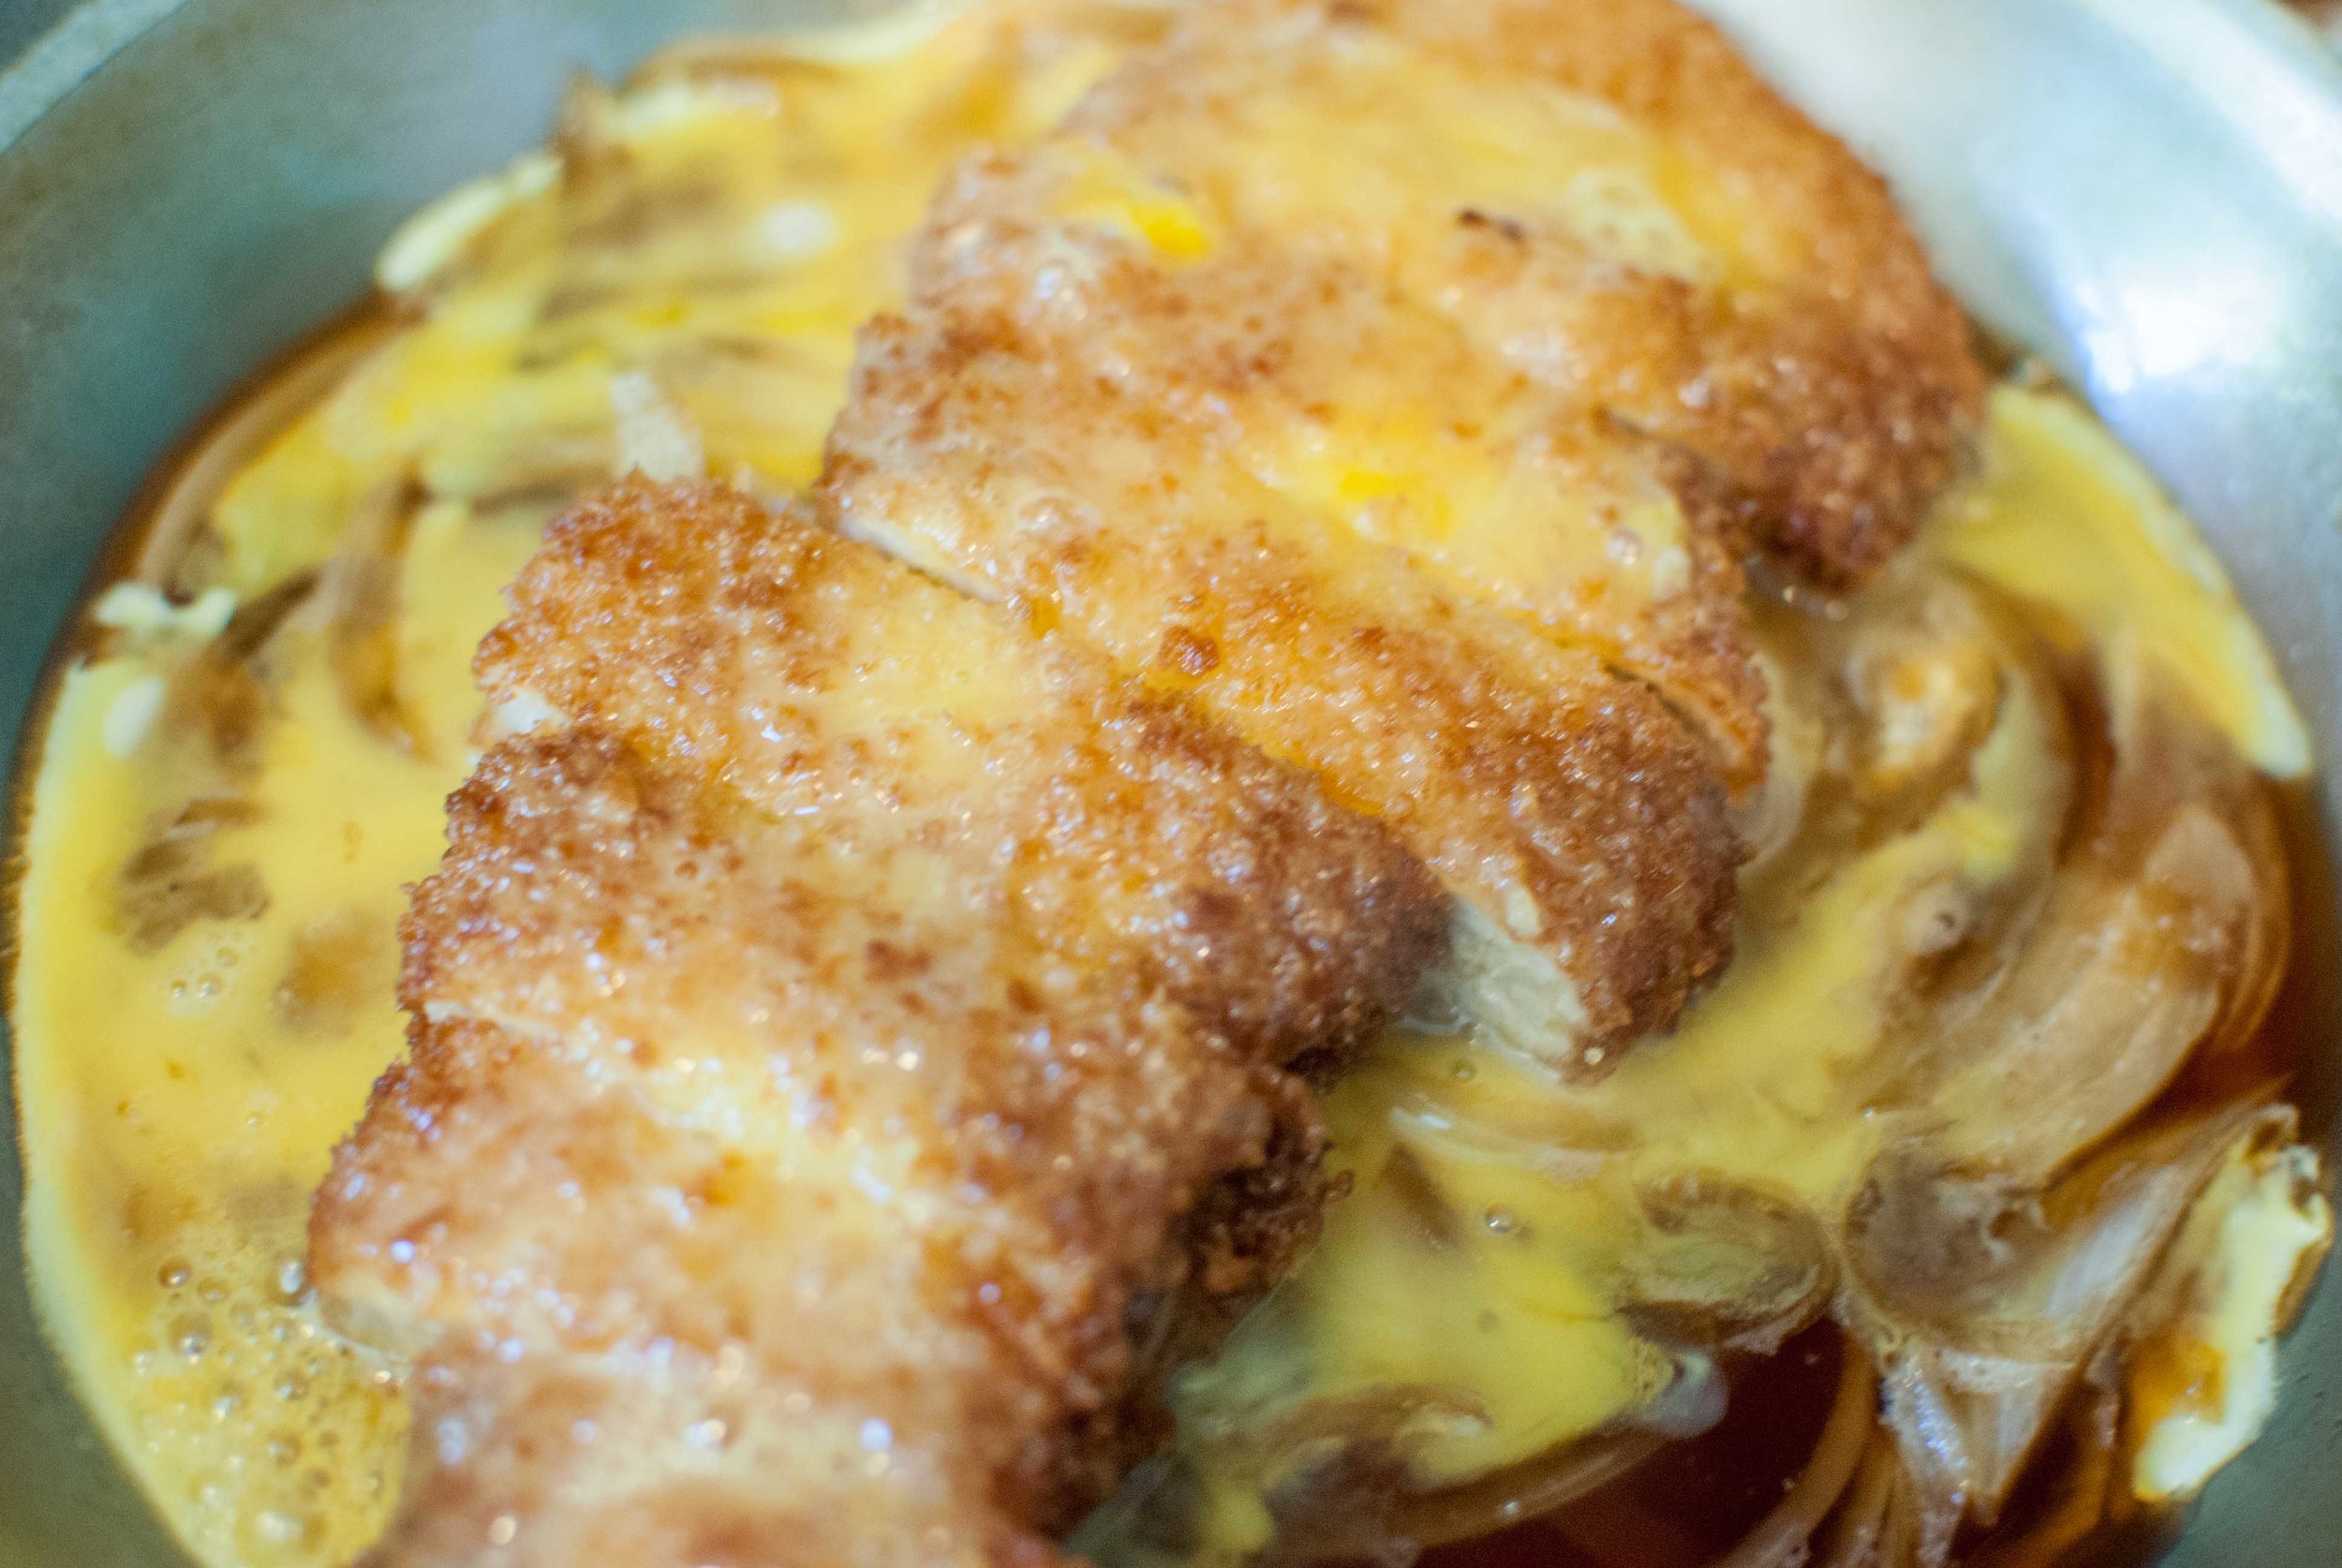
Katsudon is leftover sliced tonkatsu, which is quickly stewed in a sweet-salty broth, with softened onions and bound together with nature's finest: an egg. Once this beautiful mixture is finished cooking, you slip it over a bowl of steaming hot rice. Then you either: 1) pump your fist in excitement, 2) cry a thousand tears into your shirt because "It's so wonderful!", 3) hope no one else smells it so you don't have to share a bite or 4) all of the above. If you have leftover tonkatsu, this comes together quickly and easily. If you don't have any leftover tonkatsu, it's worth an entire batch just to make this dish. 

Notes: Katsudon is generally made from leftover tonkatsu so I wrote this recipe as a serving for one. I don't know why there would be ANY leftover tonkatsu, let alone MULTIPLE leftover servings. It's unfathomable to me and this recipe reflects that. This recipe is easy to scale up and you can do multiple servings in large pans, so don't be dismayed by the serving size. There is enough soy sauce in the recipe to season the sauce, which is why I have not included salt. I used low sodium soy sauce, and I didn't think any more salt was necessary.


Time: 12 minutes
Serves: 1

1/2 cup water (or stock)
3 scant tablespoons soy sauce
1 tablespoon mirin or sake
1 heaping tablespoon sugar
1/2 cup thinly sliced yellow or brown onion
1 portion of tonkatsu, sliced
1 egg, beaten
1 cup white rice
Green onion as garnish

In a small pan, combine water, soy sauce, mirin, sugar and onions. Over medium high heat, cook for 4-6 minutes, shaking the pan occasionally, until onions are soft and the liquid has reduced by 1/3. Add tonkatsu to the sauce and onion mixture. Pour beaten egg over pork and onions and cover the pan to cook the egg through - about 1 minute. Once the egg is cooked through, slip the contents of the pan onto a bowl of rice. Garnish with green onion and serve with Togarashi (Japanese seasoned chili powder). 

Tonkatsu (Japanese Fried Pork Cutlet) by Cynthia Raub

Print Friendly and PDF

Tonkatsu is a western-influenced Japanese dish that most would consider as comfort food. Similar to German wiener schnitzel, it is merely fried pork cutlets with a crumb coating. Tonkatsu is traditionally served over thinly sliced green cabbage with a side of hot yellow mustard and tonkatsu sauce, a fruit and vegetable based sauce (similar to a thickened and sweet Worcestershire sauce). Home-frying might be daunting, but I assure you that this recipe is not. Crank up your vent, prepare a few extra dishes for the dredging process, and make sure you have a handful of paper towels available. 

My mom makes this at home when she is feeding a group of people - it is inexpensive, delicious and easy. She will send leftovers home with me, which we will rewarm in the oven, (or just eat cold,) and it's one of the dishes that initially inspired me to share meals with the people I care about.

Notes: The three-step dredging process is crucial for this recipe and type of frying. Your diligence will result in tremendously flavorful and moist fried pork cutlets. This is a messy process, but it yields great results. If you don't like your fingers to get sticky, you can use tongs to grasp the pork while you coat the chops. BUT! Cooking is supposed to be a little messy and not to mention, you have more control when you use your hands. You can also substitute chicken (skinless, boneless, filleted thigh meat) for the pork, which will give you chicken katsu. I prefer a shallow fry for this dish because it's easier to clean up and just as effective as deep frying. The pork is thin and cooks quickly, so deep frying is not necessary to save time in this instance. If you happen to have any leftover tonkatsu, have your hand at Katsudon: an incredible remix of an already delicious dish.


Time: 40 minutes
Serves: 4

1 1/2 lbs pork loin chops, 3/4"-1" thick
1/2 cup flour
2 eggs, beaten
3/4 cup panko bread crumbs
Kosher salt, divided
Fresh ground black pepper
Vegetable oil

Depending on the size of your pork loin chops, place 2-4 in a gallon freezer bag and close halfway. On a sturdy and flat surface, pound the pork loin chops into 1/2" thick cutlets.

Prepare three shallow dishes for the dredging process. In the first dish, combine 1/2 cup flour and 1/2 teaspoon kosher salt. In the second dish, beat eggs with 1/2 teaspoon kosher salt and 1/4 teaspoon freshly ground black pepper. In the third dish, combine panko breadcrumbs and 1/2 teaspoon kosher salt.
Season pork lightly with salt and pepper. Taking the first cutlet, dredge it in the seasoned flour - coating all sides evenly. Once the pork is coated in flour, carefully dip it into the beaten egg mixture, coating the flour evenly with the egg. Then quickly dredge the flour and egg covered pork into the breadcrumbs for its final seasoning. Pat the pork slightly to make sure all of the breadcrumbs are adhered to the pork. Set aside on a large plate, and continue the process with the remaining pork.

Fill a medium to large skillet (with high, straight sides) with 1/2" vegetable oil. Turn heat to medium and allow the pan and oil to heat through about 3 minutes. Meanwhile, prepare a large plate or cooling rack with two layers of paper towels (to absorb oil from the fried pork).

Once the oil is heated through, place a pork chop into the oil, carefully releasing it away from yourself to avoid splashing oil. If there is enough room in your pan, you can cook multiple pork cutlets simultaneously. Just be sure not to crowd the pan and that each pork cutlet is evenly submerged in the oil.

Fry the pork until the first side is golden brown about 2 minutes. Flip the pork over and continue to cook until golden brown and cooked through - about another 2-3 minutes. Remove the pork from the cooking oil and place it on the paper towels to drain. Continue cooking the remaining pork in the same fashion. Slice into 1/2" strips and enjoy!

Serve with: steamed rice, thinly sliced cabbage, tonkatsu sauce

Mediterranean Turkey Burger by Cynthia Raub

Print Friendly and PDF

When Amy delivered her second baby almost two years ago, (?! Sniff!), I was in the throes of an obsession with burger patties. Lamb burgers, black bean burgers, salmon burgers, turkey burgers - I loved them all and made them with fierce frequency. A few days after she delivered her beautiful (and huge) bundle of sweetness, I brought these turkey burgers over for her family, with a side salad and dessert. She was the first mama I knew who delivered a baby after I had my own, and it was the first newborn meal I ever gifted. I think back to that day, and I think that's when the spark for intentionally sharing food with frequency began for me. She was grateful as the burden of preparing dinner was lifted, and I was so happy to help in that small way. Since then, I have brought new mamas meals like Harissa Grilled Pork Loin Chops and Swiss Chard and Leek Crostata, but these turkey burgers have a special place in my heart . . . and stomach. I still make them often because they are easy to prepare, delicious, and perfect for sharing with others. These are also a fantastic option for holiday barbecues and parties for anyone looking for a (seemingly) healthier burger!

Notes: Most beef burger recipes will recommend to work the ground meat mixture as little as possible so that the patty remains tender and loose. Because of all of the additional ingredients in this patty, I recommend a through mixing of the ingredients so that the patty is solid and does not fall apart during cooking or eating! These are perfect for preparing in a large batch and freezing for future meals. It's an easy recipe to scale up, and it takes just a little more time to form the extra patties. They are even delicious as meatballs and cooked in tomato sauce!


Time: 25 minutes
Yield: 5-7 patties

1.5 lbs ground turkey
1/2 cup (about 8 ounces) chopped frozen spinach, thawed and drained
1/3 cup crumbled feta
1/3 cup sun-dried tomatoes in olive oil, chopped
1 teaspoon kosher salt
1 teaspoon black pepper
1 teaspoon oregano
1 teaspoon paprika
2 tablespoons olive oil

In a medium microwave safe bowl, thaw frozen chopped spinach by covering the bowl with plastic wrap and nuking for 1 minute on 80% power. Spinach should be warm and thawed. Scatter spinach on a clean kitchen towel (or several layers of quality paper towels) to absorb the water. Gather the edges of the towel and wring out the liquid, drying completely. Loosen spinach into small pieces.

In a large bowl, combine turkey, spinach, feta, sun dried tomatoes, kosher salt, black pepper, oregano, paprika and olive oil. Mix ingredients with clean hands, distributing all of the ingredients throughly.

Depending on the size of your buns, use a 1/3 or 1/2 cup measuring cup to portion out patties. Scoop mixture into your hands and flatten to make a patty, smoothing out the rough edges. Create a shallow indention in the center of your patties, as the center tends to expand while cooking.

To cook: Heat a griddle, grill pan, or cast iron pan on medium-high and add enough neutral oil to coat the bottom of the pan. Once the oil begins to shimmer, carefully lay patties onto the pan, to avoid splattering oil. Don't crowd the pan! Crowding the pan will result in steamed and pale-looking patties. To avoid overcooking, brown the patty on the first side until cooked 2/3 of the way through, about 3-4 minutes. Flip over and finish cooking on the second side, about 2 minutes.

Serving suggestion: whole wheat hamburger buns, sliced tomato, lettuce, mayonnaise

Pork and Broccolini Sandwich by Cynthia Raub

Print Friendly and PDF

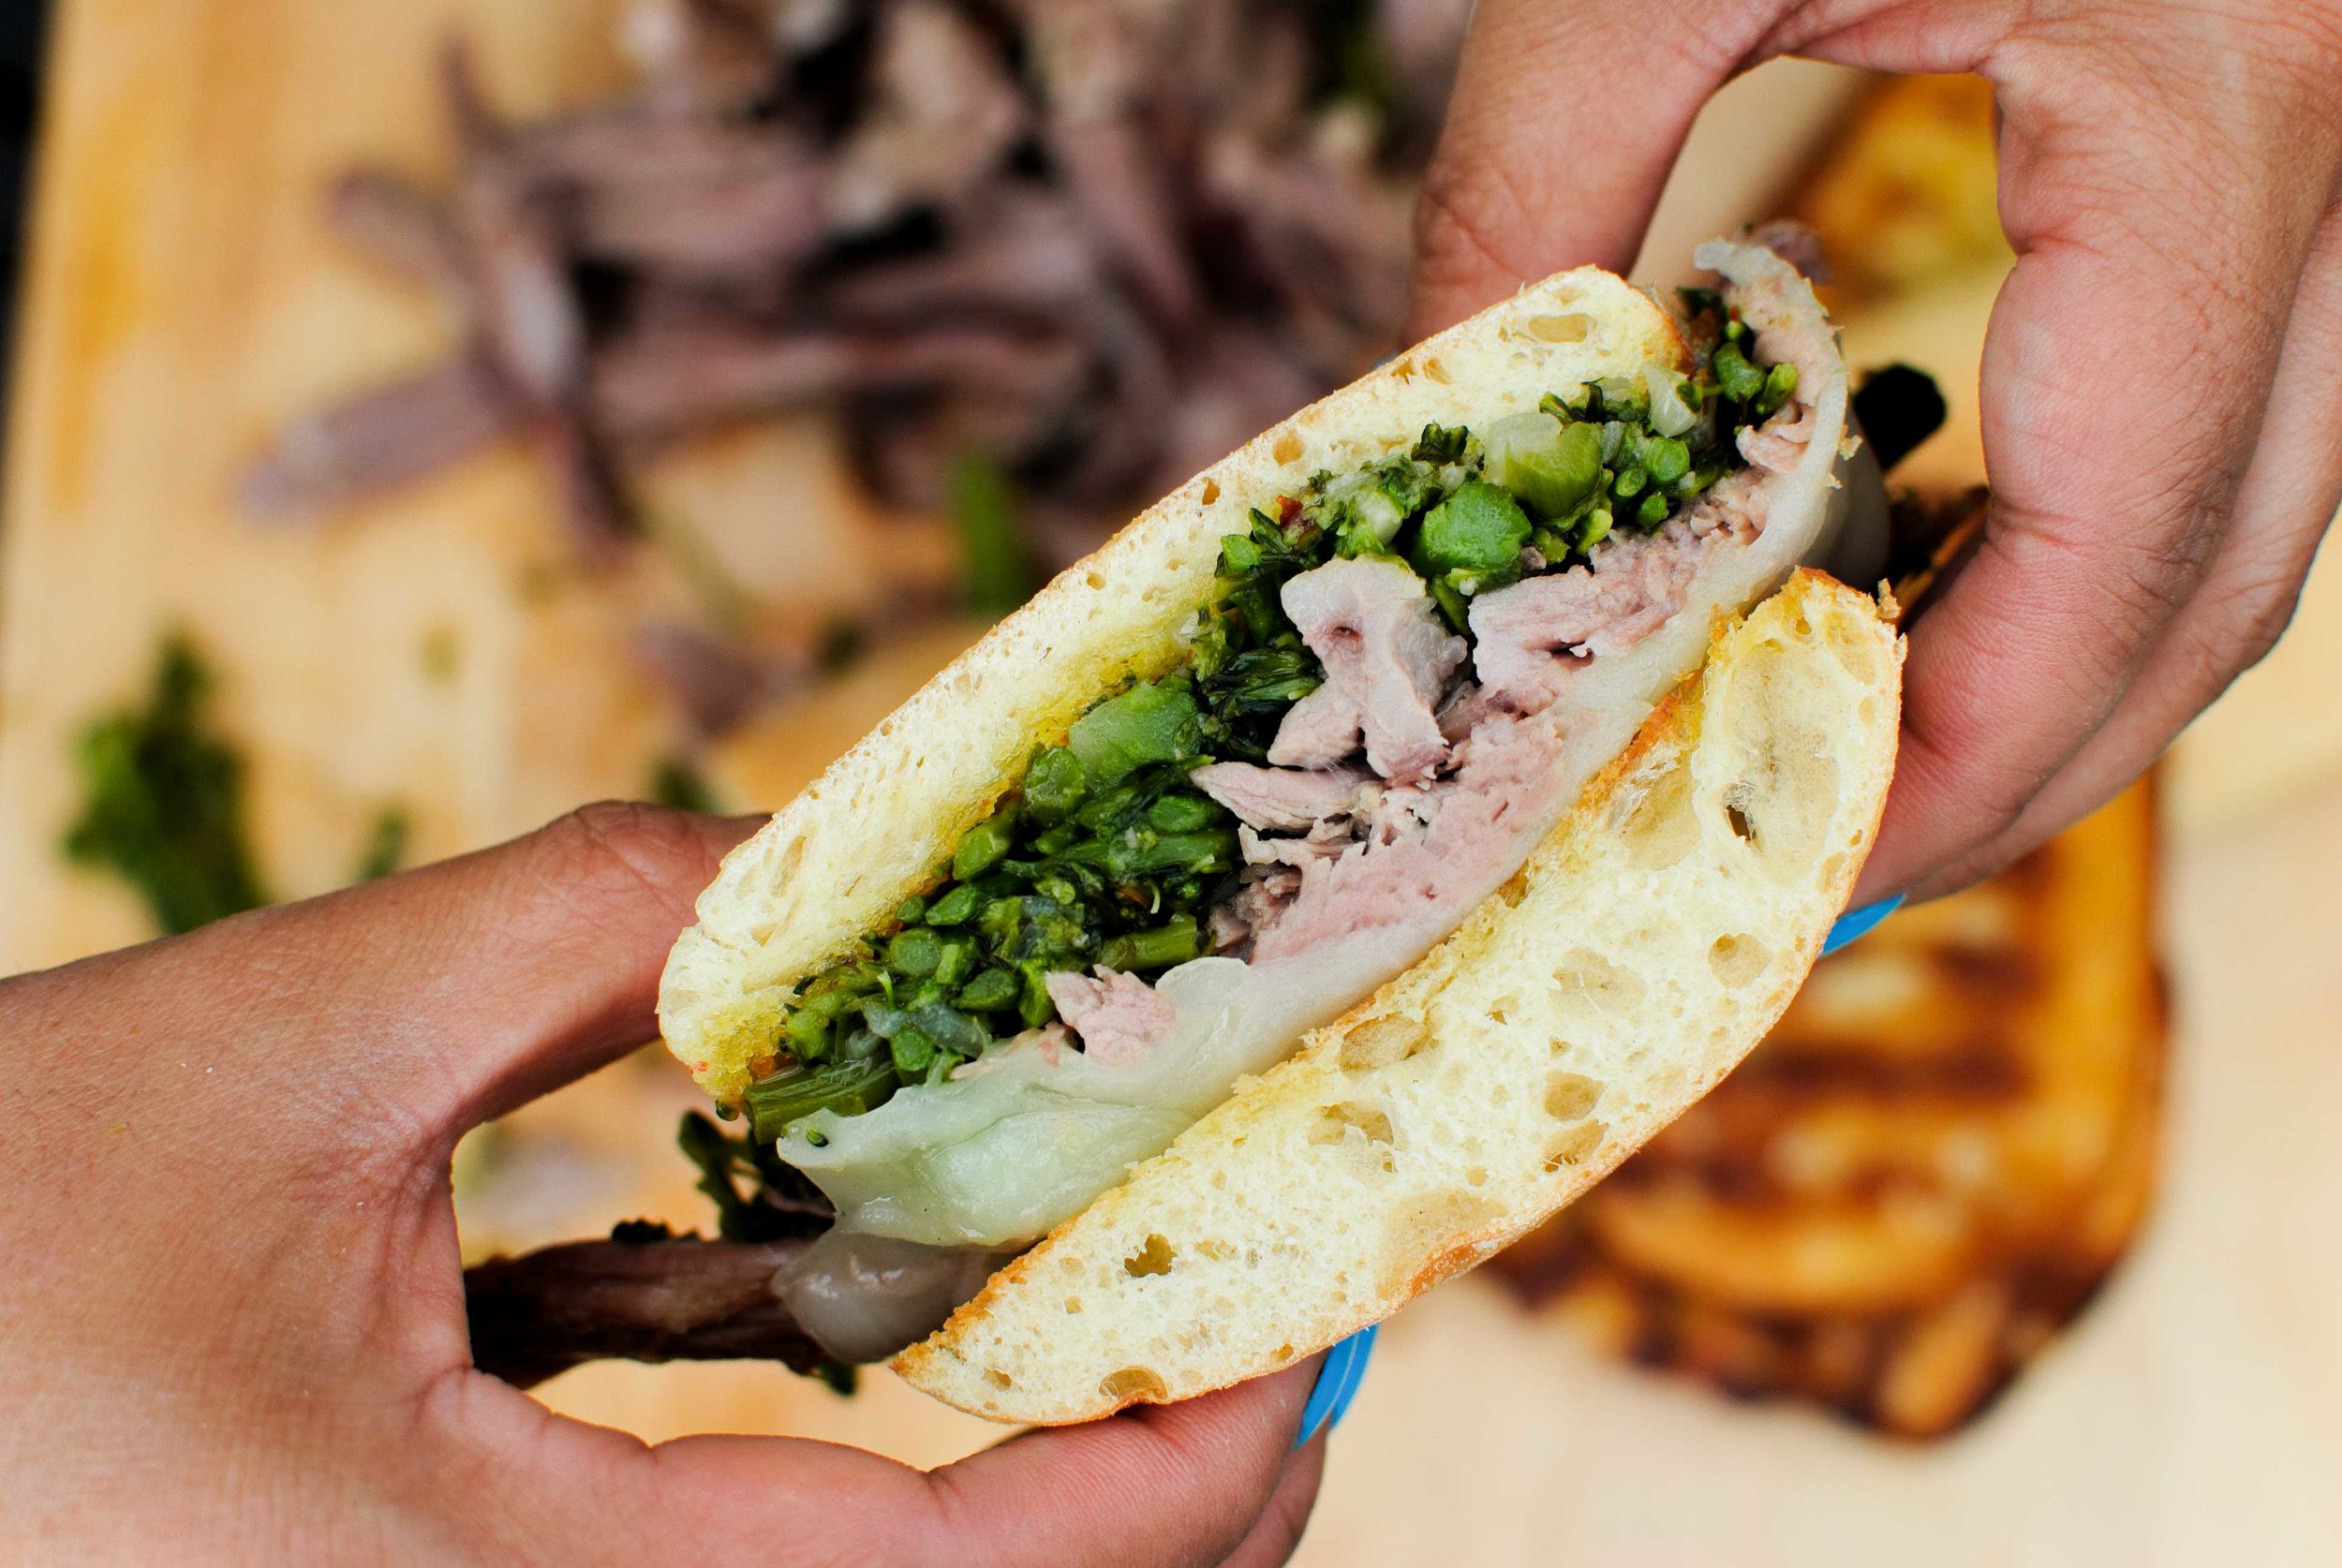
A pork shoulder roast is a gift that keeps on giving. Its meaty girth, gristle, and crisp skin provides a generous and impressive roast, without breaking the bank, which is perfect for a large group. Or, you can make one for your family and reserve the leftover meat for future meals! Amy gifted me with an enormous chunk of her roast and I wanted to do something different from my typical uses of leftover pork. I normally default to pulled pork sandwiches or use it as a taco filling, but somewhere in the depths of my memory, I recalled a pork sandwich I had at Salumi in Seattle eons ago as inspiration. The earthy and tender broccolini, with luscious and slightly crisped pork on a toasted roll, was held together by melted provolone. This decadent sandwich is my new favorite way to enjoy leftover pork shoulder.

Notes: This sandwich is pretty straightforward with few ingredients, so it's important that each component is the best that is can be. A substantial sandwich roll is crucial to a sandwich like this - a ciabatta or torta roll with good structure will not fall apart under the cooked down broccolini and loose pork. I loved the variations in texture that the broccolini had: from the firmer stems to the soft cooked heads, but I can see other greens used as a substitute. If you don't care for broccolini, I would recommend green swiss chard with stems and leaves.


Time: 20 minutes
Servings: 4

For the broccolini
2 bunches broccolini
2 tablespoons olive oil
1 teaspoon red pepper flakes
4 cloves garlic, sliced
2 shallots, sliced
1 teaspoon kosher salt
1 tablespoon lemon juice

For the sandwich
4 sandwich ciabatta rolls
4 tablespoons olive oil, divided
1 1/3 cups pork shoulder (pulled or sliced)
4 slices provolone

Preparing the broccolini
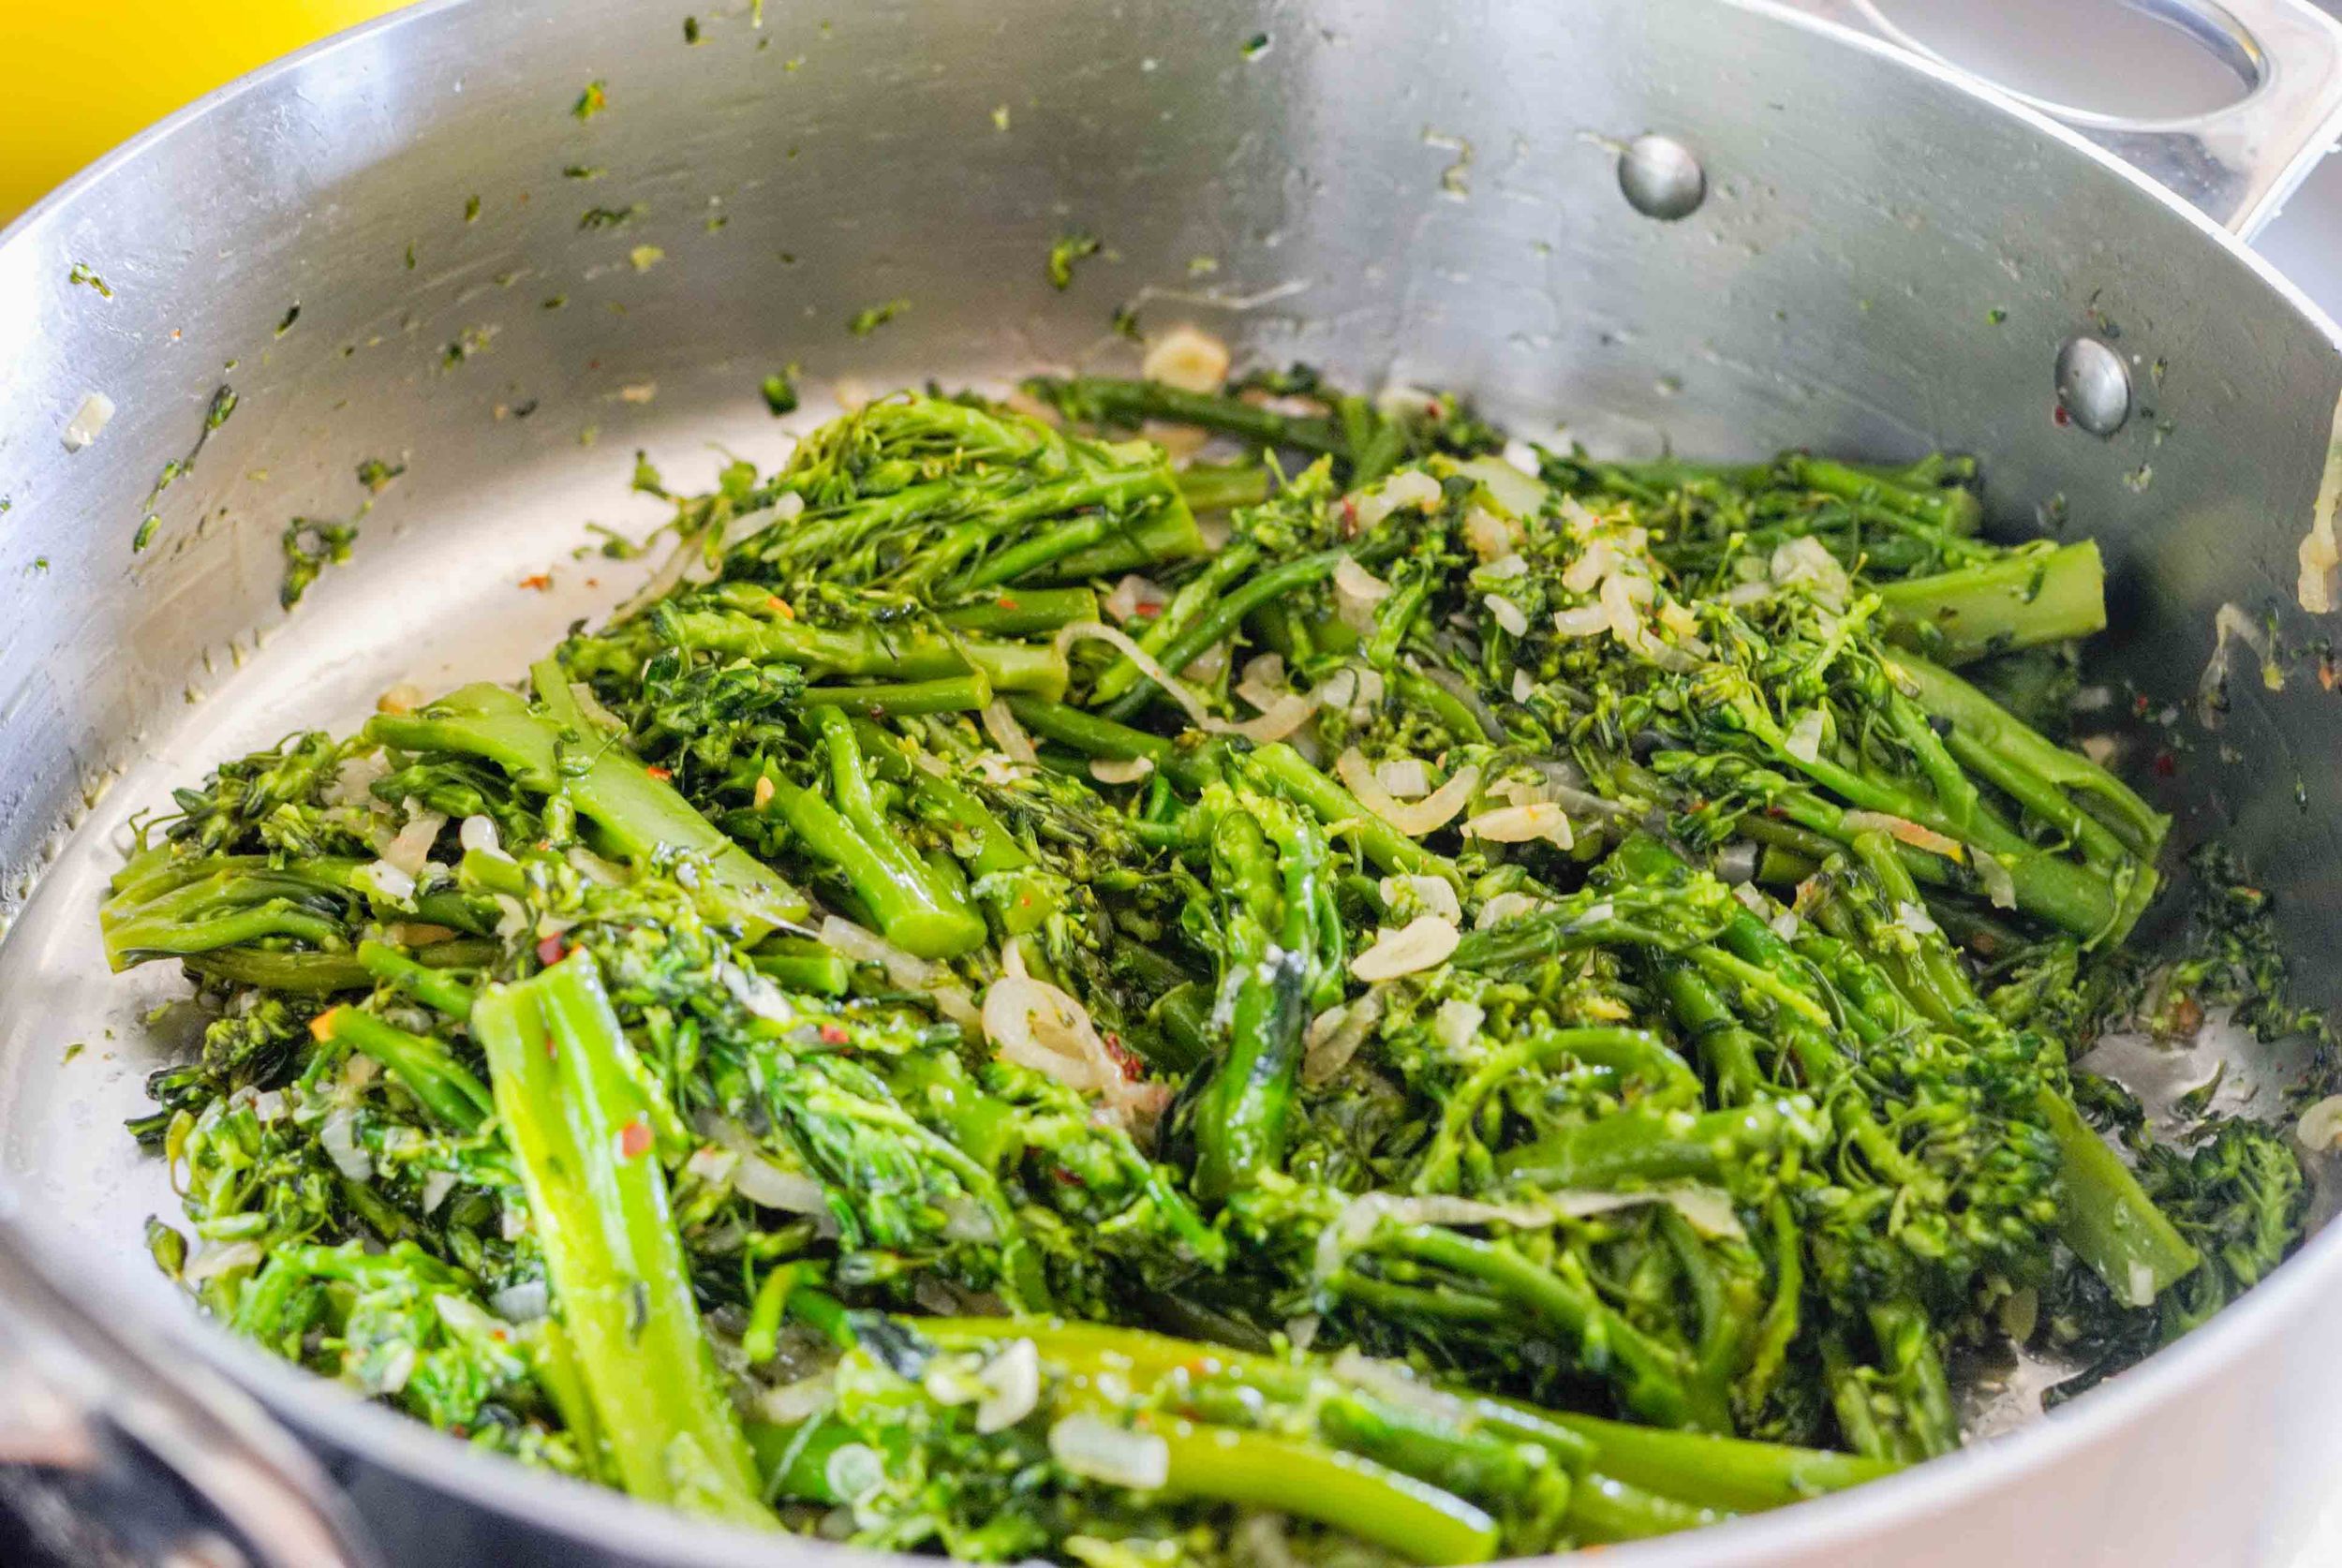
Make an ice bath to cool the broccolini, by filling a large bowl with water and ice. In a large sauté pan, fill halfway with water and bring to a boil on high heat. Trim the ends of the broccolini stems, about 1 inch. Cut the broccolini in half, place in boiling water, and cook for 2 minutes until barely cooked through.

Drain the broccolini, and put it in the ice bath to halt cooking. Drain cooled broccolini and set aside.

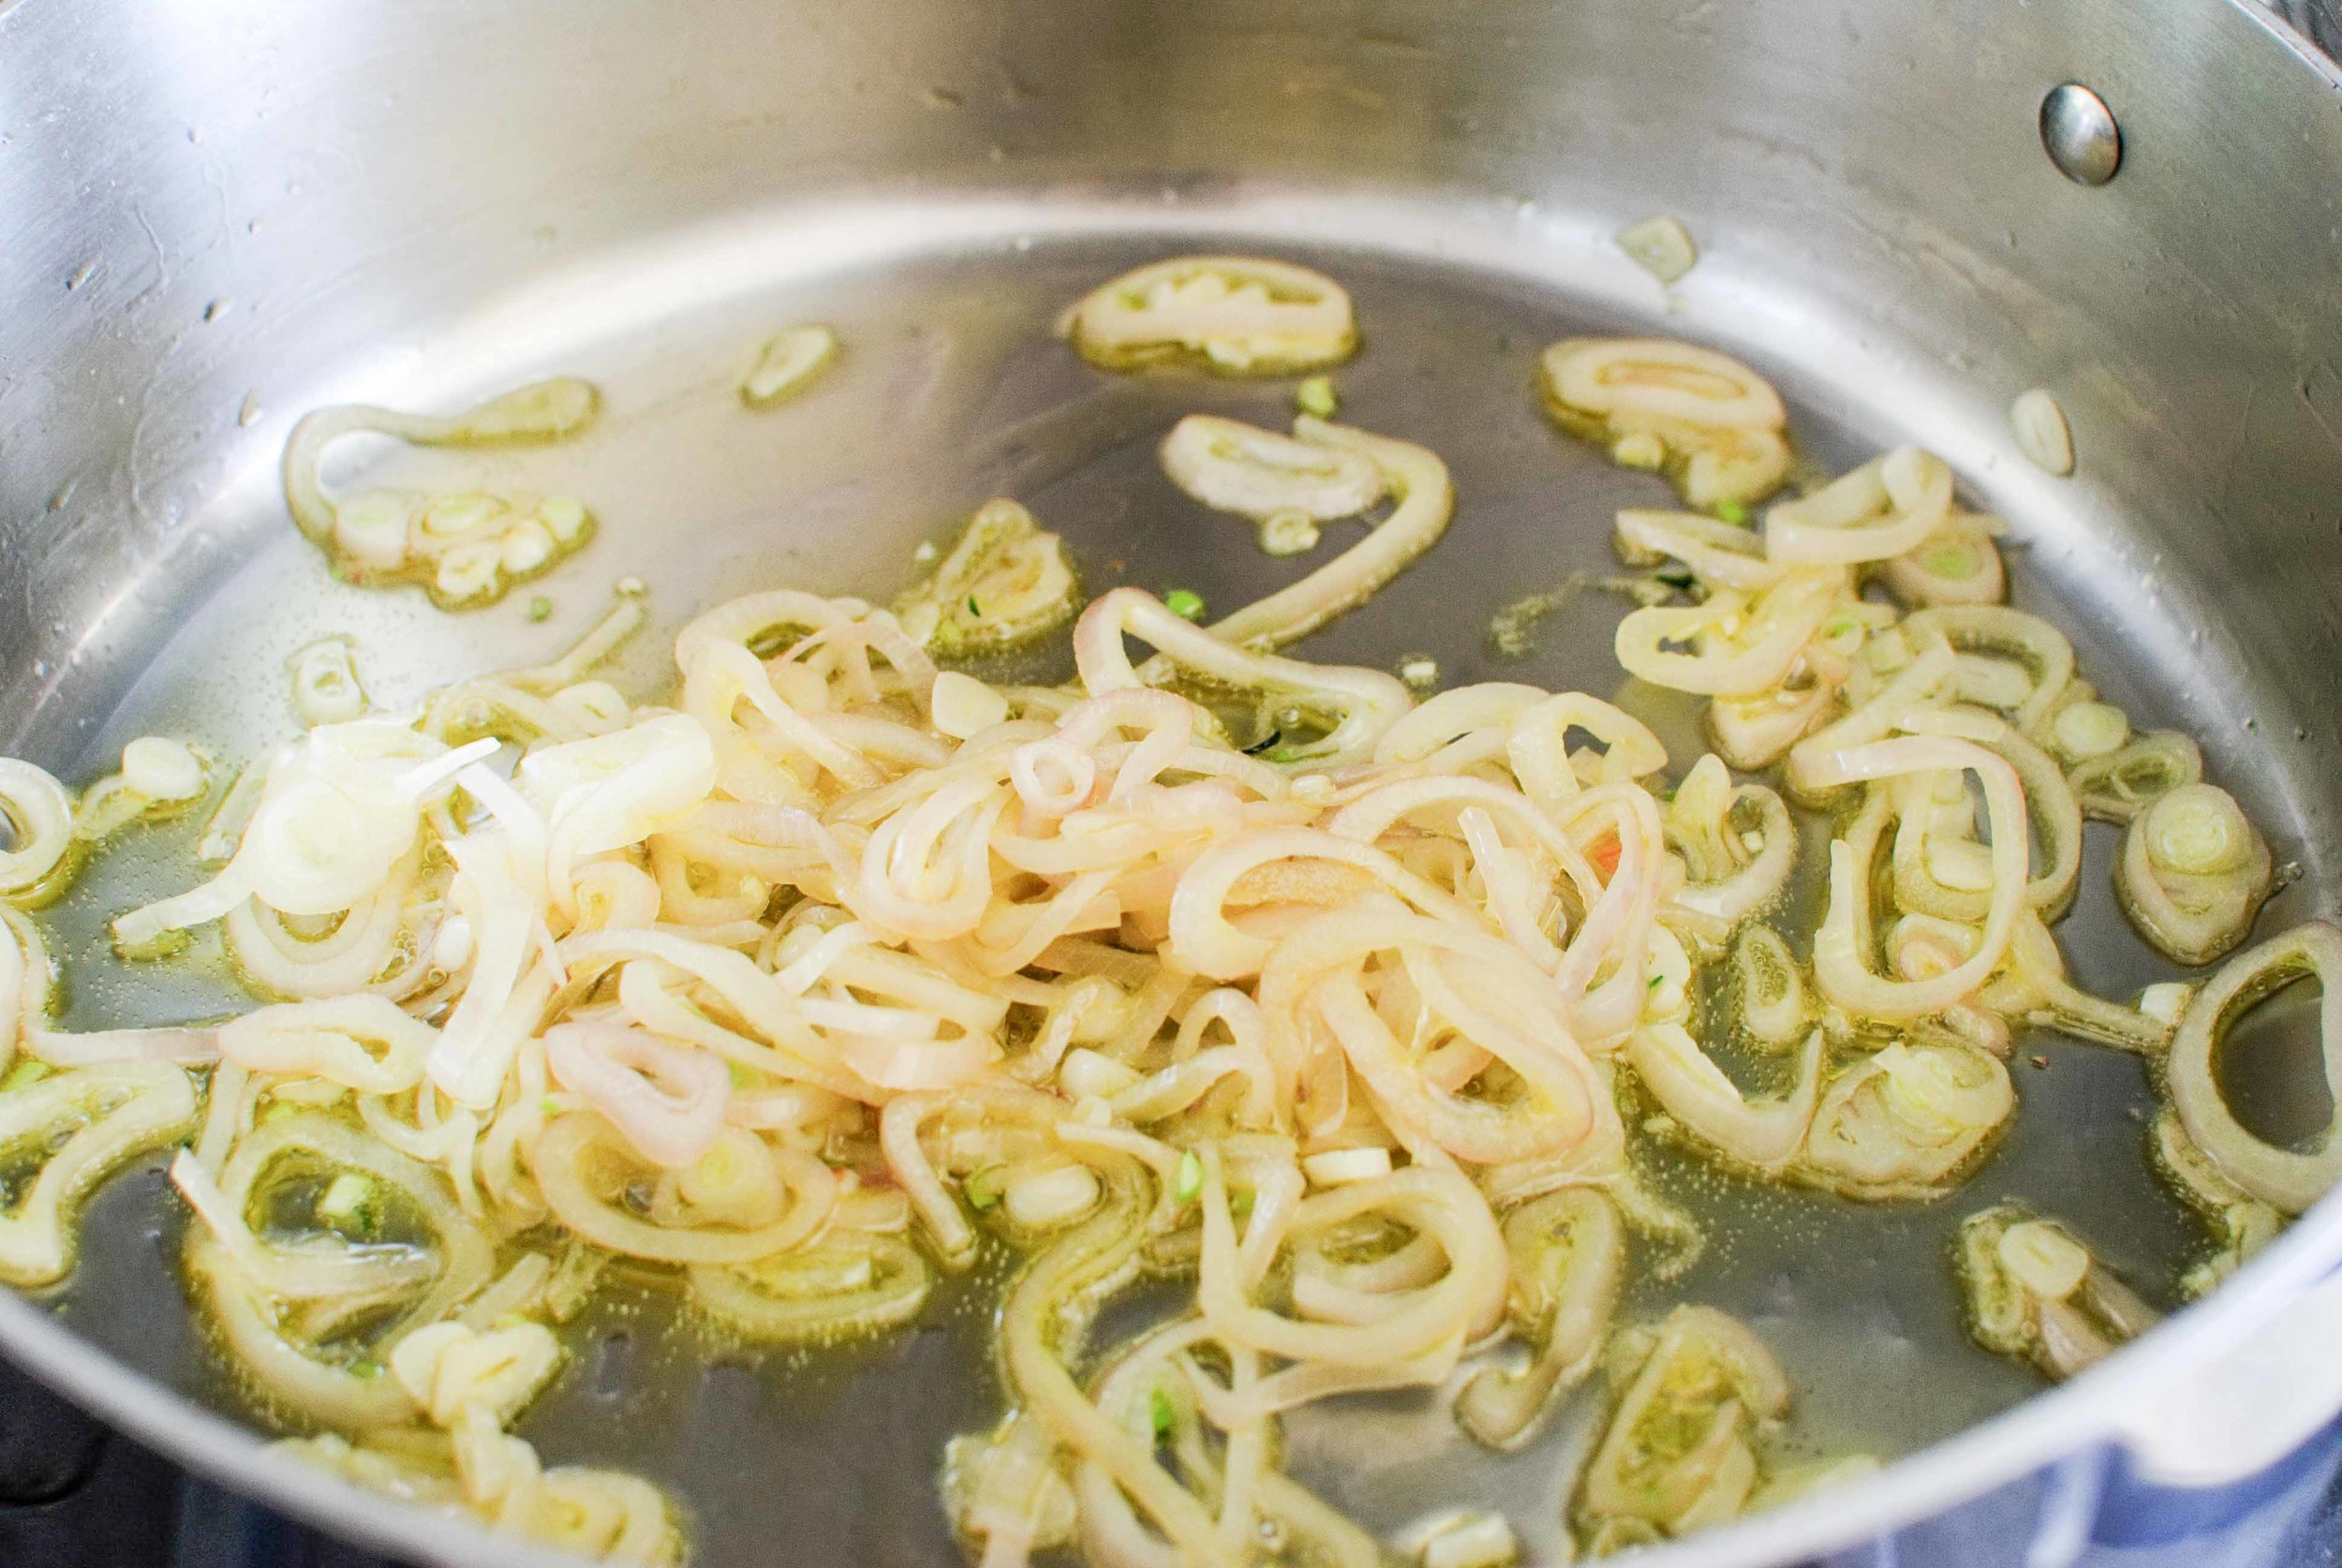
In the same sauté pan, heat 2 tablespoons of olive oil on medium heat. Add red pepper flakes, sliced garlic, and shallot rings- sweat until translucent and tender but not falling apart.

Add the broccolini and stir to combine. Cook on medium heat for 5-7 minutes, stirring occasionally, until tender and soft. Season with salt, and taste to adjust seasoning. Squeeze 1 tablespoon lemon juice on top of the broccolini to finish.

Assembling the sandwich
Slice sandwich rolls in half, drizzle with olive oil and, and toast until golden on a griddle or skillet. Set aside.

Drizzle skillet with remaining olive oil, and warm pork through, until some edges are brown and crisp.

Assemble sandwich by spooning broccolini on the bottom slice, then topping it with the supple and crisp pork. Place a slice of provolone on the pork and place under the broiler in your oven, until the cheese is melted. Devour immediately.

Slow-Roasted Pork with Crunchy Skin and Chimichurri Sauce by Amy Cantu

Print Friendly and PDF

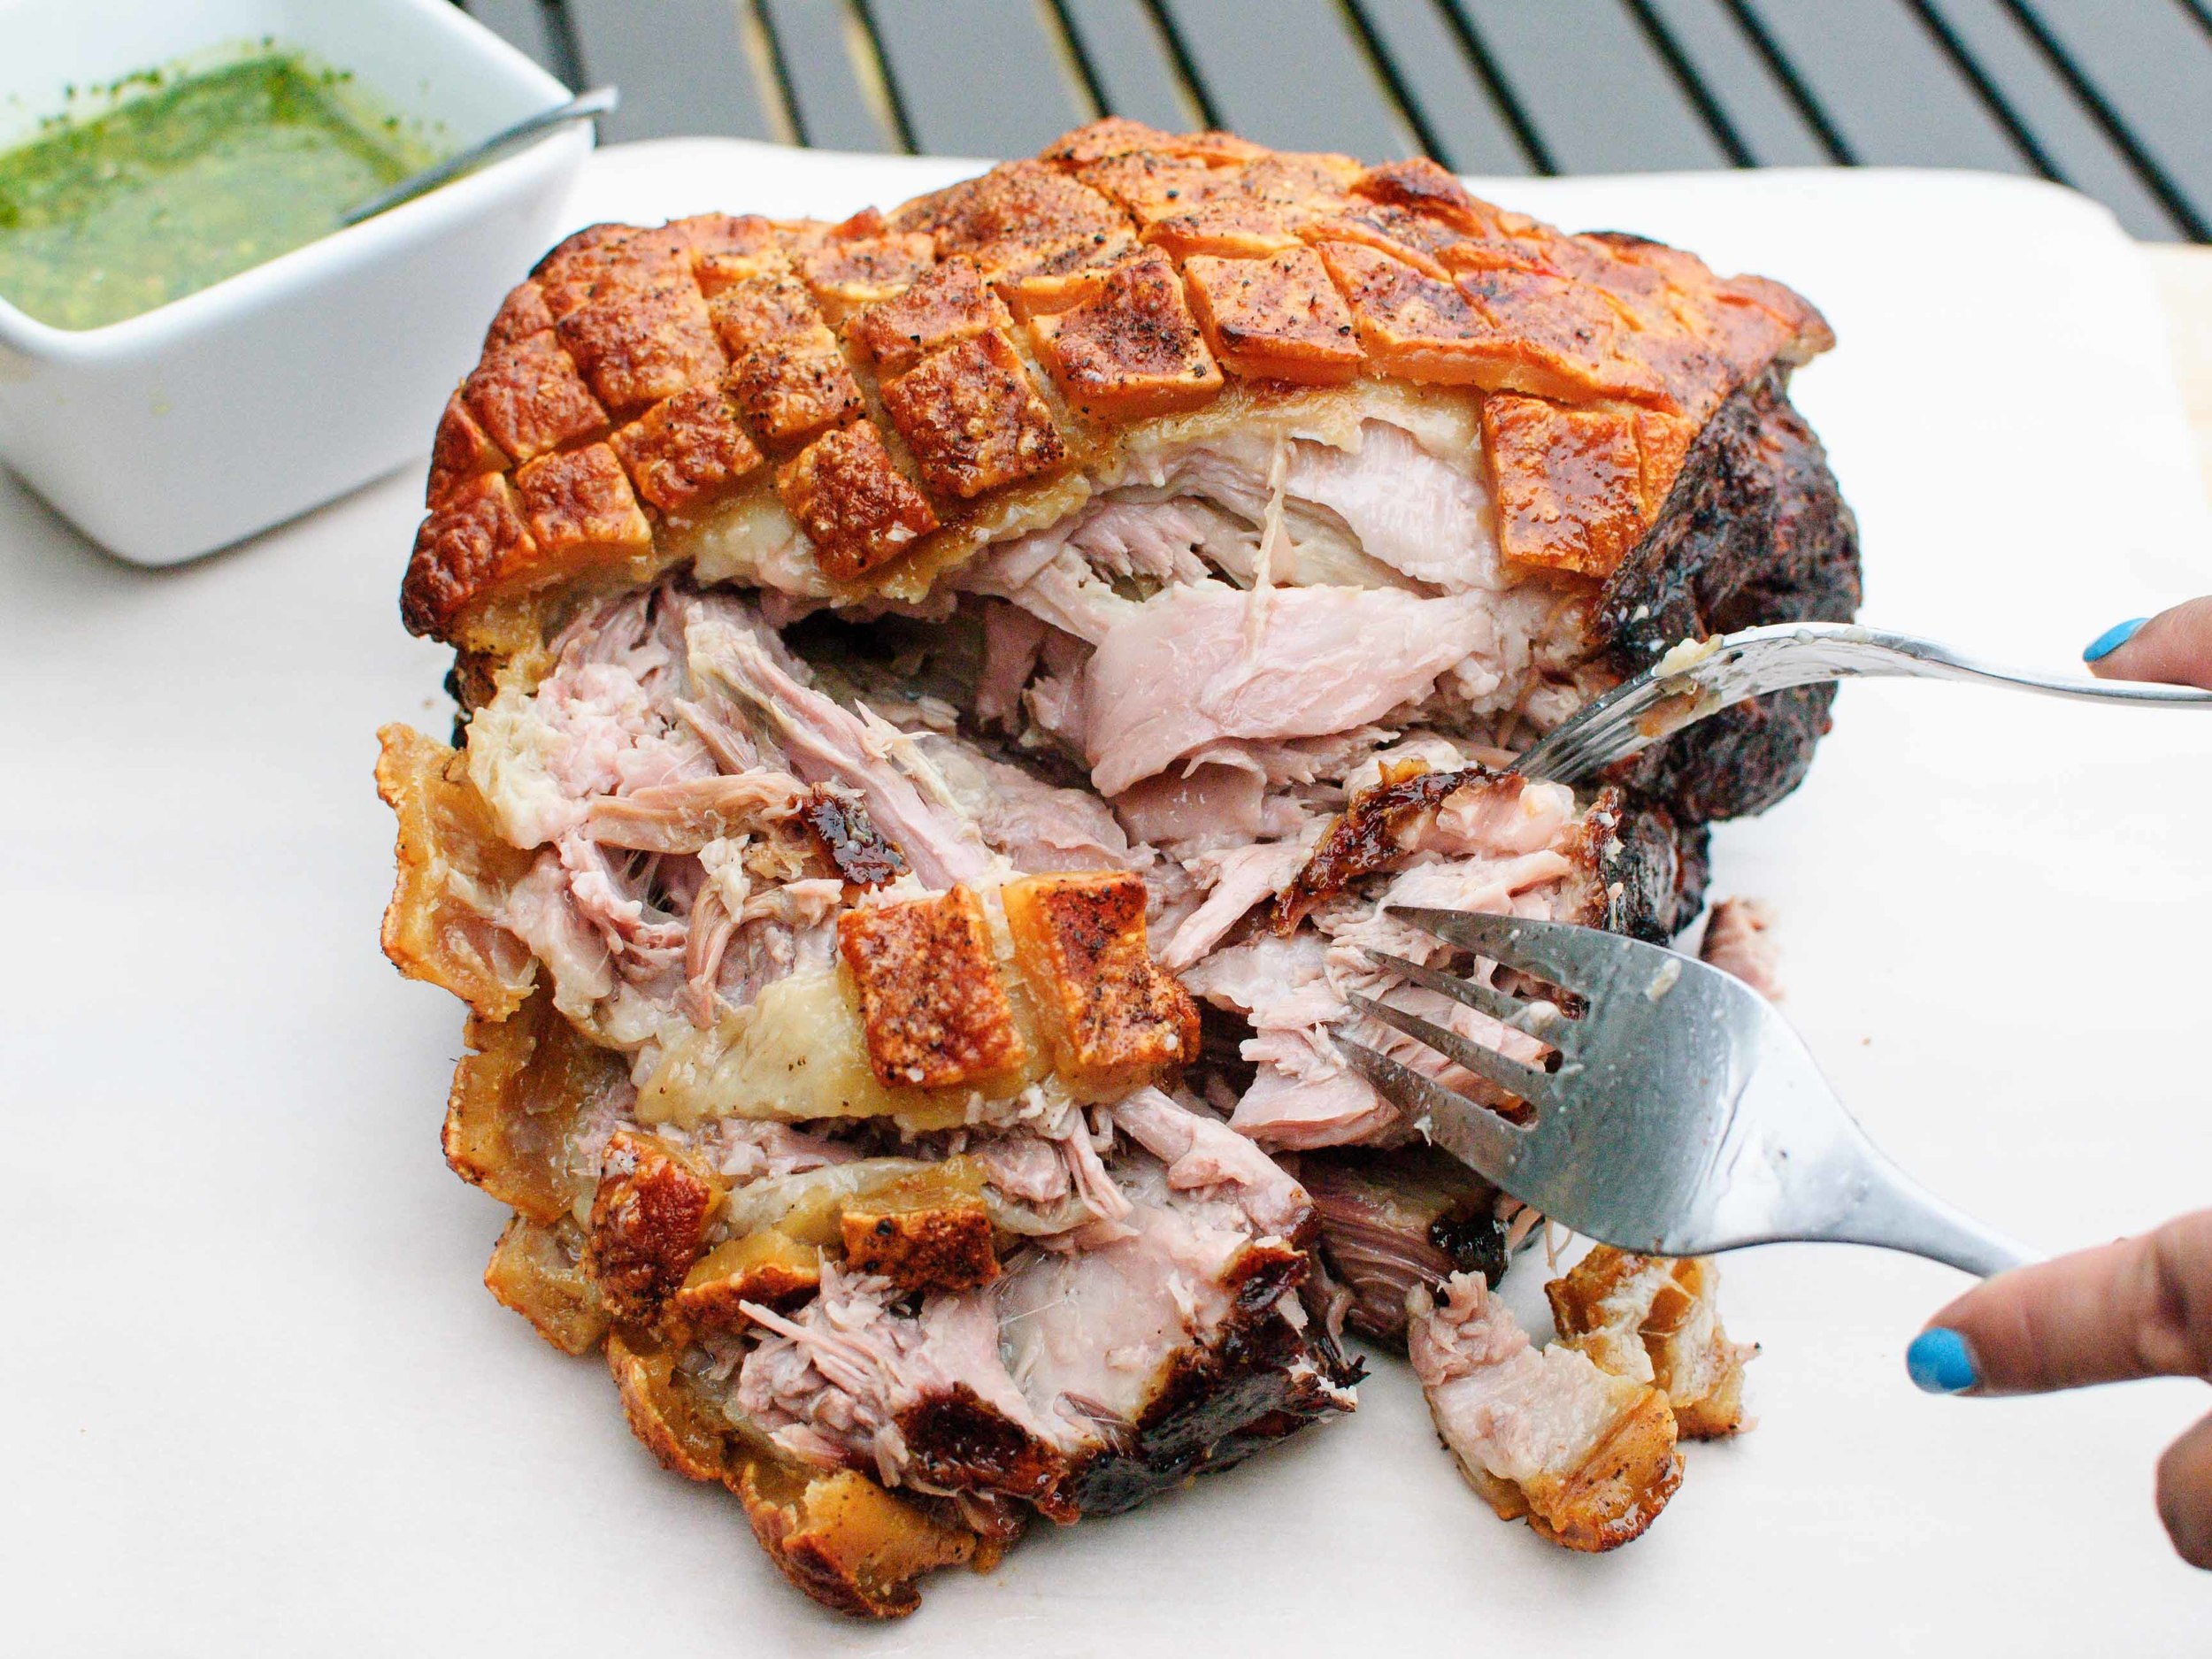
When faced with a very large, beautiful, bone-in, skin-on, fatty beast of a pork shoulder, do not be afraid. Revel in awe in its size, richness, and sacrifice to our privileged bellies. I gathered up my courage and treated this beast the best way I know how - with love and simplicity. I love pork so much. I especially love this slow-roasted, juicy, succulent, messy, pork shoulder complete with its crunchy, puffy, crackling skin. I really can't fully describe the love, joy, and pure elation that Cynthia and I felt, as we pulled this meat into thick shreds. I honestly just felt thankful. Thankful for the plentiful gifts of the pig. Thankful to have Cynthia to share it with. Thankful that Father's Day gave us an excuse to roast such a beast. As for the simplicity, just salt and pepper season this pork to allow all of its sweet, meaty flavor to shine through. I served it next to a bowl of bright green, tangy Chimichurri Sauce to cut through some of the pork's richness and contrast the slow-roasted flavors with fresh herbs. Even now, I breathe a deep, happy sigh at the thought of it.

Notes: I bought my pork from a butcher, so I asked for the skin to be scored and the meat tied (what you see in the photos below).  It never hurts to ask if the meat counter will do the same! Scoring the skin encourages crunchy pork skin (or pork rind), and it looks pretty. Tying the meat helps the roast keep its shape for even cooking. All of that said, it’s not totally necessary to score and tie the roast for great results, so don’t sweat it if you don’t feel like the hassle.
 
To score the skin on your own, use a really sharp knife or a clean box cutter to cut a diamond pattern into the skin. The cuts should go through the skin and into the fat, but not the meat. (See photos below for an example.)
 
No need to get fancy with tying the meat. Just use kitchen twine and tie the meat in 2-inch intervals. If you want to learn how to tie butcher knots, you can Google lots of tutorials.

This recipe is very simple and straightforward, but do notice that the cooking time has a wide range for a couple different reasons. 1) The time it takes for the meat to achieve the soft, shredding stage depends on the amount of fat and connective tissue. A thermometer is not super helpful here – check it with a fork to see if the meat is soft and giving. 2) This is a two-step process: Once the meat is cooked, the pork comes out of the oven to rest for at least 15 minutes, before going back into a very hot oven for another 20 minutes or so to crisp up the skin to its proper crunchy glory.

The seasoning on this pork roast is deliberately simple to allow for limitless options in the pork’s destiny. I have included a recipe for Chimichurri Sauce, which Cynthia and I used to judiciously dunk thick shreds of pork with our greasy fingers. (Forks were just getting in our way!) We also devoured Cynthia's Pork and Broccolini Sandwich made with this pork - so amazing. My family made various fun tacos with the leftover meat throughout the week. To reheat the meat, crisp the meat in either a hot pan (no extra oil needed), or in an oven/toaster oven at 400 degrees Fahrenheit for about 10 minutes. Some ideas: dollops of Pico de Gallo and Guacamole, topped with Harissa and plain yogurt, drizzled with spicy Korean Bi Bim Bap sauce, and heaped with Thai Cucumber-Peanut Relish. The pork recipe comes from the venerable Serious Eats, which has its own fun list of suggested sauces.


Time: 8-12 hours
Servings: 8-12
 
1 whole bone-in, skin-on pork shoulder, 8-12 pounds
Kosher salt
Black pepper, freshly ground

Set the oven rack to the middle position. Preheat the oven to 250 degrees Fahrenheit.

Line a rimmed baking sheeting with heavy-duty aluminum foil and set a wire rack inside it. Place a piece of parchment paper on top of the wire rack. (This prevents the pork from sticking to the wire rack.)
 
Optional: Score pork skin with a diamond pattern, using a very sharp knife or clean box cutter - cut through the skin and into the fat layer. Tie the meat in 2-inch intervals using kitchen twine.

Season the pork all over with a liberal shower of salt and pepper. Place skin-side up on top of the parchment paper.

Roast in the oven for 8-10 hours. Start checking for doneness at 8 hours, by twisting a fork into the meat – the fork should be met with little resistance.

Remove pork from oven, and let rest for 15 minutes and up to 2 hours with a piece of foil tented over it.
 
Preheat the oven to 500 degrees Fahrenheit. If the roast was tied, remove the string. Return the pork to the oven to crisp the skin.  Rotate the sheetpan every 5 minutes, for a total of about 20 minutes. The skin should be puffy and blistered, and you should be completely beside yourself with glee at this point!

Tame your beating heart, tent the pork with foil, and let rest for 15 minutes before serving. (And by serving, I really mean tearing into the meat and crunchy skin with your fingers and dunking the juicy morsels into your sauce of choice – see Notes.)

Recipe very slightly adapted from Serious Eats.

Chimichurri Sauce

½ cup packed fresh parsley leaves, washed and dried
½ cup packed fresh cilantro leaves, washed and dried
5 medium cloves garlic, peeled
2 tablespoons oregano leaves
½ shallot, roughly chopped
¼ cup red wine vinegar
1 teaspoon Kosher salt
¼ teaspoon red pepper flakes
½ cup extra-virgin olive oil

In the bowl of a food processor, pulse together parsley, cilantro, garlic, oregano, shallot, vinegar, salt, and pepper flakes until roughly chopped. With the motor running, drizzle in the olive oil, until just combined. Drizzle a little extra oil, if sauce seems too thick. Do not over-process – you should still see distinct flecks of herbs.

Alternatively, finely chop the herbs, garlic, and shallot. Combine chopped aromatics with vinegar, salt, and pepper flakes in a medium bowl. Whisk in olive oil, drizzling in extra if the sauce seems too thick. 

Use immediately or store up to 2 days in the refrigerator. (Also makes a great marinade.)

Korean Stewed Tofu with Green Onion Salad and Crisp Bacon by Cynthia Raub

Print Friendly and PDF

Notes: This recipe is easily made vegan or vegetarian by omitting the bacon garnish. 


Serves: 2-4
Time: 20 minutes

2 slices of bacon
1 tablespoon fermented bean paste (Korean dwen-jang is recommended but miso is fine, too.)
2 tablespoons gochujang (Korean fermented red pepper paste)
1 tablespoon soy sauce
1 tablespoon honey
1 tablespoon + 1 pinch gochugaru (Korean red pepper flakes) 
1 teaspoon black pepper, coarse ground
1 teaspoon kosher salt
1/4 cup onion, small dice
3 medium cloves of garlic, sliced thin
14 oz firm tofu, cut into 1/2" cubes
1/3 cup water
1 tablespoon sesame seed oil
3 medium green onions
2 teaspoons rice wine vinegar

Slice bacon into lardons, place in nonstick skillet and cook on medium heat until crisp and fat is rendered- about 7 minutes.

Meanwhile, in a small bowl add: fermented bean paste, gochujang, soy sauce, honey, coarse black pepper and kosher salt. Stir to combine, set aside. Cut onion into a small dice, slice garlic, and cube tofu- set aside.

Once the bacon is cooked, drain on a paper towel and drain all but 1 tablespoon of bacon fat from the pan. On medium high heat, add the onion and garlic and sweat until translucent.

Add tofu to the pan and turn heat up to high, lightly frying the tofu in the bacon fat. Toss and brown until heated through- about 3 minutes. Add the spicy sauce and 1/3 cup of water to the tofu, stirring gently to prevent breaking up the tofu. Cook on high for 4-6 minutes until sauce has thickened and coated the tofu. Turn off heat and drizzle tofu with sesame oil. 

Slice green onions on a bias and place in a small bowl. Dress the green onions with a pinch of gochugaru (red pepper flakes) and 2 teaspoons of rice wine vinegar.

Spoon tofu into a shallow bowl and garnish with dressed green onions and crisp bacon. Serve with white rice and devour immediately. 

Bi Bim Bap with Beef and Spicy Sauce by Cynthia Raub

Print Friendly and PDF
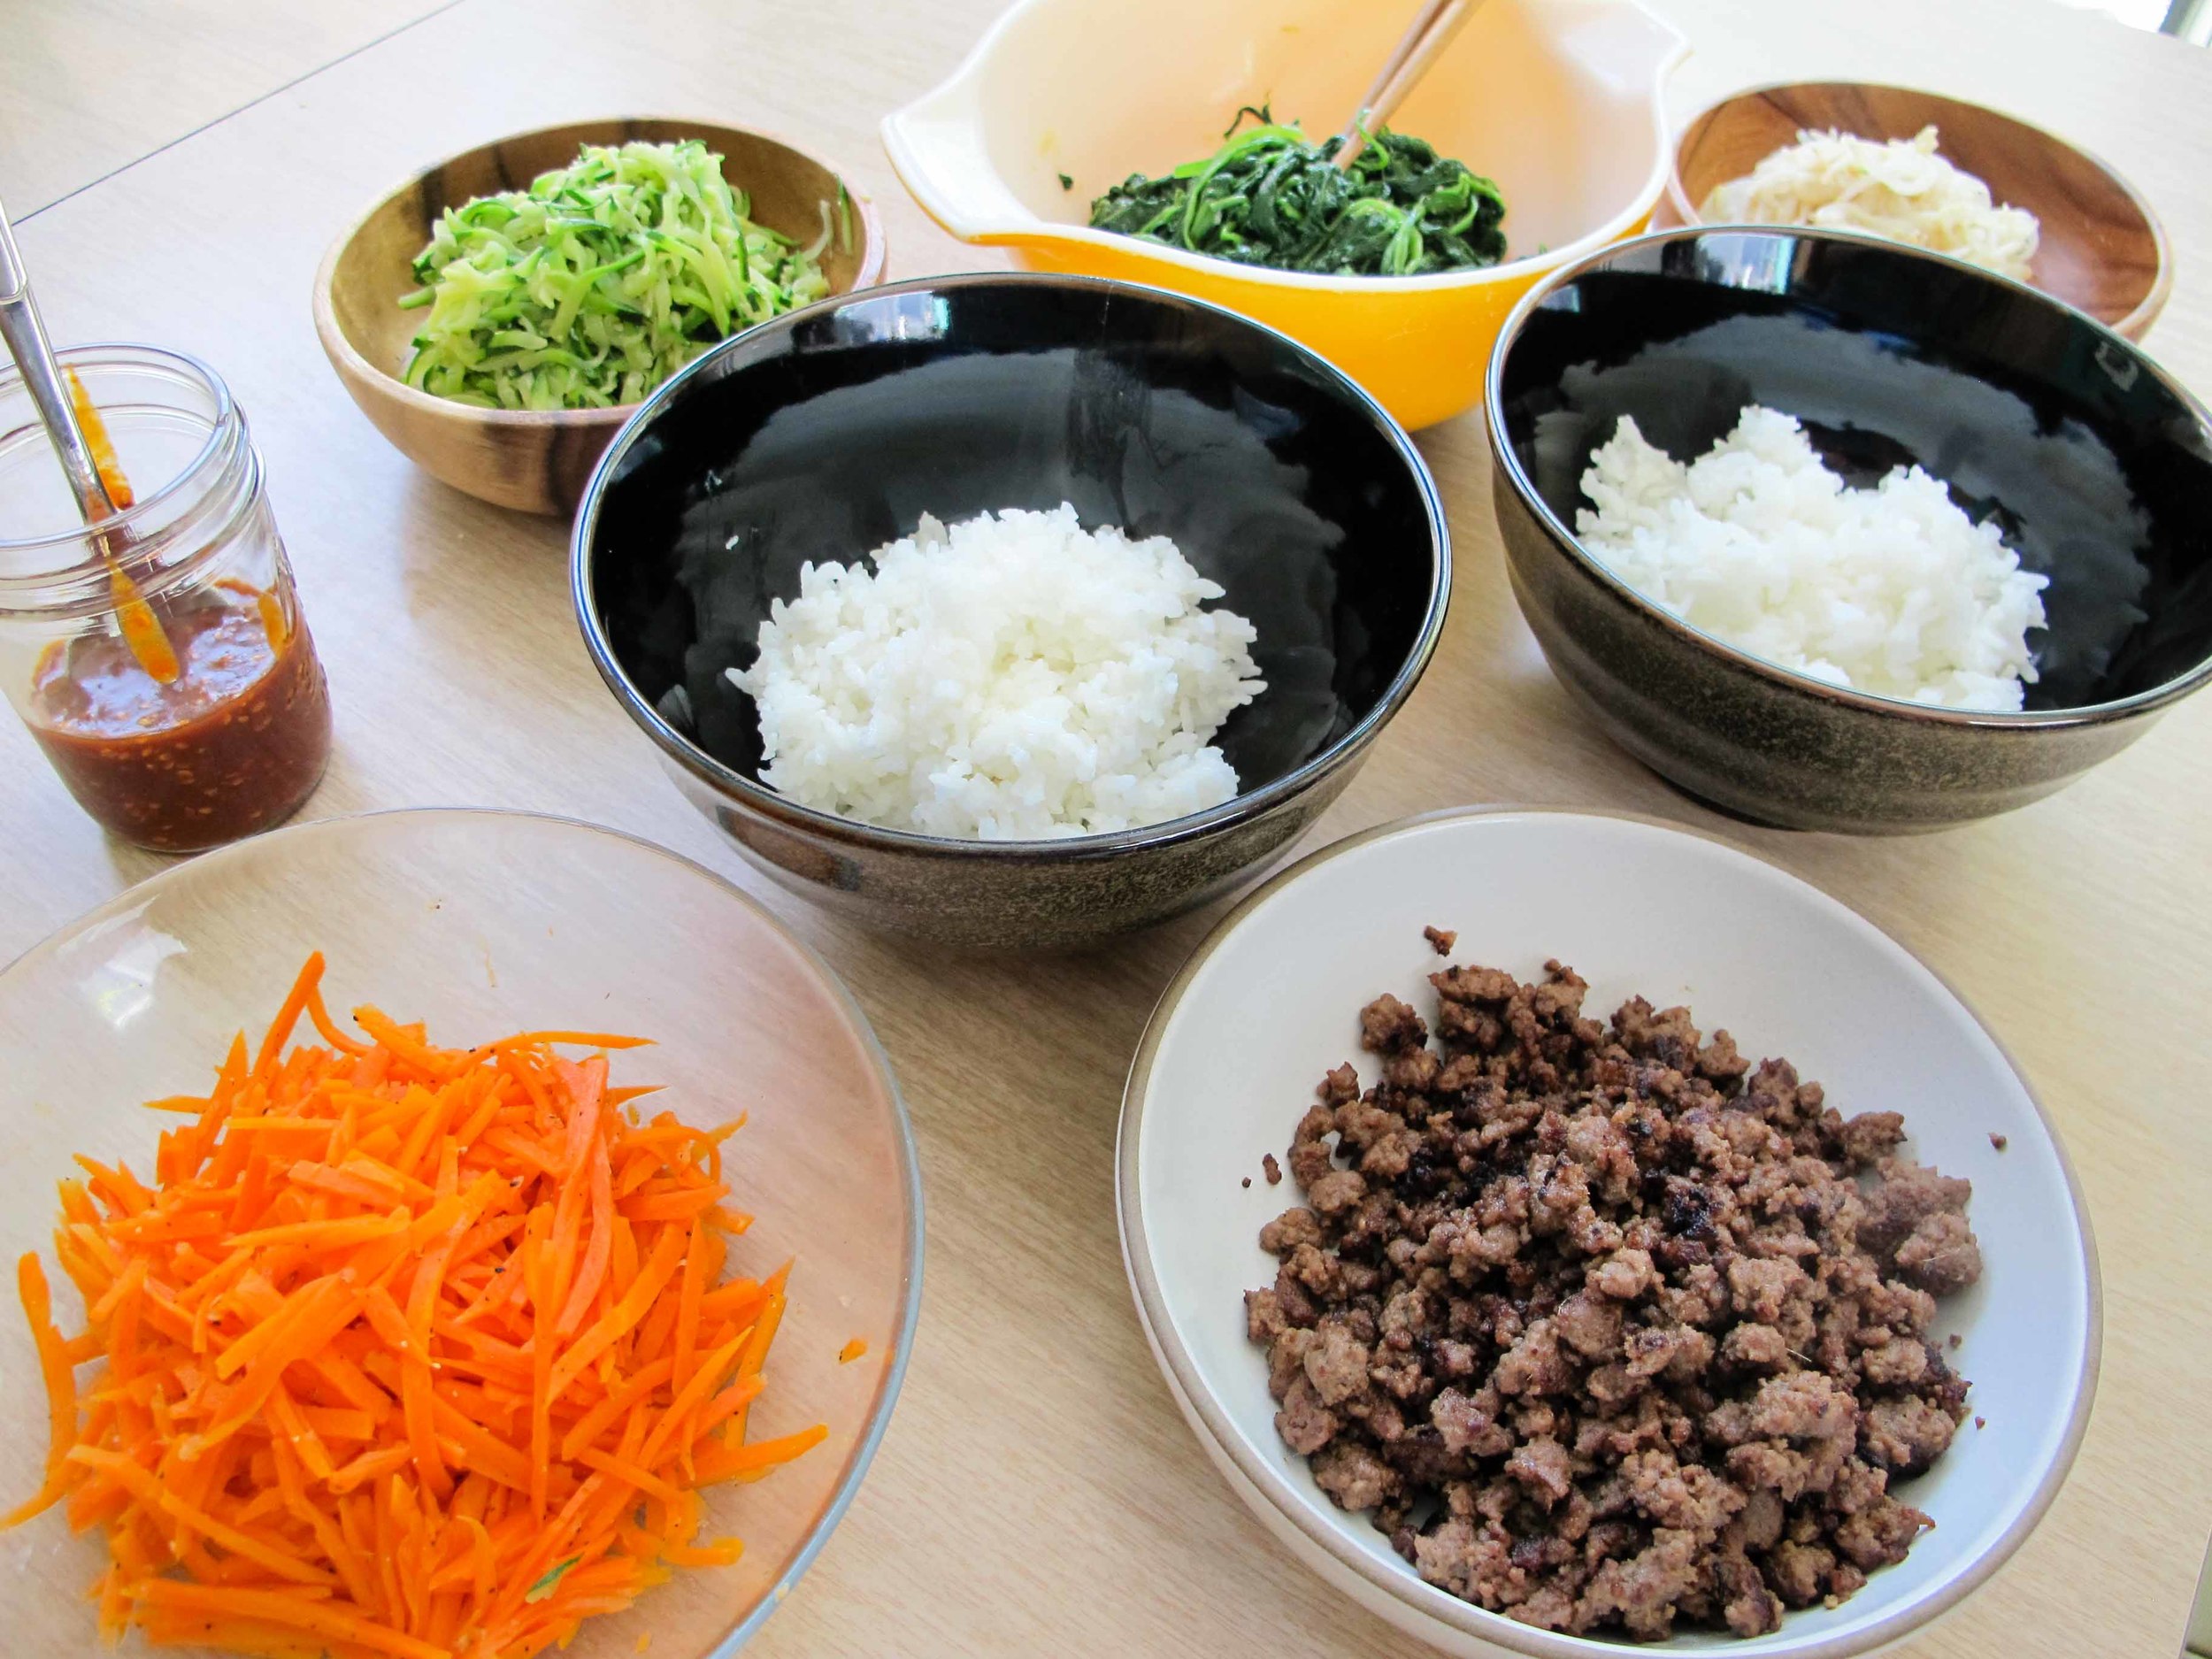
Bi Bim Bap with Beef and Spicy Sauce (Korean Mixed Rice)

I love the Perfect Bite. Salty, a hint of acid, some sweetness, something crunchy, something soft, and a little chew all comprised of vegetables, carbs and protein. This is why I love sandwiches, loaded nachos, burritos or rice salads! Last week, I shared Ottolenghi's Rice Salad with Nuts and Sour Cherries. Similar to that recipe, bi bim bap (translated from Korean it means "mixed rice") has multiple facets, steps, and ingredients that come together to make a delicious bowl of food. The cold vegetables temper the steaming hot rice and beef, which is bound by a luscious and sticky egg yolk. Each heaping spoonful is balance of cold, hot, crunch, soft, sweet, salt and heat. This dish may take a bit of preparation and organization, but don't let that dissuade you from making it! I like to make bi bim bap in large quantities as it stores well in the fridge for a few days. It can then be thrown together from the fridge in the amount of time that it takes you to fry an egg.

Notes: In this recipe I am using and preparing very common vegetables to make a delicious bi bim bap (Korean mixed rice). But to make your own, the vegetable world is your oyster. You can include: sautéed mushrooms, lightly pickled radish, or kale instead of spinach . . . the possibilities are endless! The beauty of this dish is it's inherent flexibility. When storing the different vegetables, it's best to store each vegetable by itself. This way, when you go to make a bowl from the fridge, the vegetables keep their individual characteristics even when they are eventually mixed together. My mom always reminds me to not aggressively season the vegetables, so I'm going to tell you the same thing. This dish is most harmonious when the vegetables are a tad under seasoned to delicately balance the rich egg yolk, spicy sauce and flavorful beef.

Additionally, the bi bim bap sauce recipe I've shared is a versatile sweet and spicy condiment that is delicious and addictive. It's sweeter and less acidic than sriracha, making it a great addition to your hot sauce arsenal. Gochujang, used in the bi bim bap sauce recipe, is a Korean fermented chili paste (kind of like a spicy miso paste), that can be found in the refrigerated section of most Asian supermarkets. 


Serves: 4
Time: 1 hour

For the Marinated Beef
1 pound ground beef
4 garlic cloves
1/2 yellow onion
1" piece of peeled ginger
6 tablespoons soy sauce
1 tablespoon roasted sesame oil
1 tablespoon vegetable oil
3 tablespoon light brown sugar or honey
1 teaspoon black pepper
1 teaspoon kosher salt

Combine all of the ingredients in a blender or food processor and liquify. Place beef in a large bowl and add marinade, combining until well incorporated. Cover and keep in the refrigerator until ready to cook. Marinate for at least 30 minutes up to 2 hours.

Bi Bim Bap Sauce (fermented red pepper paste sauce)
2 tablespoons gochujang (Korean chile paste, found in most Asian markets)
1 teaspoon kosher salt
1 tablespoon rice vinegar
2 cloves garlic, minced
1 tablespoon toasted sesame seeds
2 tsp honey
1 teaspoon sesame oil

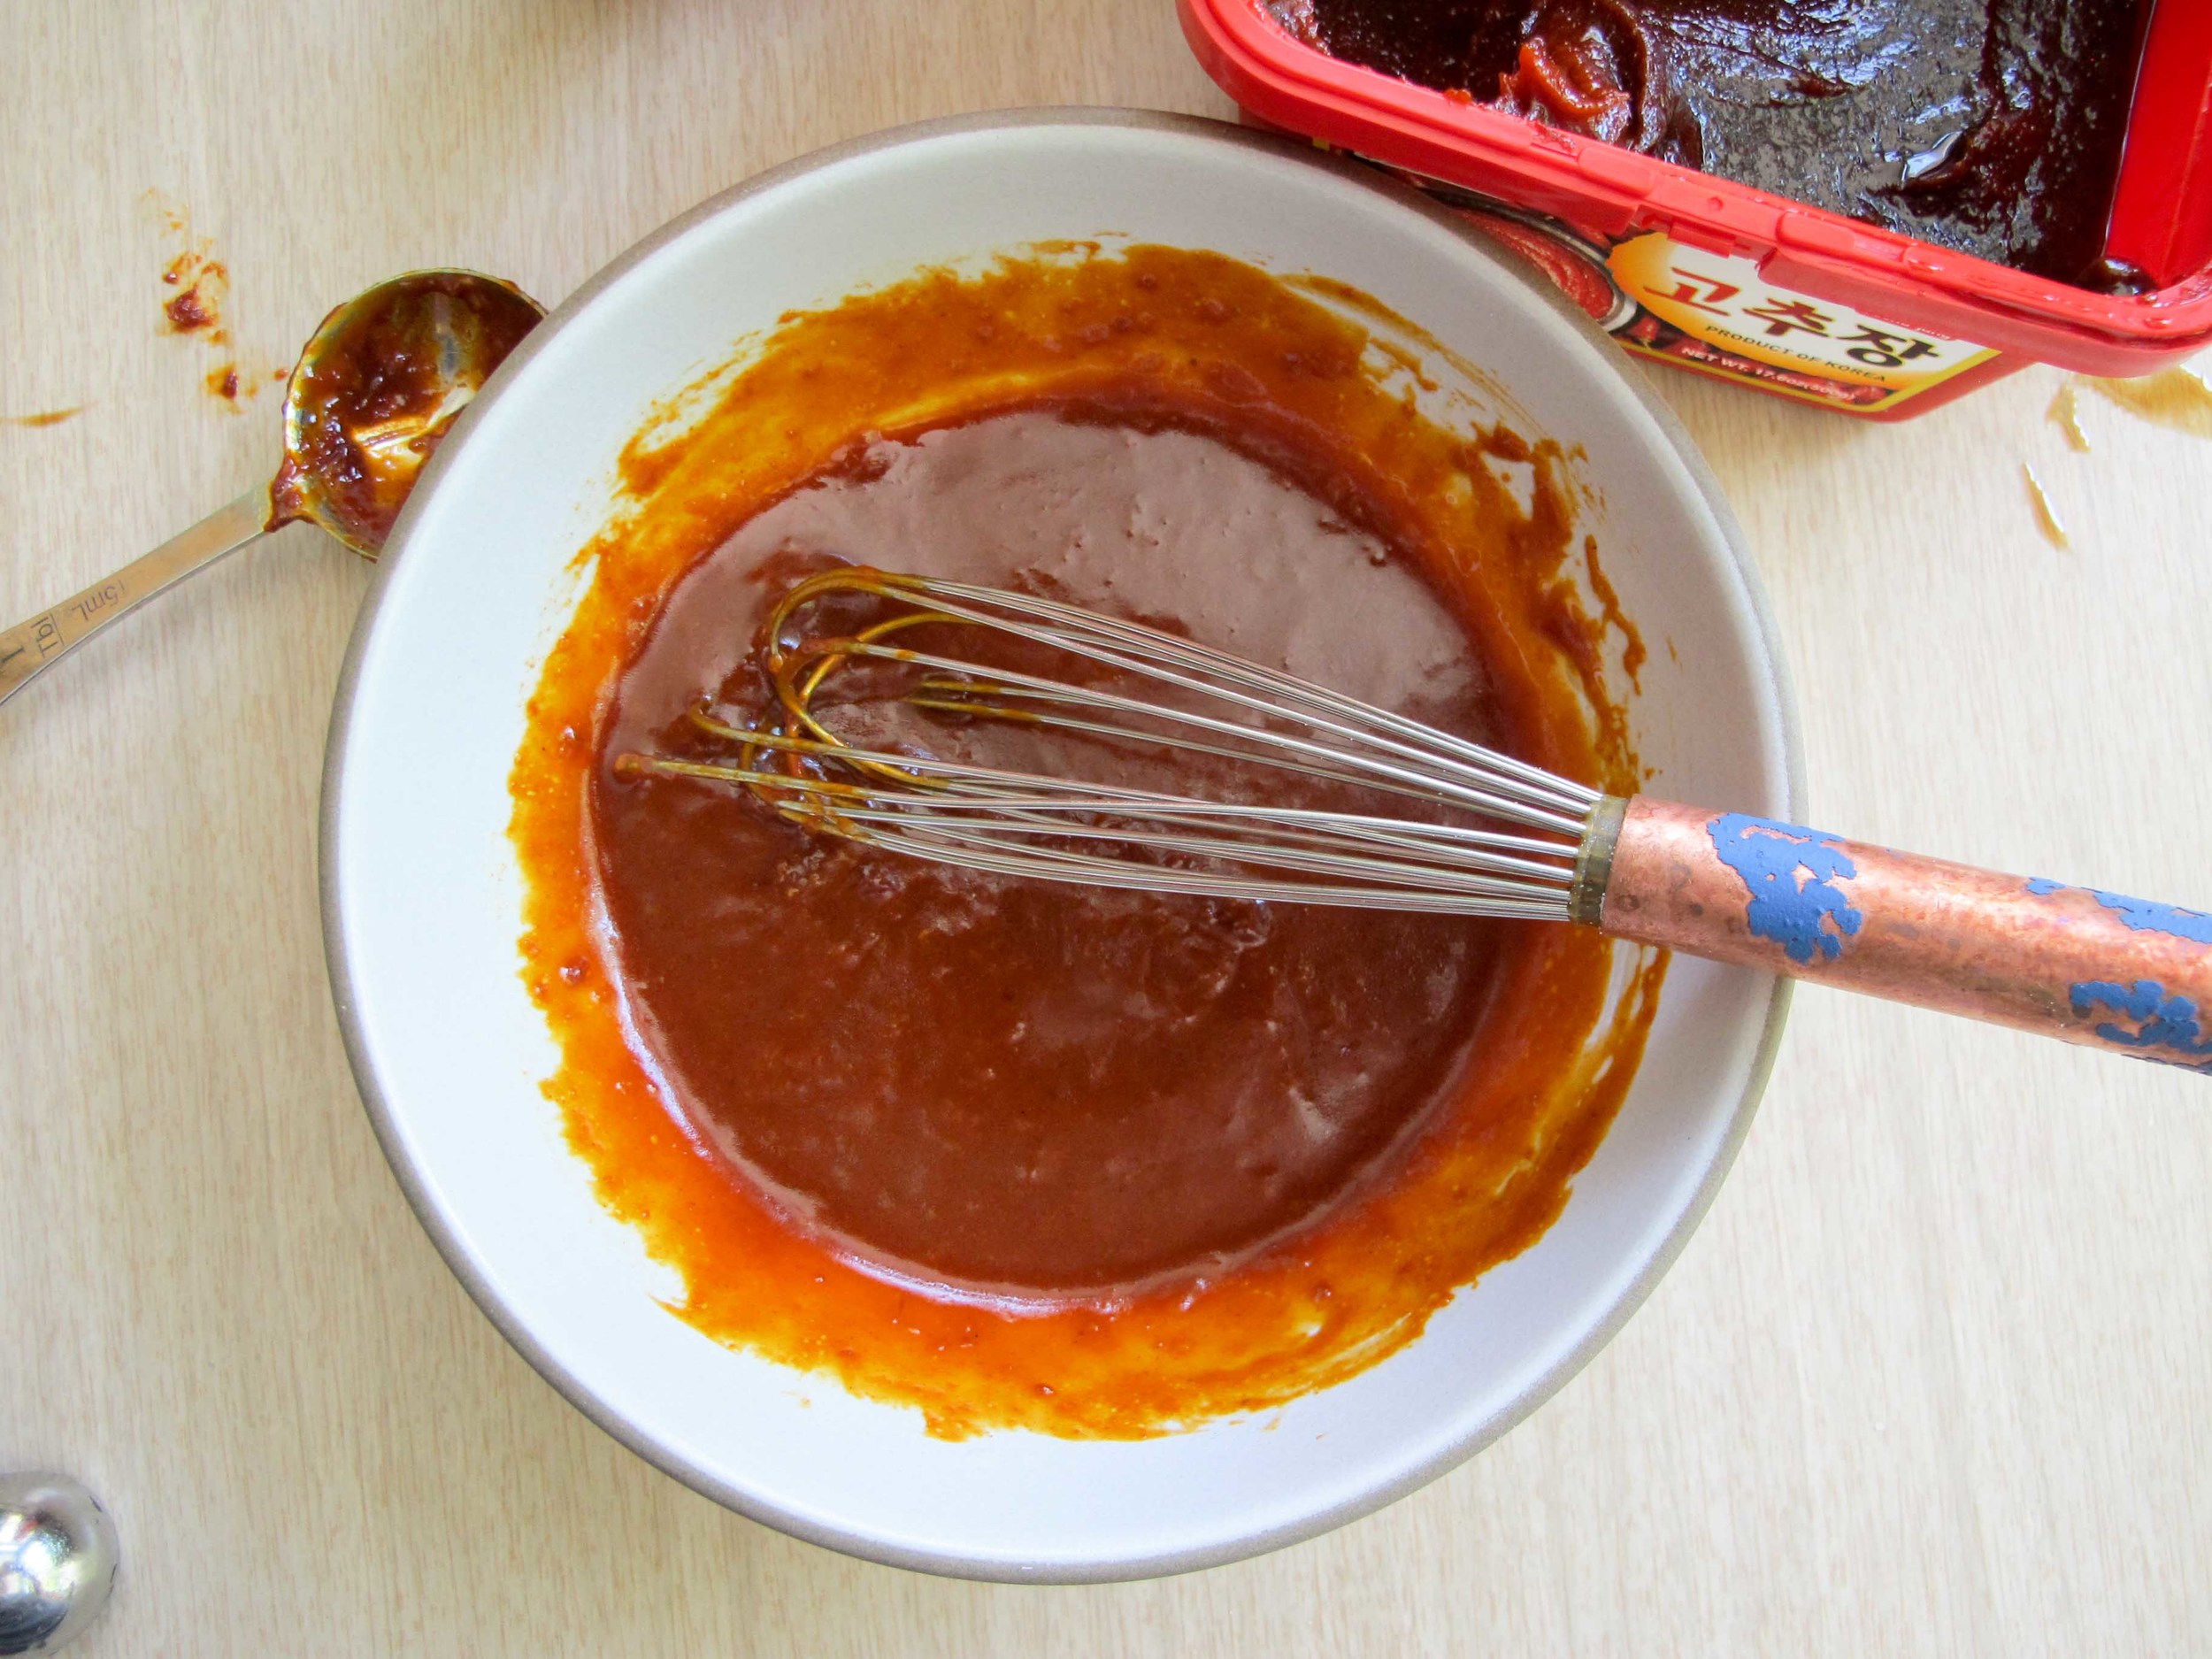
Combine all of the ingredients in a medium bowl, whisk to combine, taste to adjust seasoning and set aside.

For the Bi Bim Bap
2 medium zucchini, julienned
12 oz mung bean sprouts
3 carrots, julienned
2 small bunches of spinach (standard size, not baby), washed with root ends trimmed
3 tablespoons sesame seed oil
1 tablespoon vegetable oil
Pinch of sugar
3 teaspoons kosher salt (divided)
2 teaspoons crushed garlic (divided)

To Serve
4 cups of prepared rice (short grain white rice is traditional, but brown rice would be delicious, too!)
4 eggs
Bi Bim Bap Sauce (recipe above)
Marinated Beef (recipe above)

Bring a large pot of water to a boil. Place julienned zucchini in the boiling water for about one minute until cooked through. Remove the zucchini (delicately with tongs or a strainer) and plunge it into an ice bath. Remove, strain well and set the zucchini aside in a small bowl. Dress with 1 heaping teaspoon of kosher salt and 1 tablespoon of sesame seed oil. Taste and adjust seasoning.

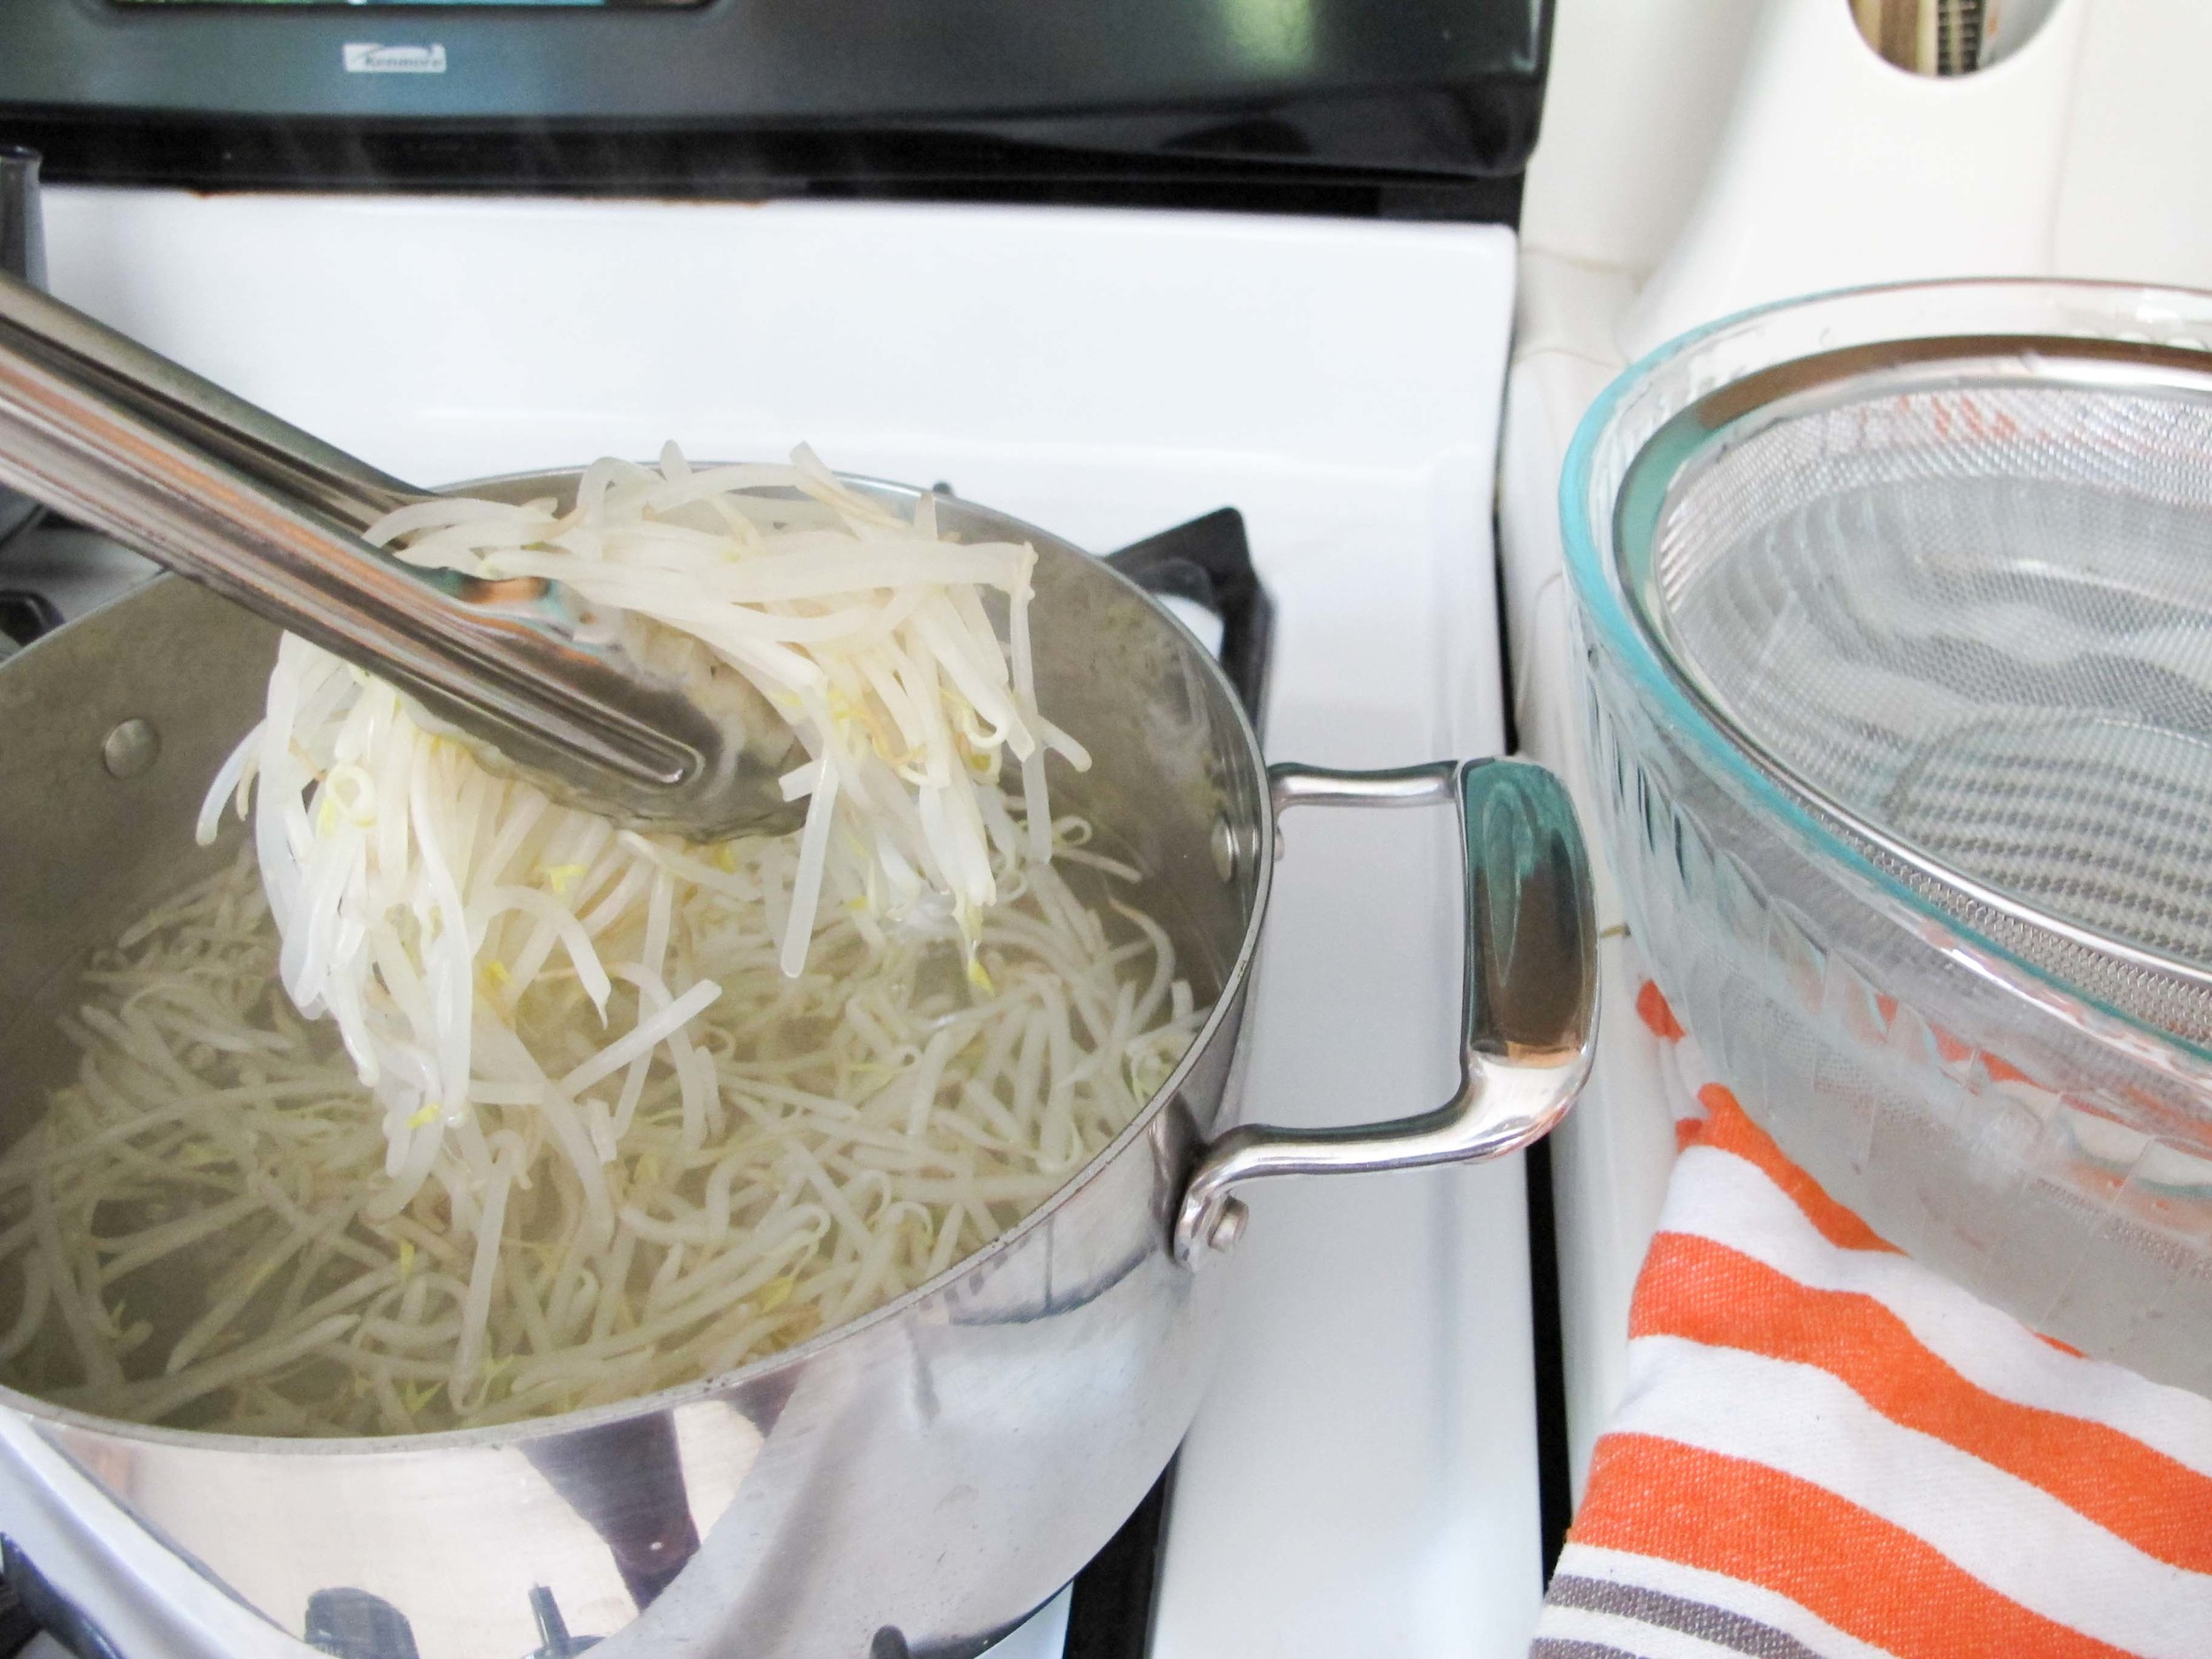
In the same boiling water, place mung bean sprouts in the water for 3-5 minutes until just translucent and limp. Remove the mung bean sprouts and plunge into the previously used ice bath. Remove, strain and squeeze sprouts of excess liquid, and set the mung bean sprouts aside in a small bowl. Dress with 1 heaping teaspoon of kosher salt, 1 tablespoon of sesame seed oil and 1 teaspoon of crushed garlic. Taste and adjust seasoning.

Refresh the ice bath. In the pot of boiling water, place carrots in the boiling water for 1 minute until cooked through and limp. Remove the carrots and plunge into the ice bath. Remove, strain very well and set the carrots aside in a small bowl. Dress with 1 teaspoon of kosher salt, a pinch of sugar, 1/4 teaspoon of black pepper, and 1 tablespoon vegetable oil. Taste and adjust seasoning.

Clean spinach of dirt and trim the ends. In the pot of boiling water, place spinach in the boiling water for 1 minute until cooked through and the stems are tender. Remove the spinach and plunge into the previously used ice bath. Remove, strain well (pressing out any additional liquid) and set the spinach aside in a bowl. Dress with 1 heaping teaspoon of kosher salt, 1 tablespoon sesame seed oil and 1 teaspoon crushed garlic. Taste and adjust seasoning. A note on spinach: I would not recommend using bagged baby spinach - it doesn't cook the same as large bunch spinach, and it doesn't hold up well during the final mixing process.

Cook the beef by heating a large skillet on medium-high heat and cook the beef until browned, fragrant, and cooked through. You may have to cook the beef in two batches to avoid overcrowding the pan.

Meanwhile, heat a nonstick pan on medium-high heat and coat with cooking oil. Crack eggs into pan and fry until the whites are opaque and the bottoms of the eggs are crisp and brown.

To Assemble: In a large bowl, scoop 1 cup of fluffed rice into the center. Around the perimeter, arrange 1/4 of each vegetable around the rice, spoon 1/4 of the beef mixture. Top with a fried egg.

Serve the bowl with the spicy Bi Bim Bap sauce on the side and a spoon to eat with. Immediately before eating, mix and toss all of the ingredients in the bowl together: break up the egg white, incorporate the yolk into the rice, while tossing the vegetables together. Dress with sauce and enjoy!

Lentils with Broiled Eggplant by Amy Cantu

Print Friendly and PDF

Luxurious. I would not have ever imagined that I might describe a lentil salad this way, but luxurious is exactly the perfect word. Smoky, silky, creamy, spicy, and a bit tangy: All of these sensations tangle together into one luxurious bite after another. Eggplant can be sensual. Yes, I said it. The broiled eggplant lifts ordinary lentils into a sensual tizzy of textures and flavors, and I don't think I've been the same ever since! Please eat this. It's a feast of colors for the eyes, sustaining nutrients for the body, and sensual luxury for the mouth and tongue. I understand completely now why Yotam Ottolenghi's approach to treating and eating vegetables can become an obsessive experience. I am forever changed, and now seeking to cook every single recipe in his cookbooks. (Speaking of which, Cynthia shared Ottolenghi's Rice Salad with Nuts and Sour Cherries with us, and I will be making this immediately. So good.)

Notes: The smoky broiled eggplant is what makes this dish so special. Roasting them directly over a gas stove is the fastest way to cook them and achieve that smoky flavor, but it definitely made a mess that took scrubbing to clean up. If you can lay down aluminum foil around the flame to catch some of the drippings, that would help a lot, but this was hard to do with my particular stovetop. Using the oven broiler to roast the eggplant is a less messy alternative, but it does take an hour instead of 15 minutes. If you choose the broiler method, please ensure that you poke the eggplant all over with a small sharp knife, to allow steam to escape. Otherwise, the eggplant may explode all over the oven - an even bigger mess to clean up!

The harissa is optional, but I was so happy to have a jar of homemade harissa gifted to me from Cynthia. It elevated this already excellent lentil salad into something truly special.


Time: 45 minutes to 1 hour, 30 minutes (depending on your method for roasting the eggplant)
Servings: 4

2 medium eggplants
2 tablespoons top-quality red wine vinegar
salt and black pepper
1 cup small dark lentils (such as Puy or Castelluccio), rinsed
3 small carrots, peeled
2 celery stalks
1 bay leaf
3 thyme sprigs
1/2 white onion
3 tablespoons olive oil, plus extra to finish
12 cherry tomatoes, halved
1/3 teaspoon brown sugar
1 tablespoon each roughly chopped parsley, cilantro and dill
2 tablespoon crème fraîche (or natural yogurt, if you prefer)
2 tablespoons harissa (purchased or homemade), optional

To cook the eggplants on a gas stovetop, which is the most effective way: Start by lining the area around the burners with foil to protect them. Put the eggplants directly on two moderate flames and roast for 12 to 15 minutes, turning frequently with metal tongs, until the flesh is soft and smoky and the skin is burnt all over. Keep an eye on them the whole time so they don’t catch fire.

To broil the eggplants in an oven instead: pierce the eggplants all over with a sharp knife. (This creates exit points for the steam to escape the eggplant; otherwise, the eggplant will explode and make a giant mess!) Put them on a foil-lined tray and place directly under a hot broiler for 1 hour, turning them a few times. The eggplants need to deflate completely and their skin should burn and break.

Remove the eggplants from the heat. If you used an oven broiler, change the oven to its normal setting. Heat the oven to 275°F. Cut a slit down the center of the eggplants and scoop out the flesh into a colander, avoiding the black skin. Leave to drain for at least 15 minutes and only then season with plenty of salt and pepper and 1/2 tablespoon of the vinegar.

While the eggplants are broiling, place the lentils in a medium saucepan. Cut one carrot and half a celery stalk into large chunks and throw them in. Add the bay leaf, thyme and onion, cover with plenty of water and bring to the boil. Simmer on a low heat for up to 25 minutes, or until the lentils are tender, skimming away the froth from the surface from time to time. Drain in a sieve. Remove and discard the carrot, celery, bay leaf, thyme and onion and transfer the lentils to a mixing bowl. Add the rest of the vinegar, 2 tablespoons of the olive oil and plenty of salt and pepper; stir and set aside somewhere warm.

Cut the remaining carrot and celery into 3/8-inch dice and mix with the tomatoes, the remaining oil, the sugar and some salt. Spread in an ovenproof dish and cook in the oven for about 20 minutes, or until the carrot is tender but still firm.

Add the cooked vegetables to the warm lentils, followed by the chopped herbs and stir gently. Taste and adjust the seasoning. Spoon the lentils onto serving plates. Pile some eggplant in the center of each portion and top it with a dollop each of crème fraîche or yogurt and harissa. Finish with a trickle of oil.

Korean Soft Tofu Stew (Soondoobu Jjigae) by Cynthia Raub

Print Friendly and PDF

At a Korean table, a variety of side dishes (banchan) will clutter and cover an entire table to the corners and edges. Each diner is set with their own bowl of rice, a spoon, and chopsticks. A soup or stew is a standard for every mealtime during a Korean meal. As such, a single pot of soup is set in the middle of the table for everyone to eat from directly. Due to the long reach to the communal pot, Korean spoons have longer handles than other culture's spoons for this reason. Interesting, right? You're welcome for that tidbit of trivia knowledge. Don't ever say I never gave you anything. 

This tofu soup comes together in no time, and as I explain in the notes below, is very flexible in ingredients as well. The silken tofu's luscious and soft texture is carried through a mildly spicy soup base with small nibbles of vegetables and meat along the way. Share this pot of stew with your family or some friends, or eat the whole thing by yourself. There's no wrong way to enjoy this fragrant and bubbling mess. 

Notes: This soup can easily be made vegetarian or even vegan! You can also swap the seafood for beef or pork and it will be just as delicious. I made this version of tofu soup to accompany Korean Green Onion and Seafood Pancakes (Pa Jun) so I used the same seafood for both dishes to make it easier on myself. If you omit the animal broth and/or meat, I recommend a spoonful more of kimchi and a bigger glug of sesame oil for more flavor. This is a mild version, so feel free to add Korean red pepper flakes (gochugaru) or sliced spicy peppers to your liking. Also, I had a difficult time tracking down silken tofu - so don't be discouraged if you can't find it, either. Soft tofu is a perfectly delicious substitute for this soup.


Serves: 1 - 4
Time: 20 minutes

1/4 cup chopped seafood (I used shrimp and squid.)
3 clams
1 tablespoon grape seed oil (or any other neutral oil)
1/4 cup chopped kimchi
2 cloves garlic, minced
1/4 cup diced mushrooms
1/4 cup diced zucchini
1 cup of stock (vegetable, seafood, chicken, beef) or water
14 ounces silken tofu
1 teaspoon kosher salt
1 tablespoon sesame oil
1 tablespoon green onion, thinly sliced
1 egg

Cut seafood into small dice and clean and sort clams. Set aside.

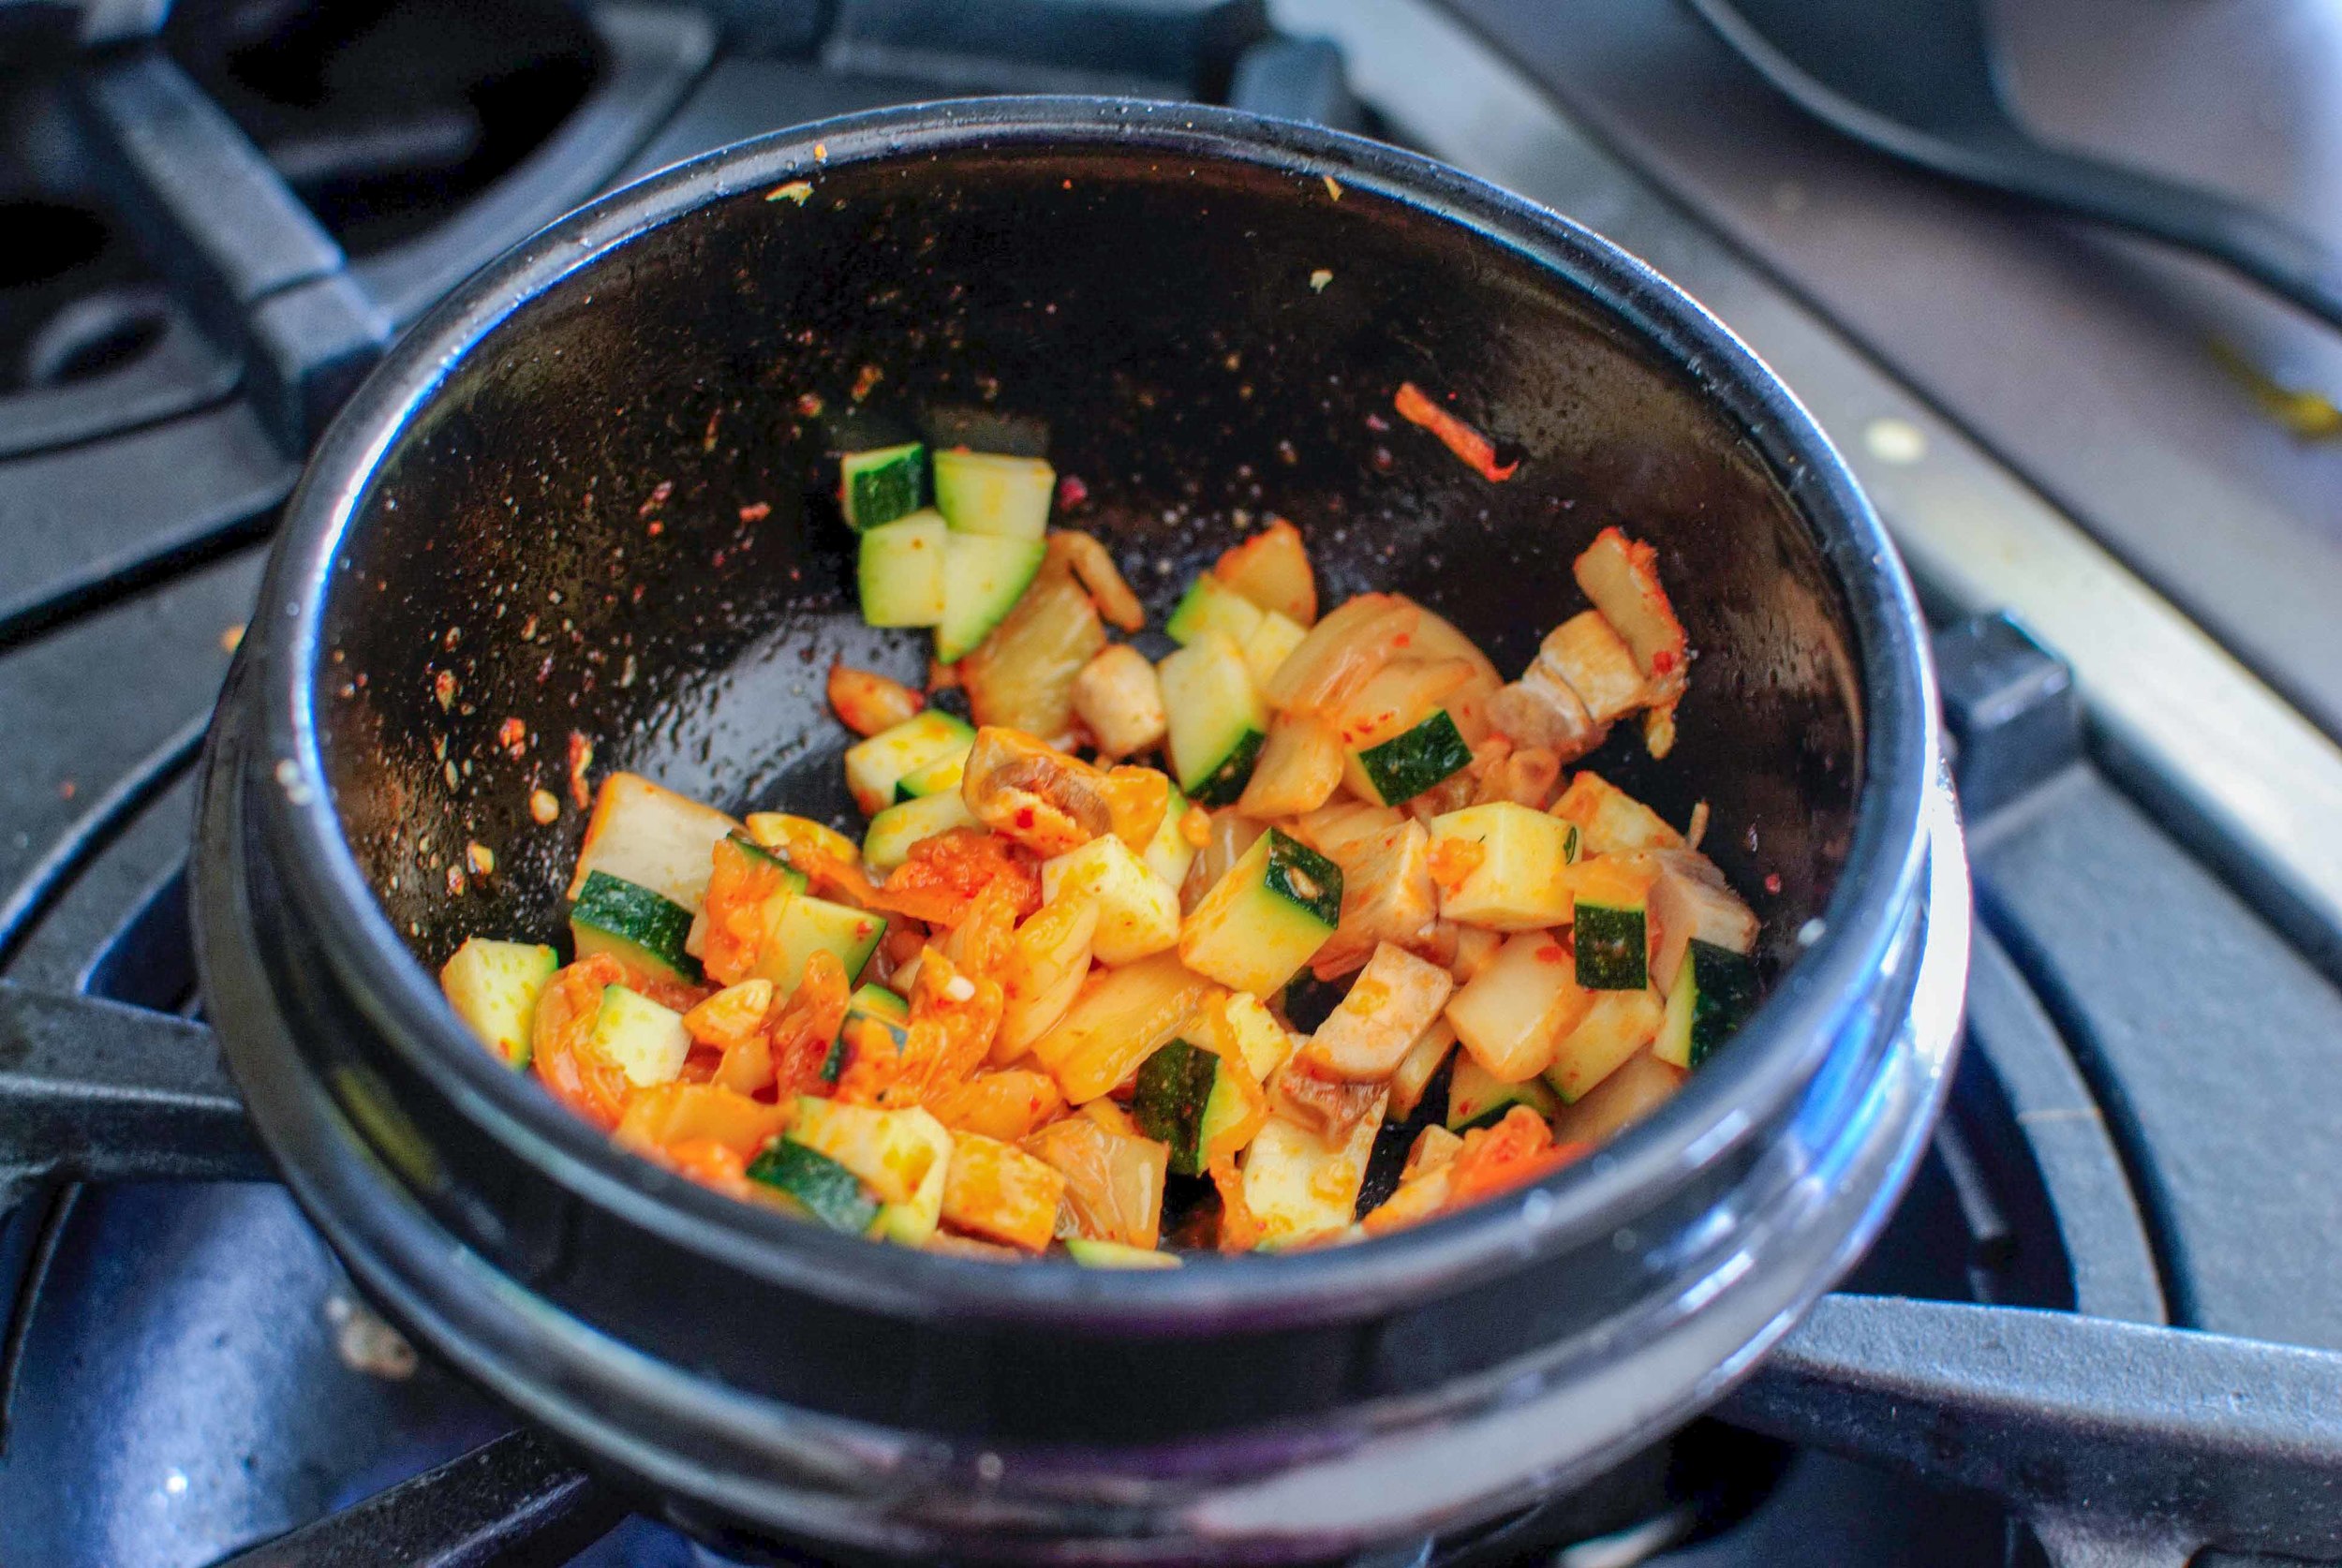
In a small saucepan, heat grape seed oil on medium high heat. Add kimchi, garlic, mushrooms, and zucchini; cook until tender and barely browned, about 2-3 minutes. Add stock and bring to a boil. Scoop large spoonfuls of silken tofu from its package into the boiling soup base. Reduce heat to medium and bring back to a hard simmer, stirring occasionally to break up the tofu. Simmer for 3 minutes until tofu is heated through. Season with kosher salt. Add seafood and cook until cooked through, about 2 minutes. Taste and adjust seasoning.

Reduce the heat to low and drizzle the soup with sesame oil and scatter green onions. Crack an egg into a small bowl and gently pour on top of the soup; the hot soup with cook the egg. Serve from your saucepan and enjoy!

Fresh Egg Pasta by Amy Cantu

Print Friendly and PDF

I never fully understood why anyone liked pasta with butter and parmesan. It always just sounded bland and boring to me. I filed it under "picky kid food". This luscious and ethereal fresh egg pasta changed my entire understanding of what pasta with butter and parmesan could actually mean. These wide ribbons were at once delightfully delicate and richly filling. A quick toss with a pat of butter and shower of grated parmesan infused the springy strands with a bit of luxury and saltiness without masking its simple glory. Cynthia and I went mad for it - dancing around the kitchen, swooning, moaning, eyes-rolling-into-the-back-of-our-heads, madness. This fresh pasta meets and exceeds any and all expectations you might have for homemade noodles.  If eating a bowl of nothing but plain pasta is too one note for you, (I promise that I struggled to consider eating anything else with it,) Cynthia's spring vegetables are a bright and punchy (if not guilt-appeasing) match to the simple indulgence of homemade pasta.

Notes: Homemade pasta is not terribly difficult to make, even for a novice. It can even be made with no special equipment, except perhaps a rolling pin. I had a pasta machine collecting dust in the closet (I almost forgot I even had it and only used it once 10 years ago), so I pulled it out to see if it still worked. It does, and it's been getting a lot of use ever since we tested this recipe. I pulled inspiration and direction from both Serious Eats, which has yet to fail me, and also a recipe from Melissa Clark in New York Times Cooking. I love the delicate richness of an extra egg yolk and detailed, fool-proof directions from Serious Eats; I also liked the addition of olive oil in Melissa Clark's version, which added flavor and made the dough easier to roll out. My first batch of pasta sported some ragged edges and uneven texture, but it still tasted better than any pasta I'd ever eaten. So, don't toss out any uglies - close your eyes and enjoy the perfect taste!

If the recipe makes more pasta than you need, the strands can be twisted together into a few loose nests and then frozen to cook later. The frozen pasta can be cooked without thawing, adding an extra minute or two to cook through.


Time: 1 hour
Serves: 4-6

2 1/4 cups all purpose flour
1 teaspoon kosher salt
1 tablespoon extra version olive oil
2 eggs
4 egg yolks

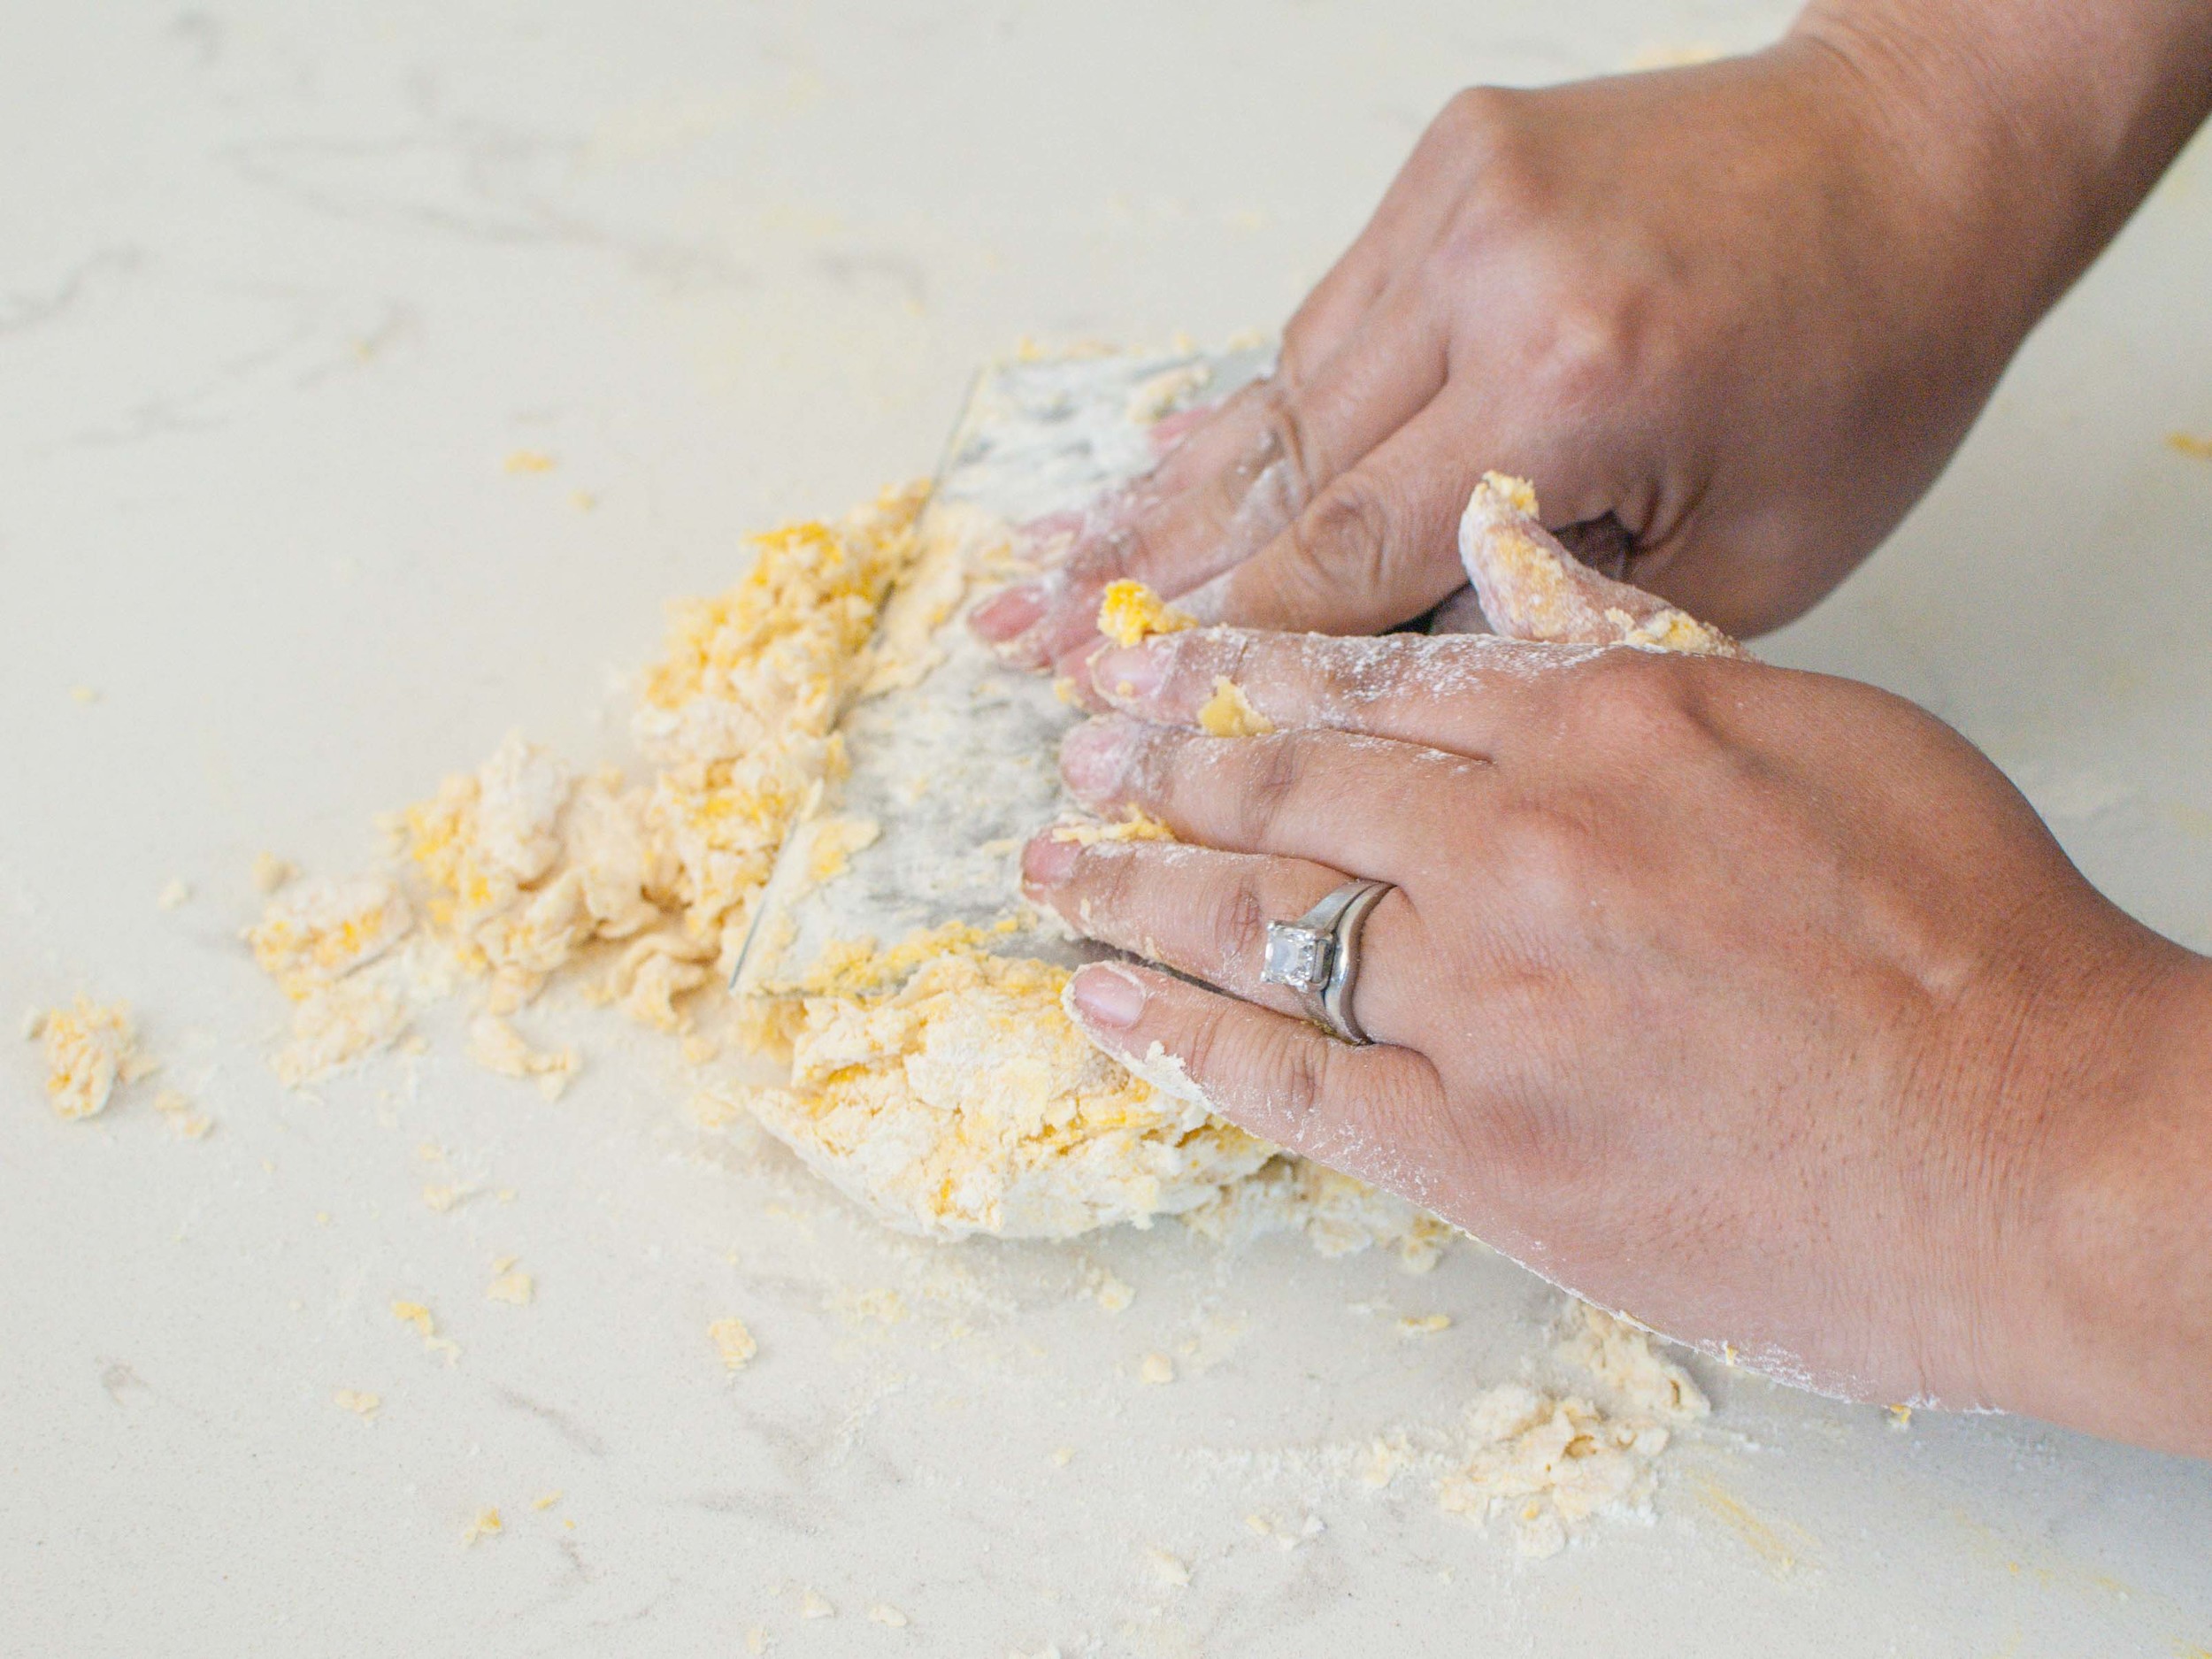
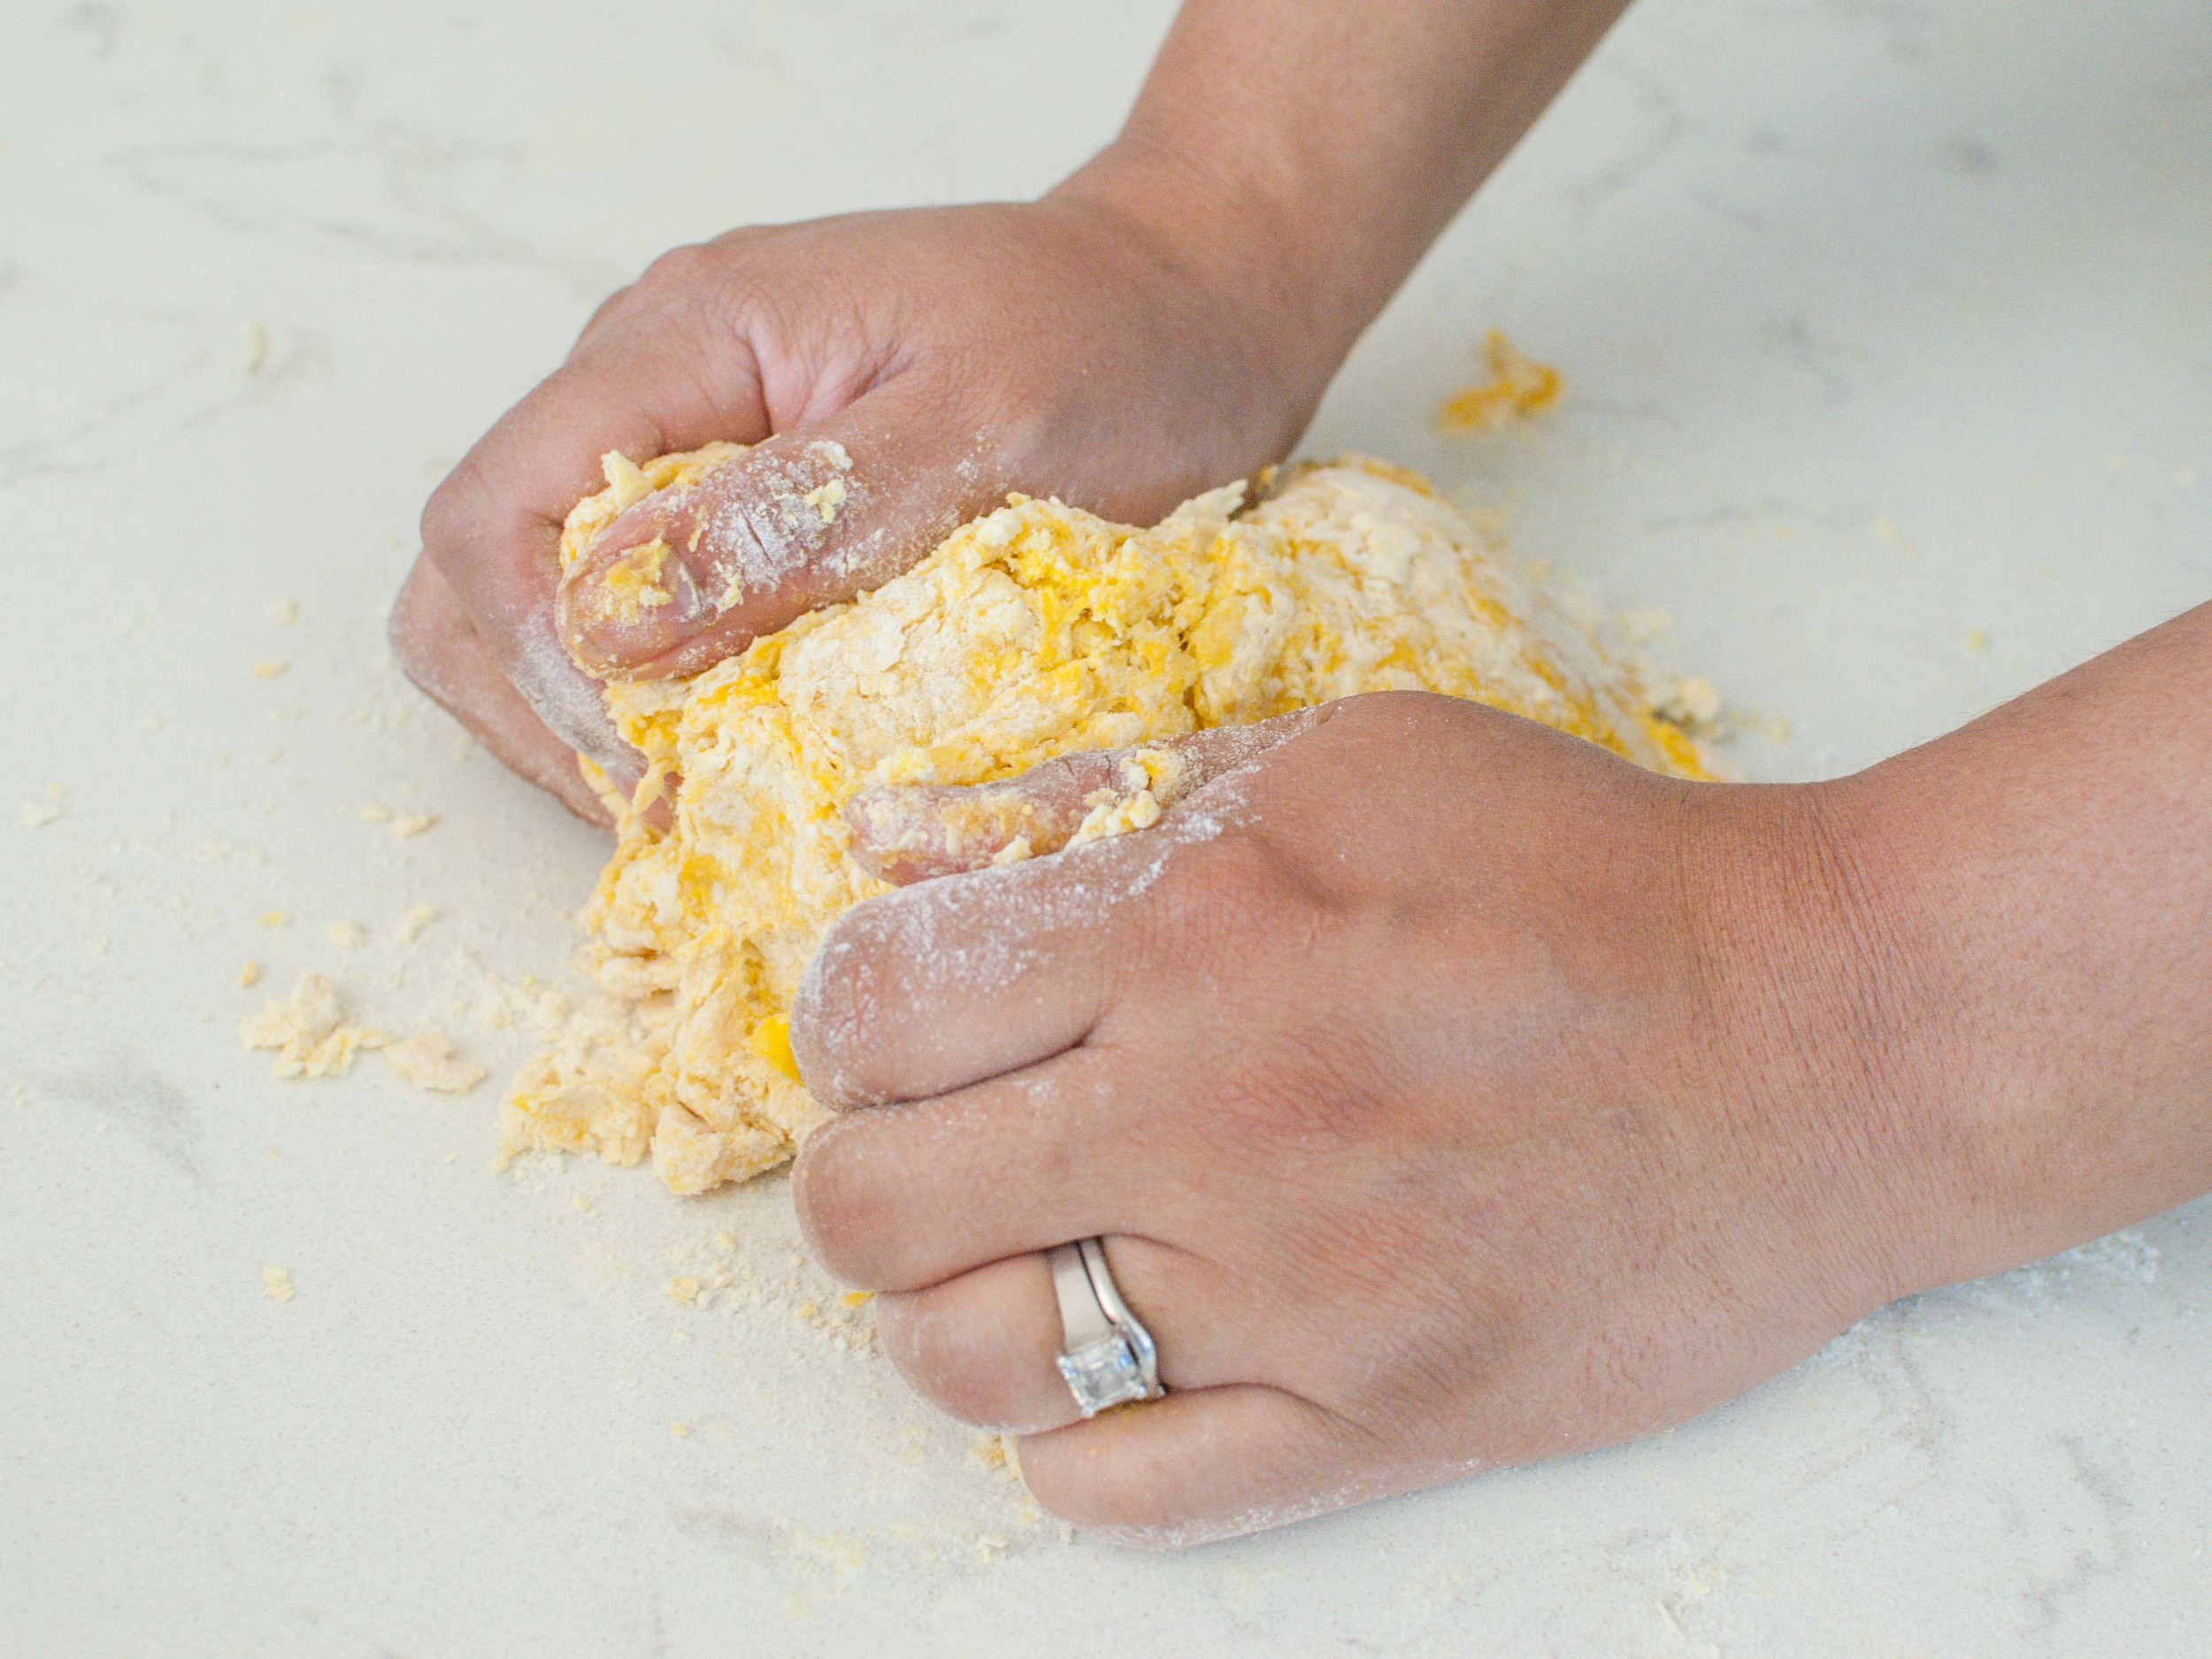
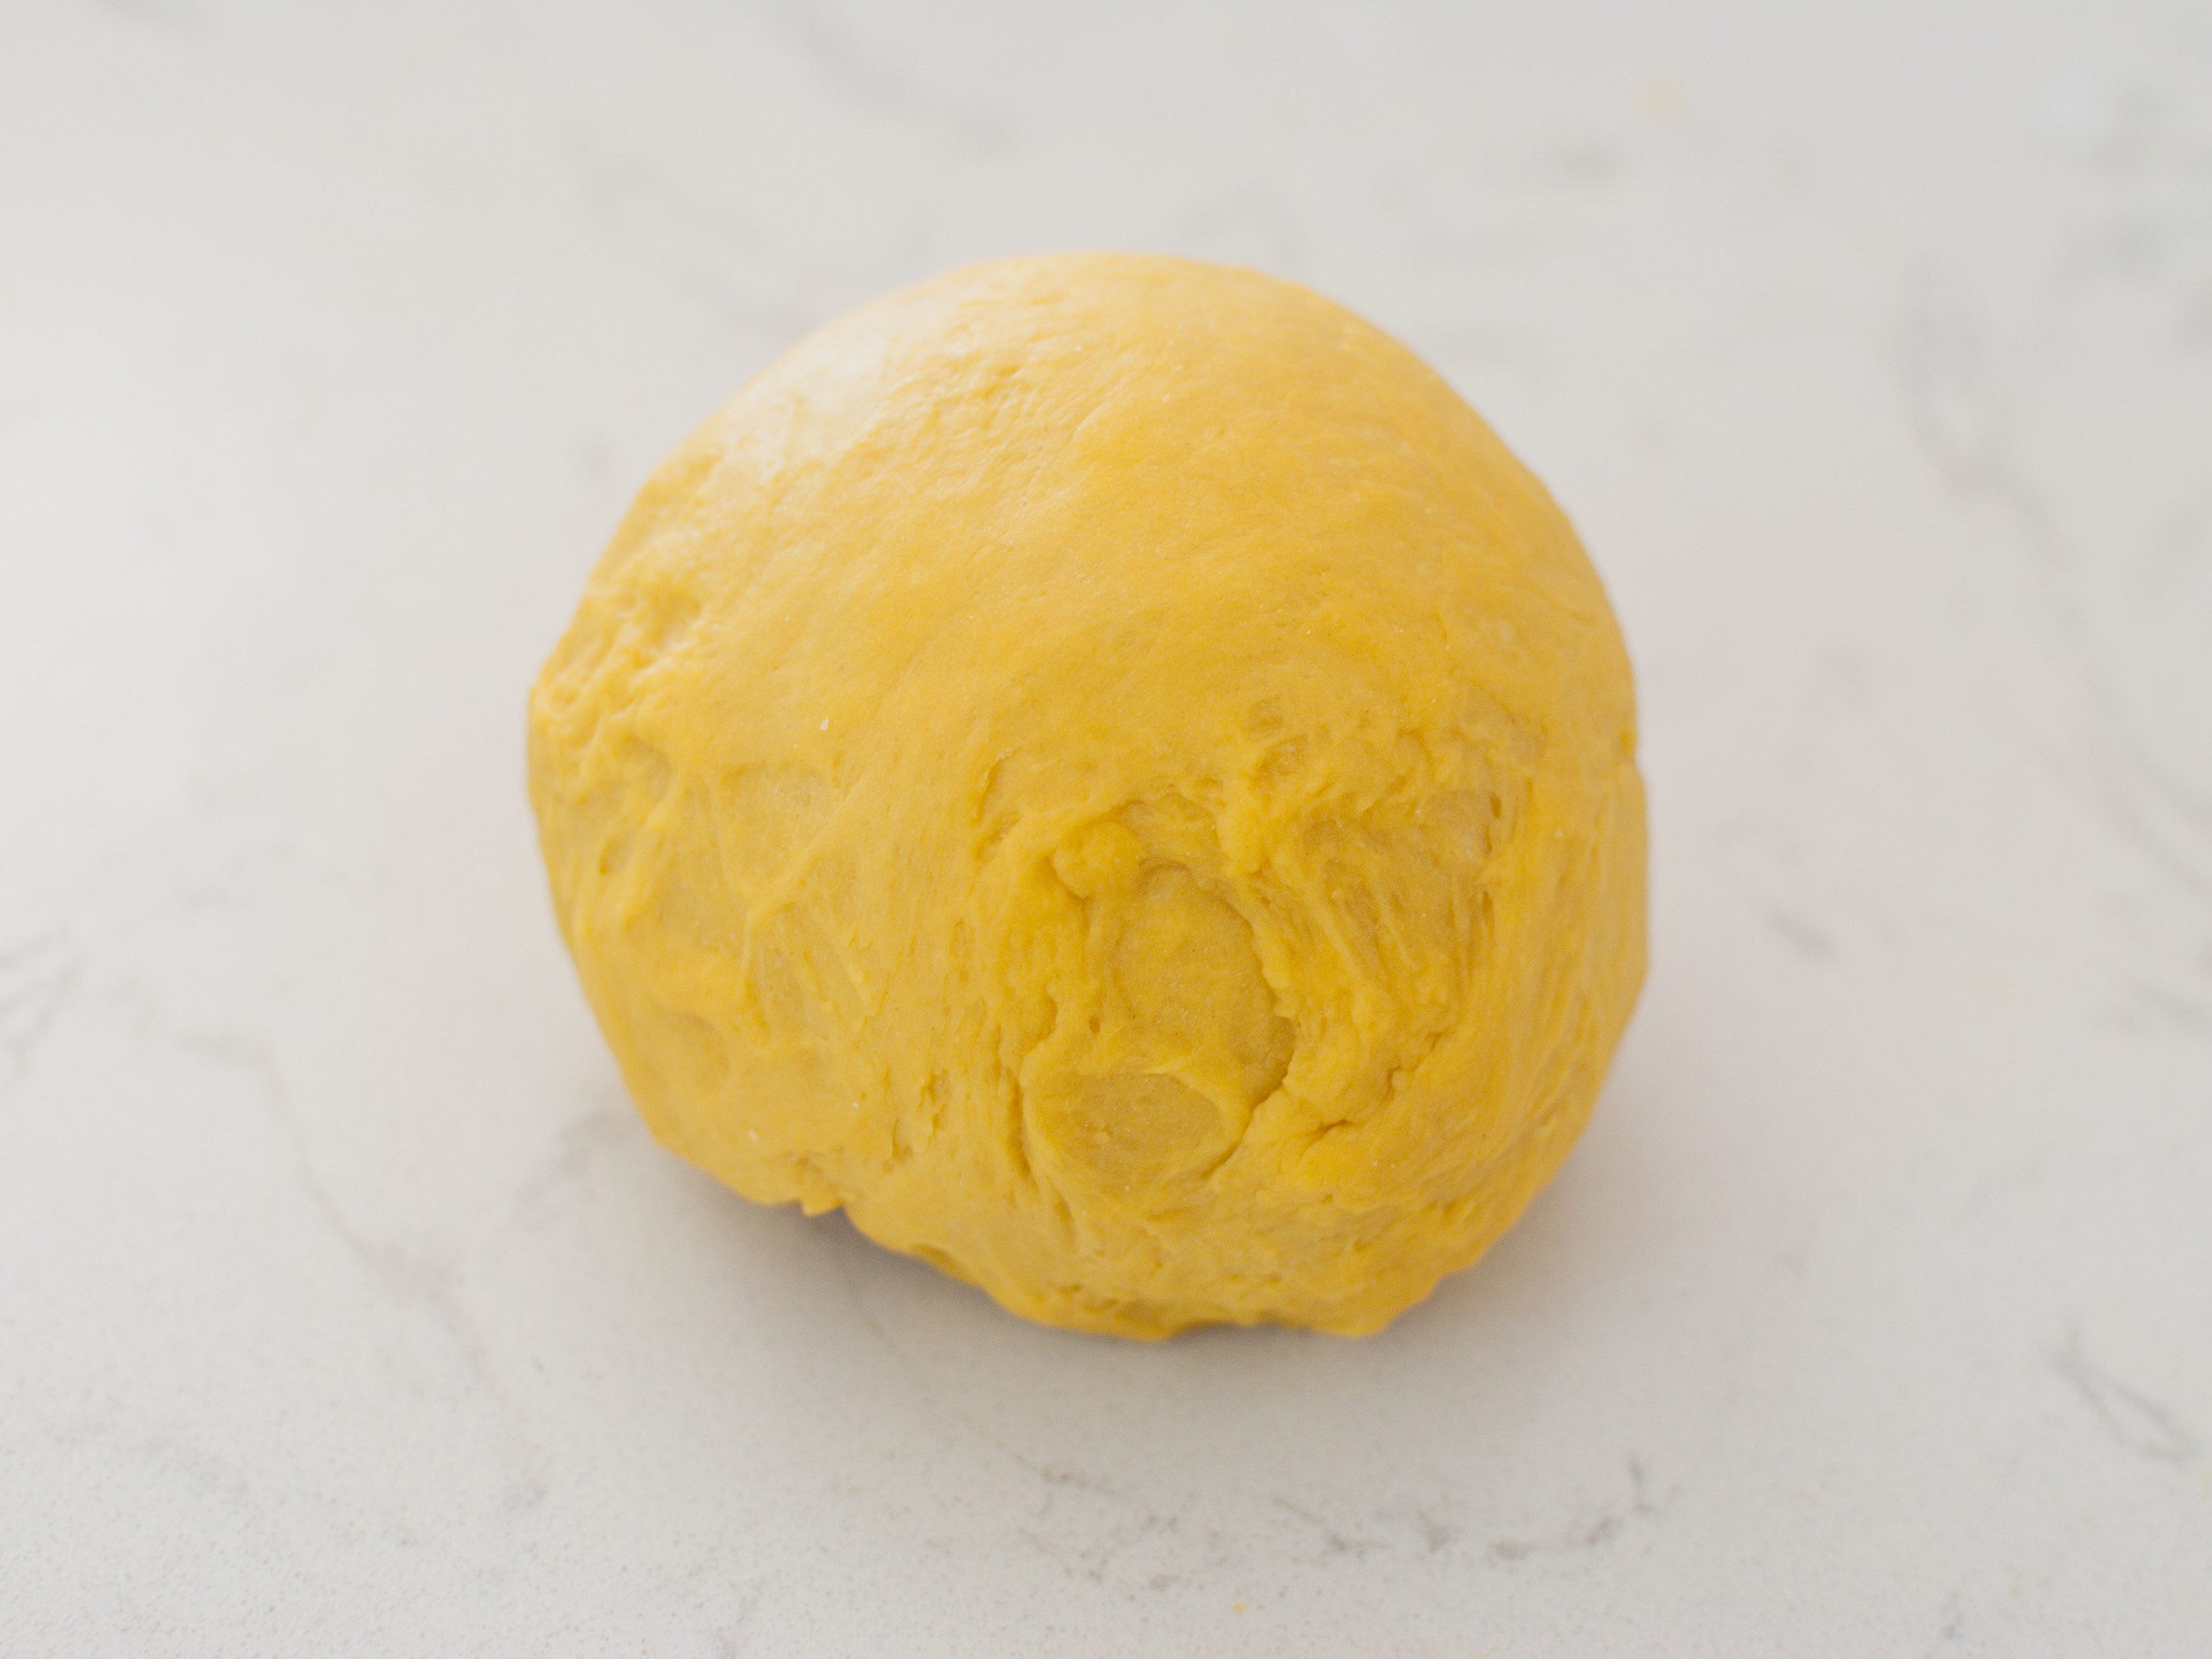
Dump the flour onto a clean work surface, making a large well in the center. Sprinkle the salt and drizzle the olive oil over the flour. Carefully pour the eggs and egg yolks into the well. Use a fork to break up the egg yolks and beat well. With a bench scraper, fold flour into the egg, creating a shaggy dough ball. Scrape the dough from fingers then continue to knead the dough using the heels of your hands until the dough is very smooth and elastic. Add additional water 1 tablespoon at a time, if the dough feels too dry, or add additional flour 1 tablespoon at a time, if the dough feels too wet. Wrap dough in plastic wrap and let rest at least 30 minutes on the countertop or overnight in the fridge.

To use a pasta machine:

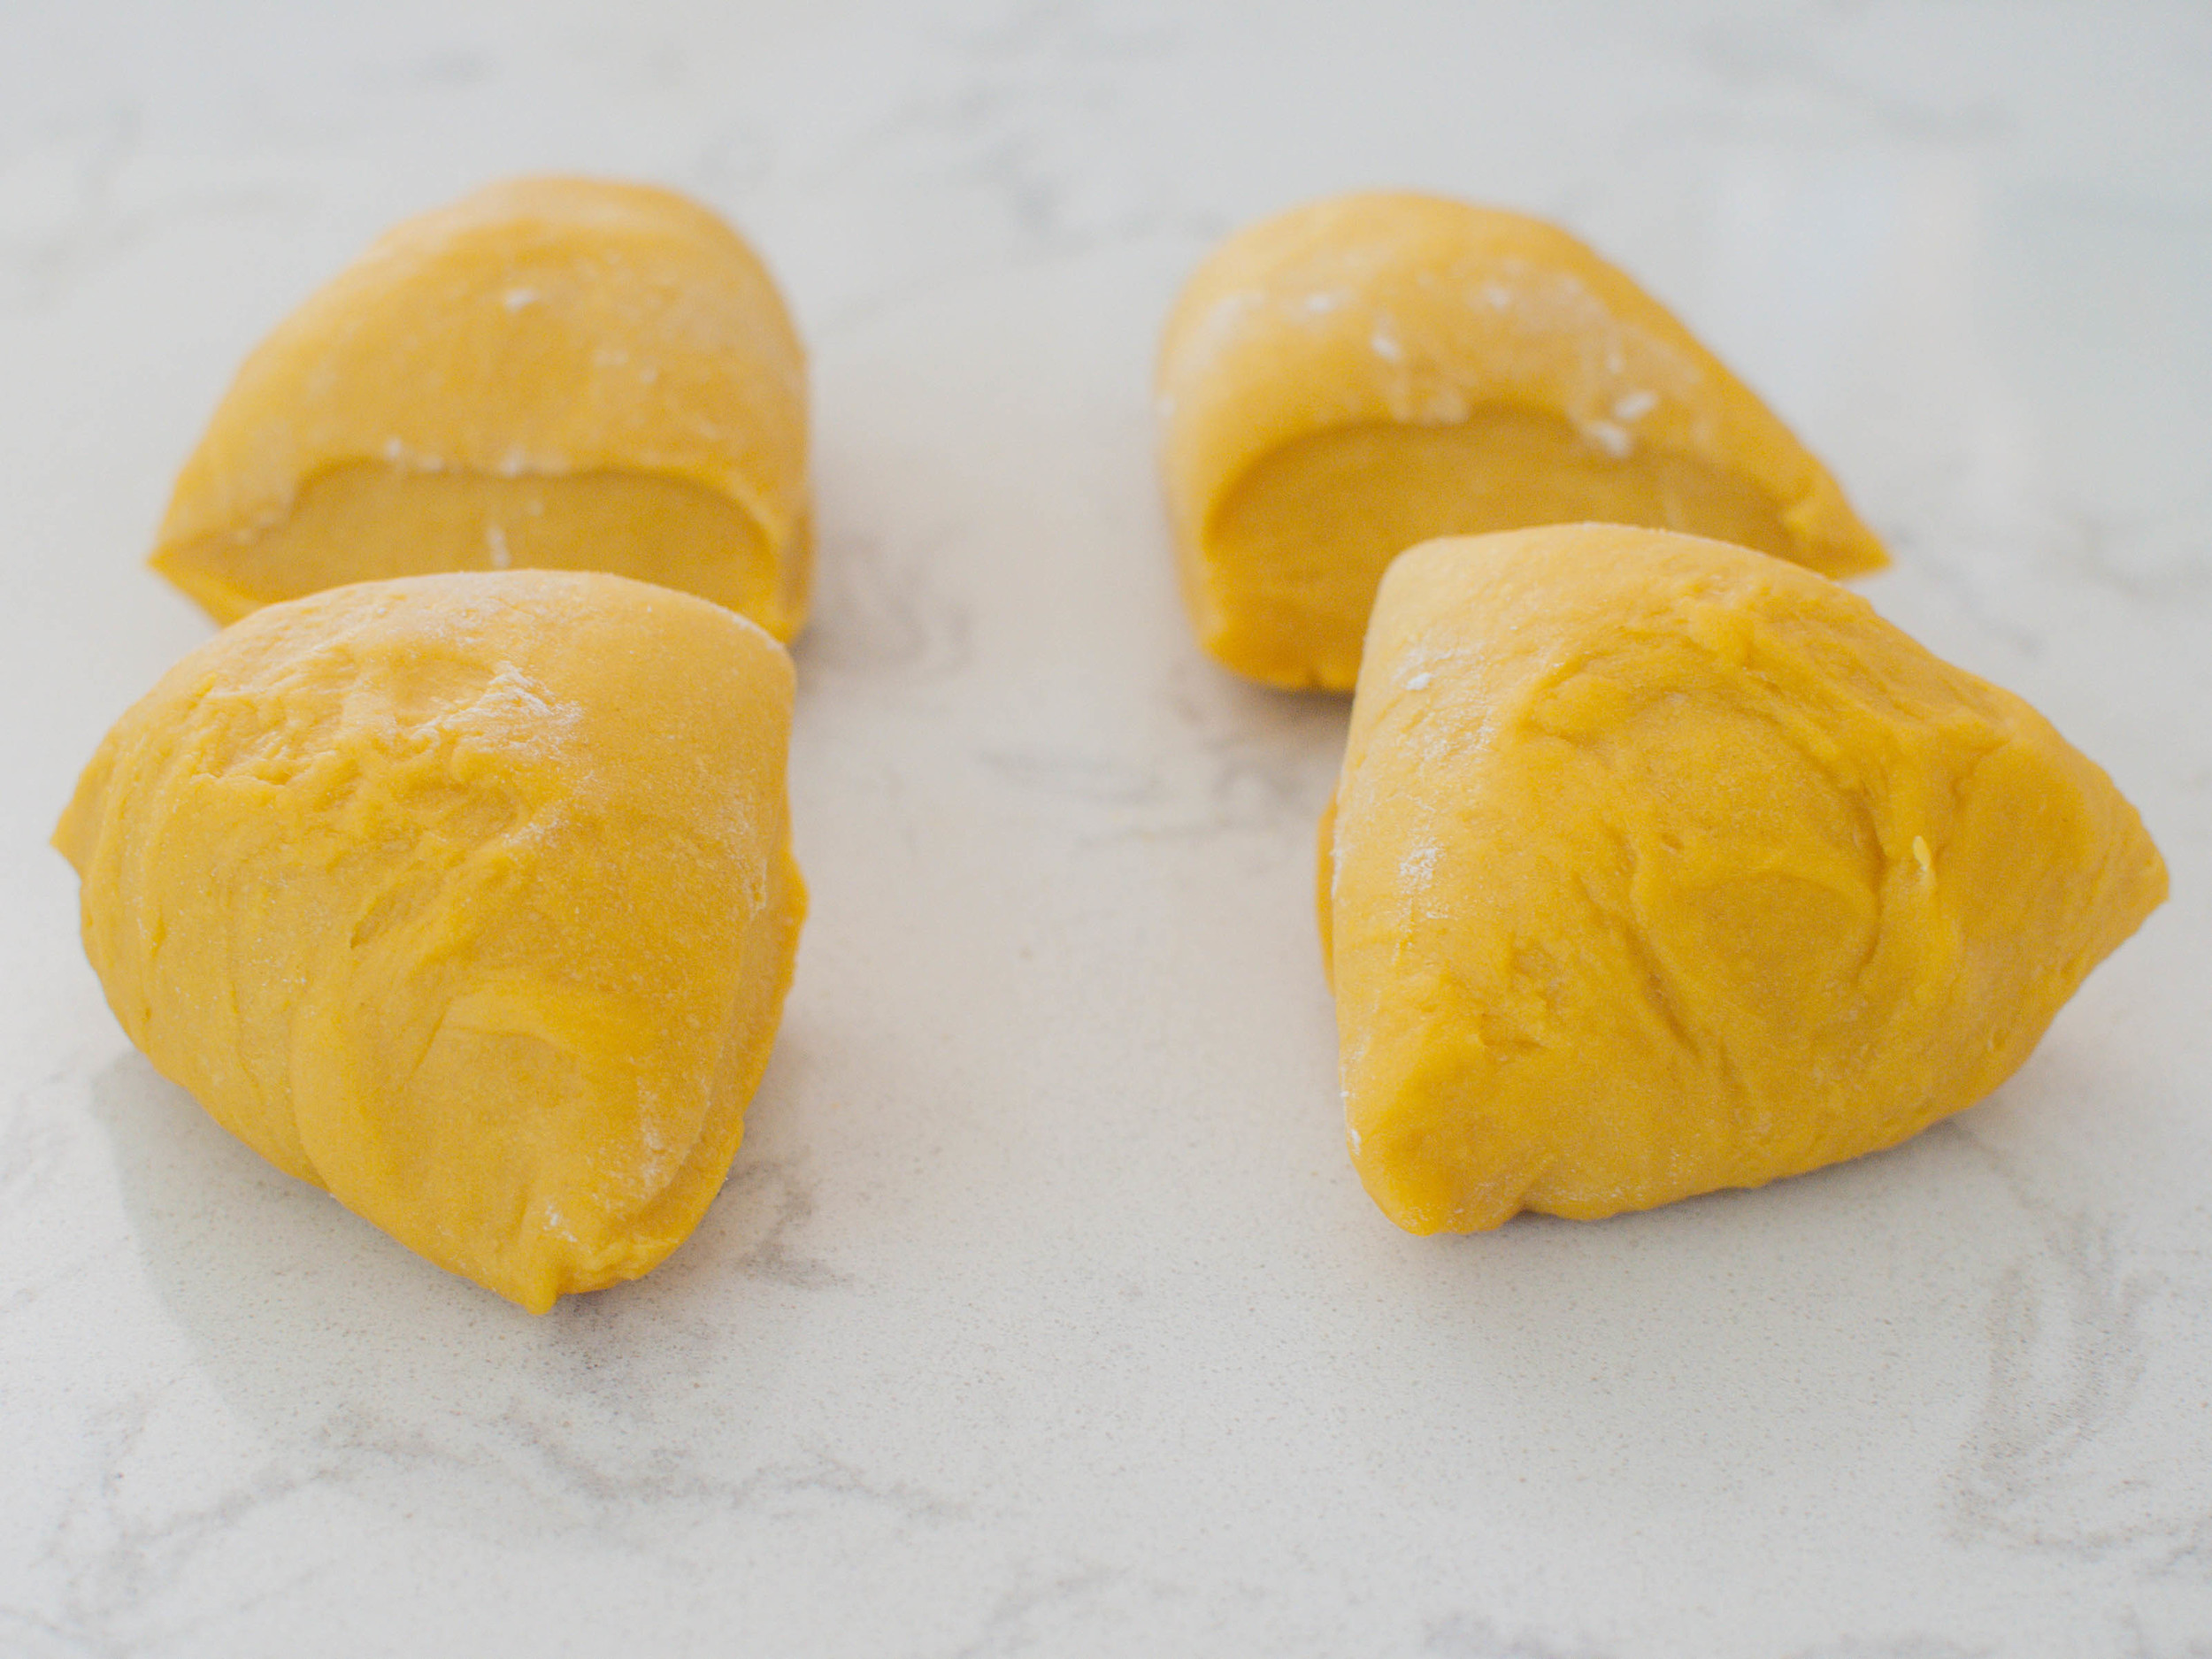
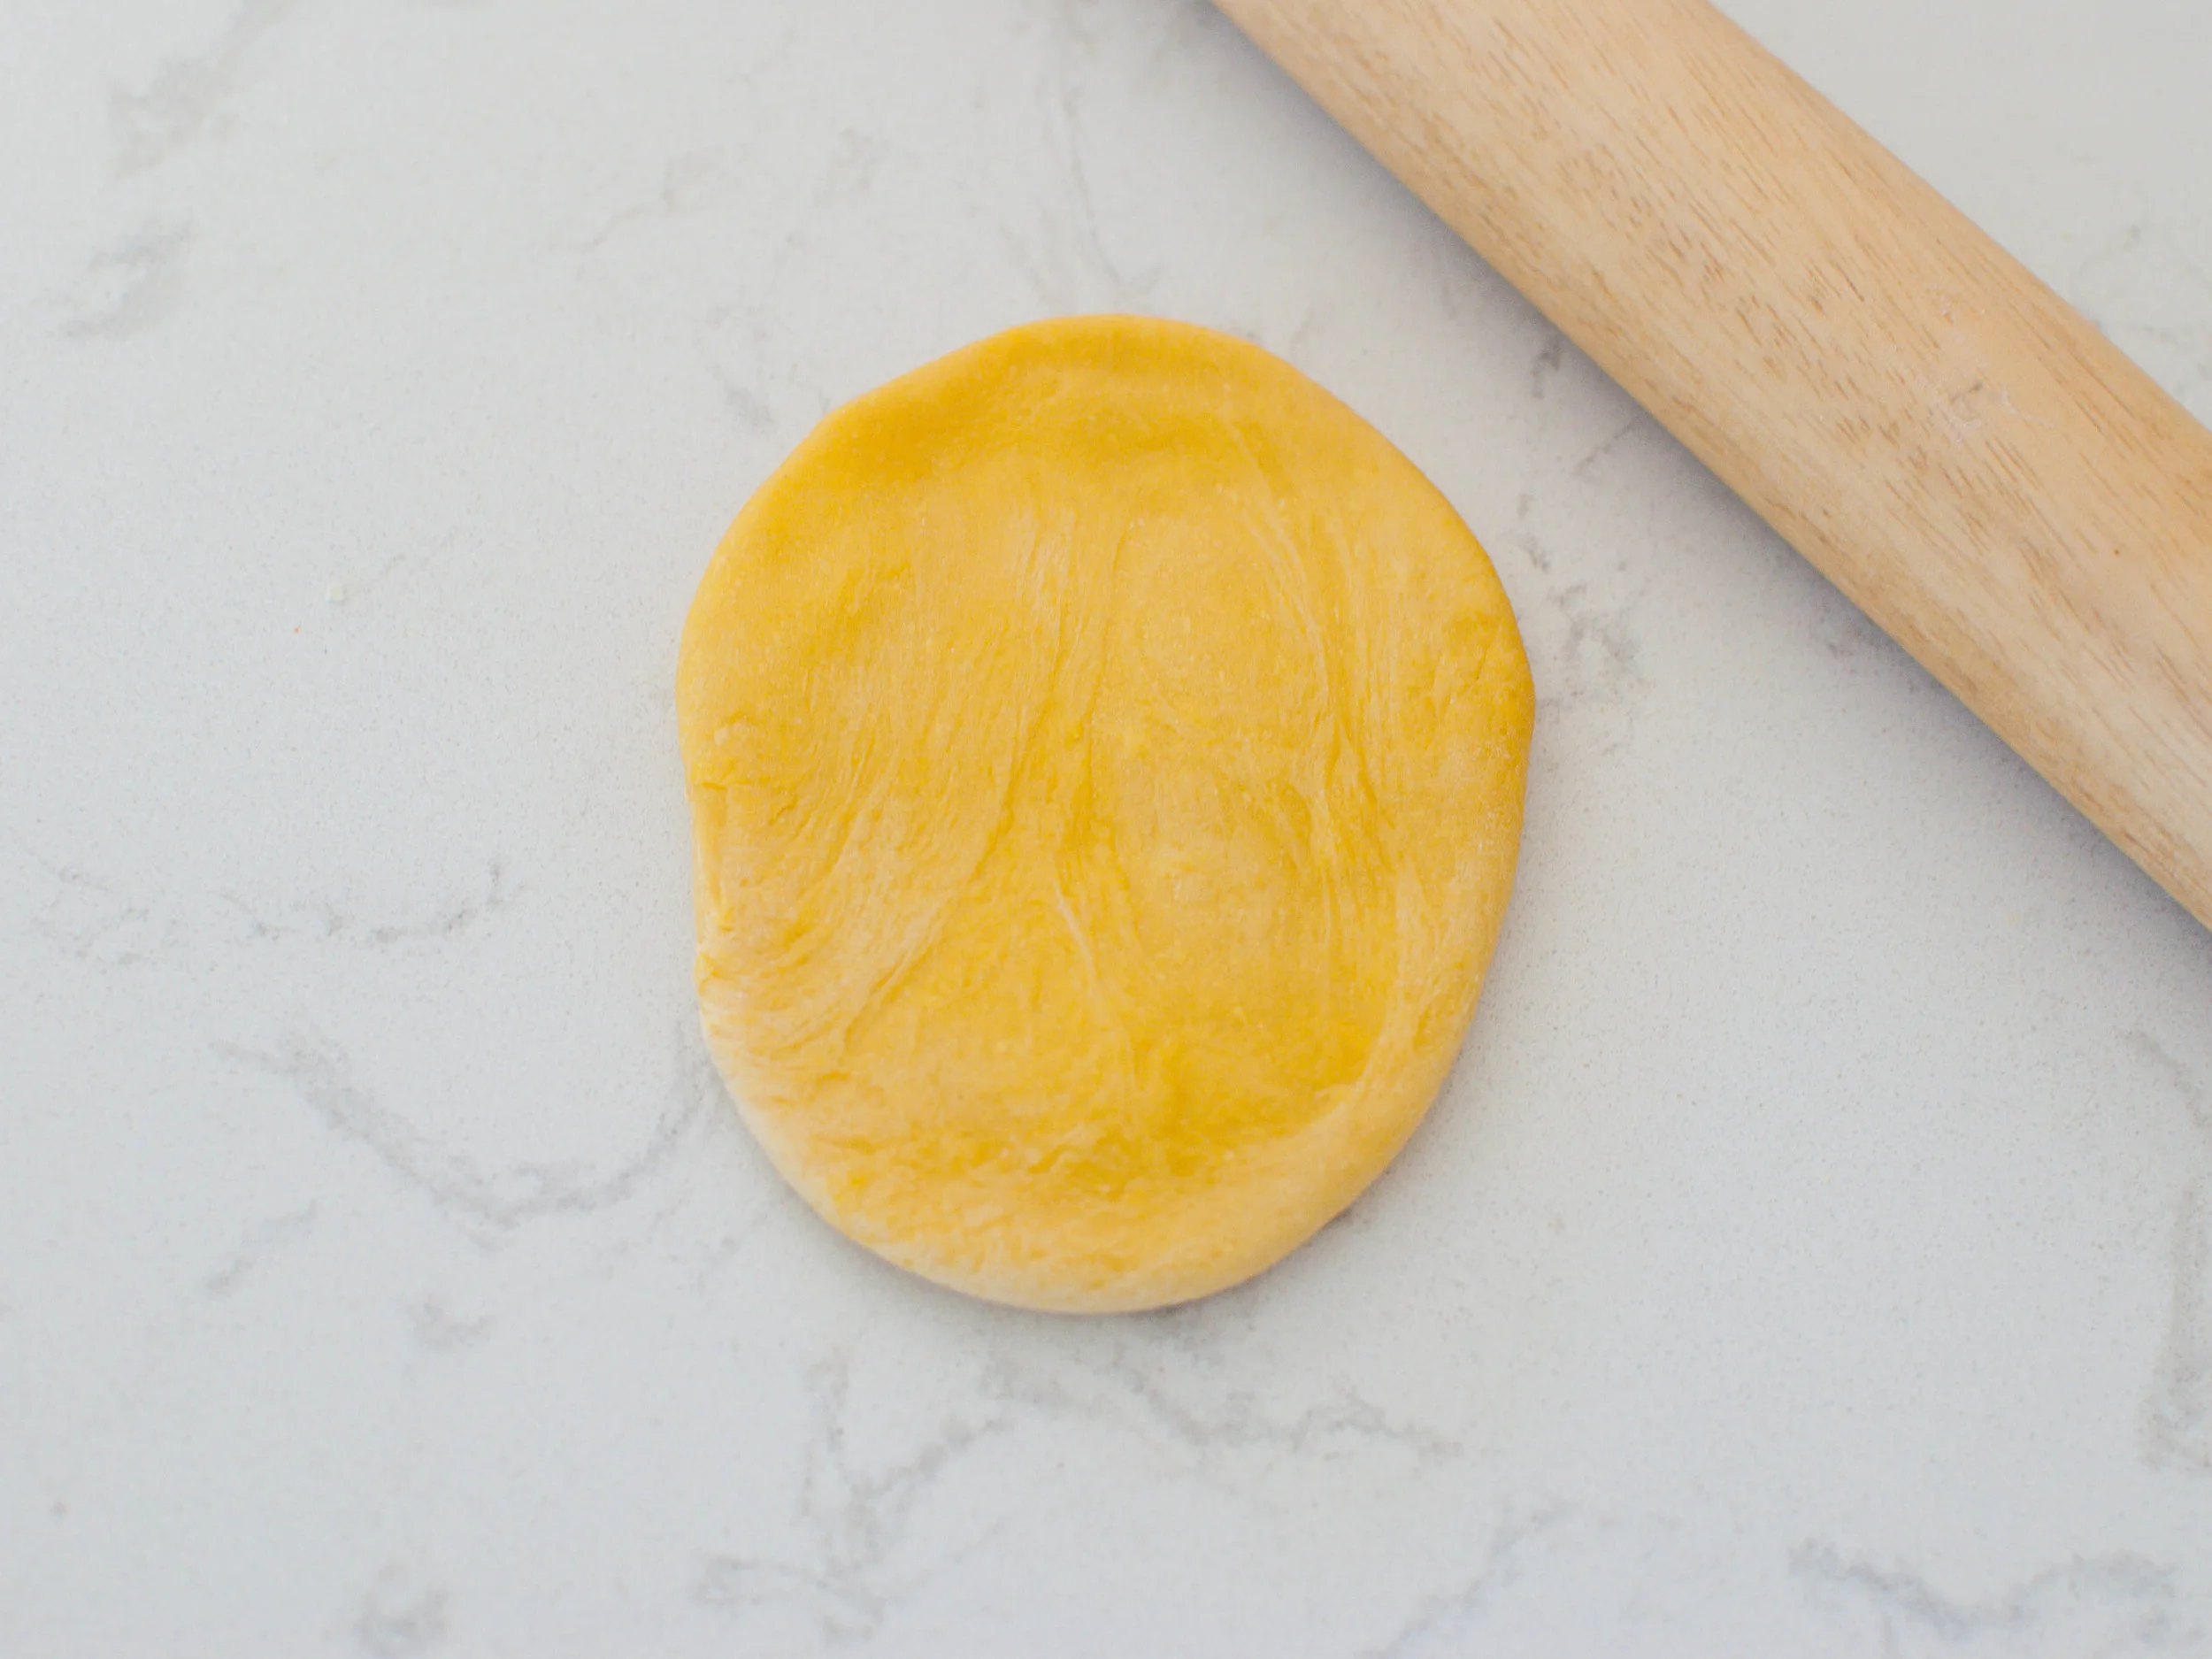
Cut dough into quarters. Place one quarter on a lightly floured work surface and re-cover the remaining dough. Using a rolling pin, roll the dough into an oblong shape about 1/2-inch thick.

Set the pasta machine to the widest setting. Pass the dough through the pasta machine to make a sheet, then repeat 2 more times. 

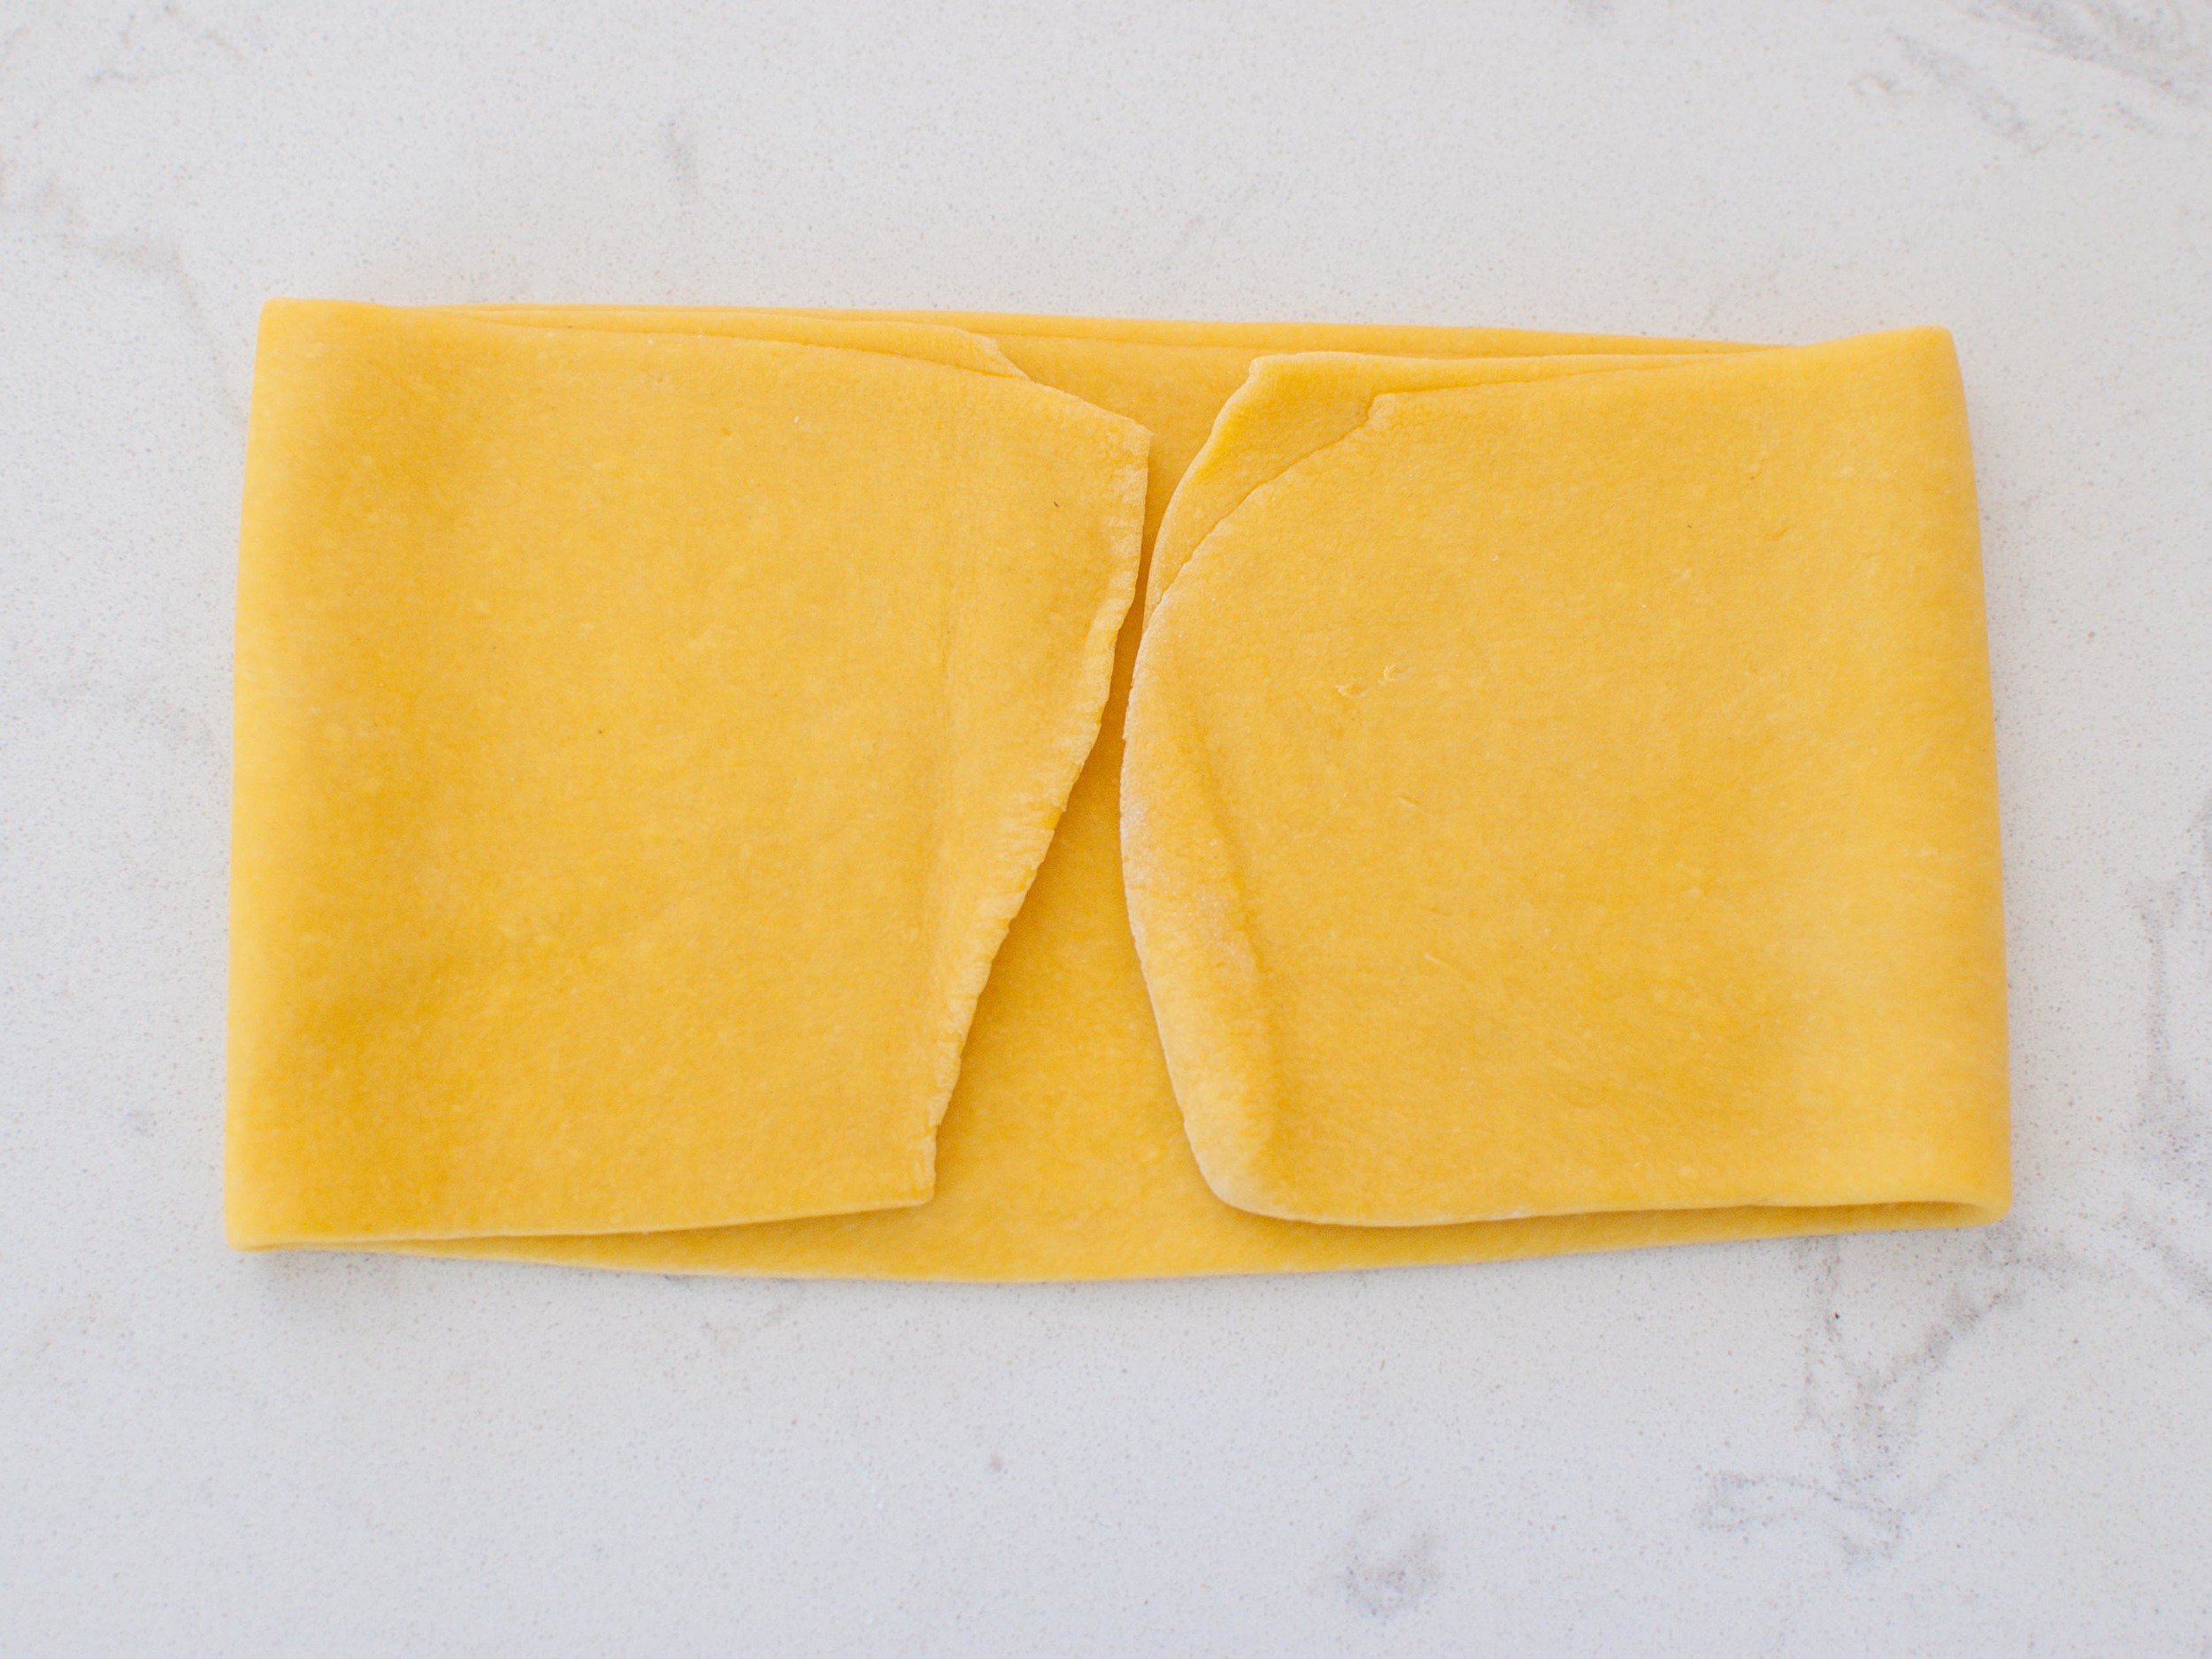
Place dough on a lightly floured work surface. Fold both ends in so that they meet at the center of the dough, and then fold the dough in half where the end points meet, trying not to incorporate too much air into the folds. Using rolling pin, flatten dough to 1/2-inch thick. Pass through the rollers 3 additional times.

Reduce the setting, and repeat rolling and folding the dough, passing it through the machine 2 or 3 times before going to the next setting. For pappardelle and fettuccine, stop rolling when the dough is about 1 or 2 settings wider than the thinnest one on your roller. For lasagna noodles, and for ravioli and other stuffed or filled pasta, go to the thinnest setting. 

Narrow the setting by 1 notch and repeat the folding and rolling process. Repeat once more (the dough should now have passed through the third widest setting). Continue passing the dough through the rollers, reducing the thickness by 1 setting each time until it reaches the desired thickness. It should now be very delicate and elastic to the touch, and slightly translucent.

Place rolled dough onto a work surface or baking sheet lightly dusted with flour or lined with parchment paper, folding the dough over as necessary so that it fits; sprinkle with flour or line with parchment between folds to prevent sticking.

Cover dough with plastic wrap or a kitchen towel to prevent drying, then repeat rolling and folding process with remaining dough quarters. If making noodles, cut dough into 12- to 14-inch segments. Run the dough through the pasta machine again using the cutter attachment, or cut the dough into your desired width using a pizza cutter or chefs knife.

If rolling by hand:

Cut the rested dough into 2 pieces, keeping them covered with plastic wrap or a dish towel when not in use. Use a rolling pin to flatten the dough until it is as thin as a penny for fettuccine and pappardelle, or even thinner for lasagna sheets. This will take some time and arm strength, but the process is easy and the results are rewarding! Cut the noodles to the desired width and length using a pizza cutter or chefs knife.

To cook the pasta:

Bring a large pot of well-salted water to a boil, add fresh pasta and boil for 1 to 3 minutes, depending on thickness of the pasta. Drain well. 

To enjoy this simple indulgence, toss noodles with butter, a light sprinkling of coarse salt, and a heavy shower of freshly grated parmesan cheese. Perfection!

Swiss Chard and Leek Crostata by Cynthia Raub

Print Friendly and PDF

I first laid eyes on this beautiful and majestic creature several years ago on Anne Burrell's Secret of a Restaurant Chef on the Food Network. As she effortlessly prepared this beautifully browned and rustic crostata, I vividly remember salivating and wondering when I should make it and for what occasion. This recipe is not for the faint of heart, as it includes MORE than four cups of various cheeses (I refuse to count and acknowledge the true amount of cheese in the recipe). For the sheer volume of cheese alone, this recipe is perfect for sharing with a group of people. I have made it for friends at brunch, for potlucks, and for holidays. It can be the main or it can be a side for a meal. Dreamers like me would consider it a serving of vegetables. It's showy and beautiful, incredibly delicious, and makes a statement on any table for every occasion. 

Notes: Because this recipe yields such a large crostata, I split the recipe to make two smaller crostatas: one to gift to sweet new parents and one to Amy and her family. This recipe is adaptable and you can substitute any vegetables that you love for the leeks and/or swiss chard. Mushrooms! Squash! Roasted TOMATO! Don't get me started on tomatoes in a savory crust . . . Anyway, this recipe is also just perfect as written. So make this one before you start doing your own jazzy riffs. I promise, it's GOOD.


Read More: The Shared Brunch


Time: 2 hr 30 min (1 hour inactive)
Serves: 8 to 10

Crust:
2 cups all-purpose flour
1 cup grated Parmesan
1/2 cup mascarpone
Pinch kosher salt
Pinch cayenne pepper
1 stick cold butter, cut into pea-sized pieces
2 eggs

Filling:
Extra-virgin olive oil
2 cloves garlic, smashed
Pinch crushed red pepper flakes
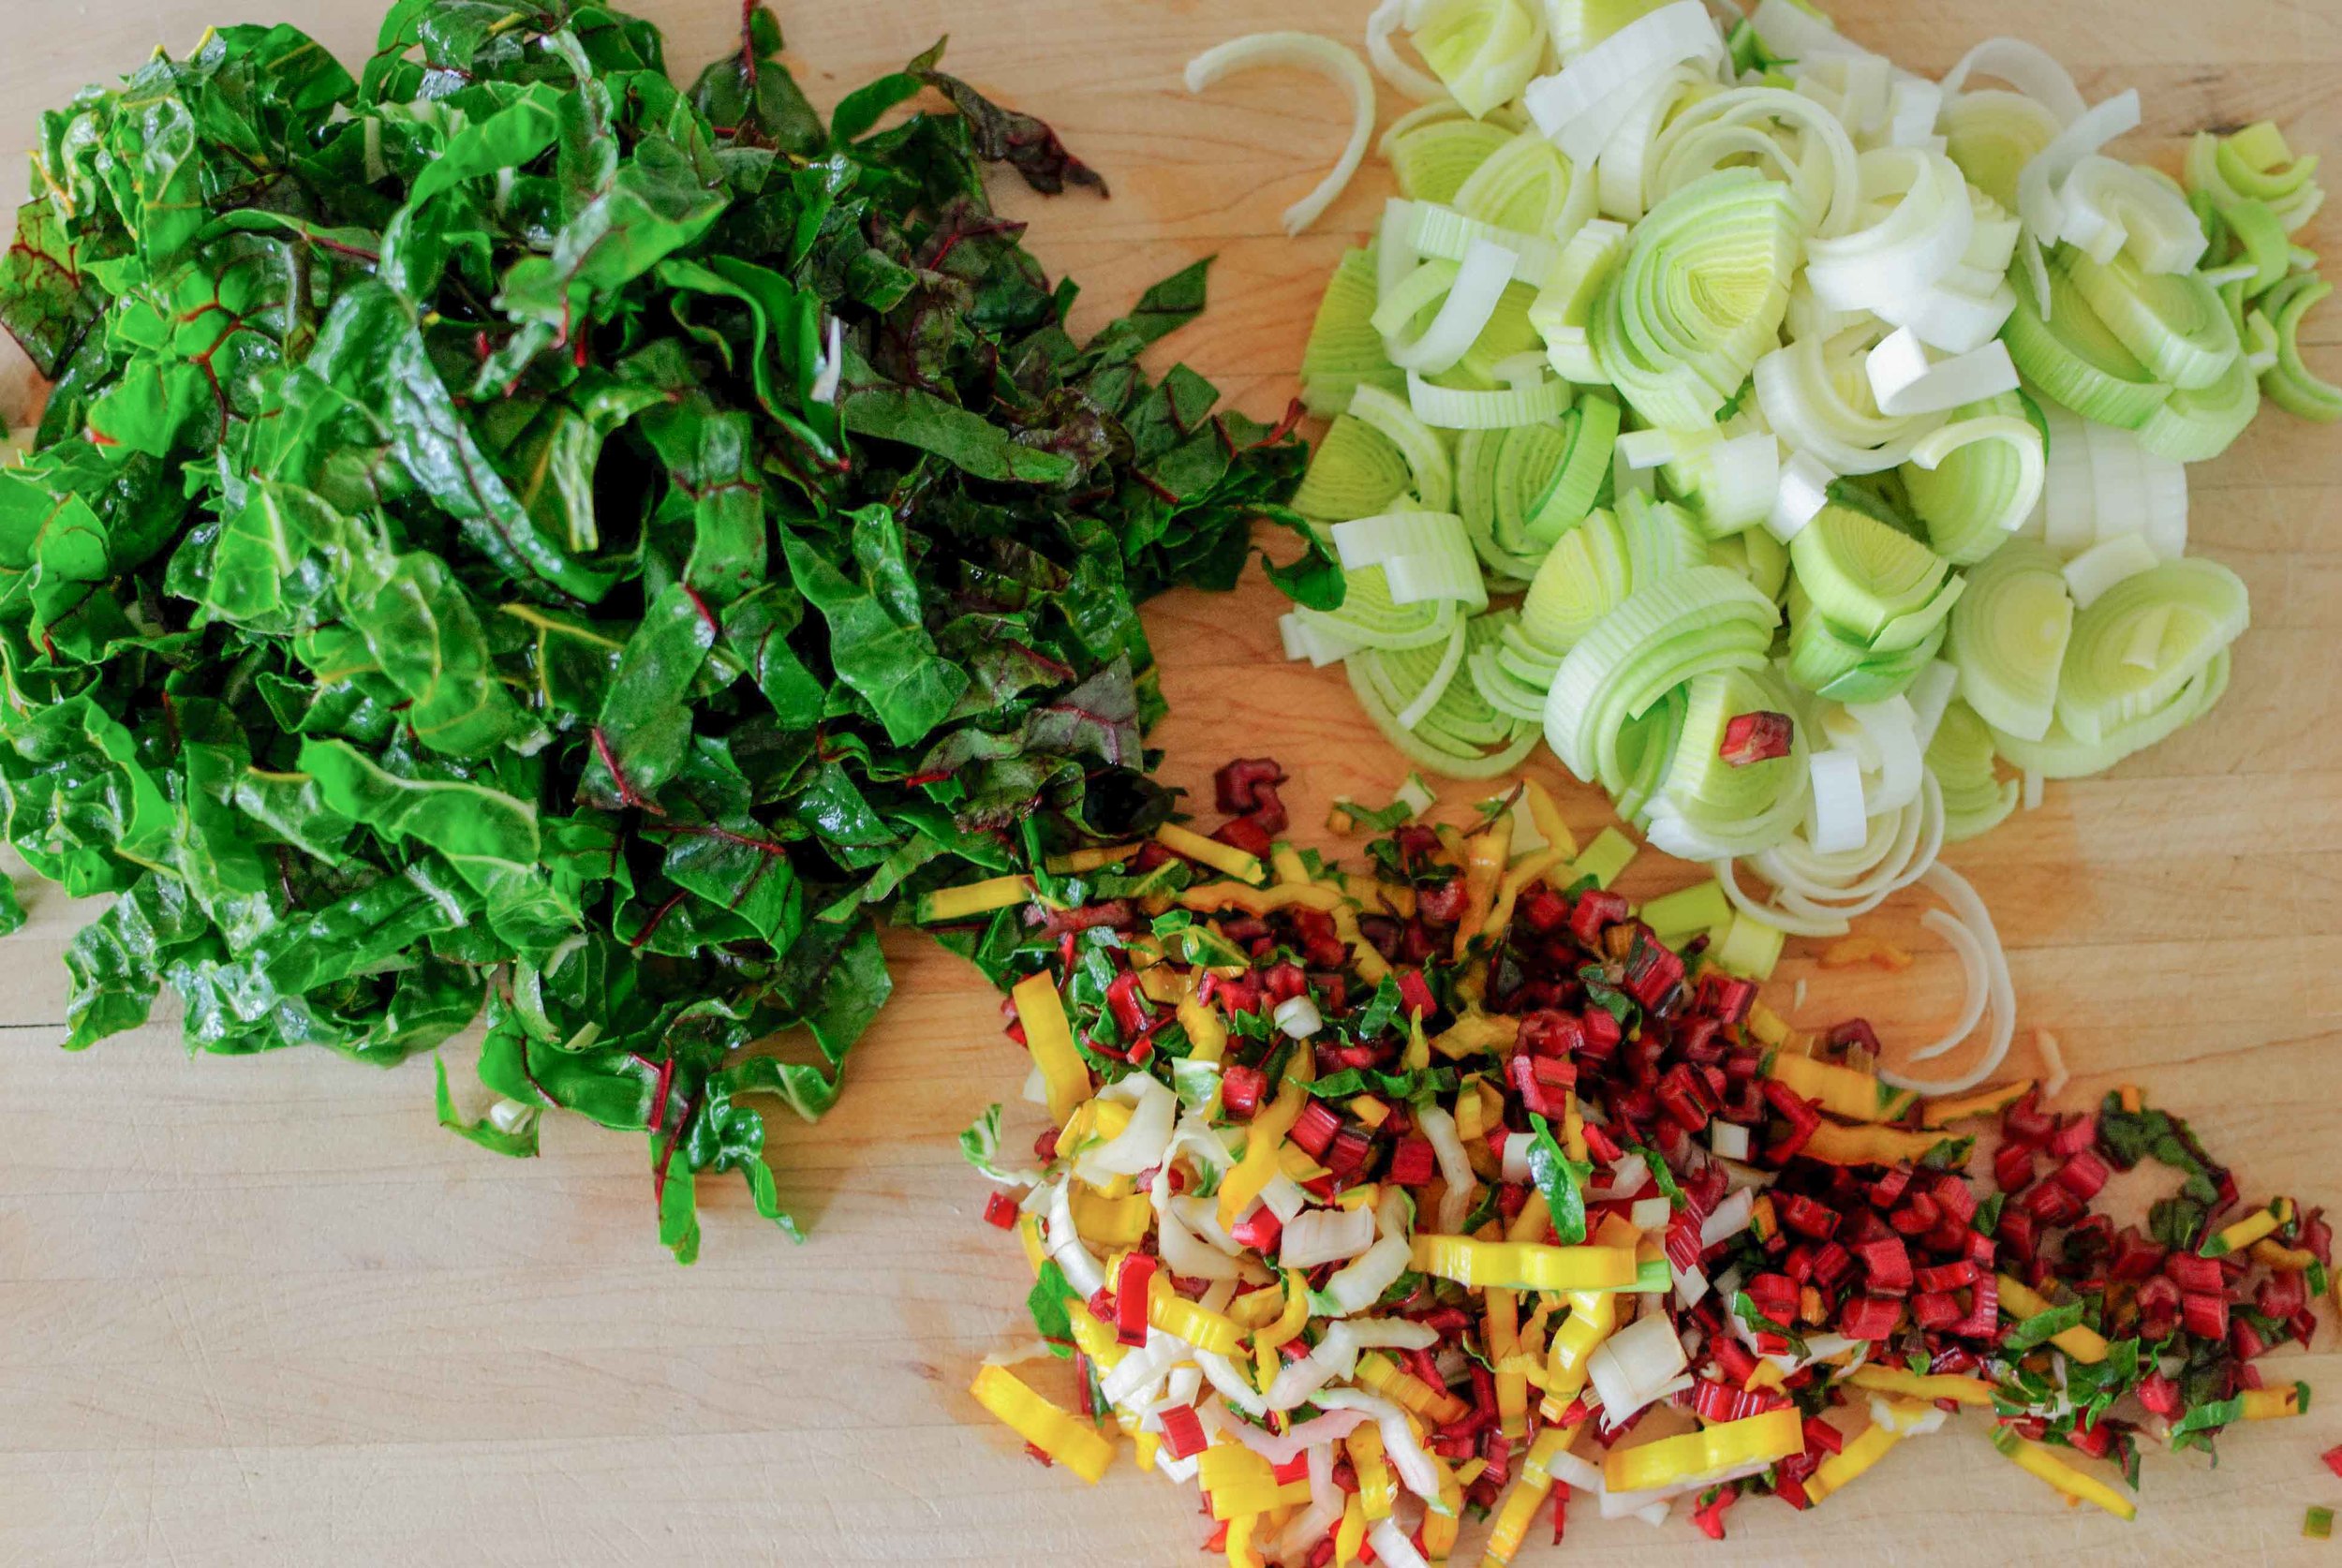
1 bunch white Swiss Chard, stems removed cut into 1/4-inch lengths, leaves cut into 1-inch lengths
2 leeks, tough green tops removed, cut in 1/2 lengthwise and then cut crosswise into 1/4-inch lengths
2 to 3 tablespoons water
Kosher salt
2 cups fresh ricotta
1 cup grated Parmesan
2 eggs
Pinch cayenne pepper
Egg wash: 
1 egg beaten with 2 tablespoons water

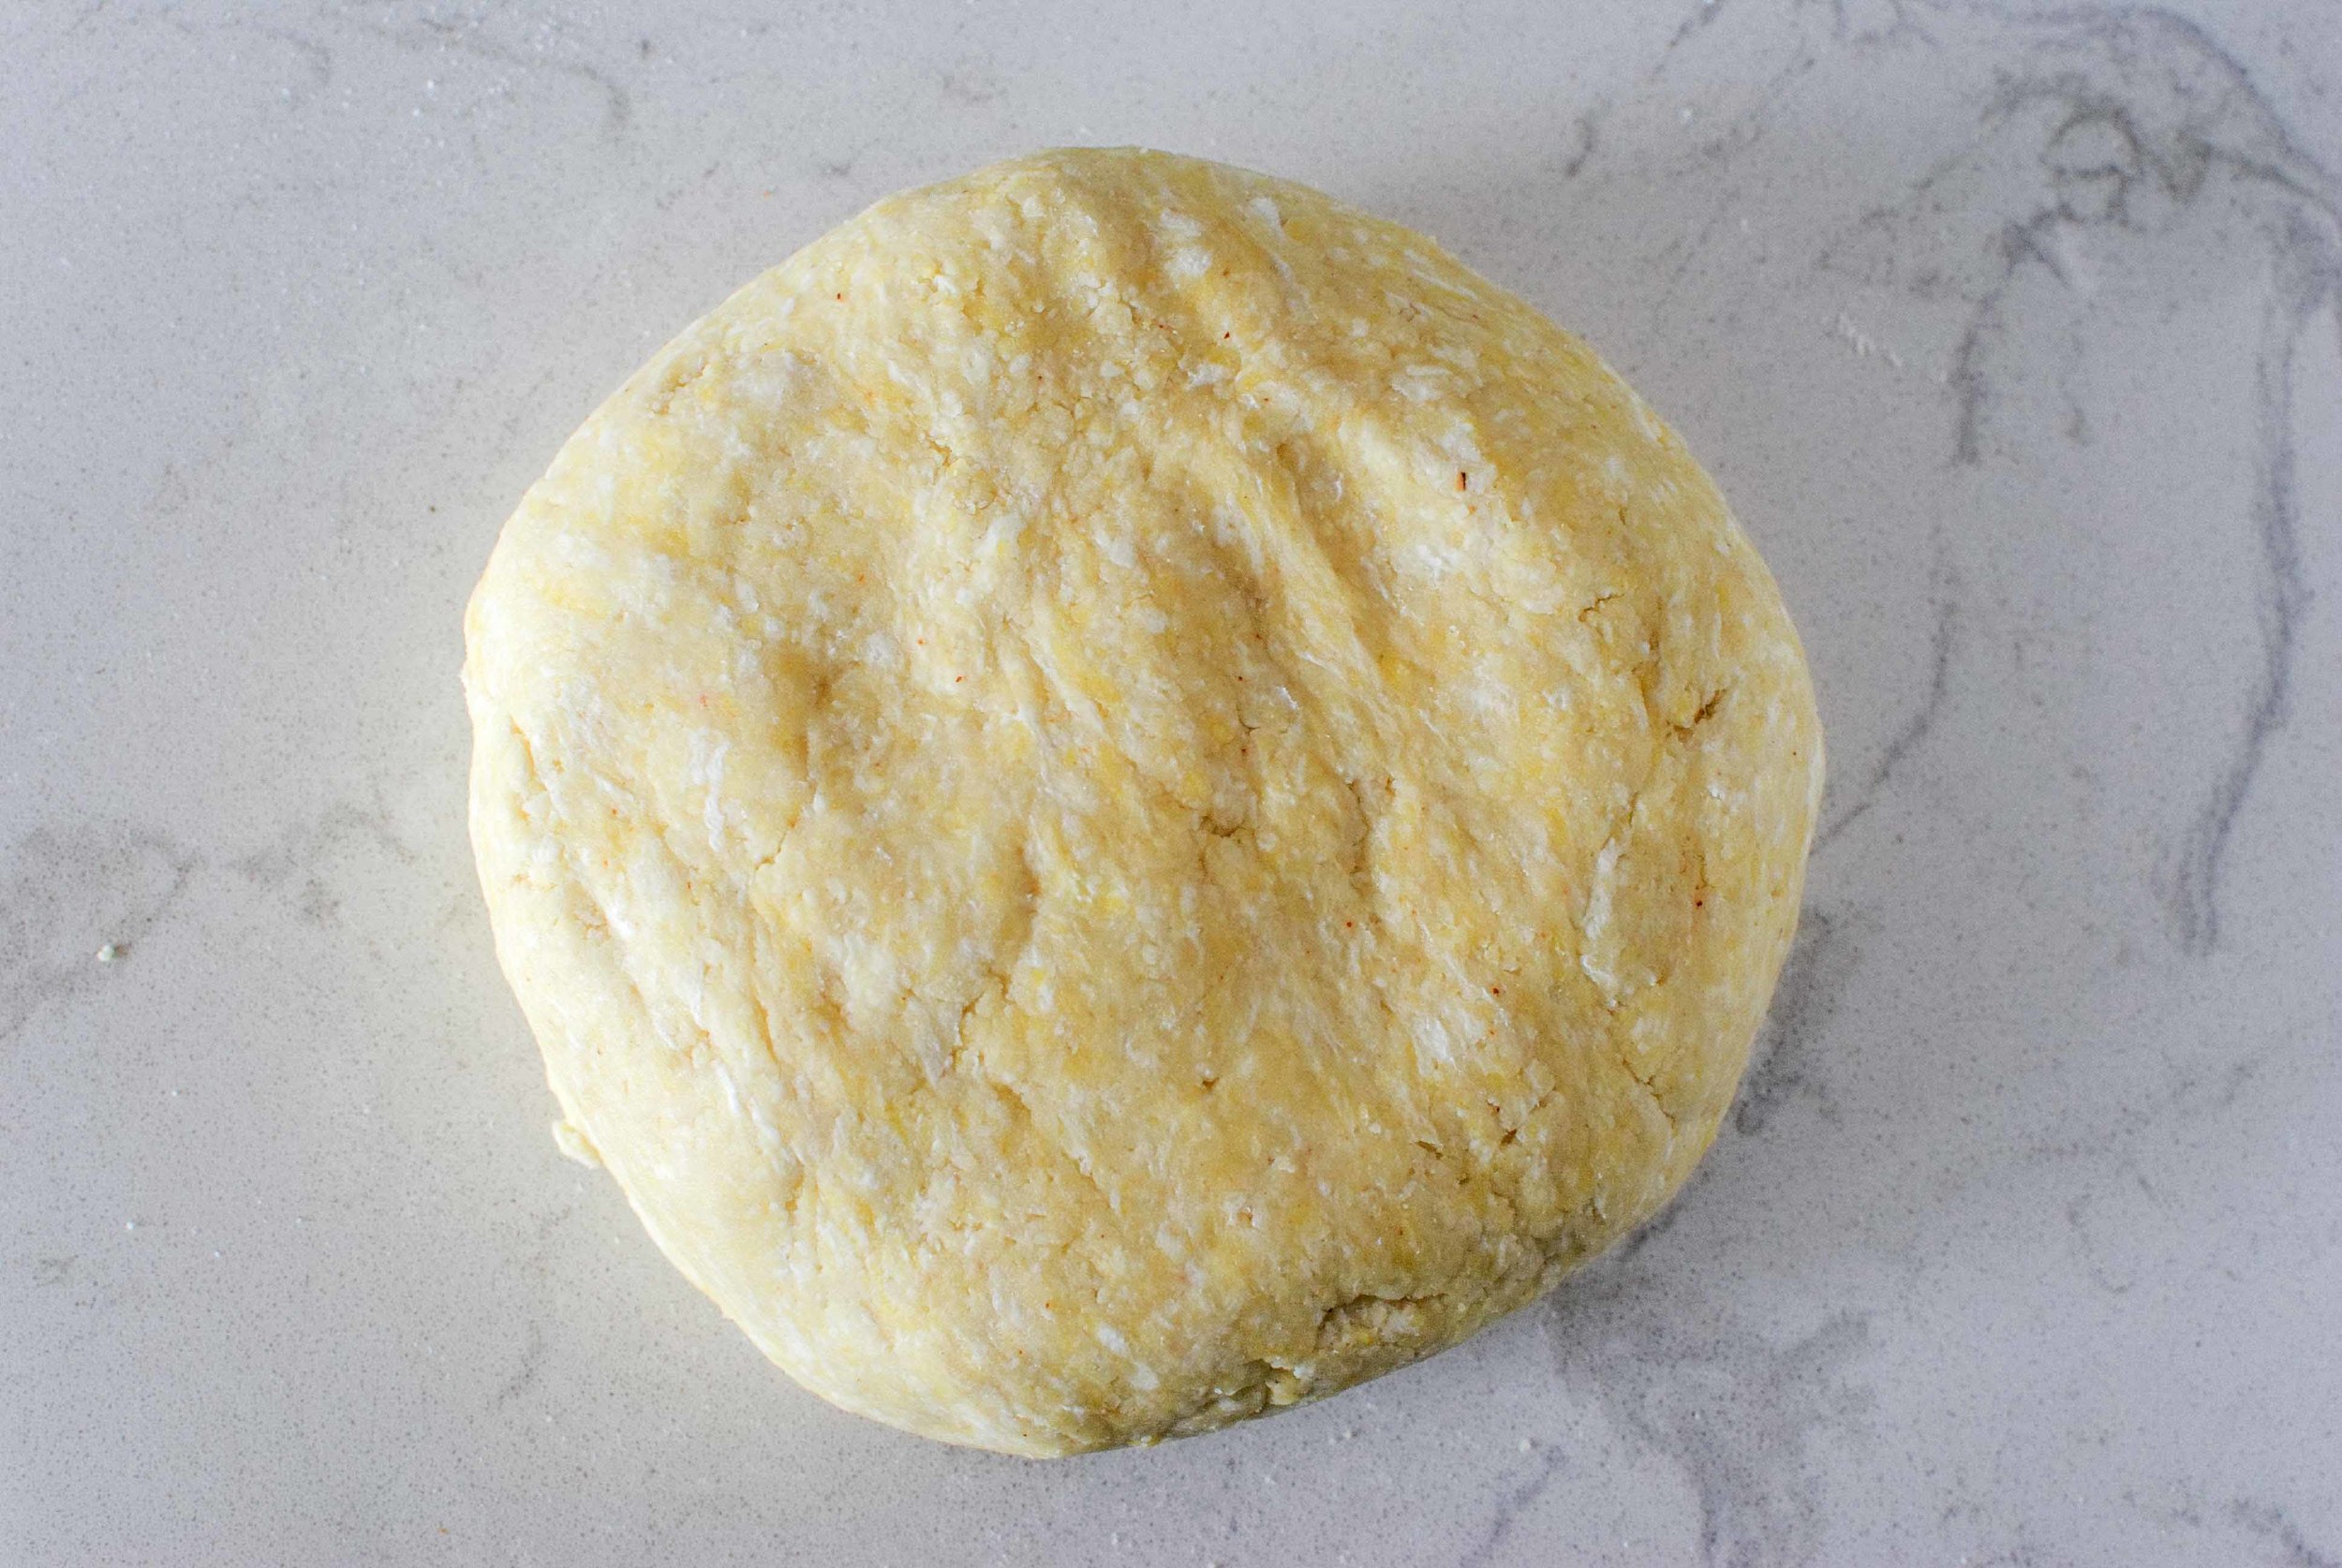
Combine the flour, Parmesan, mascarpone, salt, cayenne and butter in the bowl of a food processor and pulse until combined and crumbly in texture. Add the eggs and pulse until the mixture tightens up. Turn mixture over onto a clean and flat work surface, shape into a disc, cover with plastic wrap and refrigerate for at least 30 minutes.

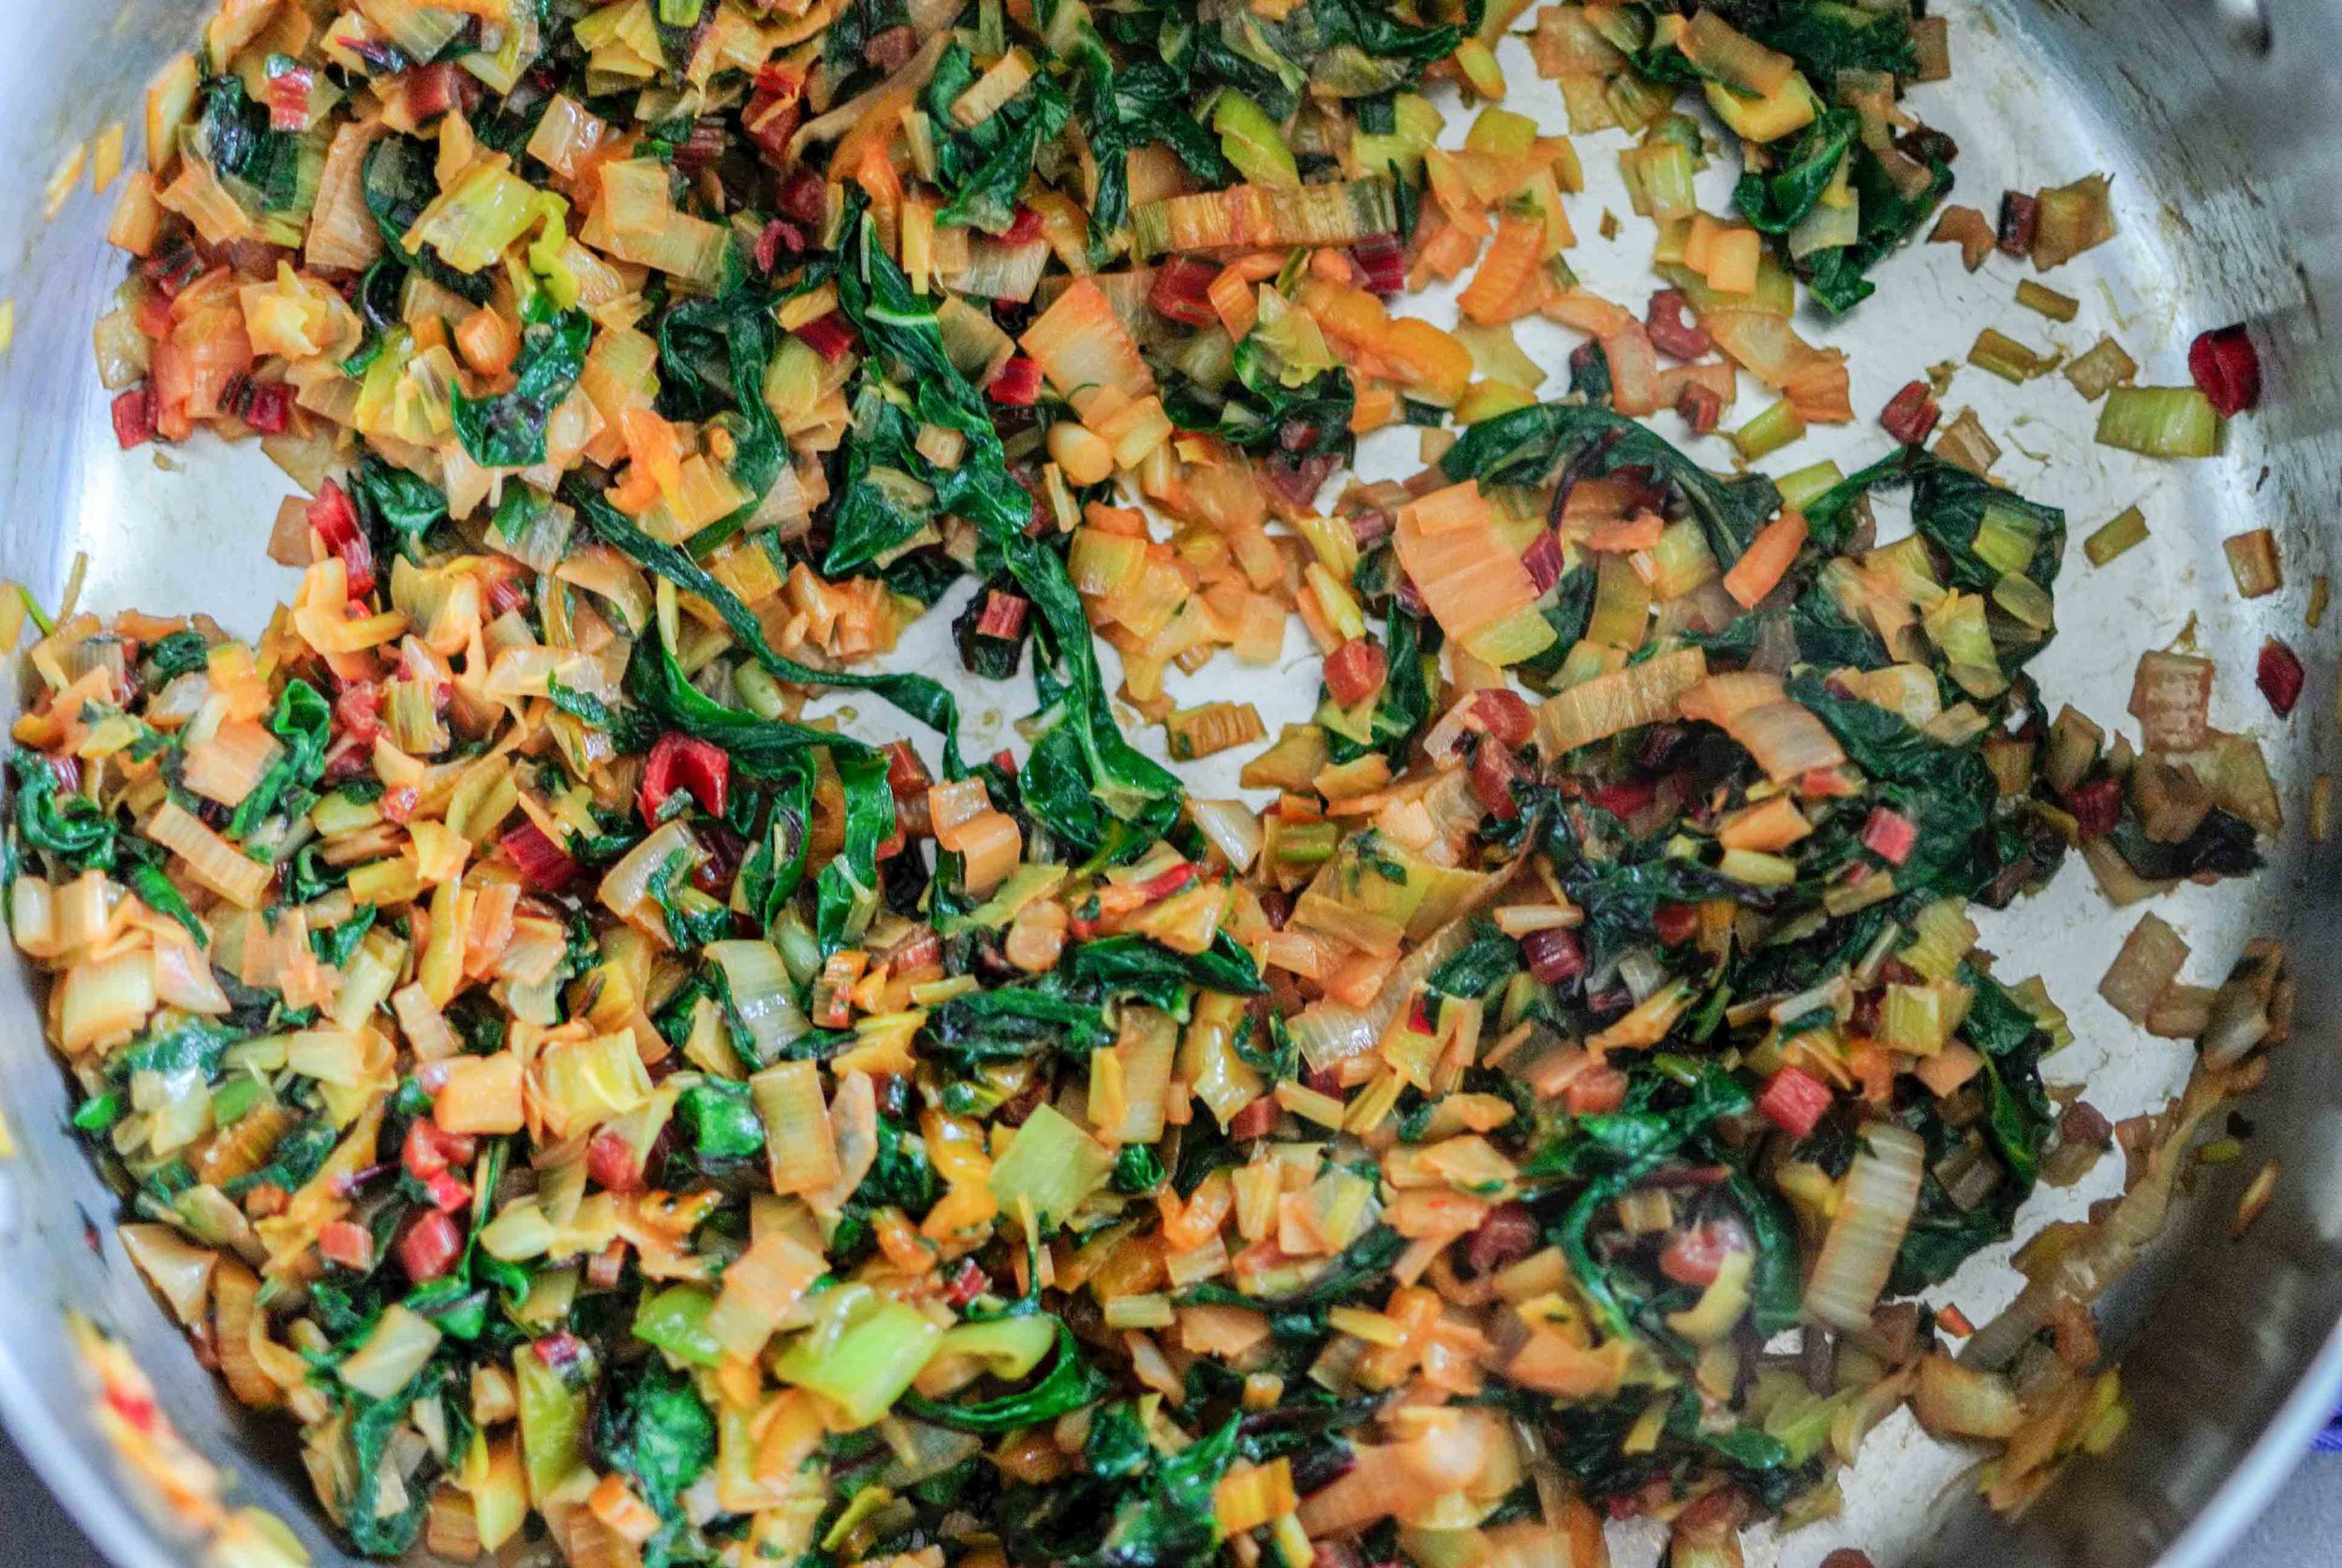
Meanwhile, heat olive oil to a large sauté pan over medium heat. Add the garlic and crushed red pepper. When the garlic has become golden brown and is very aromatic remove it and discard. Add the swiss chard stems, leeks and 2 to 3 tablespoons of water and season with salt. When the water has evaporated and the stems and leeks are soft, add the leaves. Season the leaves with salt and sauté until they are very soft and wilted. Remove from the heat and allow the Swiss chard to cool.

In a large bowl combine the ricotta, Parmesan, eggs, cayenne and the Swiss chard mixture. Mix to thoroughly combine. Taste and adjust the seasoning if needed. Set aside.

Preheat the oven to 375 degrees F. Remove the dough from the refrigerator and let warm up for about 10 to 15 minutes.

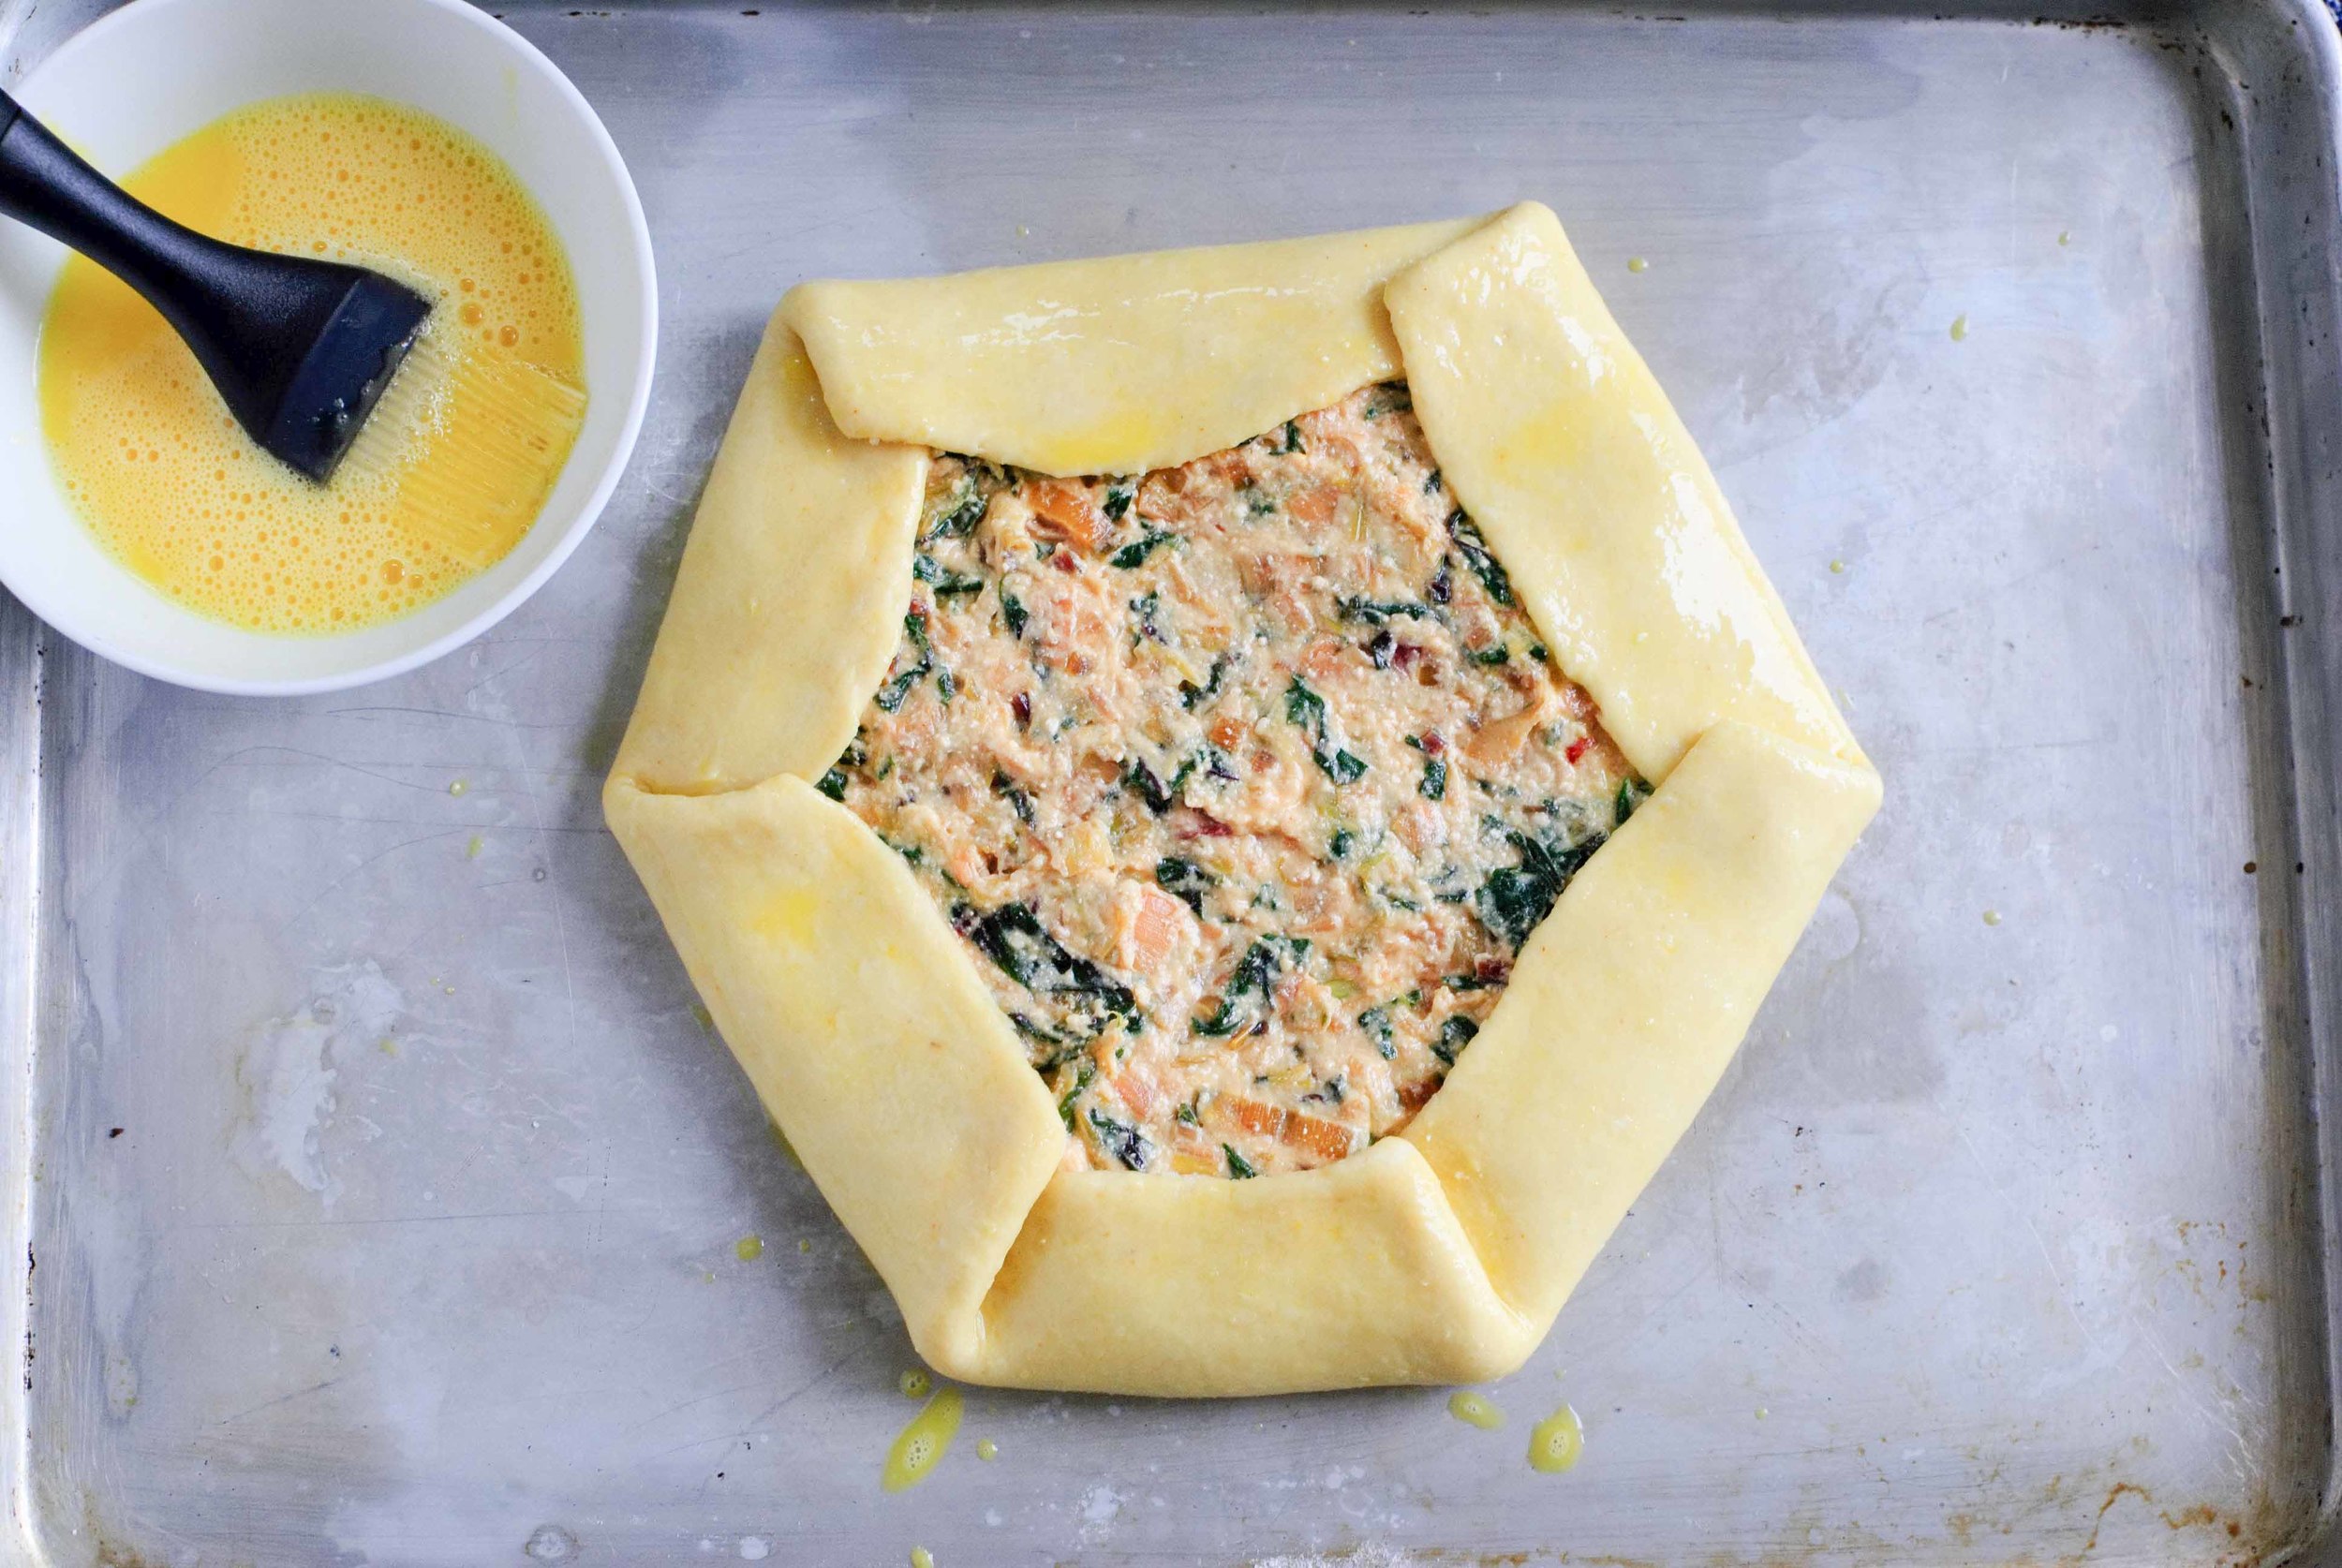
Dust a large clean work surface with flour and roll the dough into a large circle about 1/4 to 1/8-inch thick. Transfer the dough to a large sheet try lined with parchment paper. Lay the dough out flat, don't worry about the overhang on the sides. Put the filling in a large circle in the center of the rolled out dough leaving a 3 to 4-inch border of dough along the outside edge. Fold the dough up around the filling to make a "free-form pie". Brush the top of the dough with egg wash and bake in the preheated oven until the crust is firm, golden brown and shiny, about 45 to 50 minutes. Remove from the oven and let cool for 10 to 15 minutes before slicing, this will allow it to up for easier slicing.

Serve hot or at room temperature.

You're a goddess, Anne Burrell!

Roasted Eggplant and Pickled Beet Sandwich by Cynthia Raub

Print Friendly and PDF


Serves: 4
Time: 45 minutes

2 medium eggplants (~2 pounds), sliced into 1/2"-thick rounds
1/4 cup olive oil
1/4 teaspoon smoked paprika
Kosher salt, ground pepper
1 garlic clove, finely grated
1/2 cup mayonnaise
2 teaspoons Sherry vinegar
4 scallions, thinly sliced
1 cup mixed tender fresh herb leaves (such as flat-leaf parsley, dill, and mint), torn if large
1/2 cup chopped pickled beets
1/4 cup chopped pitted oil-cured olives
2 tablespoons drained capers, chopped
1 tablespoon olive oil
4 6x4" pieces focaccia, split (I used La Brea Bakery torta rolls from Costco)
6 ounces feta, thinly sliced or crumbled

Preheat oven to 400°F. Place eggplant slices on a large rimmed baking sheet and rub both sides with oil. Season with paprika, salt, and pepper. Roast until golden and tender, 30-40 minutes. Whisk garlic, mayonnaise, and vinegar in a small bowl; set aside.

While the eggplant is in the oven, toss scallions, herbs, beets, olives, capers, and oil in a medium bowl to combine. Spread cut sides of focaccia with garlic mayo. Build sandwiches with focaccia, eggplant, feta, and beet salad.

Recipe from: Epicurious
 

Pizza Two Ways by Amy Cantu

Print Friendly and PDF

The idea to make pizzas came from an obsession with Broccoli Cooked Forever and my family's deep love for pizza and cheese. If you've never made pizza dough from scratch, I promise it's worth the effort. This dough is easy to stretch (much more so than the stuff you buy from the store), and the crust tastes better than a lot of pizza you'd get delivered! The Broccoli Cooked Forever makes a "sauce" for the pizza that's both creamy and even a little sweet, while the soft, melty fresh mozzarella is the perfect complement. The mushrooms lend the pizza some earthiness. The second pizza was born from another one of my (and Cynthia's) favorite pairings - fontina and roasted tomatoes. Roasted tomatoes topped with fontina cheese - so good! The Canadian bacon adds that salty, meaty bite. One could also make a case for using smoky bacon pieces instead. I certainly wouldn't argue! Bake this as a leisurely weekend meal, or make the dough and/or broccoli ahead of time to make this a quick weekday meal.


Time: 45 minutes
Yield: Two 14" pizzas (serves 6)

For Pizza #1:
Pizza dough (see recipe below)
Cornmeal (to prevent sticking)
1 cup Broccoli Cooked Forever
1/2 pound fresh Mozzarella, 1/4 - 1/3" slices
1/2 cup cremini or button mushrooms, thinly sliced
1/4 red onion, thinly sliced
1/2 cup parmigiano-reggiano cheese, grated
Italian (flat-leaf) parsley, finely chopped, for garnish (optional)

For Pizza #2
Pizza dough (see recipe below)
Cornmeal (to prevent sticking to pizza peel/stone) or Olive Oil (is using a pizza pan)
1 tablespoon extra-virgin olive oil
1/2 pound fontina cheese, shredded
1/2 cup parmigiano-reggiano cheese, grated
1/2 cup grape or cherry tomatoes, halved
6 oz Canadian bacon
1/4 small red onion, thinly sliced
Italian (flat-leaf) parsley, finely chopped, for garnish (optional)

If you have a pizza stone, place it on your oven's middle rack. Preheat the oven to 500 degrees Fahrenheit or as high as it will go. Let heat for 30 minutes or more (1 hour would be better).

If using a pizza stone, sprinkle cornmeal liberally on a wooden pizza peel or the back of a baking sheet. If using a pizza pan or baking sheet, sprinkle the pan liberally with cornmeal. Stretch rested pizza dough into a 14" round. Not being an experienced pizza tosser (and lacking good hand-eye coordination), I flatten a ball of dough into a disc. Then stretch the dough out from the middle, using my knuckles and backs of my hands - as to not poke holes in the dough with my fingernails. As it begins to stretch further, I concentrate on evenly stretching the edges. When the dough is close to the correct size, I put it on the pizza peel (or pizza pan) and continue to stretch and shape the dough until it is roughly 14" and covers almost the entire pizza peel (or pizza pan).

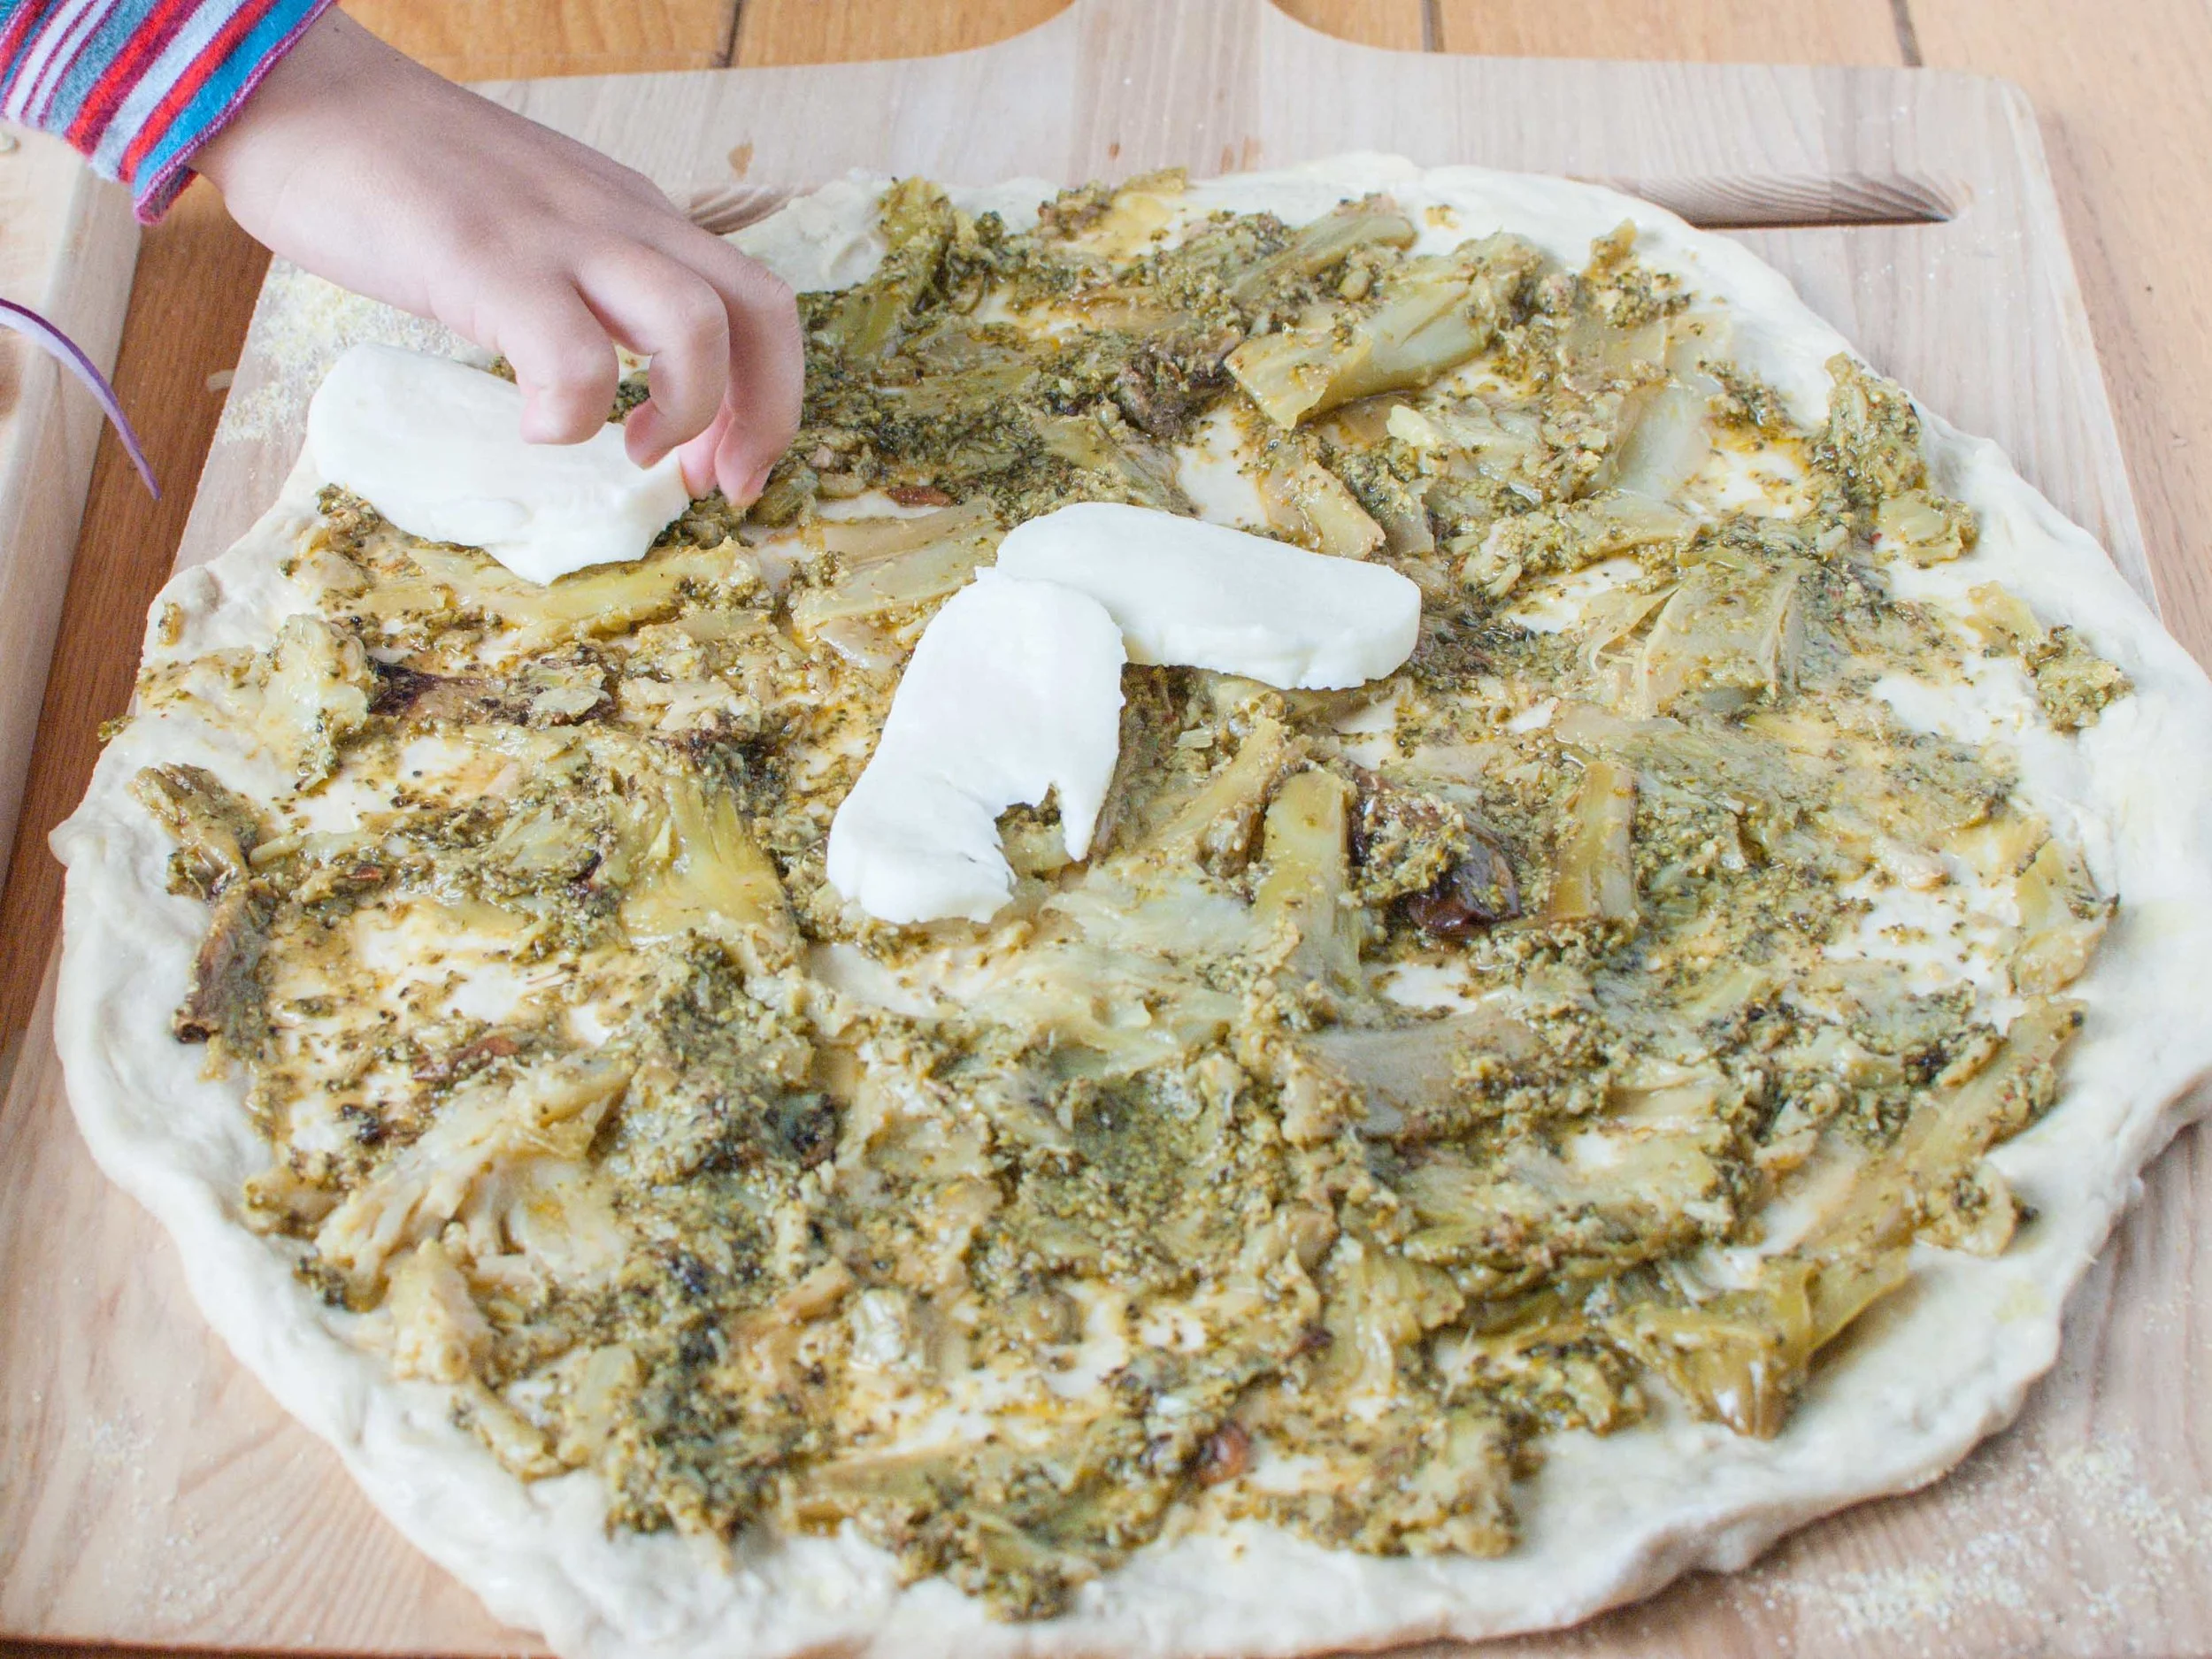
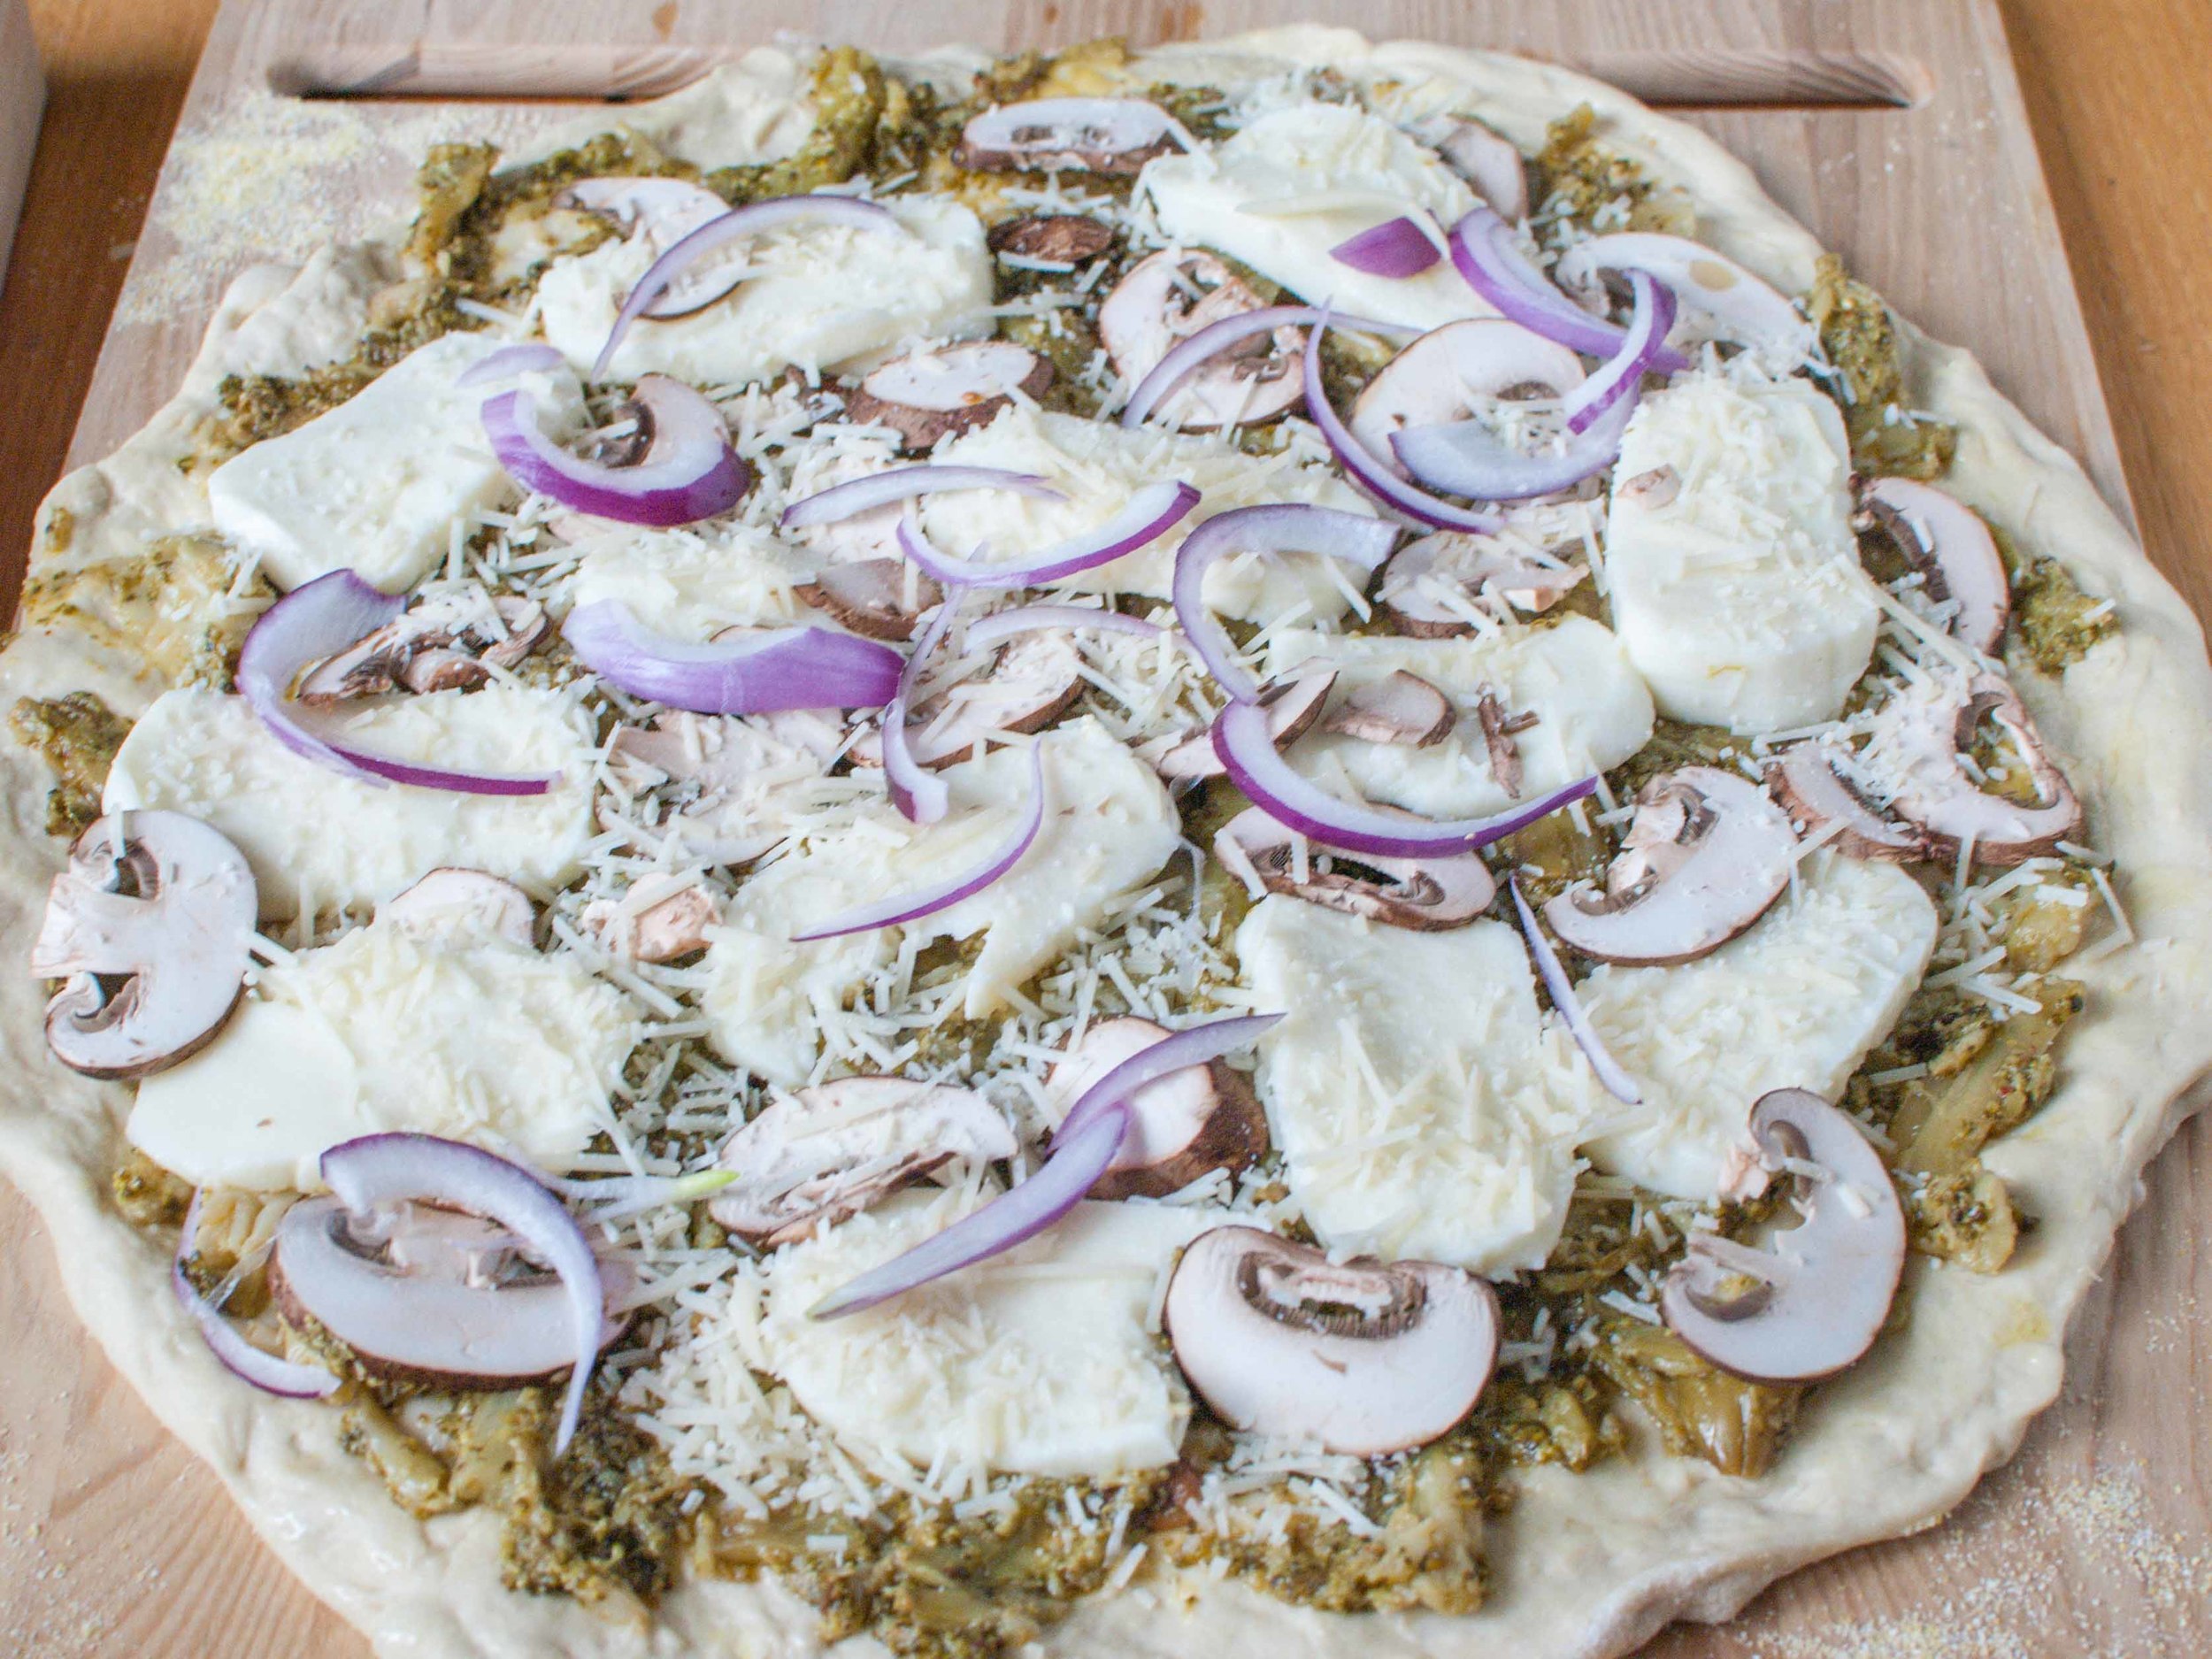
For Pizza #1: Spread Broccoli Cooked Forever evenly over the pizza crust. Place fresh mozzarella slices evenly over the broccoli. Next distribute the mushrooms and red onion over the top. Lastly, sprinkle the grated parmigiano-reggiano. 

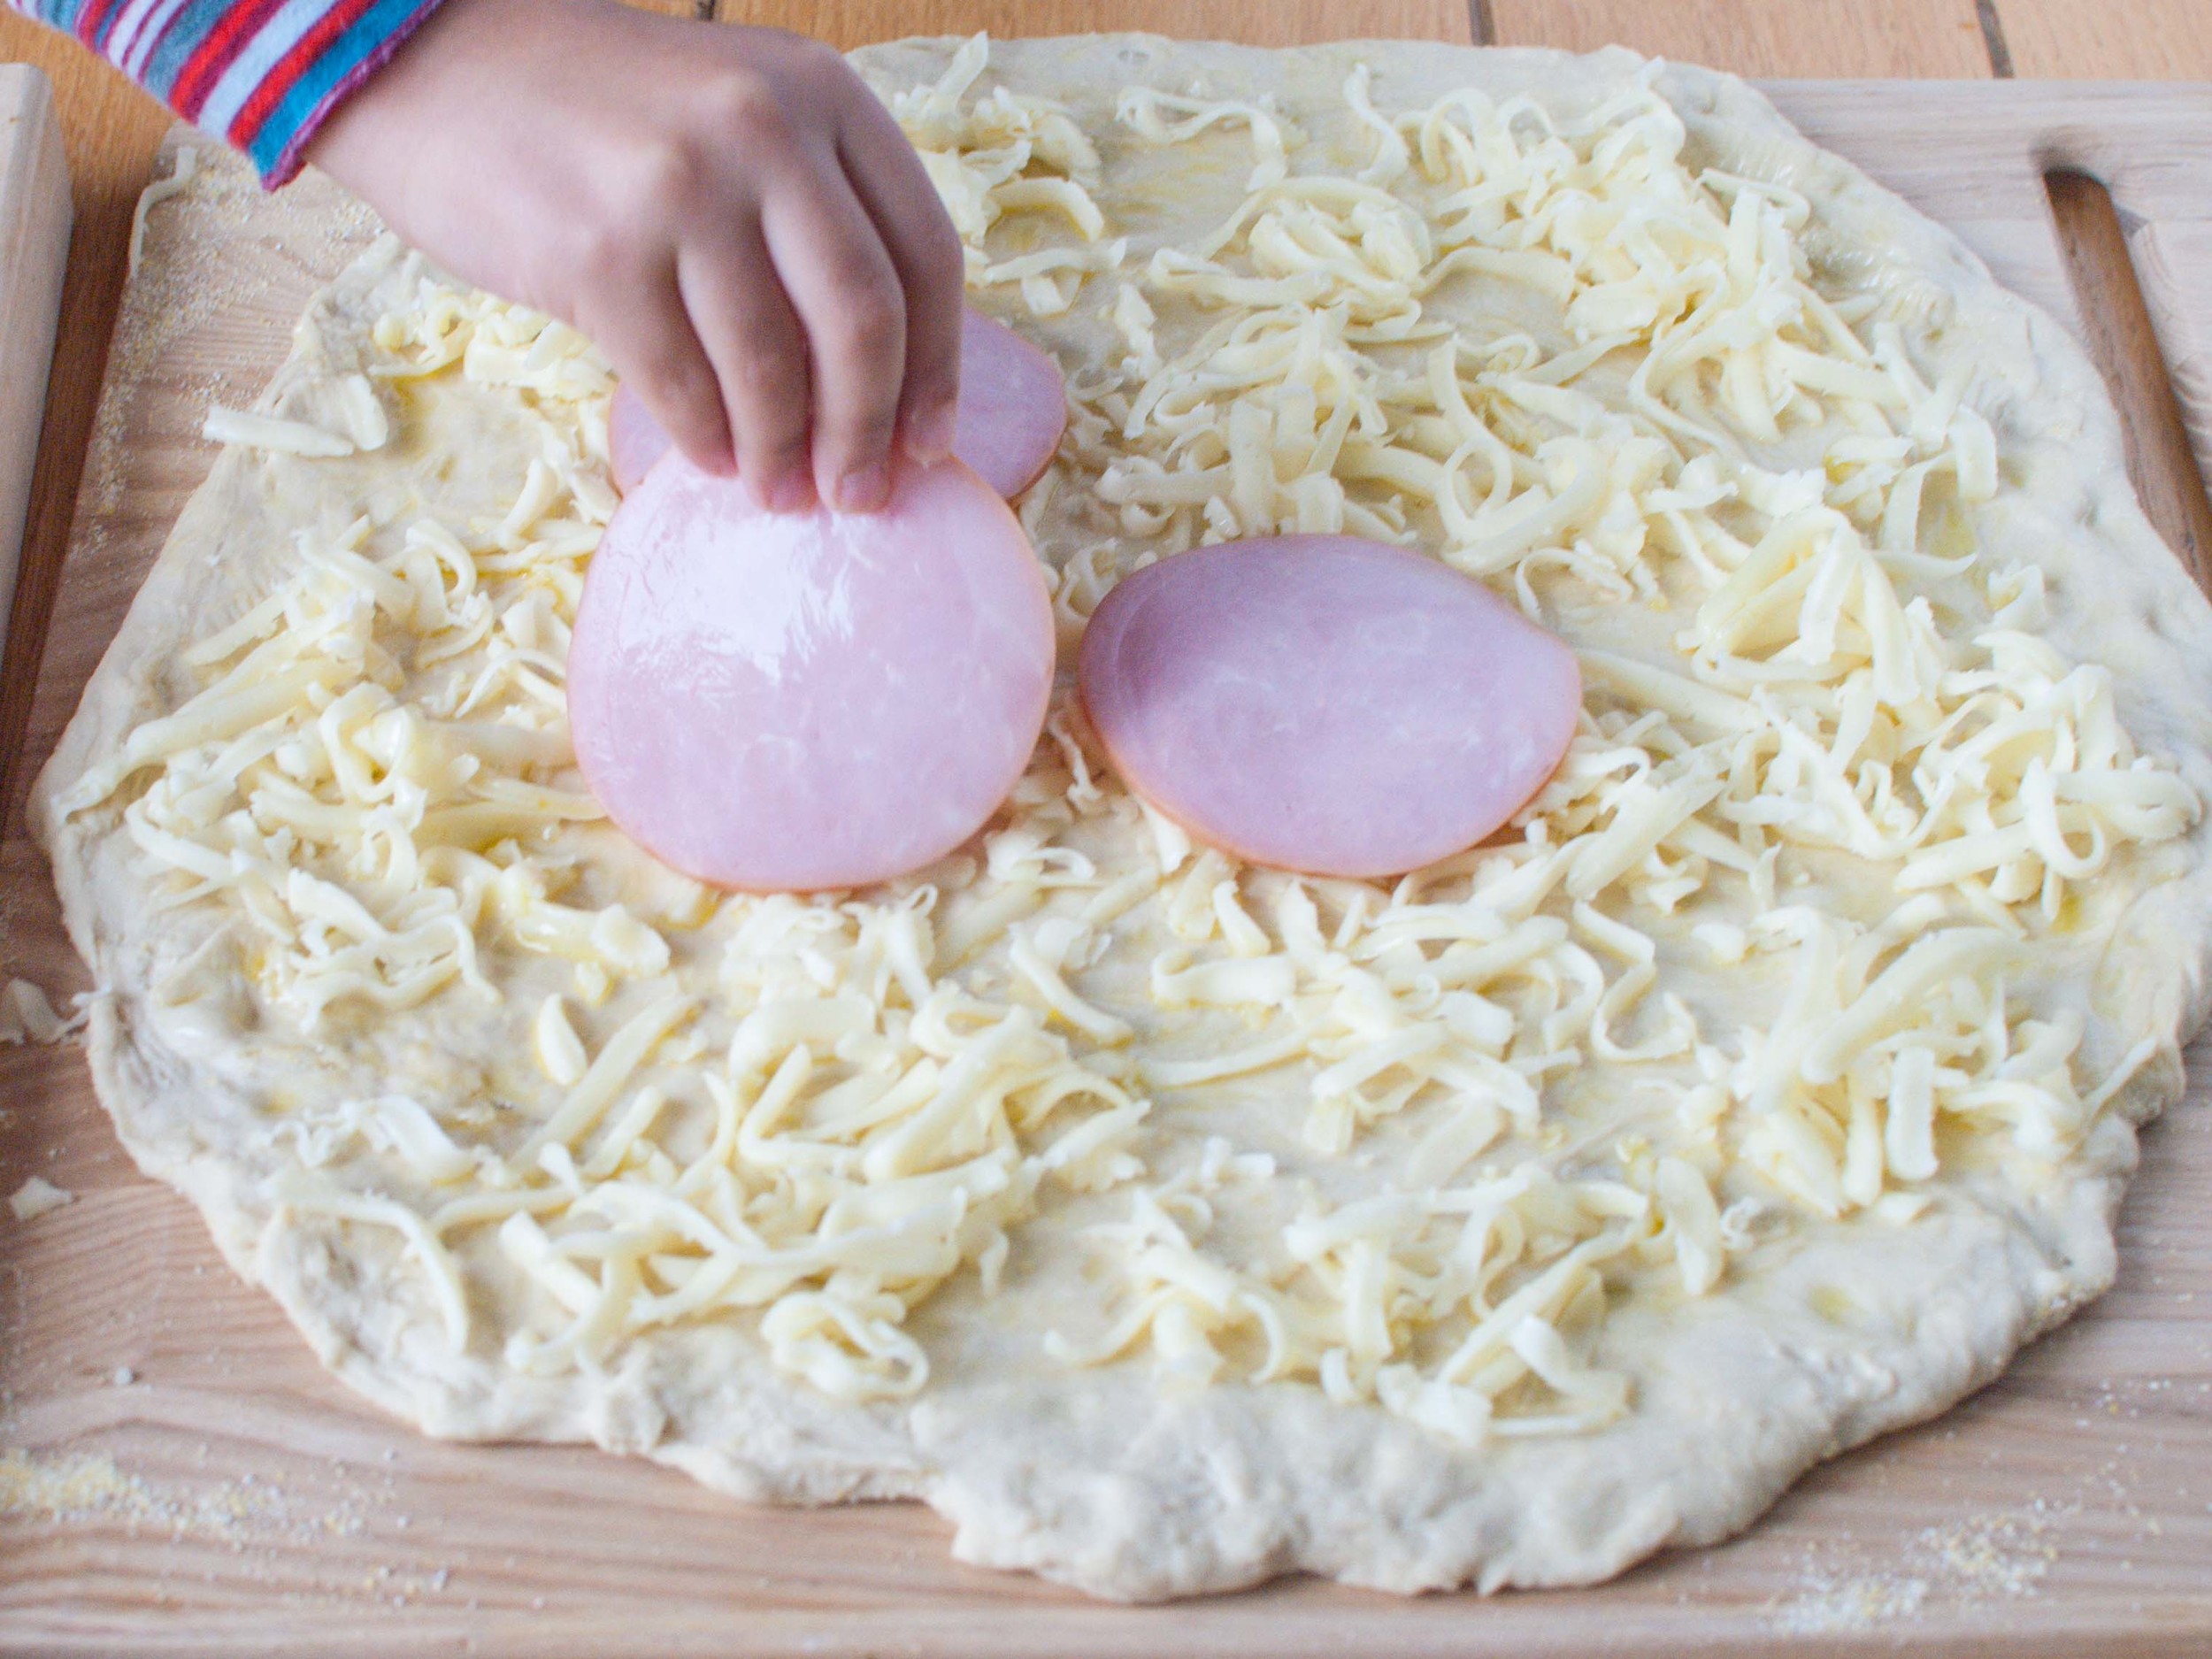
For Pizza #2: Brush olive oil lightly over pizza crust. Evenly sprinkle fontina, Canadian bacon, tomatoes, red onion, and parmigiano-reggiano cheese over the crust in that order.

If using a pizza stone, transfer the pizza from the pizza peel/back of a baking sheet to the stone. (If using a pizza pan, place pizza in the oven.) Bake for 10-15 minutes. Pizza is done when cheese is melted with a few golden spots and crust is brown and crispy. Remove from oven, sprinkle with parsley (optional), and serve.

Pizza Dough


Notes: This pizza dough is very forgiving. If you don't have bread flour, you can use all-purpose flour for a chewier crust. If you don't have time to let the dough rise to double in size, let rest for at least 30 minutes before continuing. If you'd like to make it ahead, just put the dough in the fridge and let it rise slowly for several hours. If it rises too much, you can just poke a hole in the dough to deflate it. You can freeze the dough before or after letting it rise, just make sure to defrost and come to room temperature before proceeding with the next step of the recipe.

If you don't have a stand mixer, you could also use a food processor. Simply add the water and oil mixture with the processor running, until it forms a ball (less than a minute). 

To make the dough by hand, make a well in the middle of the flour mixture, and pour liquid mixture into the well. Combine with your fingers or a fork, to make a shaggy dough. Then turn the dough out onto a well floured surface and knead dough until you have a smooth, slightly tacky dough. 

Time: 20 minutes (plus 1 hour and 10 minutes inactive time)
Yield: Pizza dough for two 14" pizzas

4 cups bread flour
2 1/4 teaspoons (or 1 envelope) instant yeast
2 teaspoons kosher salt (or 1 teaspoon table salt)
1 1/2 cups warm water, 110 degrees F
1 tablespoon honey
2 tablespoons olive oil, plus extra to grease bowl

Whisk together flour, yeast, and salt into the bowl of a stand mixer, fitted with a dough hook. 
Combine water, honey, and olive oil. With the mixer running, slowly pour liquid into the flour mixture. Beat until a dough ball forms. If the dough is sticky, add additional flour one tablespoon at a time. If the dough is dry, add additional water one tablespoon at a time. Dough will form a ball and feel slightly tacky when done. 

Scrape dough onto a lightly floured surface and knead dough for 1 or 2 minutes. Form dough into a ball, transfer to a large, greased bowl, and cover with plastic wrap. Place in a warm place like a sunny window or an oven with the light on, and let rise for 1 hour or until doubled in size.

Divide dough evenly into two pieces and form into two balls. Cover with plastic wrap or a clean towel, and let rest at least 10 minutes before proceeding to make pizza.

Salmon Cakes by Cynthia Raub

Print Friendly and PDF


Time: 45 minutes
Servings: 10 as an appetizer, 5 as a meal

1/2 pound salmon (cooked and cooled)
4 tablespoons unsalted butter (divided)
3/4 cup small-diced red onion
1 cup small-diced celery
1/2 cup small-diced red bell pepper
1/2 cup small-diced yellow bell pepper
1/4 cup minced fresh flat-leaf parsley
1 tablespoon capers, drained and chopped
1/4 teaspoon hot sauce (recommended: Tabasco)
1/2 teaspoon Worcestershire sauce
1 1/2 teaspoons crab boil seasoning (recommended: Old Bay)
1 cup breadcrumbs
1/2 cup mayonnaise
2 teaspoons Dijon mustard
2 extra-large eggs, lightly beaten
Kosher salt and pepper
Lemon (optional)

Place 2 tablespoons of butter, 2 tablespoons olive oil, onion, celery, red and yellow bell peppers, parsley, capers, hot sauce, Worcestershire sauce, crab boil seasoning, 1/2 teaspoon salt, and 1/2 teaspoon pepper in a medium saute pan over medium-low heat and cook until the vegetables are soft, about 20 minutes. Cool to room temperature.

Flake the chilled salmon into a large bowl. Add the bread crumbs, mayonnaise, mustard, and eggs. Add the vegetable mixture and mix well. Cover and chill in the refrigerator for 30 minutes. Scoop into desired size and shape into patties. (I used a 1/4 measuring cup and made 10 good-sized patties)

Heat the remaining 2 tablespoons butter and 2 tablespoons olive oil in a large saute pan over medium heat. In batches, add the salmon cakes and fry for 3 to 4 minutes on each side, until browned. Place on paper towel lined plate, sprinkle with kosher salt. Serve with lemon wedges. 

Recipe adapted from http://www.foodnetwork.com/recipes/ina-garten/salmon-cakes-recipe.html

Steak Fajitas by Cynthia Raub

Print Friendly and PDF

I really love foods that deliver all the textures and all the food groups in one bite. A perfectly loaded chip from a plate of nachos, bi bim bap (a Korean rice dish with an assortment of vegetables and meat), cheeseburgers. Fajitas are also included in this fantastical group of perfect meals, and they may be even more superior because you can customize each bite as you go. I don't usually order fajitas when I am out at a restaurant (because: nachos), but whenever a hot skillet of roasting onions and meat walks across the dining room, I regret my meal choice immediately. Fajitas can vary from the traditional beef to vegan, and all of the iterations are delicious - you just can't go wrong with anything wrapped in a warm tortilla. Here is my ode to fajitas and all of the opportunities I have missed in restaurants of eating them. 

Notes: The cut of beef is paramount when making steak fajitas. Traditionally, buttery and deeply beefy-flavored skirt steak is recommended, but flap and hangar are comparable substitutions that will produce similarly delicious results. This marinade is robust, complex and flavorful; I found it to be an incredibly tasty and different treatment of beef in traditional fajitas. In the directions, I recommend resting the beef on the uncooked bell peppers and onions. This is so 1) you don't have to dirty another dish and 2) to give the vegetables even more flavor. Likewise, when cooking the vegetables, include the residual juices from the rested meat for another re-up in Flavortown.


Time: 45 minutes active cooking, plus 2-6 hours of marinating
Serves: 4-6

1/4 cup soy sauce
1/2 cup lime juice (3-6 limes depending on the size)
1/2 cup canola oil
1/4 cup packed brown sugar
2 teaspoons ground cumin seed
2 teaspoons freshly ground black pepper
1 tablespoon chili powder
1 tablespoon garlic, finely minced
2 pounds trimmed flank steak, cut crosswise into 5- to 6-inch pieces
Cilantro stems, if available
1 large red bell pepper, stemmed, seeded, and cut into 1/2-inch-wide strips
1 large yellow bell pepper, stemmed, seeded, and cut into 1/2-inch-wide strips
1 large green bell pepper, stemmed, seeded, and cut into 1/2-inch-wide strips
1 white or yellow onion, cut into 1/2-inch slices
12 to 16 fresh flour or corn tortillas, hot
Guacamole, for serving (optional - see recipe below)
Pico de Gallo, for serving (optional)
Cheese, hot sauce and salsa (optional)

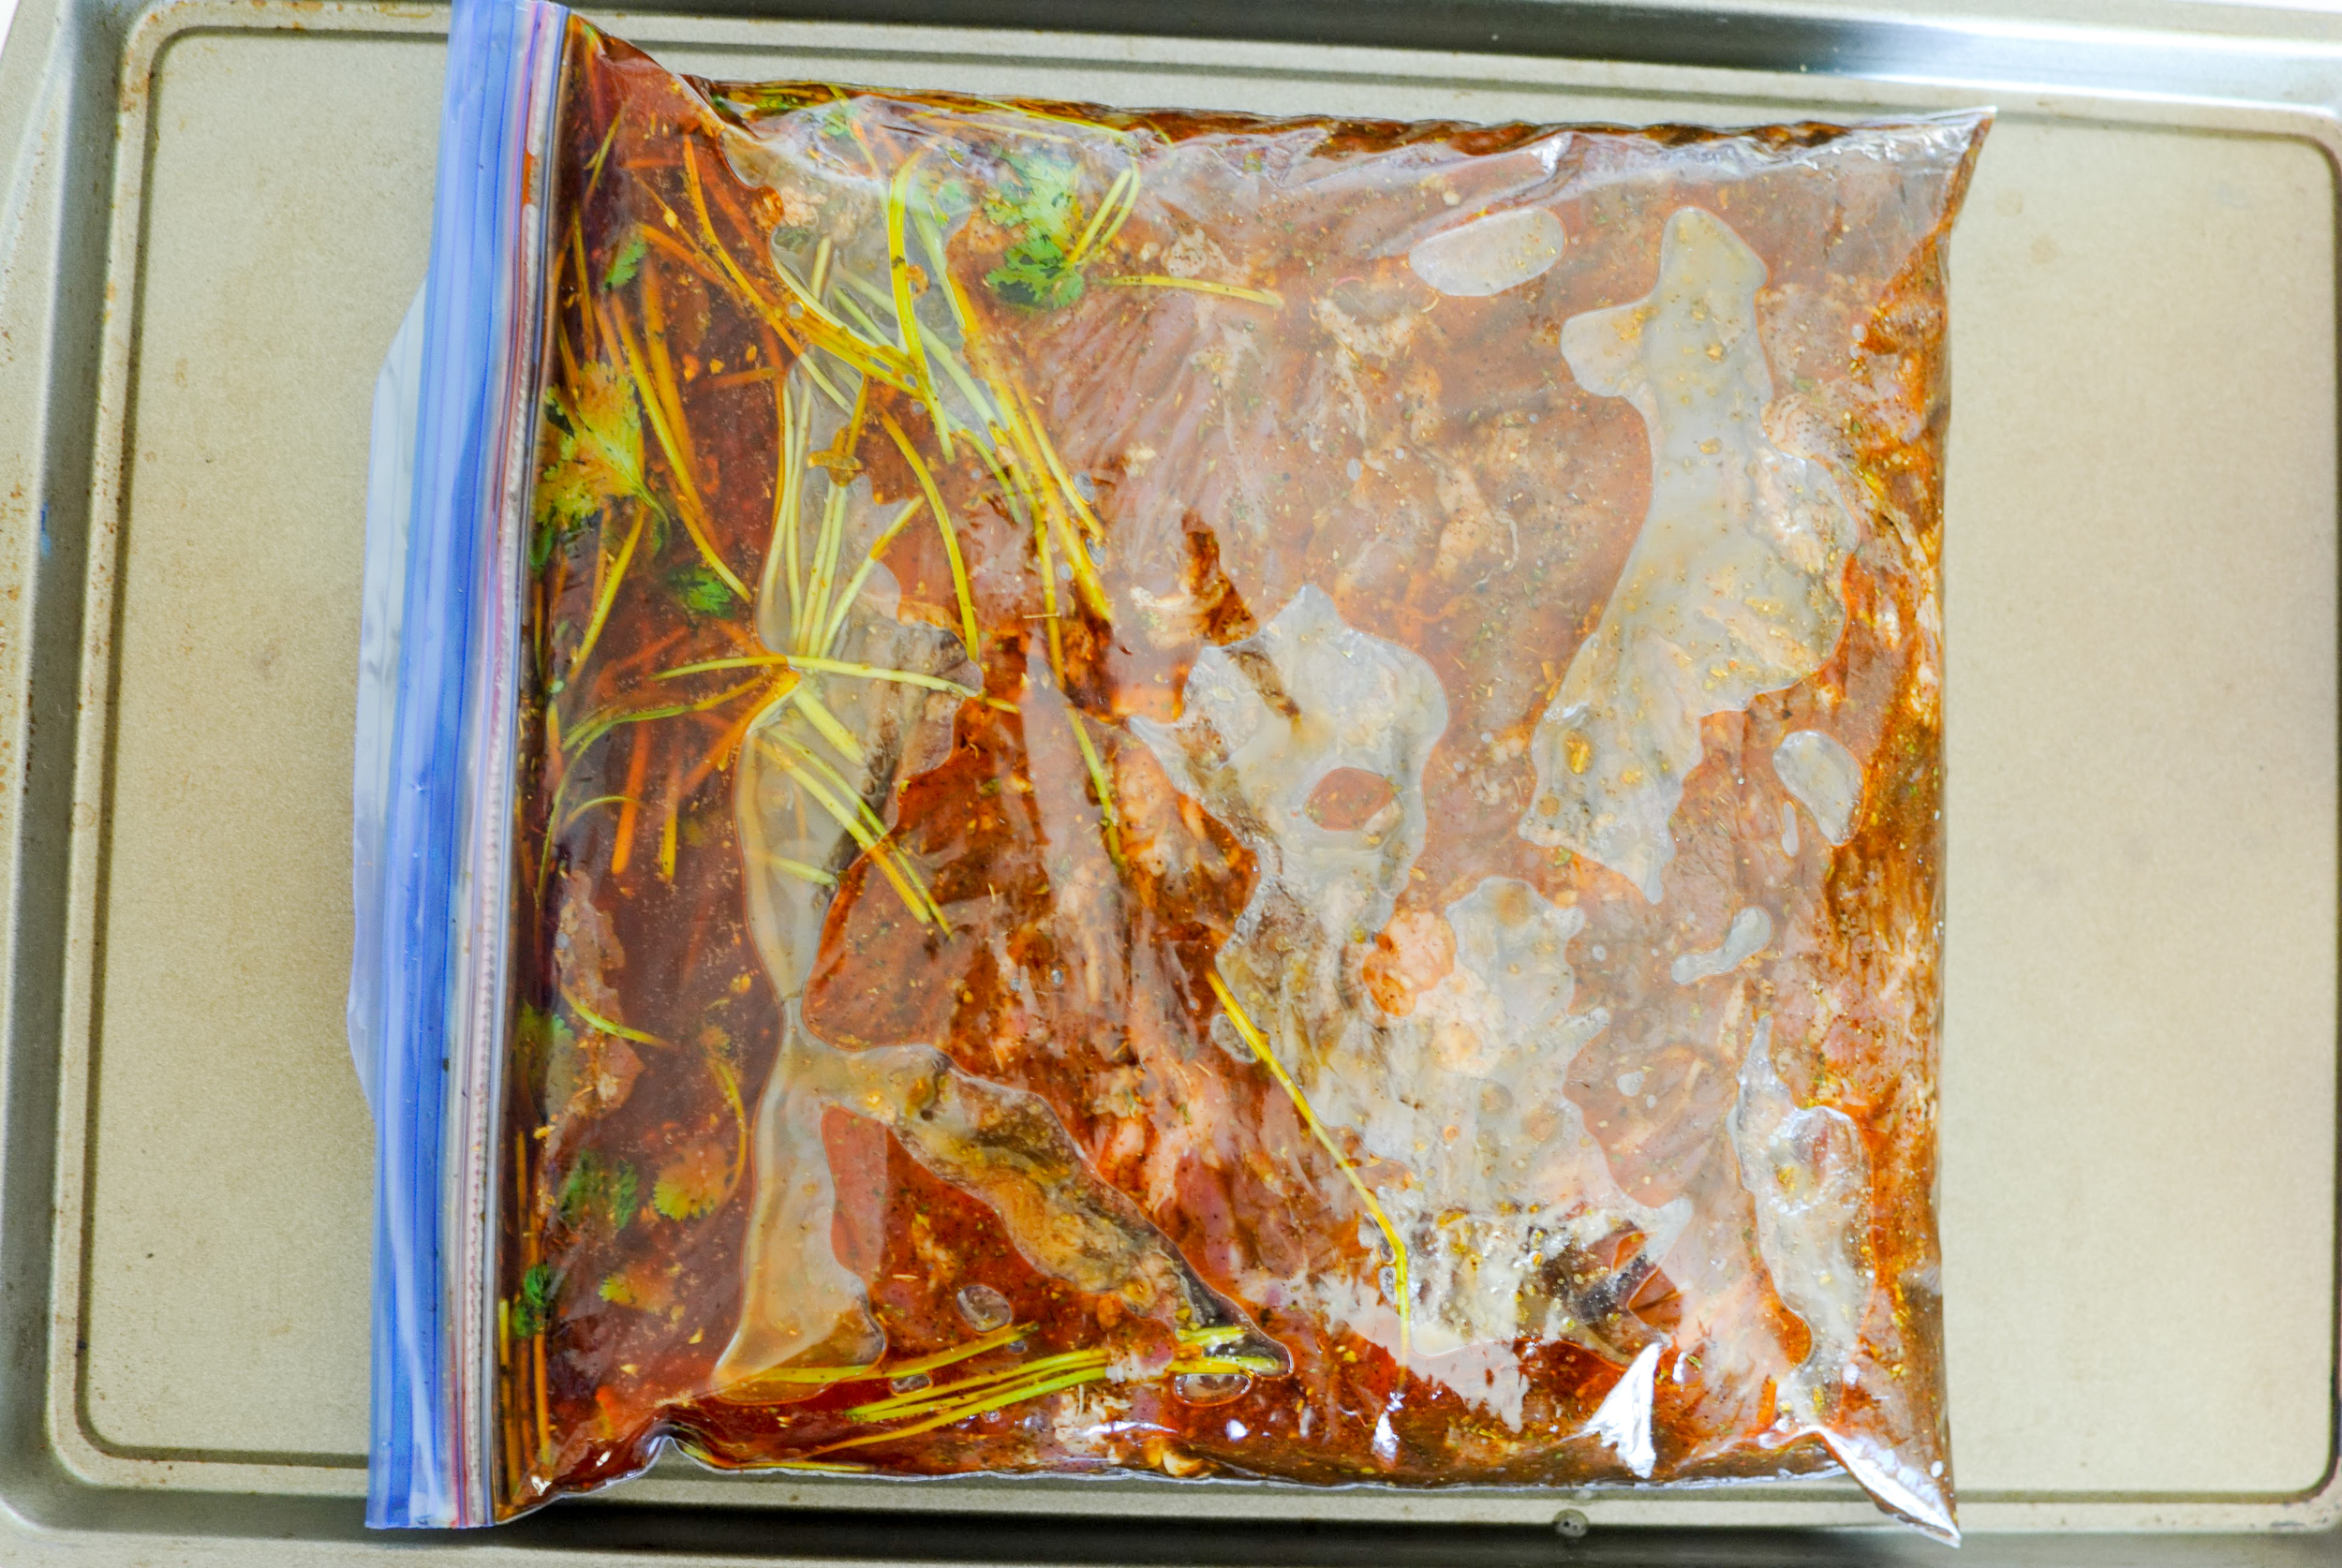
Combine soy sauce, lime juice, canola oil, brown sugar, cumin, black pepper, chili powder, and garlic in a medium bowl and whisk to combine. Cut steaks into several 6" pieces. Place steaks in a gallon-sized zipper-lock bag and add marinade and (optional) cilantro stems. Seal bag, squeezing out as much air as possible. Massage bag until meat is fully coated in marinade. Lay flat in the refrigerator, turning every so often for at least 2 hours and up to 6. 

Slice bell peppers and onions into 1/2" strips. Season liberally with salt and pepper. Set aside.

Once the meat has marinated, remove steaks from marinade, wipe off excess liquid, and transfer to a large plate. Turn your fan on and heat a grill pan on high for 3-5 minutes. Once the grill pan is smoking, place meat pieces on the grill pan several inches away from each other. Cook meat in multiple batches about 2-4 minutes per side and develop a nice char and grill lines. Your cooking time will depend on the thickness of your steaks, your preferred meat temperature, and the strength of your heat source. Rest the cooked meat on top of the uncooked bell peppers and onions. Allow meat to rest for 5-15 minutes before slicing. 

Carefully wipe your grill pan clean of carbon left from the cooked meat. Bring the grill pan back up to high and add pepper and onion mix and cook, stirring occasionally. Cook the vegetables until they are softened and beginning to char in spots, about 5 minutes. When vegetables are cooked, transfer steaks to a cutting board and pour any accumulated juices from the plate into the skillet with the vegetables. Toss to coat.

Transfer vegetables to a warm serving platter. Thinly slice meat against the grain and transfer to platter with vegetables. Serve immediately with hot tortillas, guacamole, pico de gallo, and other condiments as desired.

Recipe (adapted) from: Serious Eats

For Guacamole

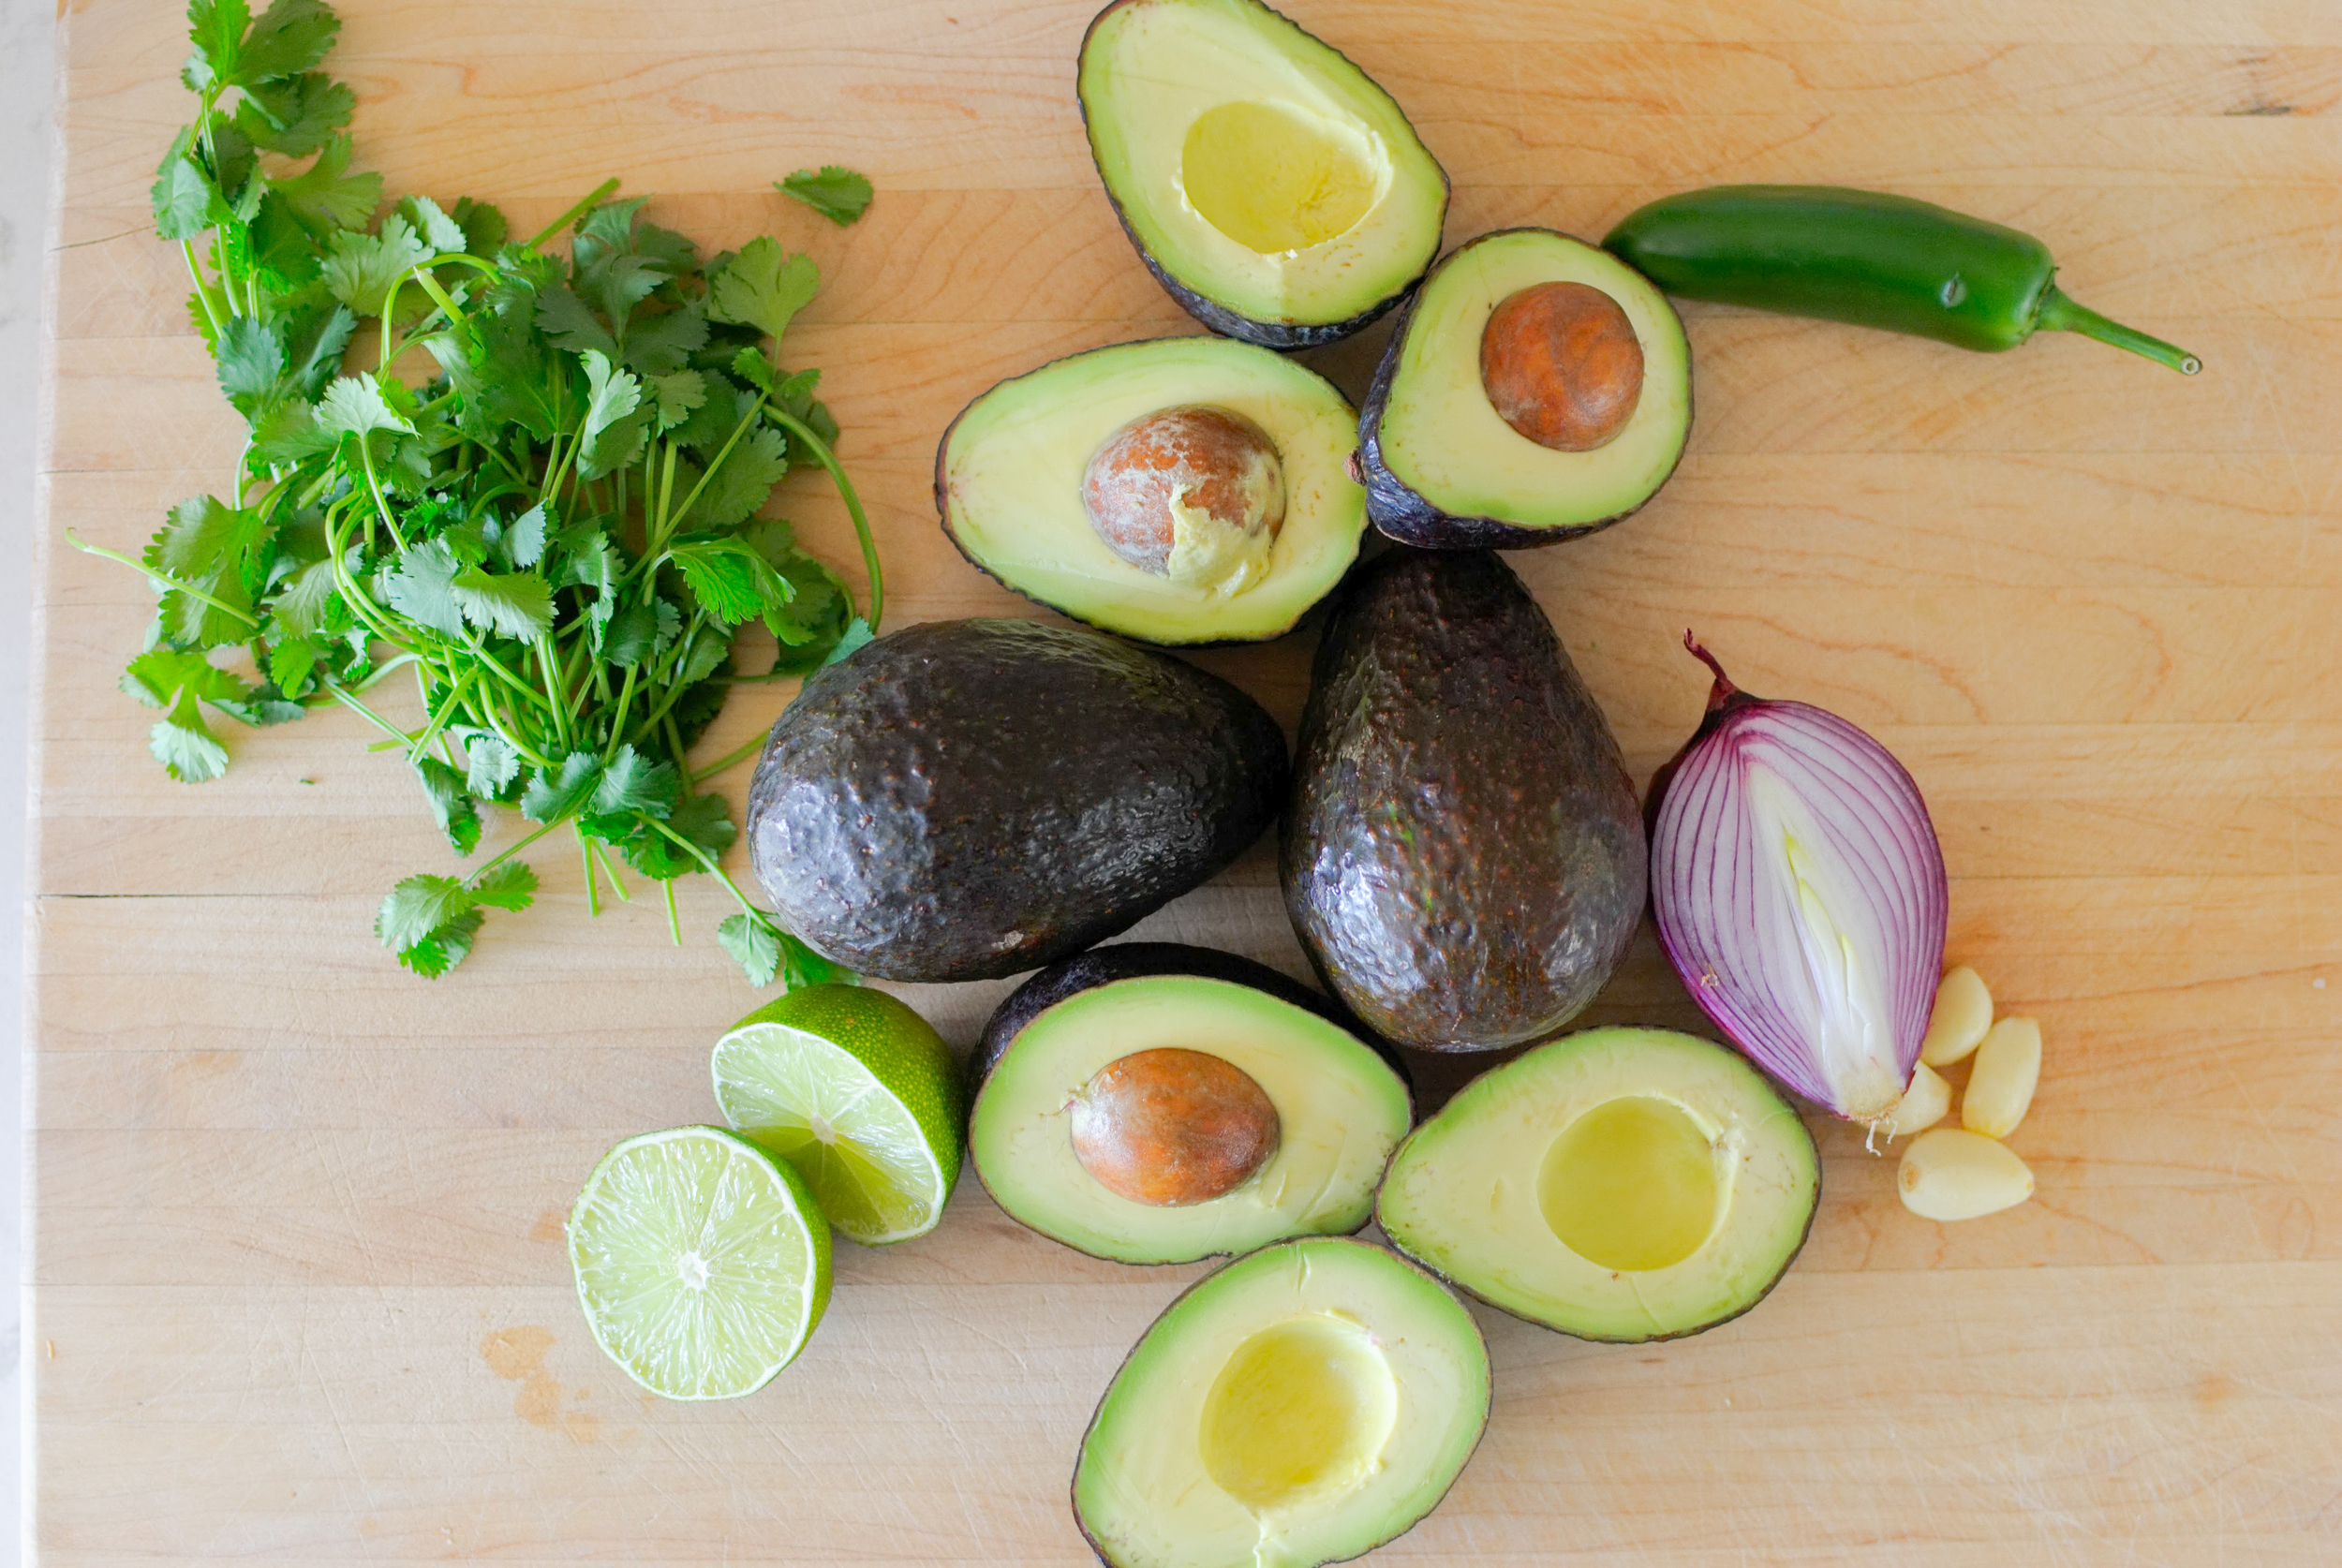
3 ripe avocados
1 large shallot, finely minced
1 tablespoon jalapeno, finely minced
1/2 cup loosely packed cilantro leaves
1-2 limes
Salt and pepper to taste

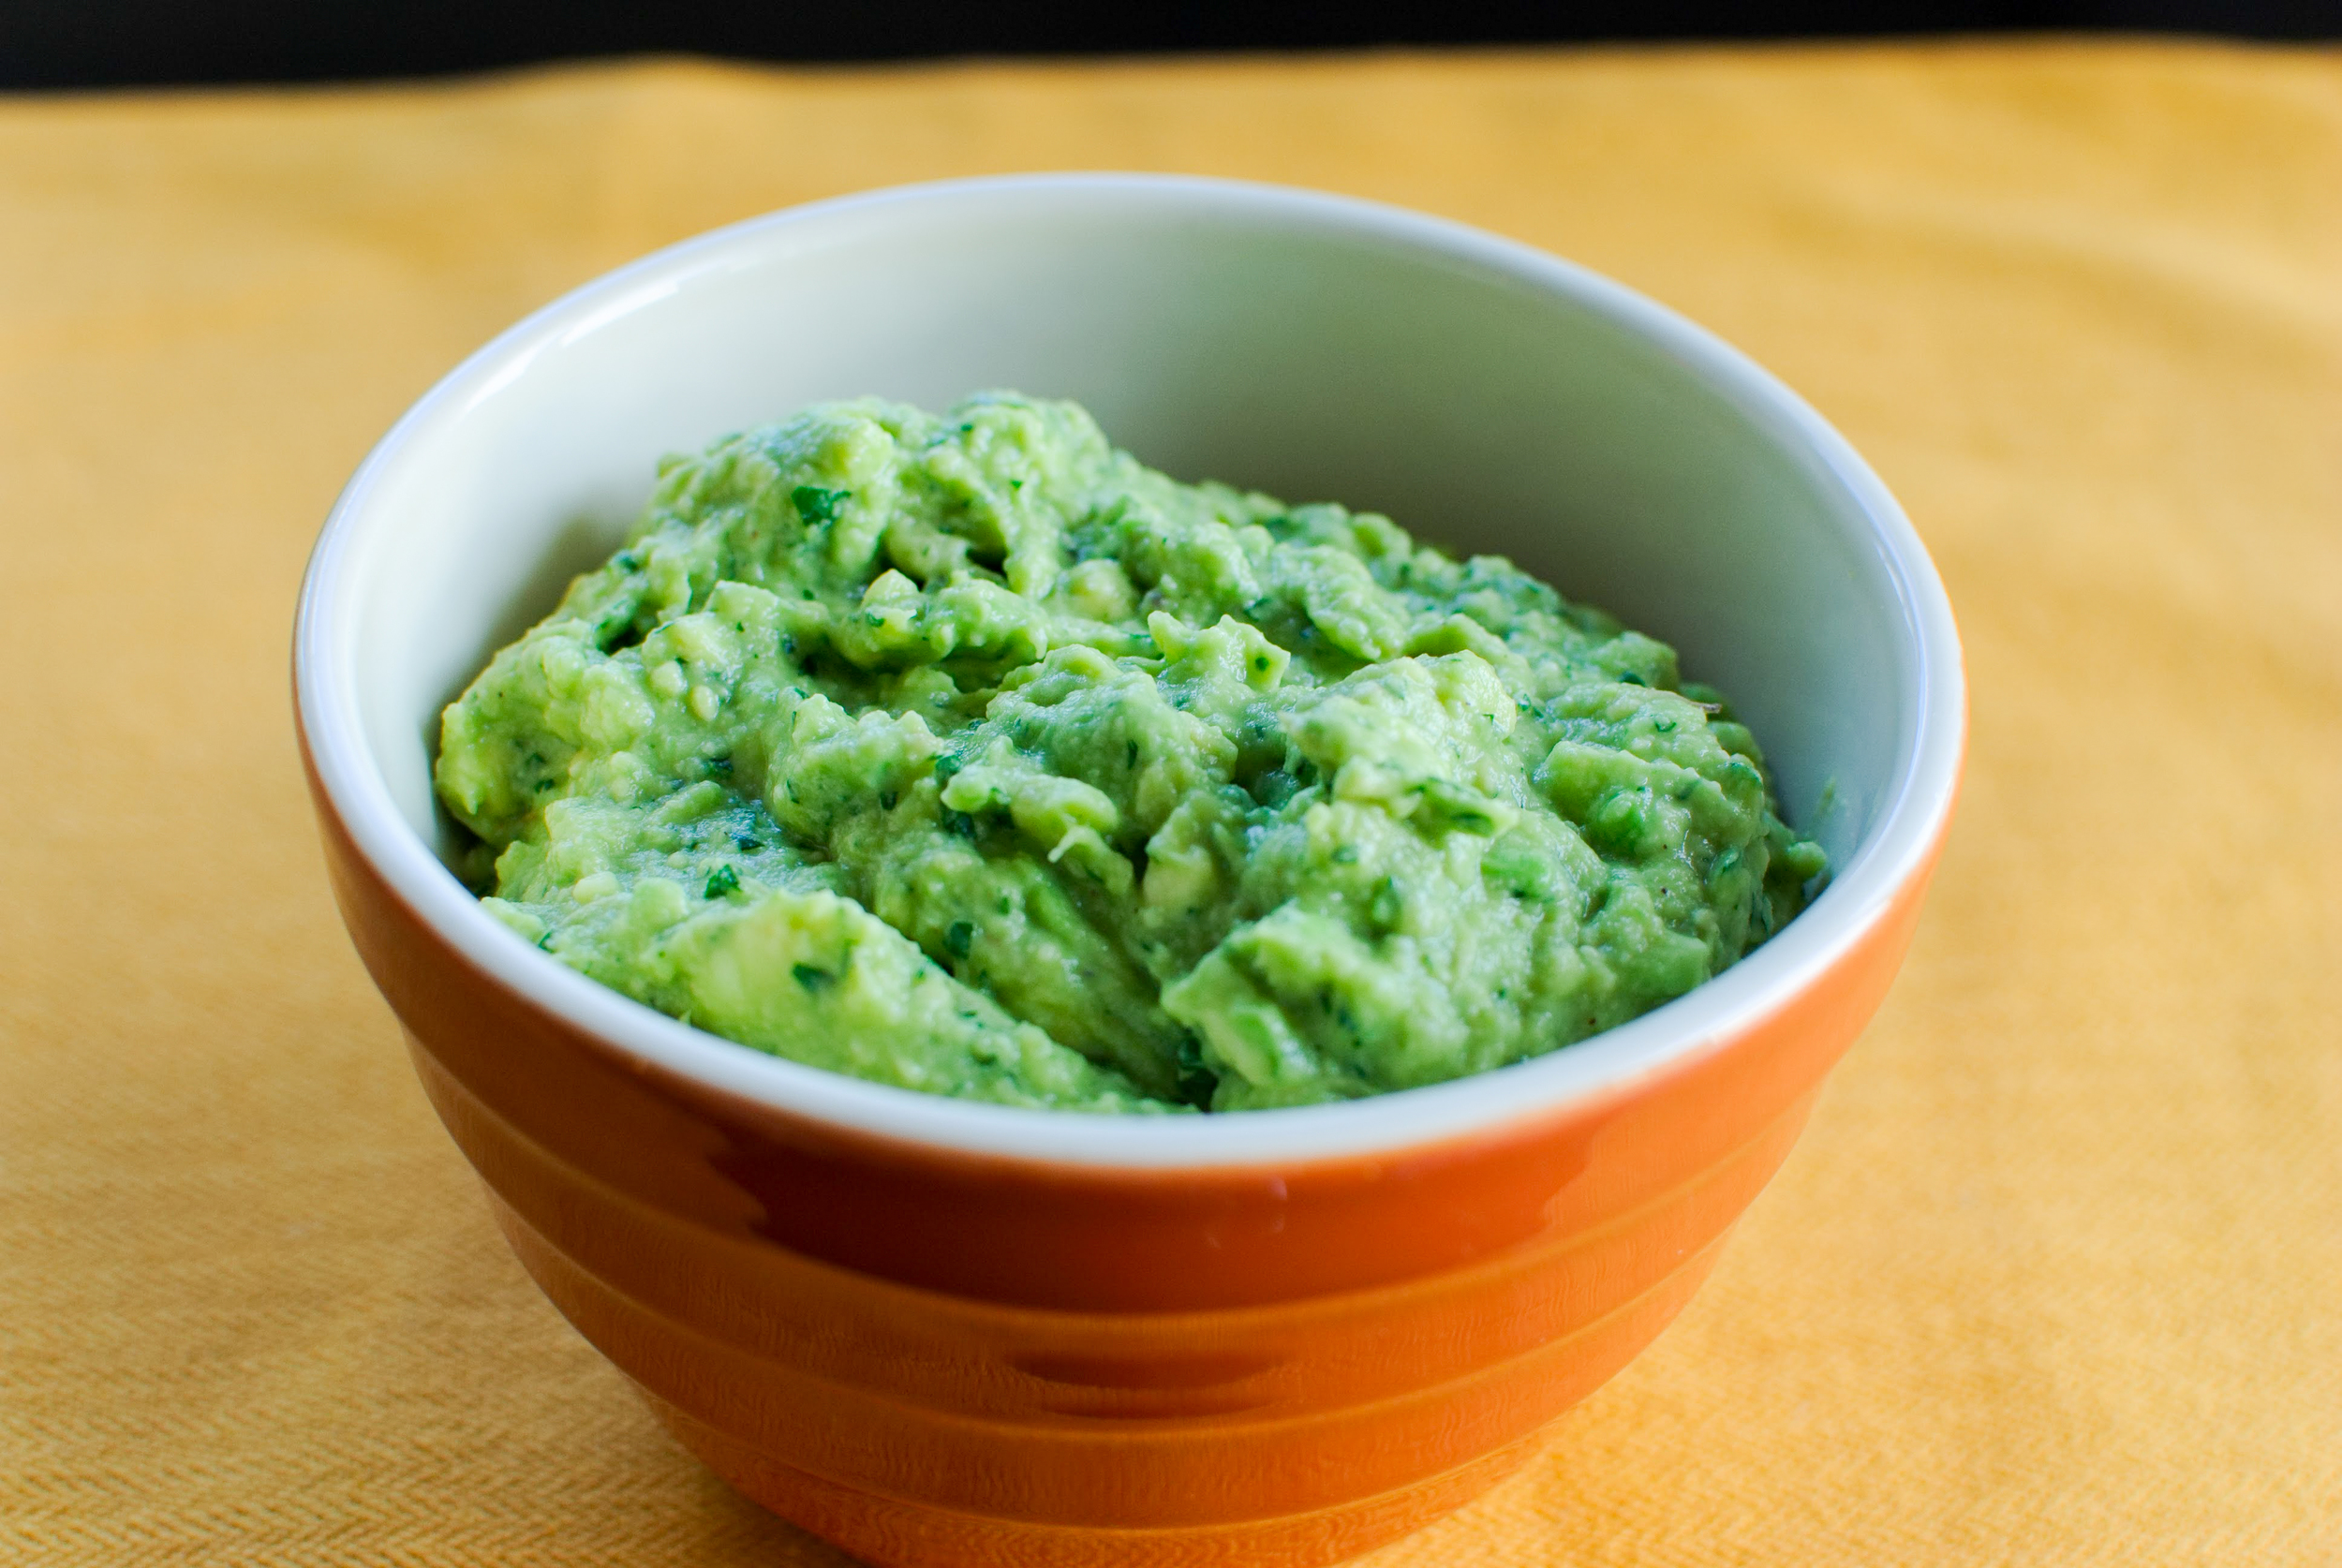
Slice avocados in half- remove seeds and scoop out flesh into a mixing bowl. Mash the avocado with a fork or whisk into desired guacamole consistency. Finely dice shallot and jalapeno and add to the avocado. Roughly chop cilantro leaves and add it to the bowl. Squeeze juice of 1 lime into the bowl, fold ingredients together and season with salt and pepper to taste. Adjust amount of lime at this time, too.


Audy's Pineapple Fried Rice by Amy Cantu

Print Friendly and PDF

My dad’s fried rice is a potluck legend - it arrives onto the table and not five minutes later, it disappears. It doesn’t matter how much he makes, the Pineapple Fried Rice never makes it back home for leftovers. So, count yourself lucky that he’s finally sharing his recipe here!

Notes: Using a non-stick pan or well-seasoned wok will prevent the rice from sticking to the pan. Otherwise, expect a bit of a crust to form on the bottom of your pan, and be OK with a little soaking and elbow grease. If you don’t have a pan roomy enough for a full batch of fried rice (without worrying about rice and pineapple being flung out) fry the rice in two batches. If you overcrowd the pan, the rice will steam and will not cook properly. Not to mention, you’ll have a big mess around the stove!

My dad likes to serve his Pineapple Fried Rice in a hollowed out pineapple. Slice a whole pineapple in half lengthwise, leaving the leafy top attached to one half. Carefully use a knife to carve out slices of the pineapple to hollow out the pineapple half. You now have a festive bowl for your Pineapple Fried Rice! You will have more pineapple than is needed for the recipe - reserve the extra, chill, and serve as a refreshing dessert or snack for later.

For the rice: Day-old rice is ideal, so that it is a little dry and won’t get mushy during the frying process. About 2 cups of uncooked rice should yield 4 cups of cooked rice. If you don’t have day-old rice, spread freshly cooked rice onto a sheet pan or tray and let cool for 5 minutes before proceeding with the recipe. Don’t try to use rice that’s been cooled to room temperature in a covered bowl (there’s too much moisture), but not been refrigerated for at least 12 hours - you’ll end up with weird, goopy rice. Serious Eats recently had a good article about this. Jasmine rice is the preferred rice for Thai fried rice - it’s a fragrant, medium grain rice that will give this dish an authentic flair. You could also substitute medium grain Chinese rice or Japanese rice, but it won’t be quite the same.


Time: 30 minutes
Servings: 4-5

3 tablespoons vegetable oil
½ onion, diced fine
1 shallot, diced fine
1-2 Thai bird’s eye chilies or serrano chilies, diced fine (optional)
2 plum tomatoes, diced with juices reserved
4 cups cooked Jasmine rice (see note above)
1 lb medium shrimp, peeled and deveined
½ cup red bell pepper, finely diced
1 ½ cups fresh pineapple, small dice
1 teaspoon kosher salt or to taste
1 tablespoon Thai fish sauce
2 eggs
¼ cup green onions, sliced
¼ cup cilantro, including stems
⅓ cup cashews, roasted
Sliced cucumber, tomatoes, and limes for garnish (optional)

Heat vegetable oil in a large saute pan or wok over high heat. (If you do not have a large saute pan or wok, divide ingredients in half and make two batches.)

Add shallot and onion to the hot pan and saute for 1 minute. Stir in the chilies and tomato with juices, until saucy and well combined. Add red bell pepper and toss to combine. Add rice and continue to stir and toss for 2 minutes. Add shrimp, continuing to stir for 1 minute.

Make a well into the center of the rice mixture, crack two eggs into the well and scramble lightly. Stir scrambled eggs into rice. Add pineapple, season with fish sauce and salt to taste. Add green onions, cilantro and cashews. Transfer to a serving platter and garnish with fresh slices of cucumber and tomatoes on the side. Serve immediately.